
Are you looking for ways to get your little ones creative juices flowing? Do you want to show them that nature can be an incredible source of inspiration for art projects? Then you’re in luck! Exploring art projects using leaves for kids is a great way to foster their imagination, creativity, and connection with the outdoors. Not only is it an eco-friendly activity, but it’s also a fun and engaging way to learn about different techniques and materials.
In this article, we’ll take you on a journey through various leaf-themed art projects that are perfect for kids. We’ll cover techniques for creating stunning leaf rubbings, collages, and sculptures, as well as safety precautions to ensure a fun and mess-free experience. Whether you’re a parent or educator, get ready to discover the world of creativity and fun that awaits with these simple yet impressive art projects using leaves!
Getting Started with Leaf Crafts
Welcome to our leafy art adventures! In this next part, we’ll share some fun and easy steps to help you get started with making beautiful leaf crafts.
Types of Leaves Suitable for Arts
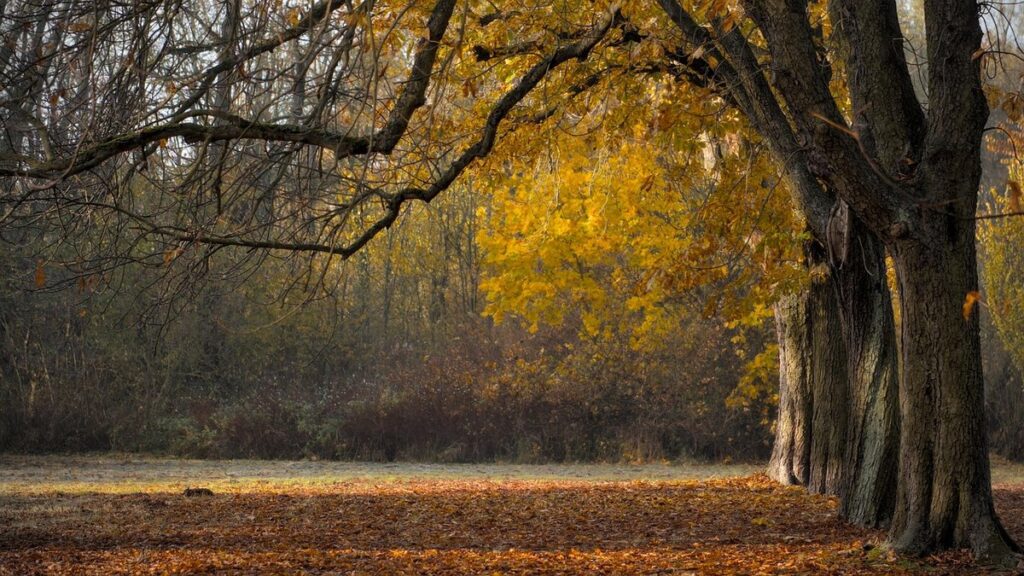
When it comes to choosing leaves for art projects with kids, you’ll want to pick ones that are not only beautiful but also durable and easy to work with. Oak leaves are a popular choice due to their distinctive shape and rich colors, which range from deep reds to vibrant oranges. Their texture is also quite interesting, making them perfect for creating intricate designs.
Maple leaves are another favorite among leaf crafters, thanks to their delicate shapes and stunning color patterns. The veins on maple leaves add an extra layer of visual interest, making them ideal for kids who love exploring textures and patterns.
Succulent leaves might not be the first thing that comes to mind when thinking about traditional art projects, but they’re actually a great choice! Their thick, fleshy texture makes them perfect for creating 3D designs or collages. Plus, they come in an array of colors and shapes, adding a fun element of surprise to your project.
When selecting leaves for your art project, be sure to choose ones that are fresh and free from damage. This will ensure they hold their shape and color throughout the creative process. With these types of leaves, you’ll have endless possibilities for creating beautiful, unique pieces with your kids!
Preparing Leaves for Art Projects
When working with leaves for art projects, it’s essential to properly clean and dry them before using. This process may seem tedious, but trust us, the end result is worth it! Begin by gently sweeping away dirt and debris from the leaf’s surface using a soft-bristled brush or a small, dry paintbrush.
Next, lay out your leaves in a single layer on paper towels to air-dry completely. This can take anywhere from a few days to a week, depending on the leaf type and environmental conditions. For more delicate leaves like ferns or orchids, consider placing them between sheets of blotting paper to prevent bruising.
Once dry, store your leaves in an airtight container filled with silica gel packets to absorb any remaining moisture. Label each packet with the date and contents so you can easily track what you have stored away. By following these simple steps, you’ll be well on your way to preserving leaves for use in your next art project!
Leaf Rubbings and Impressions
Let’s explore some fun ways to capture the intricate details of leaves, from creating leaf rubbings to making leaf impressions on paper. You’ll love these simple yet effective techniques!
Techniques for Creating Leaf Rubbings
Creating leaf rubbings is an excellent way to capture the intricate details and textures of leaves. To get started, place a single leaf under a sheet of paper or tracing paper, making sure it’s centered. Then, gently draw over the leaf with a crayon, colored pencil, or even a charcoal stick. The resulting impression will reveal the leaf’s shape, veins, and texture.
To achieve different textures, try using various materials to create your rubbings. For example, you can use a soft graphite pencil for delicate impressions or a chunky crayon for more dramatic effects. Experiment with different colors by layering multiple rubbings on top of each other or mixing media like pastels and charcoal.
To capture the leaf’s intricate veins, press harder on your drawing tool as you draw over them. For a softer impression, apply gentle pressure. You can also try rubbing in different directions to create interesting patterns. By experimenting with various techniques, kids will discover that creating leaf rubbings is all about exploring the unique characteristics of each leaf and having fun while doing it!
Using Leaves for Printing Art
Using leaves as stencils is a fun and creative way to create unique prints. To get started, you’ll need some leaves with interesting shapes and textures. Try using leaves from different plants, such as maple or oak, for varying effects.
When it comes to ink choice, consider using a water-based paint or ink that’s suitable for printing on paper. Avoid using oil-based inks, as they can be difficult to clean up and may damage your paper. You can also use food coloring or natural dyes for a more subtle effect.
To achieve the desired results, experiment with different pressures and techniques. Gently placing the leaf on the paper can create soft, delicate prints. For bolder designs, try applying more pressure or using a brayer to apply even ink coverage. Remember to clean your leaves between each print to prevent smudging. You can also layer multiple prints to create intricate patterns. Don’t be afraid to experiment and get creative with different leaf shapes, inks, and techniques – it’s all part of the fun!
Leaf Collages and Mosaics
Let’s get creative with some amazing leaf collages and mosaics that your kids will love making, using natural leaves as their canvas. These projects are easy to set up and encourage imagination and artistry!
Designing and Creating Leaf Collages
When it comes to designing and creating leaf collages, the possibilities are endless. To get started, take some time to think about what theme you’d like your collage to have. Do you want to create a nature-inspired piece featuring different types of leaves? Or perhaps something more abstract using only certain shapes or colors?
Once you’ve decided on a theme, it’s time to choose your colors. You can select leaves based on their natural color palette or get creative and use paint, markers, or even glitter to add some extra flair.
When arranging your leaves, think about balance and harmony. Start by placing the largest leaves first, then fill in with smaller ones. Don’t be afraid to experiment and move things around until you like what you see. You can also try creating a focal point by grouping similar shapes or colors together.
Some fun ideas for leaf collages include using only certain types of leaves (like oak or maple), incorporating other natural materials like twigs or flowers, or even creating a 3D effect by layering leaves on top of each other.
Tips for Creating Leaf Mosaics
Creating leaf mosaics can be a fun and creative way to reuse fallen leaves. To get started, you’ll need a few basic materials: leaves of various shapes and sizes, a design or pattern in mind, a pair of scissors or a craft knife for cutting, and some kind of adhesive like glue or decoupage medium.
When it comes time to cut your leaves, try to use scissors that are designed for paper or thin materials. This will help you get clean cuts without tearing the leaf. Alternatively, if you’re using a craft knife, make sure to hold it at a 45-degree angle and apply gentle pressure. You can also use a craft mat or other protective surface to prevent your work surface from getting damaged.
To arrange your leaves, start by sketching out a rough outline of your design on paper. Then, begin placing the largest leaves first, working your way down to the smallest ones. Experiment with different patterns and shapes until you find one that works for you. When it’s time to glue them in place, use a small brush or applicator to apply a thin layer of adhesive.
Nature-Inspired Leaf Crafts
Get creative and make a statement with nature’s own art supplies: we’ll show you how to turn leaves into stunning decorative pieces, perfect for any room.
Making Leaf Crowns and Wreaths
Making leaf crowns and wreaths is a fun and creative activity that kids will love. To get started, you’ll need to gather some materials. Head outside and collect a variety of leaves in different shapes, sizes, and colors. You can also use artificial leaves if you prefer. Next, choose a stem or wire base for your crown or wreath.
To shape the forms, start by gluing individual leaves onto the stem or wire, overlapping them slightly as you go. This will help create a full and lush look. Be sure to leave some space between each leaf for a more natural appearance. You can also use floral tape to attach the stems to the crown or wreath.
To secure the stems in place, use floral wire or hot glue to attach them to the base. For a wreath, you can wrap the stems with floral tape to create a neat and tidy finish. Encourage kids to get creative with their design by experimenting with different leaf combinations and arrangements.
Creating Leaf Ornaments and Decorations
Get creative and make some beautiful leaf ornaments and decorations with your kids! There are so many fun ways to repurpose fallen leaves into lovely decorative pieces that can brighten up any room. Let’s explore a few ideas on how to create stunning leaf ornaments and decorations.
One of the simplest ways to get started is by painting or drawing on individual leaves. Use washable paints, markers, or colored pencils to create unique designs, patterns, or even portraits. You can also glue multiple leaves together to form larger shapes or designs. For example, create a beautiful butterfly effect by gluing leaves in alternating colors.
You can also arrange leaves in patterns and designs on a piece of paper or cardboard. Try creating a collage using different types of leaves, like oak, maple, or birch. To make it more interesting, use a glue stick to attach the leaves to a transparent sheet or a small frame, creating a beautiful mobile that can be hung from a window.
When arranging leaves in patterns, remember to choose leaves with unique shapes and colors to add visual interest. You can also experiment with different textures by combining smooth leaves with hairy ones. Don’t worry too much about perfection – the beauty of these ornaments lies in their imperfections!
Another fun idea is to make a leaf garland using twine or string. Simply thread individual leaves onto the string, creating a beautiful and delicate chain that can be hung from a window or across a room. You can also add other natural materials like acorns, pinecones, or dried flowers to create a more intricate design.
To preserve your creations, you can use a spray adhesive or fixative to prevent them from getting damaged or falling apart easily. This will ensure that your beautiful leaf ornaments and decorations last for a long time.
Lastly, don’t forget to experiment with different types of leaves and arrange them in unique ways. You can create a stunning centerpiece by gluing multiple leaves together to form a geometric shape or use single leaves as place cards at a dinner party.
By following these easy steps, you’ll be amazed at how beautiful and creative your leaf ornaments and decorations turn out. Most importantly, have fun making these projects with your kids – it’s a great way to bond and explore the natural world together!
Environmental Awareness through Leaf Art
Using leaves for art projects can help kids develop a deeper appreciation for nature, and this section shows you how to cultivate that awareness through creative leaf designs. From simple collages to intricate sculptures, we’ll explore the possibilities.
Promoting Sustainability through Leaf Crafts
When working on leaf crafts with kids, it’s not just about creating beautiful art pieces – it’s also an opportunity to promote sustainability and environmental awareness. By using leaves as a creative medium, children can develop a deeper appreciation for nature’s beauty and the importance of preserving our planet.
To start, begin by collecting leaves from your local area, encouraging kids to observe their textures, shapes, and colors. This hands-on experience helps them connect with nature and understand the significance of each leaf’s unique characteristics. As you work on the craft project together, discuss ways in which humans impact the environment, such as pollution, deforestation, and climate change.
By using leaves in art projects, kids can learn about the life cycle of plants, the role of photosynthesis, and the interconnectedness of ecosystems. This holistic approach to leaf crafts fosters a sense of responsibility towards nature and encourages kids to take small steps towards sustainability, such as reducing waste, conserving water, or participating in local environmental initiatives.
Using Leaves to Teach Children about Nature
When exploring the natural world with children, using leaves as a teaching tool can be incredibly effective. Not only do they add an extra layer of texture and interest to leaf art projects, but they also provide a valuable opportunity for kids to learn about the interconnectedness of our environment.
Start by taking your child on a nature walk to collect different types of leaves. Encourage them to observe the shapes, colors, and patterns found in each one. This can lead to discussions about the unique characteristics that allow plants to thrive in their respective environments. For example, you might notice how some leaves have adapted to conserve water or protect themselves from harsh sunlight.
Use these observations as inspiration for a collaborative leaf art project. You can create a collage using real leaves, or use them as stamps to add patterns and textures to paper or canvas. This process allows kids to see the beauty in nature and understand its importance in our ecosystem. As they work, ask open-ended questions to prompt critical thinking and creativity – what do you think this leaf would look like if it were a tree?
Safety Precautions when Working with Leaves
When working with leaves, it’s essential that you follow some basic safety precautions to avoid any accidents. This includes wearing protective gloves and eyewear to prevent potential hazards.
Handling Allergic Reactions and Irritants
When working with leaves for art projects, it’s essential to be aware of potential allergic reactions and irritants that some leaves can cause. While most leaves are safe to handle, there are a few common culprits you should watch out for.
Poison ivy (Toxicodendron radicans) and poison oak (Toxicodendron pubescens) are two notorious examples of plants that contain an oil called urushiol, which can cause severe skin irritation. These plants have leaves with distinctive shapes and features: poison ivy has three-lobed leaves, while poison oak has three rounded lobes or a single leaf with seven pointed segments.
Poisonous plants like these are common in many parts of the world, so it’s crucial to be able to identify them before using leaves for your project. Look up pictures and descriptions online to familiarize yourself with their appearance. If you accidentally come into contact with one of these plants, wash the affected area thoroughly with soap and water as soon as possible.
It’s also worth noting that some people may experience allergic reactions or irritations from handling certain types of leaves, even if they’re not poisonous. For example, the sap of leaves like the poison sumac (Rhus vernix) can cause blisters on sensitive skin.
To minimize risks and protect yourself while working with leaves, make sure to wear protective gloves when collecting and handling leaves. Wash your hands thoroughly after completing your project. If you experience any discomfort or irritation, consult a medical professional for advice.
Conclusion: Exploring the World of Leaf Art
As you’ve now explored the world of leaf art, I’m sure you’re filled with creativity and excitement. You’ve seen how leaves can be transformed into stunning works of art, from delicate collages to vibrant mobiles. The possibilities are endless, and it’s up to your imagination to take them further. Remember, the best part about working with leaves is that they’re readily available in nature, waiting to be discovered and used in your creations.
You can encourage kids to collect different shapes, colors, and textures of leaves to create unique pieces. Encourage them to experiment with various techniques like pressing, drying, or even painting the leaves for added effects. As you continue on this creative journey, don’t be afraid to try new things and make mistakes – they often lead to unexpected and wonderful results!
Frequently Asked Questions
Can I use any type of leaf for art projects with kids, or are some more suitable than others?
Not all leaves are created equal when it comes to art projects! While some leaves like oak and maple are perfect for rubbings and collages due to their texture and color, others might be too delicate or fragile. Choose leaves that are sturdy enough to handle manipulation without tearing easily.
How can I store leaves for later use in our leaf art projects?
If you’re collecting leaves from nature, it’s essential to dry them thoroughly before storing to prevent mold growth. You can air-dry them on a paper towel or use a desiccant. Store the dried leaves in an airtight container or ziplock bag to keep them fresh for future projects.
What if my child has allergies or sensitive skin? How do I prepare for potential allergic reactions when working with leaves?
Yes, it’s crucial to be prepared! If your child has allergies or sensitive skin, start by doing a patch test on a small area of their skin before using the leaves. Wear gloves and work in a well-ventilated area to minimize exposure.
Can we reuse leaves for multiple projects, or do they need to be replaced?
No, it’s best not to reuse leaves for future projects as they can become brittle and fragile over time. Collect fresh leaves each time you start a new project to ensure the best results. You can also consider using artificial leaves if needed.
How can I adapt these leaf art ideas for older kids or more experienced artists?
For older kids or more advanced artists, consider adding additional techniques like layering or incorporating mixed media. Experiment with different shapes and forms to create three-dimensional art pieces or use leaves as a design element in larger projects.