
Are you looking for creative ways to teach your kids about bone health, development, and safety? X-ray crafts can be an engaging and interactive way to do just that! Most of us know that x-rays are used in medical imaging, but have you ever thought about using them as a fun educational tool? By creating x-ray crafts with your kids, you’ll not only help them learn about the skeletal system, but also encourage curiosity and creativity. In this article, we’ll explore various x-ray craft ideas for learning about bones, from making bone replicas to creating x-ray images of everyday objects. We’ll also cover some fun facts about bone health and safety that your kids will love. Get ready to have fun while learning – let’s dive in!
The Importance of Bone Health in Children
When it comes to our kids’ overall health, there’s more to consider than just physical activity and a balanced diet. Building strong bones from an early age is essential for their long-term well-being.
Understanding the Basics of Bone Development
As you delve into learning about bones through x-ray crafts, it’s essential to understand the basics of bone development. During childhood, bones undergo significant growth and change as they transition from soft, pliable cartilage to rigid bone.
Bones grow and develop in several stages. At birth, a baby has around 300 bones, but by adulthood, this number decreases to about 206 due to fusion of some bone plates. This process is called ossification. It’s a gradual process that occurs over many years, with different bones maturing at various rates.
One key aspect of bone development is the concept of epiphyseal plates. These growth plates are found at the ends of long bones and allow for bone lengthening as the child grows. As the child reaches physical maturity, these plates begin to close, signaling the end of growth in that area.
Understanding these basics can help you appreciate the intricate process of bone development and the importance of maintaining strong, healthy bones throughout childhood.
How to Identify Healthy vs. Unhealthy Bones
When it comes to bone health in children, being able to identify healthy versus unhealthy bones is crucial for early detection and prevention of potential issues. But how do you know what to look for?
During a visual inspection, healthcare professionals check for signs of malalignment or deformity in the skeletal structure. They might examine the child’s posture, movement, and overall musculoskeletal function. For example, if a child has bowleggedness (knock knees) or a curvature of the spine (scoliosis), it may be an indication of underlying bone health problems.
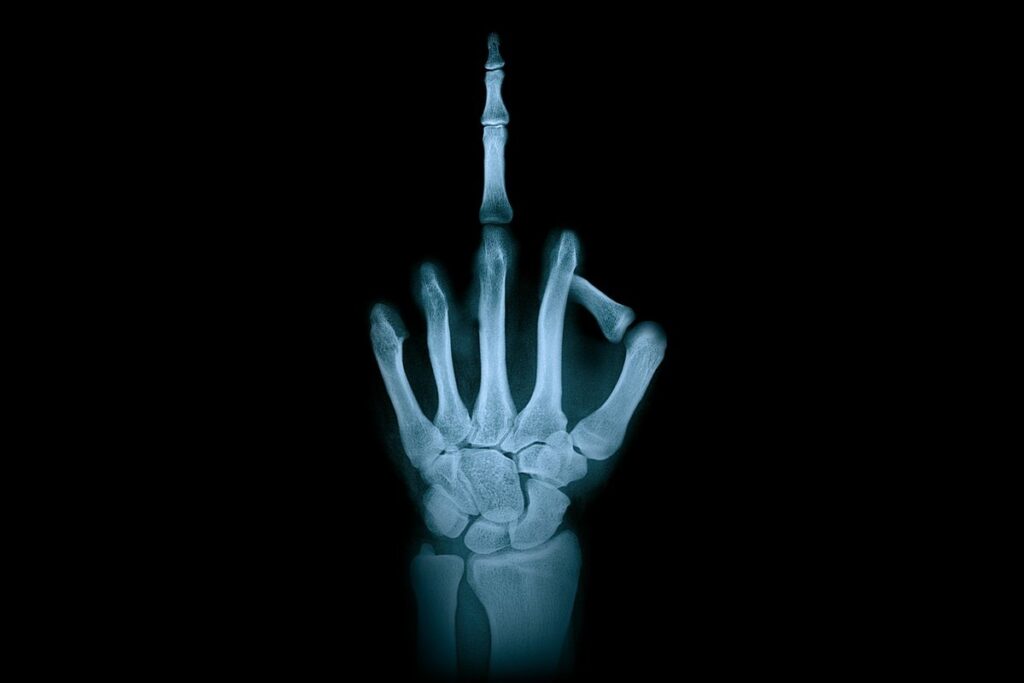
X-ray images provide a more detailed look at the bones themselves. A healthy bone typically appears dense and compact, with clear boundaries between individual bone structures. Unhealthy bones might appear porous, fragmented, or misshapen. For instance, if you see a radiograph (x-ray image) of a child’s wrist with multiple fractures or a severely thinned cortex, it could be an indication of osteoporosis.
When reviewing x-rays or other diagnostic images, healthcare providers consider various factors, such as growth plates’ maturity and bone density. These visual cues can help identify potential issues before they become severe problems.
DIY X-Ray Craft Ideas for Kids
Get ready to create some bone-afide fun with these easy and educational DIY x-ray craft ideas that are perfect for kids of all ages! From skeletons to x-rays, we’ve got you covered.
Making a Skeleton Using X-Ray Prints
Creating a skeleton using X-ray prints is an engaging and educational DIY project for kids to learn about human anatomy. Start by collecting X-ray prints of different bones, such as the skull, femur, humerus, and vertebrae. You can find these online or use printed images from medical websites.
To assemble the skeleton, begin with the largest bones, like the pelvis and femur. Use a hot glue gun to attach them to a cardboard base, making sure they are securely in place. Next, add the smaller bones, such as the ribcage and vertebrae, using a combination of hot glue and wire to create joints.
Add details like the skull, hands, and feet using smaller X-ray prints or printed images. Use a marker to draw on joints and other connections between the bones. This project allows kids to visualize and understand the structure of the human skeleton, promoting learning and exploration in a fun way.
Creating a Human Body Model with X-Rays
Creating a human body model using x-ray images is an exciting project that can help kids visualize and learn about the inner workings of the human body. To get started, you’ll need some basic craft materials like cardboard, glue, scissors, and paint, as well as access to x-ray images or prints.
First, print out a full-body x-ray image on paper or cardstock. This will serve as the base for your model. Next, cut out individual body parts from cardboard or cardstock, such as the skull, ribs, and pelvis. Use glue to attach these pieces to the x-ray image, creating a 3D effect.
Add some detail with paint or markers by drawing on muscles, organs, and bones. You can also use clay or play dough to create more textured details like joints and vertebrae. This project allows kids to explore and learn about human anatomy in a fun and interactive way.
Some x-ray images are available online for free, such as the Visible Human Dataset from the National Institutes of Health. Consider using these resources to print out different body parts and creating a layered effect by gluing them together. With patience and creativity, your kids can create an impressive human body model that’s both educational and eye-catching!
Tips for Creating Realistic X-Ray Images
To create realistic x-ray images, you’ll want to focus on layering and blending techniques that mimic the way bones appear in real-life radiographs. Experiment with different colors and shading to achieve a convincing effect.
Using Different Materials for Depth and Dimension
When it comes to creating realistic x-ray images, depth and dimension are crucial elements that can make all the difference. A 2D image of a bone might look nice, but adding layers and textures can bring it to life. This is where using different materials for depth and dimension becomes essential.
Consider using various colored pencils or markers to shade your bones, creating a gradient effect from light to dark. This will help create a sense of dimensionality and make the bones appear more lifelike. You could also use pastels or colored markers to add subtle shading and texture.
Another way to achieve depth is by layering materials on top of each other. For example, you can draw the outline of the bone with a fine-tip pen and then fill it in with layers of transparent washes or colored pencils. This technique will allow you to build up layers of color and create a sense of depth that’s almost like looking at an x-ray image.
When using materials for depth and dimension, remember that less is often more. Start with subtle shading and gradually build up the layers until you achieve the desired effect. With practice, you’ll get a feel for how different materials interact with each other to create realistic x-rays.
How to Use X-Rays to Show Bone Fractures and Injuries
When creating realistic x-ray images for learning about bones, it’s essential to depict bone fractures and injuries accurately. To do this safely and educationally, consider the following techniques.
To show a clean break fracture, you can use a white or light-colored marker to draw a line through the affected bone on your paper plate or acetate sheet, creating a clear visual representation of the fracture. This approach is especially effective for illustrating simple fractures where the bone breaks into two clean pieces.
For more complex fractures or multiple fractures, consider using different colors or shading techniques to convey depth and severity. You can also use this opportunity to demonstrate how a fractured bone might be displaced or misaligned. Be sure to include any relevant details, such as swelling, bruising, or soft tissue injuries that often accompany a fracture.
When depicting severe injuries, prioritize accuracy and safety by avoiding graphic or disturbing images. Consider focusing on the mechanism of injury rather than the aftermath, which can help students learn about prevention and risk management.
Integrating X-Ray Crafts into Educational Settings
When integrating x-ray crafts into your educational setting, consider how you can make them a hands-on and engaging way to teach kids about human bones in a fun and interactive way. You’ll want to plan activities that align with your curriculum goals.
Ideas for Incorporating X-Ray Crafts into Science Classrooms
Incorporating x-ray crafts into science classrooms can be a fun and engaging way to teach students about bones and the human body. Here are some ideas for lesson plans and activities that you can try:
You can start by having students create their own x-ray images using paper or cardboard cutouts of bones. For example, you can give each student a template of the skeletal system and have them draw or paint the different bones in place. Then, use a lamp or flashlight to shine through the paper and create an x-ray effect.
Another idea is to create a 3D model of the human body using clay or play dough. Students can work together to add small bones made from paper or cardboard to create a lifelike model. This activity not only teaches students about the skeletal system but also encourages teamwork and creativity.
You can also use x-ray crafts to teach students about different medical conditions that affect the bones, such as osteoporosis or bone cancer. For example, you can have students create an x-ray image of a bone with osteoporosis by using a combination of colored markers and watercolor paint to depict the weakened bone structure.
To make these activities more interactive, consider incorporating technology into your lesson plans. You can use apps or software that allow students to create 3D models of bones and see them from different angles. This will not only enhance their understanding of the subject but also make it more fun and engaging.
These are just a few ideas for incorporating x-ray crafts into science classrooms. The possibilities are endless, and with a little creativity, you can come up with even more innovative ways to teach students about bones and the human body.
How to Use X-Ray Crafts to Teach Other Subjects
Using x-ray crafts is not limited to teaching anatomy and health classes. You can also integrate them into various subjects like art, math, and language arts to create a well-rounded learning experience for students.
For example, when teaching math concepts like geometry or measurement, you can use x-ray crafts to demonstrate real-life applications. Have students create x-rays of everyday objects with unusual shapes, such as a pencil or a book, to practice measuring angles and dimensions.
In art classes, x-ray crafts can be used to explore different techniques like layering and texture. Students can create an x-ray effect on their artwork by applying multiple layers of paint or media, revealing the underlying structure of the piece.
You can also incorporate language arts into x-ray crafts by having students write a descriptive paragraph about what they see in an x-ray image. This encourages creative writing and critical thinking skills while reinforcing the concept that art is not just visual but also interpretive.
Remember, the beauty of x-ray crafts lies in their versatility – you can adapt them to fit any subject or curriculum requirement, making learning fun and engaging for students.
Safety Precautions When Working with X-Rays
When working with x-rays and creating bone crafts, it’s essential to take necessary precautions to avoid injury and ensure safe handling of materials. Always follow these critical safety guidelines to minimize risks.
Understanding Radiation Safety for Children
When working with X-rays for educational purposes, especially when it involves children, radiation safety becomes a top priority. Children’s bodies are still developing, and exposure to radiation can have long-term consequences.
Exposure to ionizing radiation, such as that from X-rays, can increase the risk of cancer in children. According to the International Commission on Radiological Protection (ICRP), children should limit their exposure to 1 millisievert (mSv) per year. To put this into perspective, a typical chest X-ray exposes a person to around 0.1 mSv.
To minimize risks when working with X-rays and children:
* Ensure proper shielding is in place to block radiation from escaping.
* Limit the number of X-rays taken, only taking images that are necessary for educational purposes.
* Use lead aprons or thyroid shields to protect sensitive areas.
* Supervise children closely during X-ray procedures and ensure they follow all safety guidelines.
Additionally, choose low-dose X-ray equipment specifically designed for educational use. These devices emit lower levels of radiation than standard medical X-rays.
How to Dispose of Used X-Ray Images Safely
When working with x-rays, it’s essential to dispose of used images safely and responsibly. This is not only for the protection of your own health but also for the environment. Used x-ray images contain sensitive medical information, making them potentially hazardous if not disposed of properly.
First, make sure you understand what constitutes a used x-ray image. Any printout or digital file that has been exposed to radiation and has been handled by multiple people is considered used. To dispose of these images safely, follow the guidelines set by your local healthcare institution or hospital. Typically, this involves shredding or securely deleting digital files.
If you’re working on a personal project and don’t have access to a shredder or secure deletion software, consider using a service that specializes in medical waste disposal. These services will ensure that your used x-ray images are handled and disposed of according to industry standards.
Remember, it’s crucial to follow the proper procedures when disposing of used x-ray images to prevent any potential harm to yourself or others.
Frequently Asked Questions
How can I adapt x-ray crafts for older children or teenagers who may require more challenging activities?
Adapting x-ray crafts for older kids involves incorporating more complex concepts, such as explaining bone density, osteoporosis, and the impact of nutrition on bone health. You can also use advanced materials like 3D printing to create more detailed models. Encourage them to research and design their own x-ray projects, focusing on real-world applications and challenges.
Can I use digital tools or apps to create x-ray crafts with my kids, rather than physical materials?
Yes! There are many digital tools and apps that allow you to create interactive x-ray images and 3D models. This can be especially useful for remote learning or when working with children who have mobility issues. Explore online platforms like SketchUp or Blender to design and print your own x-rays.
How do I ensure the accuracy of my child’s x-ray crafts, especially if they’re not accurately depicting bone structure?
Accuracy is crucial in teaching about bones. Encourage your child to research and consult with experts or reliable sources to ensure their crafts are accurate. You can also use reference images from medical websites or textbooks to double-check their work.
What safety precautions should I take when working with x-rays, especially if my child has a history of fragile bones or injuries?
When working with x-rays, it’s essential to follow radiation safety guidelines, especially for children with fragile bones. Use lead aprons and gloves to minimize exposure, and ensure your child understands the importance of handling x-ray images carefully.
Can I reuse or recycle used x-ray prints or materials from previous projects?
Yes! Reusing and recycling materials is a great way to reduce waste and promote sustainability. Consider using old x-rays as a starting point for new crafts or repurposing materials like cardboard or paper towel rolls to create unique x-ray-inspired designs.