
Are you looking for a fun and creative activity to do with your kids? Something that not only brings them joy but also helps develop their fine motor skills, creativity, and bonding time with you? Look no further than making a peg doll craft together! Peg dolls are a classic toy that has been delighting children for generations, and with this guide, you’ll learn how to create your very own. In this article, we’ll take you through the simple materials needed, step-by-step design process, and fun decoration ideas to make your peg doll truly unique. Whether you’re a crafty parent or just starting out, our instructions are easy to follow, so grab some wooden dowels, paint, and glue, and get ready for a fun and educational experience that will create memories with your little ones!
Introduction to Peg Doll Crafting
Welcome to the world of peg doll crafting, where creativity and fun come together! In this next part, we’ll explore the basics of getting started with making your own adorable peg dolls.
What are Peg Dolls?
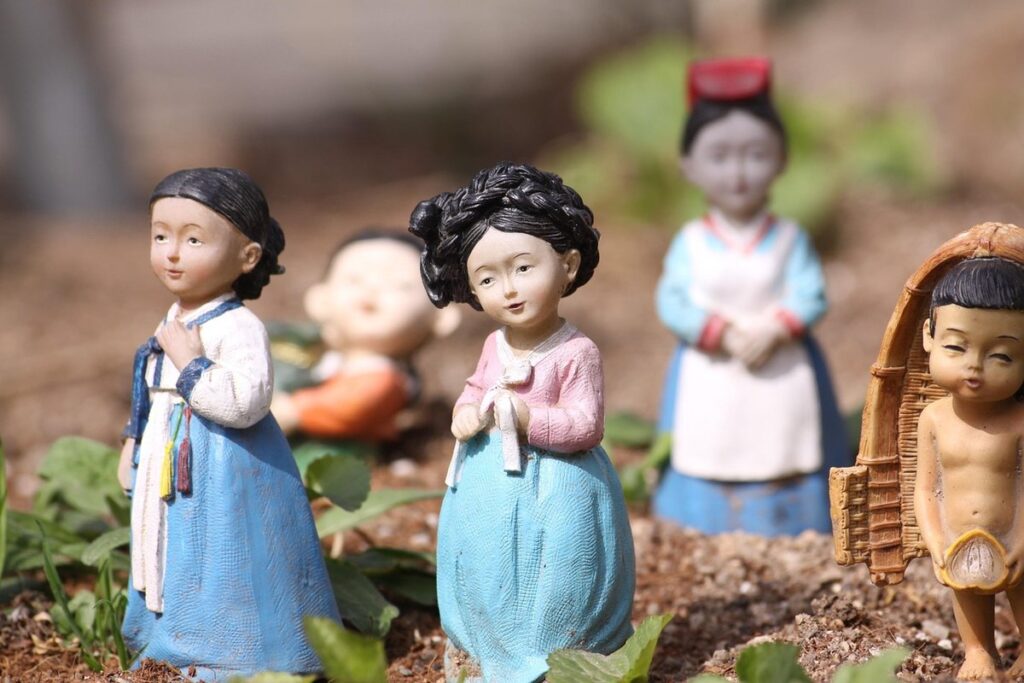
Peg dolls have been a beloved craft option for kids and adults alike for centuries. These small, intricately detailed figurines originated in Europe during the 19th century as a way to teach children about different occupations and professions. Peg dolls were often dressed in traditional clothing and posed in various settings, showcasing their daily activities.
The appeal of peg dolls lies in their versatility and ability to be customized to suit individual tastes. With just a few basic supplies, including wooden dowels, fabric, and felt, kids can create their own unique characters. This hands-on approach encourages creativity, fine motor skills, and problem-solving abilities. Additionally, peg dolls make for a wonderful storytelling tool, allowing children to imagine and act out different scenarios.
To get started with peg doll crafting, begin by selecting the type of character you’d like to create – perhaps a historical figure or a modern-day occupation. Next, gather your materials and let your child’s imagination run wild! With time and practice, they’ll develop essential skills while creating their own special peg dolls collection.
Benefits of Making Peg Dolls with Kids
Making peg dolls with kids is an incredibly rewarding experience that offers numerous benefits for their development and bonding. One of the most significant advantages is promoting creativity and self-expression. By allowing children to design and craft their own peg dolls, you’re giving them the freedom to explore their imagination and bring their ideas to life.
As children work on creating their peg dolls, they’ll also be developing their fine motor skills through tasks such as threading beads, tying knots, and assembling parts. These skills are essential for future academic success and everyday activities like buttoning shirts or using scissors.
Moreover, making peg dolls together is a wonderful way to spend quality time with your child. It’s an opportunity to bond over a shared creative activity, chat about their interests, and create lasting memories. As you work side-by-side, you can ask open-ended questions that encourage critical thinking and problem-solving skills, such as “What color would you like the dress to be?” or “How do you think we could make this peg doll’s hair more interesting?”
By engaging in peg doll crafting with your child, you’re fostering a sense of confidence, independence, and creativity that will benefit them for years to come.
Choosing Materials for Your Peg Doll Craft Project
When it comes to bringing your peg doll to life, selecting the right materials is crucial. This section will guide you through the process of choosing the perfect materials for your craft project.
Types of Wooden Dowels or Pegs to Use
When it comes to choosing wooden dowels or pegs for your peg doll craft project, you have several options to consider. The size of the dowel is crucial as it will determine the scale of your dolls. Larger dowels are ideal for creating bigger dolls, while smaller ones are perfect for making miniature figures.
In terms of material, you can opt for solid hardwood dowels, which offer durability and stability, or softwood dowels, which are more budget-friendly but may require additional support. Maple or birch dowels are popular choices due to their smooth finish and neutral color.
The price of the dowel is another factor to consider. You can find dowels in various price ranges, from affordable options starting at $1-2 for a pack of 10 to more premium hardwood dowels priced around $5-6 per piece. It’s essential to weigh the pros and cons of each type of dowel and choose one that fits your project’s specific needs.
Some popular brands like Craft Sticks or wooden craft sticks are affordable options, while others like FSC-certified dowels offer a more sustainable choice. Ultimately, the right dowel will depend on your creative vision, skill level, and budget.
Essential Crafting Tools Needed
When it comes to crafting peg dolls, having the right tools on hand is essential for creating adorable and long-lasting miniatures. Let’s start with the basics.
First and foremost, you’ll need a good pair of scissors that are sharp enough to cut through various materials such as felt, fabric, or even paper. Kids love cutting, so make sure they have their own dedicated scissor set. You can also consider investing in kid-friendly scissors with rounded tips for added safety.
Next up is glue – a must-have for assembling and attaching peg doll parts together. Choose a washable school glue that’s easy to clean and dries quickly. This will save you (and your child) from dealing with messy glue splatters.
For painting, it’s best to use kid-friendly acrylic paint or watercolor paints specifically designed for children. These are gentle on skin and come in a range of vibrant colors perfect for customization. A small paintbrush set is also a great addition to the tool collection.
Lastly, if you’re planning to add intricate details or features like eyes, mouths, or accessories, consider investing in a small drill with a set of drill bits. This will allow your child to create more elaborate designs without too much adult supervision.
Designing Your Peg Doll Character
Now that you have chosen your peg doll’s outfit and accessories, it’s time to think about what they look like underneath – let’s design their character!
Inspiration from Traditional Folk Art and Cultures
When designing your peg doll character, why not draw inspiration from traditional folk art and cultures? Exploring different regions and time periods can add depth and meaning to your creation. For example, African cultures are known for their vibrant textiles and patterns, such as the Adinkra symbols that adorn clothing and fabric in Ghana.
You could incorporate these motifs into your peg doll’s dress or accessories, creating a unique and eye-catching design. Similarly, Asian cultures offer a wealth of inspiration, from the intricate details on Chinese porcelain to the colorful kimonos worn by Japanese women. European folk art also offers a rich source of inspiration, with its use of bold colors and traditional motifs like florals and stripes.
As you explore these different cultural influences, consider how they might fit into your peg doll’s story or personality. Perhaps your doll is inspired by African textiles and wears a vibrant wrapper dress, or maybe it’s influenced by Asian motifs and sports intricate fans and parasols. The key is to have fun and get creative!
Tips for Customizing Your Peg Doll’s Appearance
When it comes to customizing your peg doll’s appearance, the possibilities are endless. The first step is to choose a wardrobe that reflects your doll’s personality. You can opt for traditional clothing like dresses and skirts or go for something more modern like t-shirts and jeans. Consider what activities your doll enjoys doing – does she love baking, gardening, or playing sports? Dress her accordingly!
Accessories are another great way to personalize your peg doll. Think about adding hats, scarves, bags, or shoes that match her outfit. For example, if you’ve dressed your doll in a chef’s hat and apron, why not add some toy utensils like a wooden spoon or spatula? This will really bring her character to life.
Hair is also an essential part of customizing your peg doll’s appearance. You can style her hair in braids, ponytails, or even go for a bold color change using fabric paint or markers. Don’t forget to add some fun details like bows, ribbons, or flowers to really make her stand out. The key is to have fun and be creative – after all, it’s your peg doll!
Creating the Body and Limbs of Your Peg Doll
Now that you have your peg doll body parts cut out, let’s start assembling them together to create a complete and adorable character. In this section, we’ll guide you through attaching the limbs and finishing touches!
Cutting and Assembling the Wooden Dowel Pieces
To cut and assemble the wooden dowel pieces, you’ll need to follow these steps. First, measure out the lengths of each piece according to your peg doll’s design. For a basic doll, you’ll typically need four limb pieces (two upper arm and two lower arm) and two body pieces.
Cut the dowels using a sharp craft knife or a miter saw, taking care to align them accurately. If you’re new to cutting wood, consider practicing on scrap pieces first to get a feel for it.
Next, assemble the limbs by gluing the top of each limb piece to the body. Use a small amount of wood glue and clamp the pieces together until dry. To ensure stability, attach one body piece to the other using glue as well.
When assembling the limbs, make sure they’re evenly spaced on either side of the body. This will create a balanced appearance for your doll. Use clamps or weights to hold everything in place while the glue dries.
Adding Details with Glue, Paint, or Markers
Now that you’ve added the head and body to your peg doll, it’s time to bring them to life with some personality! Details like eyes, hair, clothes, and accessories can make all the difference in making your peg doll unique and adorable. Let’s get creative!
To add eyes, you can use glue to attach small beads or buttons. You can also use paint to draw on eyes directly onto the face. Make sure to use a fine brush for a precise look. For hair, try using yarn, embroidery floss, or even real human hair (if you’re feeling adventurous!). Glue or hot glue them in place, and style with your fingers.
For clothes, get creative with fabric scraps! Cut out small pieces of fabric to create dresses, shirts, or pants. Use a needle and thread to sew the pieces together, or use hot glue for a quicker fix. Don’t forget accessories like hats, shoes, or jewelry – you can make these using beads, wire, or even paper. The possibilities are endless! Remember, it’s all about experimentation and having fun with your craft.
Decorating Your Peg Doll with Fabric and Textiles
Add a personal touch to your peg doll by incorporating fabrics and textiles! This section shows you how to get creative with ribbons, lace, and other materials.
Choosing Fabric Types and Patterns for Dresses and Accessories
When it comes to dressing up your peg doll, choosing the right fabric is just as important as designing the perfect dress. You’ll want fabrics that are not only adorable but also durable and easy to work with. Let’s start with some popular options for making dresses.
Cotton is a great choice for beginners because it’s soft, breathable, and comes in a wide range of colors and patterns. For a more rustic look, consider using linen or muslin. These fabrics have a lovely texture and are perfect for creating flowy sundresses or peasant tops.
When it comes to patterns, think about the theme of your peg doll’s world. For example, if you’re creating a fairy garden scene, floral prints would be a delightful choice. Stripes or polka dots can add a playful touch, while solids like white or cream are versatile and easy to pair with other fabrics.
Some great patterns for dresses include florals, polka dots, stripes, and plaids. Don’t be afraid to mix and match different patterns to create unique looks. Consider using fabric paint or markers to add extra details and personal touches to your peg doll’s wardrobe.
Embellishing with Ribbons, Bows, and Other Adornments
Now it’s time to add some extra flair to our peg doll! Let’s explore ways to embellish with ribbons, bows, and other decorative elements. These little touches can completely transform the look of our doll and make it truly unique.
To start, let’s talk about ribbons. You can tie a simple ribbon around your doll’s waist or use a more intricate bow on top of their head. Consider using ribbons in contrasting colors to add some visual interest. For example, if your doll is dressed in a bright pink dress, try pairing it with a blue ribbon for a cute and playful look.
Other embellishments you can try include adding a sparkly brooch or a tiny hat. You could also use fabric paint or markers to add some decorative details like polka dots or stripes. If you’re feeling adventurous, try using different textures like lace, ruffles, or even pom-poms! The possibilities are endless, so don’t be afraid to get creative and see what works best for your doll.
Remember, the key is to have fun and experiment with different combinations of embellishments until you find a look that makes you smile.
Displaying Your Finished Peg Doll
Now that you’ve brought your peg doll to life, it’s time to showcase it proudly! In this next step, we’ll explore creative ways to display your finished work.
Creative Ways to Showcase Your Handmade Craft
Once you’ve finished creating your adorable peg doll, it’s time to showcase it proudly. You can take your creativity to the next level by displaying your handmade craft in a unique and imaginative way. Here are some exciting ideas to get you started:
Creating a miniature world is an excellent way to display your peg doll. Build a tiny house or a castle using cardboard boxes, paper mache, or clay, and place your doll inside it. You can add furniture, accessories, and even create a backstory for the doll’s character. This will help bring your creation to life and make it more engaging for kids.
You can also turn your peg doll into a mobile by attaching it to a string or a stick, along with other decorative items like beads, feathers, or small toys. Hang the mobile in a window or from the ceiling, and watch as the colors and shapes dance together. This is not only a beautiful way to display your art but also adds a whimsical touch to any room.
Another idea is to create a themed scene using cardboard cutouts, foam shapes, or even real props like books, flowers, or small plants. Set up a mini-garden, a kitchen, or an office, and arrange the items in a way that creates a visually appealing scene. Your peg doll can be the star of the show, and kids will love exploring and interpreting the different scenarios.
Remember, the possibilities are endless, so don’t be afraid to experiment and come up with your own unique ideas! With a little creativity, you can turn your peg doll into an engaging, interactive display that showcases your child’s artistic skills and imagination.
Tips for Preserving and Caring for Your Peg Doll
When it comes to preserving and caring for your finished peg doll, there are several things you can do to keep it looking its best. To start with, make sure you store the doll in a cool, dry place away from direct sunlight. You can wrap each doll individually in tissue paper or bubble wrap to prevent them from getting scratched or damaged.
It’s also important to handle your peg dolls with care. Avoid touching the face or hands of the doll, as oils from your skin can cause it to discolor over time. Instead, use a soft cloth or brush to dust and clean the doll as needed. When displaying your peg dolls, try not to expose them to extreme temperatures or humidity levels.
In terms of storage, consider using a sturdy box or container with dividers to keep each doll separate and prevent them from getting damaged in transit. You can also use small bags or pouches to store accessories like clothes, hats, or purses that your peg dolls may be wearing. By following these simple tips, you can help extend the life of your finished peg doll and enjoy it for years to come. Regularly cleaning and dusting will also help keep them looking their best.
Frequently Asked Questions
Can I make peg dolls using recycled materials?
Yes, you can definitely get creative with recycled materials like old wooden spoons, cardboard tubes, or even plastic containers to create unique peg doll characters. This is a great way to teach your kids about upcycling and sustainability while still having fun making the craft project.
How long does it take to make a peg doll from scratch?
The time it takes to complete a peg doll depends on the complexity of the design, the age and skill level of the child, and the amount of detail you want to add. On average, it can take anywhere from 30 minutes to several hours or even days if you’re adding intricate details.
Can I customize my peg doll’s appearance without using paint?
Yes, you can use markers, colored pencils, or even fabric paint to give your peg doll a personalized look without having to use paint. This is a great option for kids who might be hesitant to get messy with paint.
How do I store and preserve my finished peg dolls?
To keep your peg dolls in good condition, store them in a dry place away from direct sunlight. You can also consider using a clear plastic bag or wrapping each doll individually to prevent dust accumulation. For long-term preservation, consider varnishing the wooden dowels with a water-based finish.
Can I make peg dolls with my child if we have limited space?
Yes, you can still make peg dolls even with limited space by choosing small-scale designs and using compact materials like miniature wooden dowels or even 3D printing. This way, you can still create quality time with your child while working on a fun project together.