
Get ready to unleash your child’s creativity with this fun and easy toilet paper roll rabbit craft! We all know that toilet paper rolls are more than just for, well, using. They can be transformed into amazing art projects that bring a smile to our little ones’ faces. If you’re looking for a way to encourage your child’s imagination and have some quality time together, this is the perfect project for you. With its simplicity and versatility, it’s suitable for kids of all ages – from toddlers to preschoolers. In this article, we’ll walk you through step-by-step instructions on how to make a toilet paper roll rabbit, along with essential safety tips to ensure a fun and safe crafting experience for your child.
Introduction to Toilet Paper Roll Crafts
Get creative and learn how to make adorable toilet paper roll rabbits for kids, perfect for arts and crafts sessions at home. This fun project is easy to follow and requires minimal materials.
Benefits of DIY Crafts for Children’s Development
Engaging in creative activities like making a toilet paper roll rabbit can have a profound impact on children’s development. Not only does it provide a fun and engaging way to reuse household items, but it also fosters essential skills that will benefit them throughout their lives.
One of the most significant benefits is improved problem-solving skills. When working on a craft project like this, children are presented with challenges they must overcome, such as cutting shapes or assembling parts. By tackling these problems head-on, kids develop critical thinking and analytical skills. For example, if your child struggles to get the ears to stay in place, you can encourage them to think creatively about how to secure them.
Fine motor control is another area where DIY crafts excel. Cutting, pasting, and manipulating small objects all require precision and dexterity. Regular engagement in these activities helps build hand-eye coordination and overall fine motor skills. You can also try incorporating other materials like scissors or small tools into the project for added benefit.
History of Paper Craft and Its Relevance Today
Paper crafting has been a beloved activity for centuries. The earliest recorded paper crafts date back to ancient China around 105 AD, where people used paper to create lanterns and other decorative items. In Japan, paper folding (Kirigami) became an art form in the 17th century. These traditional practices not only showcased creativity but also served as a means of storytelling.
The Industrial Revolution brought about mass production techniques, making paper readily available for craft purposes. The 1960s saw a resurgence in popularity with the emergence of paper crafting as we know it today, thanks to pioneers like Nancy Wick and her innovative bookbinding techniques.
In this digital age, you might wonder why paper crafts remain relevant. However, amidst the screens and gadgets, there’s been a growing desire for hands-on experiences that promote relaxation and imagination. Paper crafting encourages creativity, fine motor skills, and attention to detail – essential qualities for children (and adults alike). By incorporating toilet paper roll crafts into your creative endeavors, you’re joining a long-standing tradition of artistic expression while fostering a sense of community and shared knowledge.
Creating Your Own Toilet Paper Roll Rabbit
Now that you have a basic toilet paper roll rabbit, let’s add some personality to it by decorating and customizing its design together.
Gathering Materials and Preparation
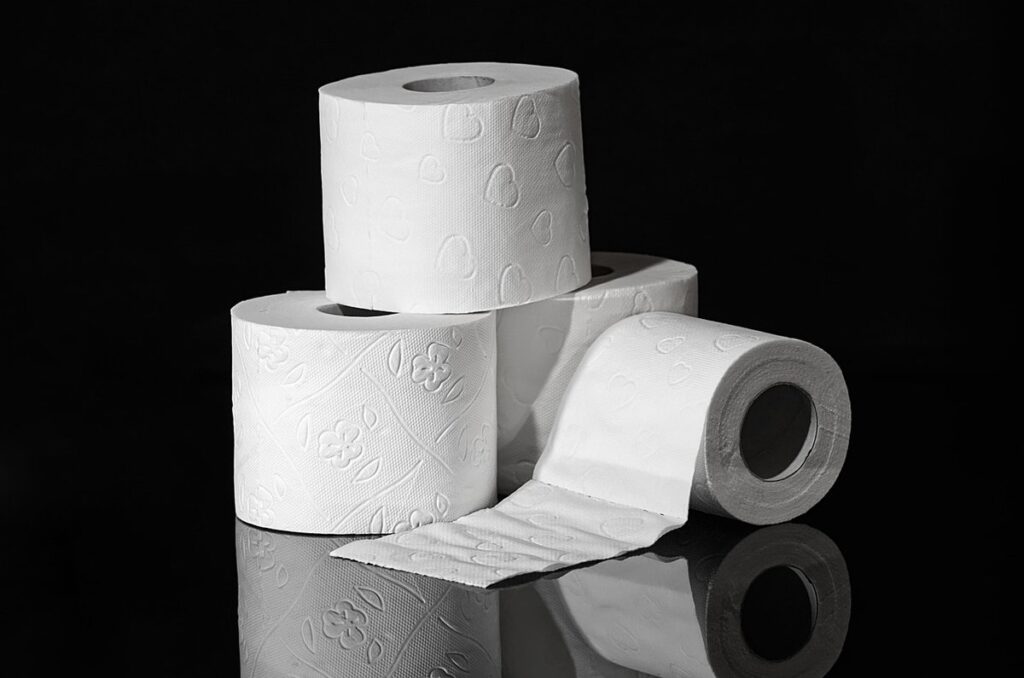
To create a delightful toilet paper roll rabbit, you’ll need to gather some essential materials. Start by collecting toilet paper rolls (you can use multiple for the ears and tail), along with a variety of craft supplies like scissors, glue, construction paper, felt, and markers or paint.
For the body, you’ll want to cut out two identical oval shapes from the cardboard roll. You can also use white paper if you prefer a more traditional look. Cut out two smaller oval shapes for the face and attach them using glue or a small dot of hot glue. Add some details like eyes, nose, and mouth with markers or paint.
Don’t forget to set aside materials for the ears, tail, and paws. You’ll need two small cardboard rolls for the ears, which you can decorate with construction paper, felt, or even fabric. For the tail, cut out a long thin triangle from construction paper and attach it using glue. Use cardboard or construction paper to create the paws, and add some details like buttons or felt to resemble rabbit feet.
Remember to have fun and be creative! You can customize your rabbit’s appearance with different materials and designs.
Step-by-Step Instructions for Assembling the Rabbit
Now that we have all our pieces ready, it’s time to put them together and create our adorable toilet paper roll rabbit! Let’s break down the process into manageable steps.
First, take a closer look at your cardboard tube. This will be the body of our rabbit. You can cut out two small rectangles from the green construction paper – these will be the ears. Attach them to the top of the tube using glue or a stapler. Make sure they’re even and pointy!
Next, cut out some cotton balls for the tail and attach it to the back of the body using a dab of glue. Now, let’s move on to the face. Cut out two small circles from white paper for the eyes and two long strips for the whiskers. Use a black marker to draw on the pupils. Attach the eyes and whiskers to the head using a bit of glue.
Finally, add some personality to your rabbit with markers or crayons! You can draw on some eyebrows, a nose, or even some cute freckles. And that’s it – you now have a one-of-a-kind toilet paper roll rabbit!
Remember, don’t be afraid to get creative and make your rabbit unique. With these simple steps, you’ll have a lovely companion in no time!
Tips and Variations for Enhancing Your Project
Now that you’ve created your adorable toilet paper roll rabbit, let’s explore some fun ways to make it even more special. From creative accessories to exciting variations!
Adding Textures and Patterns to Your Rabbit
Adding some personality to your toilet paper roll rabbit is as simple as experimenting with textures and patterns. Let’s start with textures! You can add a sense of depth to your rabbit by incorporating different materials like felt, fleece, or even yarn. Try gluing small pieces of fabric onto the bunny’s body for a more dimensional look.
For patterns, think about what makes your rabbit unique. Perhaps you want to give it a polka-dot nose or some stripes on its ears? Use colored markers, paint, or even stickers to add those fun details. Don’t be afraid to get creative and experiment with different designs!
Colors can also play a big role in bringing your rabbit to life. Consider using pastel shades for a softer look or brighter colors for a more playful vibe. You could also try ombre effects by gradating the color from one end of the bunny to the other.
Some great textures to incorporate include:
* Faux fur for a fluffy appearance
* Pom-poms for added dimension and texture
* Glitter or sequins for a touch of luxury
Using Different Materials and Embellishments
Using different materials and embellishments can add an extra layer of creativity to your toilet paper roll rabbit project. For instance, you could use colored cardboard tubes instead of plain white ones to create a rainbow-colored effect. Alternatively, you could wrap the tube with patterned paper or construction paper in various colors and textures.
If you want to create themed rabbits, consider using specific materials like foam sheets for a 3D effect, felt for a fuzzy look, or even recycled materials like egg cartons or toilet paper rolls (yes, you can use multiple!) to create a more complex design. You could also add beads, sequins, or glitter to give your rabbit some sparkle.
For added texture and interest, try using different types of paper such as tissue paper, crepe paper, or even newspaper. You can also experiment with fabric scraps like cotton, fleece, or silk for a softer appearance. Remember, the key is to have fun and be imaginative with the materials you choose!
The Science Behind Toilet Paper Roll Crafts
Let’s dive into the science behind these creative crafts, exploring how simple materials can become fascinating art projects through the process of transformation and imagination.
Understanding Cardboard Strength and Durability
Cardboard rolls are a staple material for crafting projects like our adorable toilet paper roll rabbits. But have you ever wondered why they’re so well-suited for these kinds of activities? The answer lies in their impressive strength, durability, and resistance to moisture.
When we talk about cardboard strength, we’re referring to its ability to withstand stress without tearing or breaking. This is due to the unique structure of the paper fibers that make up the cardboard. These fibers are bonded together with a natural adhesive called lignin, which helps to distribute forces evenly across the material. As a result, cardboard rolls can support their own weight and even handle some external pressure without compromising.
But what about moisture? Well, most cardboards are made from cellulose-based materials that repel water, making them resistant to dampness and humidity. This means you can use toilet paper rolls in various crafting projects, including those that involve paint, glue, or other liquids, without worrying about the cardboard becoming soggy or disintegrating.
This unique combination of strength and moisture resistance makes cardboard rolls an ideal material for kids’ crafts like our toilet paper roll rabbits. So go ahead, get creative, and enjoy making these adorable little friends with your little ones!
How Creases and Folding Affect the Final Product
When working on your toilet paper roll rabbit craft, it’s essential to understand how creases and folding techniques can impact the final appearance of your project. Creasing involves creating a sharp fold in the paper by applying pressure with your finger or a tool. This technique is crucial for achieving clean, crisp folds that will help you create the rabbit’s features.
To demonstrate this, try folding a piece of toilet paper in half lengthwise and crease it firmly with your finger. Open it up and observe how sharp the fold is – you should see a clear line where the paper was folded. Now, imagine using this technique to create the rabbit’s ears or tail.
Folding techniques can also be used to add dimension to your craft. By creating gentle folds in the paper, you can achieve soft, rounded features that give your rabbit a more lifelike appearance. Experiment with different folding patterns and techniques to see how they affect the overall look of your craft. For example, you could try using a accordion-fold technique to create the rabbit’s fluffy fur.
By mastering creases and folding techniques, you’ll be able to add depth and detail to your toilet paper roll rabbit, making it look more realistic and engaging.
Encouraging Creativity with Toilet Paper Roll Rabbit Themes
Turn your child’s imagination loose with creative rabbit crafts, from colorful collars to adorable ears, made possible by toilet paper rolls and a little creativity. Let’s get crafty together!
Seasonal and Holiday-Inspired Projects
One of the best ways to keep kids engaged with toilet paper roll rabbits is by adapting them to fit various seasonal and holiday themes. Let’s face it, kids love participating in holidays and celebrations, and what better way to get them involved than by creating their own themed decorations or gifts?
For example, during Christmas, you can turn your toilet paper roll rabbit into a jolly Saint Nick by decorating it with red and green construction paper, adding some cotton balls for a snowy effect, and giving it a candy cane hat. On Easter, transform your rabbit into a springtime bunny by covering it with pastel-colored paper, adding some fluffy grass made from cotton balls, and giving it a basket full of plastic eggs.
You can also incorporate Halloween-themed accessories like fake spiders, bats, or other spooky decorations to create a witch’s familiar. To make things more exciting, you can involve your kids in the creative process by asking them to come up with their own unique ideas for seasonal toilet paper roll rabbit adaptations. This not only fosters creativity but also teaches them about different holidays and traditions.
Themed Storytelling with Your Craft Project
As you work on your toilet paper roll rabbit craft project with your little ones, don’t let it collect dust once it’s complete. Encourage them to bring the creation to life by telling stories or creating scenarios around it. This is an excellent opportunity to promote creative writing and imagination in children.
Ask your child to think about their rabbit’s personality, habits, and daily routine. Does it have a favorite food? Where does it like to hop? What kind of adventures would it go on? Encourage them to draw or write down the story, using their creativity to imagine what their rabbit might be doing.
For example, you could start with simple prompts like: “What’s your rabbit’s name?” or “Where does it live?” As they begin to tell its story, ask open-ended questions to spark their imagination. You can even create a narrative together by taking turns adding sentences or paragraphs to the story. This interactive storytelling process will help them develop their creative writing skills and think creatively about their craft project.
Safety Precautions and Parental Involvement
To ensure your little ones stay safe while enjoying their toilet paper roll rabbit, we’ll cover essential safety precautions and offer guidance on involving parents in the crafting process.
Handling Sharp Objects and Materials Safely
When working on craft projects like the toilet paper roll rabbit, it’s essential to handle sharp objects and materials safely. Scissors, glue, and other supplies can be hazardous if not used properly. As a parent, supervising your child is crucial to avoid accidents.
To start, make sure your child understands basic safety rules before beginning any project. Explain that sharp objects like scissors and craft knives should only be handled under adult supervision. Demonstrate how to hold the object correctly, with fingers curled gently around the handle and not touching the blade.
When using glue, teach your child to apply it in small amounts and on a surface where they won’t slip or get hurt if it dries quickly. Keep materials like scissors and glue out of reach when not in use, and encourage your child to clean up as they go to avoid tripping hazards.
For the toilet paper roll rabbit project specifically, you’ll need to cut the ears and legs from construction paper using scissors. Show your child how to hold the scissors firmly and make gentle cuts, taking breaks if needed to avoid fatigue. By following these guidelines, you can help ensure a fun and safe crafting experience for both of you.
Collaborative Crafting: Tips for Parent-Child Projects
Collaborative crafting is an excellent way to bond with your child while creating something beautiful together. When working on a project like the toilet paper roll rabbit, it’s essential to set clear goals and expectations from the start. Decide what you want to achieve with this craft session – do you want to create a specific design or learn a new skill? Make sure to communicate this clearly to your child.
Divide tasks between yourself and your child based on their abilities and interests. For example, you can take charge of cutting out intricate details, while your child focuses on painting the rabbit’s fur. This way, everyone feels involved and valued in the creative process.
Encourage feedback and open communication throughout the project. Ask your child to describe what they’re trying to achieve with a particular task or ask for their opinion on a design decision. This will not only help them develop problem-solving skills but also make the experience more enjoyable and rewarding. Remember, it’s okay if things don’t turn out as expected – it’s the process that matters, not the final product!
Conclusion and Final Thoughts
As we come to the end of our fun journey creating a toilet paper roll rabbit, let’s wrap up with some final thoughts on how your child can keep exploring their creativity.
Reflecting on the Fun and Learning Experience
As you put down the toilet paper roll rabbit you’ve just created with your little one, take a moment to reflect on the fun and learning experience you’ve shared. The benefits of making this craft project are numerous, and it’s essential to acknowledge how it can positively impact your child’s development.
Creativity is an incredible tool for children to express themselves, and the toilet paper roll rabbit project allows them to tap into their imagination and bring a unique creation to life. By providing a variety of materials and encouraging experimentation, you’re giving your child the freedom to make choices and try new things. This not only fosters creativity but also develops problem-solving skills as they navigate through different challenges.
Hands-on learning is another significant advantage of this activity. Working with physical materials like toilet paper rolls, glue, and scissors enables children to understand concepts in a tangible way. It’s an excellent opportunity for them to practice fine motor skills, hand-eye coordination, and dexterity while having fun at the same time. Moreover, the process-oriented approach of making a toilet paper roll rabbit helps build confidence and a sense of accomplishment as your child sees their creation come together.
As you engage in more activities like this with your child, remember that the journey is just as important as the end result. Encourage them to explore different materials, try new techniques, and make mistakes – it’s all part of the learning process! By embracing a hands-on approach to learning, you’re setting your child up for success in both creativity and cognitive development.
Frequently Asked Questions
Can I use different materials for the rabbit’s ears?
You can experiment with various textures by using felt, foam, or even fabric paint to create unique ear designs. This adds an extra layer of creativity and encourages kids to think outside the box. Just ensure that the material is safe and sturdy enough to hold its shape.
How do I make my toilet paper roll rabbit more durable?
To make your project last longer, consider using a hot glue gun to attach the ears and other embellishments. You can also use a strong adhesive or double-sided tape for added stability. This will help prevent your craft from falling apart over time.
What are some alternative ways to decorate my toilet paper roll rabbit?
Think beyond traditional markers and colored pencils! Use crayons, watercolors, or even stickers to add vibrant colors and patterns. You can also try using real flowers, leaves, or other natural materials for a more earthy look. The possibilities are endless!
Can I make this craft project with younger children who may not be able to follow instructions?
Yes, you can definitely adapt the project for toddlers by simplifying the steps and using larger, easier-to-handle materials. Consider pre-cutting the shapes or providing a template to help them stay on track. This will allow them to still enjoy the creative process while developing their fine motor skills.
How do I store my toilet paper roll rabbit after it’s complete?
To keep your craft looking its best, consider displaying it in a protective case or frame. You can also store it in a dry place, away from direct sunlight and moisture. This will help preserve the materials used and prevent any damage over time.