
If you’re like most parents or caregivers, you want to encourage creativity in young children while keeping the chaos level at bay. Craft projects for 5-year-olds can be an excellent way to achieve this balance, fostering fine motor skills and self-expression without leaving a trail of destruction behind. But where do you start? With so many craft ideas out there, it’s hard to know which ones are suitable for little hands and which will lead to more mess than magic.
In this article, we’ll explore some fun and easy craft ideas perfect for developing your child’s fine motor skills and creativity while minimizing mess and chaos. From finger painting to paper crafting, we’ll cover a range of activities that are sure to delight both you and your child. So, let’s get creative and make some memories!
Introduction to Crafting for Preschoolers
Welcome to our world of creativity, where little hands can create big masterpieces! In this next part, we’ll explore essential tips and basics for introducing crafting to your preschooler.
Benefits of Crafting for 5-Year-Olds
Crafting is an essential activity for 5-year-olds as it helps them develop fine motor skills, creativity, and self-expression. When children engage in crafting, they use various tools like scissors, glue, and paint to create something from scratch. This process enhances their hand-eye coordination, dexterity, and ability to manipulate objects, all of which are crucial for developing fine motor skills.
Through crafting, young children also learn to express themselves creatively. They can bring their imagination to life by creating art pieces that reflect their thoughts, feelings, and experiences. Encourage your child to explore different materials and techniques to find what works best for them. For instance, you can try finger painting, playdough modeling, or collage making.
As children engage in crafting, they also develop self-expression skills. They learn to make choices, experiment with new ideas, and take ownership of their creations. This process helps build confidence, independence, and a sense of pride in their work. By incorporating crafting into your child’s daily routine, you’ll provide them with a fun and engaging way to develop essential skills that will benefit them throughout their lives.
Setting Up a Safe Crafting Environment
When working with preschoolers on craft projects, it’s essential to set up a safe and organized space that allows them to explore their creativity without worrying about potential hazards. Start by designating a specific area for crafting, such as a table or countertop, where all the necessary supplies can be kept within reach.
Make sure this space is well-ventilated, especially when working with materials like paint, glue, or other chemicals that might release fumes. A fan or open window can help keep the air fresh and prevent any unpleasant odors from building up.
Some essential safety precautions to consider include:
• Covering your work surface with newspaper, a tablecloth, or a plastic sheet to protect it from spills and stains.
• Keeping sharp objects like scissors, craft knives, or hot glue guns out of reach or using safety covers to prevent accidental injuries.
• Supervising children at all times when they’re working with materials that could be hazardous if mishandled.
• Having a first-aid kit nearby in case of any minor accidents.
By following these simple tips, you can create a safe and welcoming environment where your preschoolers feel free to express themselves through art.
Finger Painting Fun
Get ready for a splat-tastic time! This next part is all about creating amazing finger paintings, perfect for little artists to show off their skills and imagination.
Introduction to Finger Painting
When it comes to art projects for 5-year-olds, finger painting is an excellent choice. Not only is it a fun and messy way to get creative, but it’s also an excellent medium for developing important skills. One of the primary benefits of finger painting is that it helps children develop their hand-eye coordination.
As young artists dab their fingers in paint and apply it to paper, they’re strengthening their fine motor skills and learning to control their movements. This coordination is essential for future activities like writing and drawing. Plus, as children experiment with different colors and textures, they begin to recognize and understand the concept of color recognition – a fundamental skill that will serve them well in art and beyond.
To get started with finger painting, all you need is some paper, paint, and smocks! Encourage your little ones to explore different techniques, like swirling their fingers to create marbled effects or making bold strokes for dramatic backgrounds. Don’t worry too much about messes – they’re an essential part of the creative process! By embracing the fun and freedom of finger painting, your 5-year-old will be developing essential skills while unleashing their inner artist.
Easy Finger Painting Projects
Get ready to unleash your child’s creativity with these easy finger painting projects! Finger paints are an excellent way for 5-year-olds to express themselves and bring their imagination to life. Let’s dive into some fun and simple ideas that will make you go “wow!”
Painting self-portraits is a great place to start. Simply give your child a blank piece of paper, some finger paints, and let them get creative. They can paint their face, hair, clothes, and anything else they want to include. Encourage them to experiment with different colors and techniques, like mixing two colors together or making swirling patterns.
Handprint art is another favorite among little ones. You can use a variety of materials, such as paper plates, sponges, or even real leaves, to create unique textures and designs. Try painting your child’s hand and stamping it onto the paper to make fun shapes and patterns. Don’t be afraid to get messy and have fun!
Remember, finger painting is all about exploration and creativity. Encourage your child to try new things and make mistakes – they’re just a part of the process!
Tips for Minimizing Mess
When working with finger paints, it’s not uncommon for messes to occur. However, there are some simple steps you can take to minimize the chaos and make clean-up a breeze.
First, cover your work surfaces with paper or a plastic tablecloth. This will catch any spills and make it easier to wipe down when you’re finished. You can also use a drop cloth or old sheets to protect your floors and furniture from any accidental splatters.
Another key part of minimizing mess is frequent hand washing. Encourage your child to wash their hands with soap and water as soon as they’ve finished painting. This will not only prevent the spread of germs, but it’ll also help remove any paint residue that may have gotten stuck under their nails or in between their fingers.
You can also consider setting up a designated space for finger painting, such as a small table or countertop covered with paper and a container of water on hand for quick clean-ups. This will help contain the mess and make it easier to supervise your child’s creative endeavors.
Collage Making for Little Artists
Let’s get creative and make some amazing collages! This fun activity is perfect for little artists aged 5, teaching them to mix and match textures, colors, and shapes.
Introduction to Collage Art
Collage making is an exciting and creative way to let little artists express themselves. It’s a fun and interactive medium that allows children to explore their imagination while developing essential skills. When engaging in collage making, young children tap into their creativity, experimenting with different textures, colors, and patterns.
As they gather various materials like paper, glue, scissors, and other embellishments, they begin to develop problem-solving skills and hand-eye coordination. Collage making is also an excellent way to improve fine motor skills, as children learn to cut, tear, and arrange their materials with precision.
To get started, try providing your child with a variety of materials and let them explore different techniques. You can start by gluing paper shapes onto a large sheet or creating 3D objects using cardboard boxes. Encourage experimentation and creativity, allowing your child’s imagination to run wild. With each new project, their skills will improve, and they’ll develop confidence in their ability to create something unique.
This activity is not only entertaining but also educational, promoting cognitive development while nurturing a love for art.
Simple Collage Projects
One of the most fun and creative collage projects for little artists is creating a picture of their family. You can start by asking your child to think about who they want to feature in their collage – mom, dad, siblings, pets, or even grandparents! Then, give them a stack of construction paper sheets in different colors and ask them to cut out shapes that resemble each family member. For example, you can use a rectangle for the body, an oval for the head, and a triangle for the hat.
Once they have all their cut-out shapes, help your child arrange them on a new sheet of paper to create a cohesive picture. You can use glue to stick the shapes together, making sure not to overpower the original shape. Encourage your child to get creative with colors and textures by adding some additional details like eyes, mouths, or accessories.
Another fun project is creating a self-portrait using cut-out shapes. Help your child identify different features of their face, such as their eyes, nose, and mouth, and then use scissors to cut out shapes that match each feature. They can arrange these shapes on a new sheet of paper to create a one-of-a-kind self-portrait. Remember to encourage experimentation and creativity – it’s okay if their collage doesn’t look exactly like them!
Experimenting with Different Textures
Incorporating different textures into your child’s collage art is an excellent way to encourage creativity and experimentation. Textures add depth and visual interest to a piece of artwork, making it more engaging and dynamic. For little artists, exploring various textures can be a fun and sensory experience.
You can start by introducing basic textures like glitter, sequins, or fabric scraps. Glitter can add a touch of luxury and sophistication, while sequins provide a sense of movement and energy. Fabric scraps, on the other hand, can introduce tactile elements to your child’s artwork.
To incorporate these textures into your child’s collage art, try using a glue stick or white school glue to attach them onto the paper. You can also use a spray adhesive for larger pieces like fabric scraps. Encourage your child to experiment with different patterns and arrangements of textures, and see how they respond to each other.
Some examples of textures you can explore include:
• Fabric scraps: old t-shirts, lace, or ribbons
• Natural materials: leaves, twigs, or feathers
• Recyclable materials: cardboard tubes, egg cartons, or newspaper
• Man-made materials: beads, sequins, or glitter
Remember to supervise your child during these experiments and encourage them to explore different combinations of textures. Who knows what amazing creations they’ll come up with!
DIY Crafts for 5-Year-Olds
Get ready for some messy fun as we share our favorite easy-to-make crafts that are perfect for 5-year-olds to create and enjoy. From finger painting to collages, we’ve got you covered!
Introduction to DIY Crafts
Welcome to the world of DIY crafts! If you’re new to this exciting field, let’s start with the basics. DIY stands for “do-it-yourself,” which means creating something on your own without relying on others. In the context of our little crafters, DIY crafts refer to projects that young children can design and build by themselves or with a little guidance from you.
Engaging in DIY crafts is an excellent way to help develop problem-solving skills in 5-year-olds. When kids work on a project, they learn to think critically and come up with creative solutions to challenges they encounter. This process not only fosters creativity but also builds confidence as they see their ideas take shape.
One of the most significant benefits of DIY crafts for young children is that they allow kids to express themselves freely. By choosing materials and designs, they can showcase their personality and interests. For instance, a child who loves animals might create a bird feeder using recycled materials. This not only develops fine motor skills but also encourages imagination and self-expression.
When introducing your child to DIY crafts, remember to start simple and encourage experimentation. Begin with basic projects like painting or making collages, then gradually move on to more complex activities like woodworking or sewing. With patience and guidance, your 5-year-old will be creating their own masterpieces in no time!
Easy DIY Projects
When it comes to DIY projects for 5-year-olds, simplicity is key. These little ones are naturally curious and love creating things, but they also need guidance and supervision to ensure their safety.
One of the easiest DIY projects for 5-year-olds is making a bird feeder. All you’ll need is some peanut butter, seeds, and a pinecone. Simply spread the peanut butter on the pinecone, roll it in seeds, and hang it outside. This project teaches kids about birds and their habitats while providing them with a fun and easy activity.
Another great DIY project for 5-year-olds is creating a picture frame. You can use pre-made frames or create your own using popsicle sticks and glue. Decorate the frame with stickers, markers, or paint, and let the child’s creativity shine. This project introduces kids to basic art concepts and teaches them about framing and displaying artwork.
Remember, always supervise your child during these activities and provide guidance when needed. Encourage their creativity and imagination while teaching them essential life skills like fine motor control and problem-solving.
Encouraging Creativity Through Mistakes
Mistakes are an essential part of the creative process, and it’s never too early to teach our little ones this valuable lesson. When working on DIY crafts with 5-year-olds, it’s natural for them to make mistakes – but instead of scolding or discouraging them, we should be encouraging them to see these errors as opportunities for learning and growth.
Encourage your child to view mistakes as stepping stones to creativity. Ask open-ended questions like “What if we try this another way?” or “How can we fix this mistake?” This will help them develop problem-solving skills and think outside the box. For instance, if they accidentally glue two pieces of paper together in the wrong spot, ask them to think about how they can use that mistake as a design element.
By embracing mistakes, your child will become more confident in their abilities and less afraid to try new things. Remember, it’s not about creating perfection – it’s about having fun and exploring creativity! So next time you’re working on a project together, take a deep breath and let the mistakes happen. Who knows what amazing creations might come from them?
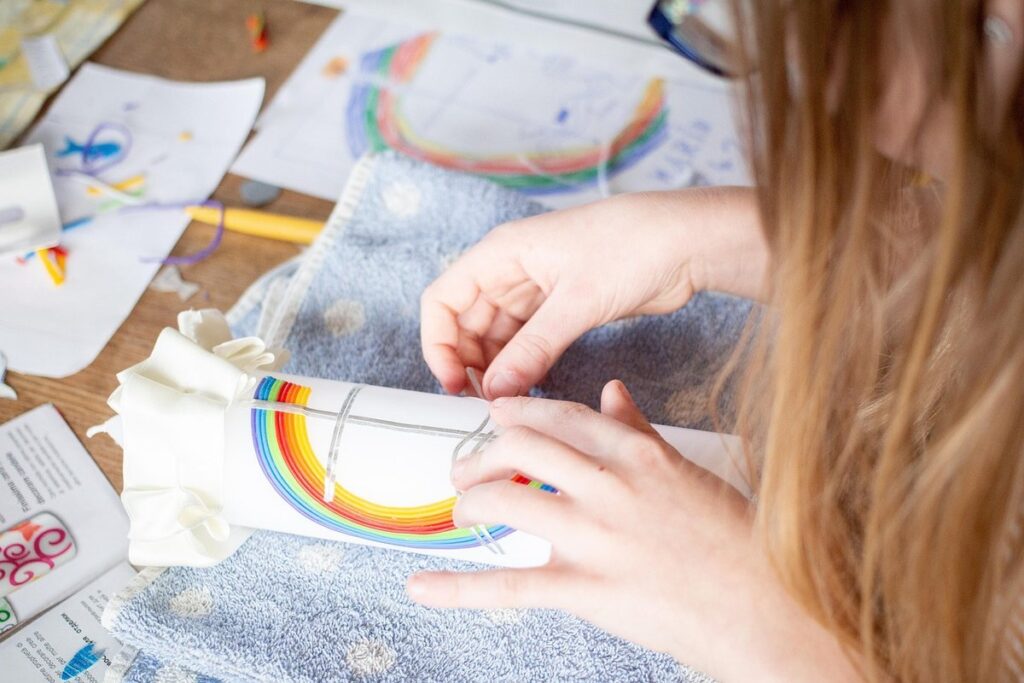
Paper Craft Fun
Get ready for some seriously cool paper creations, little crafters! In this next part of our fun project series, we’ll show you how to make adorable animals from folded paper.
Introduction to Paper Crafts
Welcome to the wonderful world of paper crafts! At five years old, you’re probably bursting with creativity and energy, just waiting to get messy and make something amazing. Paper crafts are a fantastic way to tap into that creative potential, and they’re perfect for little hands to try.
You might have heard of origami – it’s an ancient Japanese art of folding paper to create beautiful shapes and designs. With some practice, you can fold a simple paper crane or even a box! It’s all about patience and precision, but don’t worry if your first attempts look a bit wobbly – with time and practice, you’ll get the hang of it.
Paper mache is another fun technique where you use paper pulp to create 3D objects. Imagine making a bowl or a vase using nothing but layers of paper! It’s messy, but it’s also super rewarding when you see your creation take shape. And let’s not forget about paper folding – we can make all sorts of cool things like animals, flowers, and even people!
The great thing about paper crafts is that they’re easy to do at home with just a few simple tools. You’ll need some paper (of course!), scissors, glue, and maybe a bit of string or tape. With these basics, you can create all sorts of amazing things – and the best part is, it’s okay to make mistakes!
Simple Origami Projects
Origami is an amazing way to introduce 5-year-olds to the world of paper crafting. Not only does it promote fine motor skills and hand-eye coordination, but it’s also a great way to encourage creativity and patience.
Let’s start with some simple projects that are perfect for little hands. Have your child try making a traditional origami crane. This classic design is easy to fold and requires only a few folds, making it an excellent choice for beginners. You can use any square paper, but colored paper adds an extra pop of fun!
Another great project is the origami boat. Who doesn’t love boats? It’s a simple design that consists of just a few folds, and your child will be thrilled to see their creation sail across the room (or even in a tub or pool!). You can also experiment with different paper colors and patterns to create unique designs.
Remember, the most important thing is to have fun! Don’t worry if your child’s first attempts don’t turn out perfectly – it’s all about experimenting and learning. Encourage them to try again, and soon they’ll be folding like pros!
Making a Paper Mache Project
Making a paper mache project is a fun and creative activity that can be enjoyed by kids of all ages. To get started, you’ll need a few simple materials: balloons, newspaper, scissors, glue, and water. You can use these to create a beautiful bowl or vase.
First, blow up the balloon to the size you want your final project to be. Then, tear the newspaper into long strips and start wrapping them around the balloon, overlapping each strip as you go. This will create a solid layer of paper mache that will hold its shape when dry.
Once you’ve covered the entire balloon with layers of paper mache, use scissors to pop the balloon inside. Then, apply multiple coats of glue, allowing each coat to dry before adding the next. You can also add some texture or pattern to your project by layering on different colors of paint or glitter. When it’s all dry and hard, carefully peel off the balloon and you’ll be left with a unique paper mache bowl or vase!
Tips for Parents and Educators
As you plan creative activities for 5 year olds, it can be helpful to know how to adapt projects to meet different learning styles and abilities. Here are some tips to consider as a parent or educator.
Encouraging Creativity in the Classroom
When it comes to encouraging creativity in the classroom, there are many ways to incorporate crafting into lesson plans and group projects. One idea is to set up a “maker space” where children can freely explore and experiment with different materials and techniques. This could be as simple as setting up a table with various art supplies, such as paint, glue, scissors, and paper, and allowing children to create whatever they like.
Another approach is to integrate crafting into specific subjects, such as math or science. For example, you can use playdough to demonstrate mathematical concepts like shapes and geometry. Or, have children create their own volcanoes using clay and baking soda to learn about chemical reactions.
In terms of group projects, consider setting up a collaborative mural project where children can work together to create a large-scale artwork. This encourages teamwork, communication, and problem-solving skills while allowing each child to contribute their unique perspective and creativity.
Managing Messy Crafting Sessions
When working with 5-year-olds on craft projects, it’s not uncommon for mess and chaos to ensue. But don’t worry, we’ve got some top tips to help minimize the mayhem.
First things first, prep your workspace! Cover your work surfaces with newspaper, a plastic tablecloth, or even a large piece of cardboard to make clean-up a breeze. This will protect your furniture from paint spills, glue drips, and other craft-related mishaps. You can also lay down some butcher paper or a vinyl mat for kids to work on directly – these are easy to clean and come in fun colors too!
It’s also essential to have cleaning supplies nearby. Keep a designated “messy box” with wipes, soap, and water handy so kids can quickly clean up spills as they happen. And don’t forget to label the supplies clearly, so little ones can help put things back where they belong.
By taking these simple steps, you’ll be well on your way to creating a more manageable crafting experience for both you and the kiddos!
Making Crafting a Family Affair
Involving parents and caregivers in their child’s creative process can be a wonderful way to strengthen family bonds and create lasting memories. Not only does it allow for quality time together, but it also provides an opportunity for children to learn from their loved ones and gain new skills.
One way to make crafting a family affair is to start small. Try setting aside a specific time each week, like Saturday morning, to work on a project together. This could be as simple as building a birdhouse or making a collage. You can also try incorporating craft projects into your daily routine, such as making lunchboxes or decorating picture frames.
As you work on a project with your child, ask open-ended questions and encourage them to take the lead. What color do they think we should use? How do you want to arrange these shapes? This not only helps to build their confidence but also allows you to learn from each other’s perspectives. By making crafting a family affair, you’ll be creating a sense of teamwork and collaboration that will last long after the project is finished.
Frequently Asked Questions
How do I choose the right materials for my child’s craft project?
When selecting materials, consider your child’s age, skill level, and interests. For 5-year-olds, it’s best to use washable paints, glue sticks, and paper that can withstand their creativity. You can also involve them in the material selection process to encourage excitement and ownership.
What if my child makes a mess while crafting? How do I clean up?
Yes, messy moments are inevitable! To minimize mess, cover your work surface with newspaper or a plastic tablecloth. Have a designated area for cleaning supplies and encourage your child to clean as they go. For tougher stains, use gentle soap and water.
Can I adapt these craft ideas for children with special needs or abilities?
Yes, many of the crafts mentioned can be adapted for children with special needs. Consider using larger materials or tools for fine motor skill challenges. Be sure to involve your child in the adaptation process to ensure their participation and enjoyment.
How often should we schedule crafting sessions, and how long should they last?
Schedule regular crafting sessions (2-3 times a week) to maintain momentum and excitement. Keep initial sessions short (20-30 minutes) for young children and gradually increase duration as they become more engaged and focused.
Can I involve my child in the planning process of upcoming craft projects?
Absolutely! Involve your child in selecting themes, colors, or materials for their next project. This will not only make them feel invested but also help you tailor activities to their interests and abilities.