
Are you ready to unleash your child’s creativity and imagination? Crafting a witch’s hat is an exciting activity that allows kids to express themselves through art, imagination, and self-expression. As parents or educators, we’re always on the lookout for fun and engaging ways to encourage our little ones’ creative spark. A customizable witches hat template can be just what you need! With this in mind, we’ve put together a step-by-step guide to creating your very own witch’s hat template for kids. In this article, we’ll share practical tips and guides on how to design, print, and customize the perfect witch’s hat for your mini-witch or wizard. Get ready to spark creativity and have fun with our easy-to-follow instructions!
Introduction to Witch’s Hats
Welcome to our guide on creating a witch’s hat template for kids, where we’ll start by exploring what makes a classic witch’s hat so iconic and beloved. Let’s get started!
What is a Witch’s Hat?
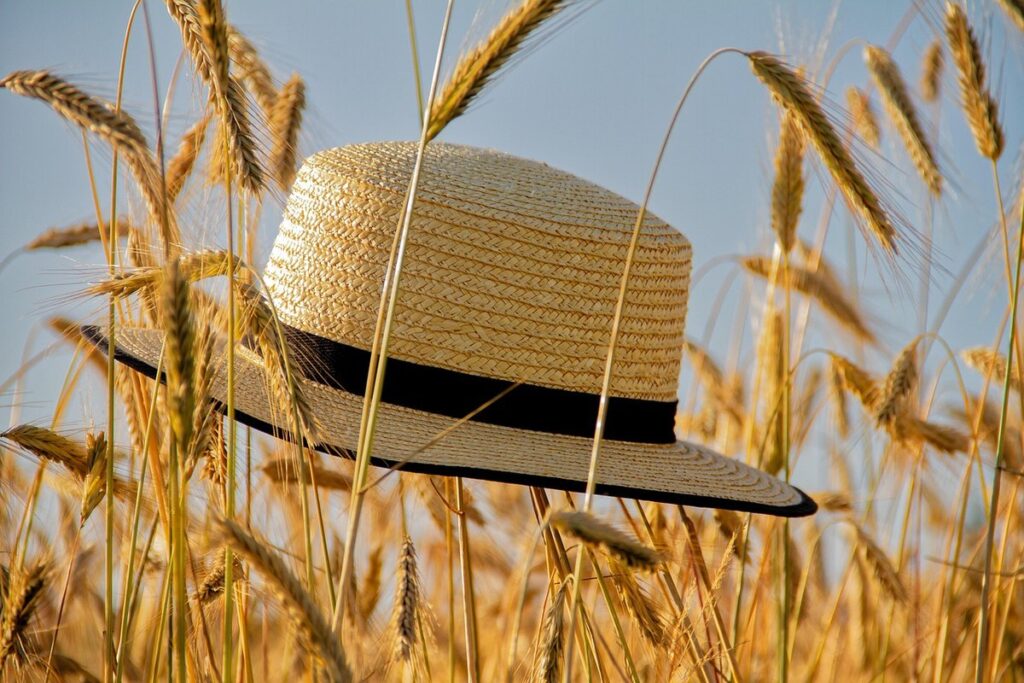
A witch’s hat is a distinctive and iconic symbol of magic and mysticism that has captivated our imagination for centuries. At its core, a witch’s hat is a tall, pointed hat that typically reaches up to the shoulders or even higher, often with a wide brim that casts a shadow over the face. This headgear has been associated with witches in folklore, fantasy, and popular culture, where it’s often depicted as a signature part of their costume.
In many cultures, the witch’s hat is believed to hold spiritual significance, serving as a conduit for magic and communication with the divine. For example, in ancient European folklore, witches were said to use their hats to store magical herbs and potions that helped them cast spells and predict the future. In fantasy fiction, such as in the works of J.K. Rowling’s Harry Potter series, witch’s hats are often seen as a symbol of authority, wisdom, and power.
When it comes to creating your own witch’s hat for kids, you can choose from various designs and styles that blend fun with fantasy.
Importance of Creativity in Craftsmanship
When crafting a witch’s hat for kids, it’s essential to tap into their imagination and creativity. This activity encourages self-expression, allowing children to bring their unique ideas and vision to life. By embracing their creative freedom, you’re not only helping them develop problem-solving skills but also fostering their confidence.
To make this experience even more engaging, consider setting up a “hat-making station” with various materials such as construction paper, glitter, felt, and ribbons. Let the children’s imagination run wild by giving them the autonomy to choose which colors, textures, and embellishments they’d like to use. This interactive approach not only sparks their creativity but also encourages experimentation and exploration.
As they work on their witch’s hat, encourage kids to think outside the box and push the boundaries of what’s possible. Ask open-ended questions like “What kind of magic would your hat possess?” or “How do you envision it looking?” These prompts can help stimulate their imagination and creativity while making the experience even more enjoyable.
As they work on their witch’s hat, encourage kids to think outside the box and push the boundaries of what’s possible.
Understanding the Design Elements of a Classic Witch’s Hat
Let’s dive into the classic witch’s hat design elements that will make your little one’s hat truly magical, shall we? We’ll break down the essential features to recreate a traditional look.
Historical Influences on Witch’s Hats
The design elements that make up a classic witch’s hat have been influenced by centuries of history and cultural traditions. Let’s take a journey through time to explore the medieval European designs that shaped the iconic look we associate with witches today.
During the Middle Ages, European peasants wore pointed hats as a symbol of their social status and occupation. These early pointed hats were made from straw or felted wool, and were often decorated with feathers, ribbons, or other adornments. As the craft of hat-making evolved, so did the design elements that defined these early witches’ hats.
In some European cultures, witches’ hats featured a distinctive brimless design, allowing the wearer’s face to be fully visible. In others, a wide brim was used to shield the eyes and face from the sun and wind. Modern interpretations of the classic witch’s hat have incorporated elements from these medieval designs, resulting in a diverse range of styles that still evoke the mystique and mystery of ancient times.
By understanding the historical roots of the classic witch’s hat design, you can create your own authentic-looking hat for your little ones – or even try your hand at crafting one yourself.
Iconic Features of a Traditional Witch’s Hat
A traditional witch’s hat is easily recognizable due to its distinct design elements. One of the most iconic features is the pointy tip, which can range from a subtle upward curve to a dramatic, angular peak. This shape not only adds visual drama but also serves as a nod to the mystical and magical associations of witches.
Another defining feature is the wide brim, often adorned with intricate details such as lace, ribbons, or other embellishments. The brim’s width can vary from a modest curve to an expansive, floor-sweeping sweep. When choosing a brim size, consider the overall style you want to achieve: a wider brim adds a touch of whimsy and drama, while a narrower one exudes elegance and refinement.
Ornate details are also characteristic of classic witch’s hats. Think velvet ribbons, lace trimmings, or brocade patterns – these add a level of opulence and mystique that’s hard to ignore. When incorporating embellishments, remember to balance them with the hat’s overall design to avoid overwhelming the senses.
Designing a Customizable Witch’s Hat Template for Kids
In this section, we’ll guide you through creating a customizable witch’s hat template that lets kids get creative and add their own magical touches. We’ll show you how to design it together!
Step-by-Step Guide to Creating the Template
To create a template for a witch’s hat that kids will love, you’ll want to follow these steps. First, choose materials that are durable and easy to work with, such as cardstock or construction paper. Consider the age and skill level of the children who will be using the template – if they’re young, you may want to opt for a simpler design.
When designing the template, think about the details that make a witch’s hat magical. Will it have a pointy tip? A ribbon or bow? Add these features in a way that makes it easy for kids to cut out and assemble. You can also include a variety of decorations, such as glitter, stickers, or stencils, to let their creativity shine.
Some popular template ideas include adding a velcro strip so the hat can be easily fastened, or including a small pocket for storing treats or trinkets. By considering these details and involving kids in the design process, you’ll create a template that’s both fun and functional.
Tips for Making the Template Engaging and Challenging
To make your witch’s hat template truly engaging and challenging for kids, consider incorporating hidden pockets or secret compartments. These clever features can spark their imagination and keep them motivated as they create their own unique designs.
One way to achieve this is by designing a “mystery pocket” that can be accessed only by lifting up a small flap or turning a hidden dial. Kids will love discovering the hidden space, which can store small treasures like tiny candies, beads, or even a special note from a parent.
Another idea is to create a compartment with a clever locking mechanism, such as a snap or latch. This adds an element of fun and responsibility, encouraging kids to think creatively about how to secure their secret stash.
Remember to balance the level of challenge with accessibility. For younger children, consider simpler mechanisms that are easy to operate, while older kids can enjoy more complex designs that test their problem-solving skills.
Choosing Materials and Colors for the Witch’s Hat Template
When choosing materials and colors for your witch’s hat template, you’ll want to select options that match the whimsy and charm of the holiday. Consider traditional black and orange hues, but feel free to get creative!
Exploring Various Craft Materials for Kids
When it comes to crafting witch’s hats with kids, you’ll want to choose materials that are not only fun and engaging but also easy to work with. Let’s explore some popular options for creating a spellbinding hat!
Felt is an excellent choice for young crafters, as it’s soft, pliable, and comes in a wide range of colors. You can use pre-cut shapes or have your child cut out the hat shape from a sheet of felt. This material is perfect for beginners, as it allows for easy cutting and shaping without any fraying.
Paper is another great option, especially if you’re looking to create a more delicate or whimsical design. You can use construction paper, cardstock, or even newspaper to add texture and interest to your hat. Simply cut out the shape and decorate with paint, markers, or other embellishments.
Foam sheets are also worth considering, as they provide a fun, 3D effect that kids love. They’re easy to cut and can be shaped using scissors, craft knives, or even household items like credit cards.
Last but not least, fabric is an excellent choice for adding some depth and texture to your witch’s hat design. You can use cotton, felted wool, or even stretchy fabrics like fleece or spandex. Remember to pre-cut the shape and let your child decorate with markers, paint, or appliques for a personalized touch.
Remember to always supervise children when using scissors or craft knives, and encourage them to experiment with different materials and techniques to create their own unique witch’s hat masterpiece!
Selecting Color Schemes and Themes for the Witch’s Hat
When it comes to selecting color schemes and themes for your witch’s hat template, the possibilities are endless. However, not all colors are created equal when it comes to creating a spellbinding effect. The color choices you make can greatly influence the overall look and feel of the hat.
Classic color combinations like black and purple, or black and red, are timeless favorites that exude an eerie elegance. These schemes work particularly well for more traditional witch-themed hats. For instance, pairing black with deep plum or eggplant purple creates a sophisticated and mysterious atmosphere reminiscent of old-world European folklore.
If you’re looking to modernize your design, consider bold and bright combinations like emerald green and gold, or royal blue and silver. These vibrant pairings can give your hat a whimsical and magical feel that’s perfect for contemporary witches and wizards. When selecting color schemes, don’t be afraid to experiment with different hues and shades until you find the perfect blend that captures your vision.
To get started, consider what theme or aesthetic you want to achieve: dark and mysterious, bright and playful, or elegant and sophisticated? Think about the type of witch you’re creating for – is it a young apprentice or an experienced sorceress? Let these questions guide your color choices as you conjure up the perfect hue combination.
Adding Embellishments and Details to the Witch’s Hat Template
Now that you have your basic witch hat template, let’s get creative by adding some embellishments and details that will make it truly magical. We’ll explore some fun ways to decorate your design!
Introducing Basic Craft Tools and Techniques
To add those magical embellishments to your witch’s hat template, you’ll need some basic craft tools and techniques up your sleeve. Let’s start with the must-haves: scissors, a glue stick, and a sewing machine (if you’re feeling extra fancy). Scissors come in handy for cutting out intricate designs or even crafting custom shapes from cardstock.
For our witchy embellishments, we’ll also need some basic adhesives like hot glue guns, decoupage medium, or fabric glue. Don’t worry if these sound intimidating – they’re actually pretty easy to use once you get the hang of it! When working with glue, remember to apply thin layers, allowing each one to dry before adding more.
Now, let’s talk about sewing techniques. If you have a sewing machine, practice basic stitches like straight lines or zigzags on scrap fabric until you feel comfortable. For our witch hat, we can use simple running stitch or whipstitch to attach embellishments securely. When working with glue and other adhesives, make sure the surface is clean and dry for best results. With these basic craft tools and techniques under your belt, it’s time to get creative and add some real magic to that witch hat template!
Incorporating Beads, Ribbons, and Other Decorative Elements
When it comes to adding beads, ribbons, and other decorative elements to your witch’s hat template, the possibilities are endless! These embellishments not only add visual interest but also provide a tactile experience for kids. Beads, for instance, can be used to create intricate designs or patterns on the hat, while ribbons can be tied around the band or flowing down from the crown.
To incorporate beads, you can use a hot glue gun to attach them directly onto the template. This is especially effective for creating a more rustic or earthy look. Alternatively, you can thread beads onto a ribbon or string and tie it around the hat’s band for a more whimsical feel. For added texture, consider using fabric paint or markers to draw patterns on the hat before adding beads.
When working with ribbons, remember that they come in a wide range of widths and materials, from sheer organza to chunky velvet. Experimenting with different textures can add depth and visual interest to your design. You can also use other materials like sequins, glitter, or even yarn to create unique embellishments.
Displaying and Wearing the Completed Witch’s Hat
Now that your witch’s hat is complete, it’s time to think about how you’ll show off your magical creation and wear it on a special occasion. Let’s explore some fun ideas for displaying and wearing your finished hat!
Tips for Displaying Finished Creations
Now that you’ve completed your witch’s hat, it’s time to show it off! Displaying your finished creation proudly can be just as fun as making it. Here are some ideas to get you started.
First, consider setting up a mini photo studio using items like cardboard boxes, colored paper, or even old picture frames. This will give you the perfect backdrop for capturing high-quality photos of your hat. You can also add props like broomsticks, fake spiders, and other witchy accessories to create a spooky atmosphere.
Another idea is to host a craft show where you can display all your finished projects, including your witch’s hat. Invite friends and family over to admire your handiwork and offer refreshments like “witch’s brew” (aka punch) or “magic cookies.”
If you’re feeling creative, why not turn your hat into a centerpiece for your room? You could attach it to a wall or place it on a shelf as a decorative accent. Whatever way you choose to display your hat, make sure to take plenty of photos and show off your masterpiece to all your friends!
Safety Considerations for Wearing Hats with Embellishments
When creating a witch’s hat with embellishments like beads, ribbons, and other loose elements, it’s essential to consider potential safety concerns. One of the main risks is tripping or entanglement hazards. Beads, for instance, can easily detach from the hat and roll away, potentially causing slips or falls.
To mitigate this risk, make sure to secure beads tightly using a strong adhesive or thread them carefully in place. When handling loose elements like ribbons, keep a close eye on children while they’re wearing the hats. Tie any long ribbons securely around the head or under the chin to prevent accidental entanglement.
Additionally, consider replacing beads with safer alternatives, such as fabric paint or appliques that won’t detach easily. Supervise children when they wear their witch’s hats and remind them not to touch loose elements or play with the hat while walking. By being mindful of these safety considerations, you can ensure a fun and safe experience for kids wearing their creative witch’s hats.
Conclusion: Encouraging Creativity and Imagination in Kids
Now that you’ve created your witch’s hat template, let’s talk about how to encourage creativity and imagination in kids as they use it.
Recap of Key Takeaways from the Article
As we conclude our exploration of crafting a witch’s hat as a creative activity for kids, let’s take a moment to recap the key takeaways from this article. One of the most significant benefits of engaging in this craft is that it fosters creativity and imagination in young minds. By allowing children to design and create their own witch’s hats, we encourage them to think outside the box, explore new ideas, and express themselves freely.
We also discussed the importance of providing a template for kids to work with, as it helps to build confidence and develop fine motor skills. Additionally, using a pre-printed template can help to save time and ensure that the project stays on track. Remember, the goal is not just about creating a witch’s hat, but about providing an enjoyable experience that sparks creativity and imagination in our children.
To make this activity even more engaging, consider encouraging kids to add their own personal touches, such as glitter, ribbons, or other embellishments. This can help to develop their critical thinking skills and promote problem-solving abilities. By incorporating a witch’s hat craft into your child’s creative routine, you’ll be nurturing a lifelong love of art, imagination, and self-expression.
Final Thoughts on Fostering Imagination through Craftsmanship
As we conclude our journey through crafting a magical witches hat template for kids, it’s essential to remember that the true magic lies not just in the finished product but in the creative process itself. Engaging children in imaginative pursuits like crafting has far-reaching benefits that extend beyond their childhood years.
Not only does crafting help develop fine motor skills and hand-eye coordination, but it also fosters problem-solving abilities, critical thinking, and creativity. These essential skills will serve them well as they navigate the complexities of growing up and entering adulthood. By encouraging imagination through craftsmanship, we’re giving our children the tools to excel in various areas of life.
As you continue to nurture your child’s creative spirit, remember to provide a safe space for experimentation and exploration. Encourage them to try new things, make mistakes, and learn from those errors. By doing so, you’ll be helping them develop resilience, adaptability, and a growth mindset – all crucial qualities for achieving success in an ever-changing world.
Frequently Asked Questions
Can I use the customizable witch’s hat template for kids with different craft materials?
Yes, one of the best things about our template is its versatility! You can print it on various paper types or cardstock and let your child choose from a range of materials to decorate their witch’s hat. Consider using felt, glitter paper, or even fabric for a more textured look. Encourage kids to think creatively and experiment with different materials to make the craft even more engaging.
How can I ensure my child’s safety while wearing their finished witch’s hat?
Safety is always our top priority! To prevent any accidents, make sure your child understands the importance of securing their hat properly on their head. You can also use a chin strap or elastic band to keep it in place. Additionally, consider using soft and lightweight materials for the brim to avoid any pressure points.
What if my child wants to add more embellishments than what’s provided in the template?
Encourage your mini-witch or wizard to get creative! You can always print additional templates with fun designs or shapes, such as stars, moons, or even little animals. If they want to add beading, ribbons, or other decorative elements, guide them on how to use safety pins and glue to secure these additions.
Can I use the witch’s hat template for kids in a classroom setting?
Absolutely! Our template is designed to be fun and engaging for kids, making it perfect for group activities or class projects. Consider dividing the students into small groups and assigning each one a different design element to work on together, promoting teamwork and collaboration.
How can I store my child’s finished witch’s hat template when not in use?
To keep their masterpiece safe and protected, consider laminating the finished hat or storing it in a protective folder. You can also display it proudly on your child’s bedroom wall or create a special “Witches’ Hat Gallery” in your home to showcase their creative endeavors!