
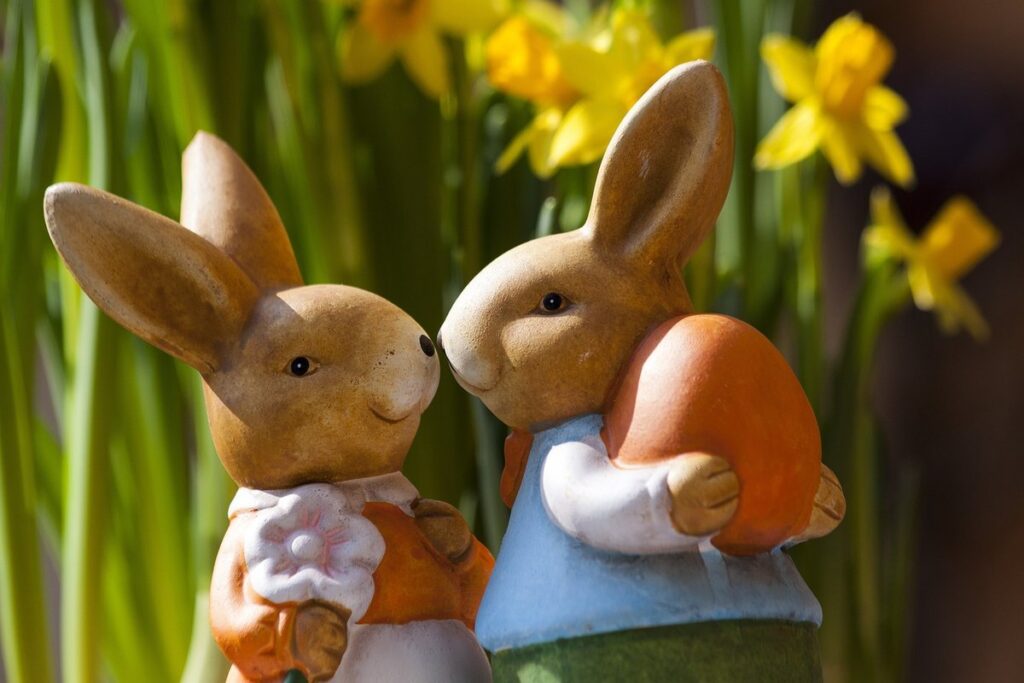
Easter is just around the corner, and you know what that means – adorable bunnies and plenty of fun creative activities! If you’re looking for some fresh ideas to keep your little ones entertained this Easter, you’ve come to the right place. In this article, we’ll be sharing a collection of easy and creative bunny craft ideas perfect for kids.
From simple paper bag bunnies that are quick to make and require minimal materials to more elaborate finger painting masterpieces, our list has got something for every young artist. We’ll show you how to bring the Easter spirit into your home with these fun and interactive crafts. With a little imagination and creativity, you and your kids can create some truly special bunny-themed art that will be treasured for years to come.
Getting Started: Materials and Ideas
Gather ’round, little crafters! This next part of our Easter bunny adventure is all about collecting the fun materials you’ll need to create your very own bunny masterpieces.
Choosing the Right Materials
When it comes to bunny crafts for Easter, you’ll need some basic materials to get started. Paper, glue, scissors, and paint are essentials that can help bring your creative ideas to life. For example, construction paper or cardstock would be great choices for making 3D bunnies or creating intricate designs.
However, if you want to add an extra layer of excitement to your crafts, consider some unique materials like fabric, felt, or even recycled materials like egg cartons or toilet paper rolls. These can help create textured and interesting bunny-themed projects that kids will love.
You can also get creative with natural materials like leaves, twigs, and flowers to make a more realistic and earthy bunny scene. For instance, use a piece of cardboard as the base for your bunny’s burrow or create a collage using shredded paper and glue to resemble a forest floor.
Remember, the key is to encourage kids to experiment and think outside the box when it comes to materials. Who knows what amazing creations they’ll come up with?
Easter-themed Craft Ideas
Get creative with these adorable Easter-themed craft ideas that are perfect for kids! With just a few simple materials, you can transform your little ones into master artists and crafters. Let’s start with one of the easiest and most fun crafts: paper bag bunnies!
All you need is some brown paper bags, scissors, glue, and markers or paint. Cut out ears from the top of the bag, add some whiskers made from yarn or felt, and decorate with colorful eyes and a cute nose. Watch your child’s face light up as they bring their own bunny to life! Next up, why not try finger painting? Use soft brushes or even just your fingers to create beautiful, swirling patterns on a piece of paper or canvas. You can make Easter-themed shapes like eggs, bunnies, and flowers.
For a more decorative touch, try making bunny-shaped decorations using cardboard, felt, or paper mache. Cut out bunny silhouettes, add some cotton balls for soft fur, and hang them up in your home to create a festive atmosphere. With these simple yet creative ideas, you’ll have a hopping good time crafting with the kids this Easter!
Bunny Ear Headbands and Accessories
Add a personal touch to your Easter bunny craft with our favorite accessories, from adorable headbands to matching bows that are sure to make you hop with joy.
Making Bunny Ear Headbands
To create adorable bunny ear headbands for Easter, you’ll need some basic crafting supplies. Start by cutting two identical triangular shapes from cardstock – these will be the bunny ears. Use a glue stick to attach the tops of the triangles together at an angle, creating the characteristic bunny ear shape.
Next, cut a piece of ribbon or elastic to fit around your child’s head. Glue the ends of the ribbon to the top of the ear shapes, securing them in place. You can adjust the size and comfort of the headband by adding more glue or repositioning the ears.
To add an extra touch, you can decorate the bunny ears with markers, stickers, or glitter. Consider using cardstock colors that match your child’s Easter basket or dress to create a cohesive look. When putting it on, help your little one adjust the fit so it’s comfortable and secure. With these simple steps, you’ll have adorable bunny ear headbands in no time! Remember to be patient and let your child take ownership of their creation – after all, that’s part of the fun!
Decorating with Bunny-themed Stickers and Ribbons
When it comes to adding that extra special touch to your bunny craft, stickers and ribbons are an easy and fun way to do just that! You can use them to add colorful details, create patterns, or even spell out cute messages. For example, you could decorate a pair of bunny ear headbands with brightly colored stripes or polka dots using stickers. This will not only make the headband more visually appealing but also give it a playful vibe.
You can also get creative with ribbons by tying them into bows and attaching them to your bunny craft. This is a great way to add a pop of color and texture. For instance, you could tie a bright pink ribbon around a stuffed bunny’s neck or use a yellow one to create a dainty bow on top of a bunny-shaped planter. Remember, the key is to have fun with it! Don’t be afraid to experiment with different patterns and colors until you find a combination that you love.
One more idea is to use stickers to create cute little details like whiskers or paws on your bunny craft. This will add an extra layer of realism and personality to your creation. By incorporating these simple yet effective decorating ideas, you can transform your plain old bunny craft into something truly one-of-a-kind!
Paper Bag Bunny Craft: A Fun and Eco-friendly Option
Let’s create a cute bunny using paper bags, a fun and eco-friendly way to celebrate Easter with your little ones while reducing waste in your home. We’ll guide you through this adorable craft project step-by-step!
Preparing the Paper Bags
Now that you have your paper bags ready, it’s time to bring them to life! Transforming these simple bags into adorable bunnies is a fun and creative process. You can use paint, markers, or colored pencils to add some personality to your bag. Encourage your child to get creative with colors and patterns – after all, Easter is all about celebrating the beauty of spring!
To decorate your paper bag bunny, start by drawing on the face using a marker or paint. Add some cute features like whiskers, eyes, and a nose. Don’t forget to add some fluffy details like cotton balls or soft felt for the ears and tail. If you’re feeling fancy, use colored pencils to draw on some grass or flowers around your bunny.
Remember, the best part about this craft is that it’s eco-friendly! By using recycled materials like paper bags, we’re reducing waste and promoting sustainability. This is a great lesson for kids – every small action counts, and even in arts and crafts, we can make a difference. So get creative, have fun, and enjoy making these adorable bunny bag friends with your little ones!
Assembling the Bunny Body
Now that we have our bunny head and ears ready, it’s time to assemble the body of our adorable paper bag bunny. Take out a large piece of construction paper in a shade that matches your preferred color scheme for this craft project. Cut two long, thin strips from the paper – these will serve as the legs of your bunny.
Next, cut another larger rectangle from the same sheet of paper to create the bunny’s body. Make sure it’s slightly taller than it is wide. Take one of the leg pieces and glue it under each side of the rectangular body, about an inch or so apart from each other. This will give our bunny a cute, rounded look.
To add some extra details, you can cut out two small circles for the paws and attach them to the ends of the legs using glue. Use your scissors to create a simple tail and attach it to the back of the body, just above where the head meets the neck. Your bunny’s body is now complete!
Finger Painting Fun: Creating Bunny Masterpieces
Get ready to unleash your child’s creativity and make adorable bunny masterpieces using finger paints, glue, and other fun materials that are perfect for Easter crafts. We’ll guide you through easy steps to create these cute artwork.
Preparing for Finger Painting
Before diving into the fun part of creating bunny masterpieces with finger painting, let’s get one crucial aspect out of the way: preparing a surface for mess-free (or at least mess-managed) creativity. You’d be surprised how much difference this makes in maintaining a stress-free and enjoyable experience for both kids and adults alike.
First things first, cover your work surface or table with newspaper, a plastic tablecloth, or even an old sheet. This will create a barrier between the paint and the actual surface, making cleanup a breeze. Next, place a large piece of paper or cardboard on top of the covering material. This is where the magic happens – your little ones’ bunny creations will come to life! Make sure the paper or cardboard is large enough for each child to have their own space without worrying about paint bleeding through.
To further minimize mess, consider laying down some drop cloths or old towels around the area. These can be easily removed and washed if needed. Don’t forget to have smocks or old shirts on hand – a little prep work here will save you from scrubbing off paint from tiny hands later on. With these simple precautions in place, you’ll be well on your way to hosting a stress-free finger painting session that everyone will love.
Tips for Getting Creative with Finger Paints
When using finger paints to create your bunny masterpiece, don’t be afraid to think outside the box. Experiment with different textures by incorporating various materials into your painting process. For example, you can use a sponge to dab on thick paint for a unique, textured look or try stamping out patterns onto your paper with foam shapes.
To add some extra flair to your artwork, consider using finger paints in different colors and combinations. Try layering bright pink over blue for a fun ombre effect or mix equal parts of yellow and green for a sunny citrus hue. You can also use white paint to create highlights on your bunny’s fur or add subtle shading with darker tones.
To take your artwork to the next level, practice different finger painting techniques such as swirling, dripping, or even blowing bubbles onto the paper. These simple methods can add incredible depth and visual interest to your masterpiece. Don’t be afraid to make mistakes – they often lead to the most creative and unexpected results!
DIY Bunny-shaped Decorations: A Fun Family Activity
Get creative and have some fun with your little ones as you make adorable bunny-shaped decorations that will add a personal touch to your Easter celebrations at home. This section shares 3 easy DIY projects!
Cutting Out Shapes
Cutting out bunny shapes from cardstock or foam sheets is a fun and easy part of creating your DIY bunny decorations. You can use scissors or a craft knife to cut out the shapes, depending on your preference and the type of material you’re using. If you’re working with young children, consider using pre-cut shapes or a craft punch to make it easier for them.
Once you have your bunny shapes, it’s time to get creative with decorating! Here are some ideas to get you started: use glitter glue to add sparkly fur, stick on colorful stickers to create eyes and noses, or use markers to draw on adorable little faces. You can also add texture by gluing on pom-poms or felt ears.
Remember, the most important thing is to have fun! Encourage your kids to get creative and experiment with different decorations. Some great combinations include using bright colors for a bold look or pastel colors for a softer feel. Don’t be afraid to try new things – it’s all part of the DIY process.
Assembling the Decorations
Now that you’ve cut out the bunny shapes and prepared all the materials, it’s time to assemble these adorable decorations! Start by applying a thin layer of glue to the edges of each shape, making sure they’ll stick together well. Then, carefully place another shape on top of the first one, ensuring they align properly. Hold them in place for a few seconds until the glue sets.
Next, use your ribbons or twine to create a cute bow for the bunny’s neck. You can tie it around a small loop made from the fabric strip or simply wrap it around the shape itself. Don’t worry if it’s not perfect – imperfections add character! For added details, you can glue on some cotton balls for whiskers or use a black marker to draw eyes and a nose.
Remember, let your kids get creative with this part! Encourage them to experiment with different bow styles or add their own embellishments. With a little patience, these DIY bunny decorations will be ready to brighten up any Easter celebration.
Tips and Tricks for Successful Bunny Crafts
Now that you’ve made some adorable bunny crafts, let’s share our top secrets to make your creations truly stand out and bring a smile to everyone’s face!
Encouraging Creativity and Imagination
When working on bunny crafts with kids, it’s essential to encourage their creativity and imagination. This can be achieved by giving them the freedom to experiment and express themselves through art. Start by providing a variety of materials such as paper, glue, scissors, and paint, allowing them to choose what they want to work with.
Encourage self-expression by asking open-ended questions like “What do you think this bunny should wear?” or “How can we make this carrot look more realistic?” This will help kids develop their problem-solving skills and think outside the box. You can also try providing a prompt, such as creating a scene with the bunny in a garden, but allow them to decide how they want to bring that scene to life.
Remember, it’s not about making mistakes – it’s about exploring new ideas and learning from them. By embracing experimentation and creativity, kids will develop essential skills for future arts and crafts projects, and have fun while doing so.
Managing Mess and Supervising Children
When it comes to bunny crafts with kids, mess is almost inevitable. However, with some planning and preparation, you can minimize the chaos and ensure everyone has a blast. To begin, choose materials that are washable and easy to clean. Look for tempera paints or watercolors instead of permanent markers or dyes.
When setting up your craft station, consider using an old tablecloth or plastic sheet as a drop cloth to protect surfaces from spills and stains. Cover the work area with paper, foam board, or even cardboard – anything that can withstand creative experimentation. You can also prep kids by demonstrating how to clean their tools and materials before switching between projects.
Another key consideration is surface safety. Opt for smooth, stable tables or countertops where children can comfortably work without fear of slipping or falling. Always supervise young crafters closely, especially when using scissors, glue, or other sharp objects.
Conclusion: Celebrating Easter with Bunny Crafts
Now that you’ve made some adorable bunny crafts, it’s time to wrap up our Easter celebration and share a few more creative ideas to keep the fun going!
Summarizing Key Points
As we wrap up our Easter bunny craft extravaganza, let’s take a moment to recap the main ideas that’ll make this holiday season truly special for kids. We’ve explored various creative and fun ways to celebrate Easter with bunny-themed crafts, from decorating eggs to creating adorable plush bunnies.
We discussed how these activities not only foster creativity but also encourage learning through hands-on experiences. By making their own bunny-themed crafts, kids develop fine motor skills, hand-eye coordination, and problem-solving abilities. Moreover, they get to express themselves freely and bring their imagination to life.
Some of our favorite ideas included creating bunny ears headbands, making paper plate bunnies, and designing Easter egg decorations. These simple yet engaging projects can be adapted to suit different age groups and skill levels. To make the most of these activities, remember to encourage your little ones to experiment with colors, textures, and shapes. By doing so, you’ll not only create cherished memories but also provide a fun and interactive way for kids to celebrate Easter.
Final Thoughts and Ideas
As you’ve completed these adorable bunny crafts with your little ones, it’s time to think about how you can share the joy and creativity with others. Hosting a craft party is an excellent way to bring friends and family together while making some special Easter-themed art. Invite your loved ones over for a fun-filled afternoon of crafting, snacking, and socializing.
To make it even more meaningful, consider donating the finished creations to local charities or nursing homes. Not only will this brighten someone’s day, but it’ll also teach your kids about the value of giving back to their community. You can partner with a nearby children’s hospital, women’s shelter, or senior center to deliver the bunny-themed crafts.
To take it to the next level, involve your kids in the donation process by having them help package and deliver the crafts. This will not only teach them about empathy but also foster a sense of responsibility and compassion. Whatever way you choose to share your creations, remember that the true magic lies in spreading joy and making this Easter season truly special for everyone involved.
Frequently Asked Questions
Can I use recycled materials for all bunny crafts, or are some better suited to certain materials?
You can definitely get creative with recycled materials, but it’s best to use them where they’ll add the most value. For example, paper bag bunnies are perfect for using old bags, while finger painting might be better with traditional paint.
How do I manage mess and supervise children during these crafts, especially with younger kids?
It’s great that you’re thinking ahead! With younger kids, it’s a good idea to set up a dedicated craft space and have all materials within reach. For older kids, consider setting a timer or having them work in short intervals to keep them focused.
Can I make bunny-themed crafts with other themes in mind, like winter or summer?
While Easter-specific decorations are perfect for springtime, you can definitely adapt the ideas to fit any season or theme. Just swap out materials and colors to match your desired style, and get creative!
How do I store and display finished bunny craft projects, especially if they’re fragile or delicate?
Congratulations on finishing your project! For storing, consider using acid-free materials like cardboard or paper boxes. As for displaying, you can use ribbons, strings, or even create a 3D backdrop to showcase your artwork.
Can I make these crafts with non-traditional tools, like a 3D printer or a knitting machine?
While traditional methods are always a great option, you can indeed experiment with modern tools and materials. However, be aware that they might add an extra layer of complexity and require some trial-and-error to get the desired results.