
Weaving can be an incredibly rewarding and engaging activity for kids, offering a wide range of benefits that extend far beyond the craft itself. By encouraging your child to learn how to weave, you’ll be giving them the opportunity to develop their fine motor skills, boost their creativity, and even improve their problem-solving abilities. In this article, we’ll explore some simple yet effective weaving projects that are perfect for kids to try at home, as well as share some valuable safety tips to keep your little ones safe while they weave away. Whether you’re a seasoned crafter or a total newbie, our goal is to provide you with all the inspiration and guidance you need to get started on this fun and creative journey with your child.
Benefits of Weaving for Children
Weaving is a fun and engaging activity that can have a significant impact on your child’s development, from fine motor skills to creativity and self-expression. Let’s explore some of the benefits of weaving for kids in this section.
Encourages Fine Motor Skills Development
When children engage in weaving activities, they unknowingly develop their fine motor skills, hand-eye coordination, and dexterity. These subtle yet significant improvements are crucial for their overall cognitive and physical growth.
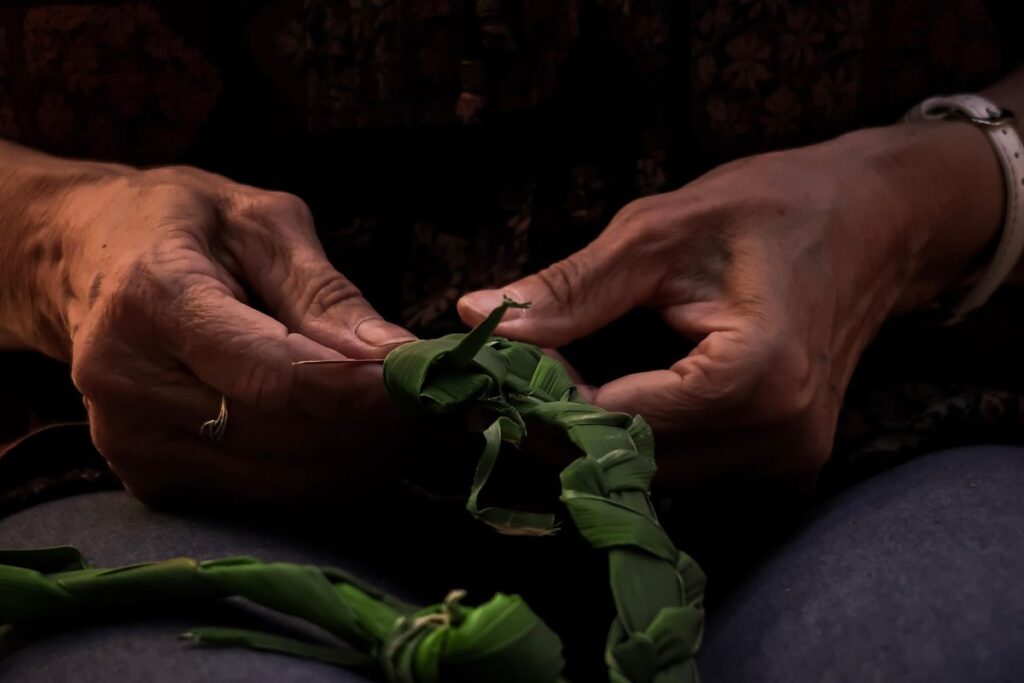
Weaving involves manipulating threads or yarns, which requires precision and control. As kids work on simple projects like creating a wall hanging or a small basket, they begin to exercise their fingers, wrists, and hands. The repetitive motion of weaving helps strengthen their finger muscles, improving hand-eye coordination and dexterity.
One way to encourage fine motor skills development through weaving is by starting with simple projects that require minimal thread manipulation. For instance, you can try a “thread maze” project where kids weave in and out of small sticks or beads. This activity introduces the concept of weaving while keeping it engaging and fun.
As children progress, they can move on to more complex projects like weaving a simple basket or a wall hanging. The key is to provide them with a variety of materials and tools that allow them to experiment and explore different techniques. With patience and practice, kids will develop their fine motor skills, hand-eye coordination, and dexterity, setting the stage for future creative endeavors.
Fosters Creativity and Self-Expression
Weaving is an excellent way to foster creativity and self-expression in children. It allows them to explore various colors, textures, and patterns while bringing their imagination to life on a tangible canvas. By working with different yarns and threads, kids can experiment with vibrant hues, subtle pastels, and even metallic finishes.
One of the most exciting aspects of weaving is that it’s not limited to just creating pretty designs; children can also express themselves through abstract compositions and geometric patterns. For instance, a child might use contrasting colors to create a striking contrast or layer different textures to achieve an intriguing depth effect.
To encourage your child’s creative expression, try introducing them to various yarns and threads with unique properties. Silk for example is great for creating soft, lacy patterns while wool offers a more rustic texture. By providing a range of materials, you’re empowering your child to make conscious choices about their artwork’s appearance.
Develops Problem-Solving Skills and Patience
When children engage in weaving activities, they are not only creating something beautiful, but also developing essential life skills. One of the most significant benefits of weaving for kids is that it helps them develop problem-solving skills and patience through trial and error.
As children work on their loom or simple frame, they will inevitably encounter obstacles such as tangled threads, uneven tension, or incorrect knotting techniques. Instead of getting frustrated, these challenges become opportunities for learning and growth. By experimenting with different solutions, kids learn to think critically, analyze problems, and develop creative problem-solving strategies.
Weaving also helps children cultivate patience and persistence as they work through each project. As they carefully select colors, measure threads, and weave patterns, they must slow down and focus on the task at hand. This process allows them to develop a sense of calm and concentration, essential skills for tackling complex tasks in other areas of life.
To encourage problem-solving skills and patience in your child, try encouraging them to take breaks and reflect on their progress regularly. Ask open-ended questions about what’s not working and how they might improve it. By embracing the process rather than just the end result, children will develop a deeper understanding of the value of perseverance and creative thinking.
Setting Up a Weaving Station for Kids
Setting up a weaving station can be just as fun as creating with it, so let’s get started on building a space that inspires imagination and creativity in your little ones!
Choosing the Right Materials
When setting up a weaving station for kids, it’s essential to choose materials that are safe, durable, and easy to use. Let’s start with the most crucial component: yarns. For children, it’s best to opt for soft, smooth yarns made from natural fibers like cotton, wool, or blends. Avoid using yarns with small parts, sharp edges, or loose threads that can pose a choking hazard.
For looms, you have several options to consider. Manual looms are an excellent choice for kids as they allow them to develop fine motor skills and hand-eye coordination. You can also use cardboard boxes or paper towel rolls as makeshift looms, making it a fun and cost-effective way to introduce weaving to young minds.
Other tools you’ll need include scissors, a yarn needle, and a measuring tape. Make sure to choose kid-friendly scissors with rounded tips and blunt edges. A good-quality yarn needle will help them thread the yarn through the loom without getting tangled or knotted.
Preparing the Space and Supervising Children
When setting up a weaving station for kids, it’s essential to create a safe and organized workspace that encourages creativity and productivity. Start by designating a specific area for weaving, free from clutter and tripping hazards. Make sure the floor is clear of obstacles, and consider using a mat or rug to define the space.
Invest in a sturdy table or desk with sufficient storage bins and containers to keep supplies within reach. Label each bin clearly so children can easily identify what’s inside. You’ll also want to ensure that your weaving station has adequate lighting, ventilation, and temperature control to promote comfort during extended sessions.
When supervising children during weaving activities, be prepared for unexpected outcomes! Encourage them to experiment with different materials and techniques while keeping a watchful eye on their safety. Establish clear rules for handling scissors, yarn, and other tools, and always supervise young children when they’re using sharp objects or electrical equipment.
Encouraging Independence and Autonomy
Encouraging kids to take ownership of their weaving projects is key to fostering creativity and self-expression. To empower them with independence and autonomy, start by offering a range of materials and colors that cater to different tastes and skill levels.
Begin by asking open-ended questions like “What do you think this pattern would look like with some blue added?” or “How can we incorporate some texture into our weaving?” This encourages kids to think critically about design choices and consider the impact on their overall creation. You can also provide a selection of simple patterns and techniques, such as stripes or chevrons, that they can experiment with.
For older children, introduce more complex designs and motifs, allowing them to take charge of the creative process while providing gentle guidance when needed. Consider setting up a “color wall” where kids can browse through various hues and textures before making their final selection. By giving them control over these elements, you’re teaching valuable skills in decision-making and problem-solving – essential for a lifetime of creativity and self-expression through weaving.
Simple Weaving Projects for Kids
Get ready for some fun and easy weaving projects that are perfect for kids of all ages to enjoy, from simple scarves to decorative wall hangings. In this section, you’ll find inspiration for little weavers-in-the-making!
Finger Knitting
Teaching kids finger knitting is an excellent way to introduce them to the world of weaving and textiles. It’s a simple yet rewarding technique that can be mastered with a bit of patience and practice. To get started, you’ll need some yarn and a pair of fingers! Begin by giving your child a length of yarn and explaining how to hold it between their thumb and index finger, leaving a small loop on the other side.
As they start to knit, encourage them to keep the tension even and not pull the yarn too tight. It’s essential to remind them that finger knitting is all about experimenting with texture and pattern, so don’t worry if things get a bit messy at first. To add some interest to their project, suggest creating simple accessories like scarves or hats. For example, they can try making a colorful scarf by repeating a single color or mixing different hues together.
Some fun ideas for kids to try include making finger-knitted flowers or leaves that can be attached to a hair clip or hat band. To take it up a notch, you could even teach them how to create more complex patterns using multiple colors and techniques. With practice and creativity, your child will soon become a master of finger knitting!
Cardboard Looms
Using cardboard looms as a weaving tool for kids is not only budget-friendly but also eco-conscious. This unconventional approach to weaving provides an innovative way to repurpose discarded materials and encourage creative thinking. Cardboard looms can be easily constructed using everyday items like cereal boxes, file folders, or even old CD cases.
The benefits of using cardboard looms are numerous. For one, they are inexpensive and readily available, making them an ideal choice for kids who want to experiment with weaving without breaking the bank. Moreover, cardboard is a versatile material that can be easily cut, folded, and shaped to create unique designs and patterns.
To set up a cardboard loom, start by folding or cutting the cardboard into the desired shape. Secure the edges using tape or glue, ensuring that the loom remains stable during use. Next, stretch yarn or thread between the cardboard slats, leaving enough tension for an even weave. This is where kids can get creative with their color choices and pattern arrangements.
DIY Yarn Balls
Making DIY yarn balls is an excellent way to introduce kids to the world of weaving and fiber arts. It’s a fun and easy project that requires minimal equipment and materials. To get started, you’ll need some yarn, a fork (yes, you read that right!), and some patience.
Begin by wrapping the yarn around the prongs of the fork in a spiral motion, overlapping each strand as you go. This will help create a bulky and textured ball. As you wrap, gently pull on the yarn to tighten it evenly. You can use one color or mix and match different hues for a marbled effect.
Continue wrapping until your desired size is reached. To finish, tie off the end of the yarn with a knot and trim the excess. Voila! Your DIY yarn ball is complete. Kids can experiment with different yarn types, colors, and textures to create unique balls that make great decorations or toys. This project teaches hand-eye coordination, fine motor skills, and basic weaving concepts – all while having fun.
Advanced Weaving Techniques for Older Kids
Now that you’ve mastered the basics, let’s dive into more complex techniques to challenge and engage your older kids as they continue to explore the world of weaving.
Introducing Shuttle Looms
As we continue to explore advanced weaving techniques for older kids, let’s introduce them to shuttle looms – a versatile and essential tool for more complex projects. Shuttle looms are designed specifically for weaving on a simple frame or harness, allowing children to create intricate patterns and textures with ease.
At its core, a shuttle loom consists of two horizontal beams connected by vertical rods, creating a rectangular frame. The warp yarn is stretched between the beams, while the weft yarn is passed through the shed using a small stick-like tool called a shuttle. This simple setup enables kids to weave more complex patterns, such as twill and herringbone.
To get started with a shuttle loom, begin by threading the warp yarn through the frame and securing it tightly. Then, pass the weft yarn through the first row of warp threads using the shuttle, weaving in and out of the shed to create the desired pattern. As kids become more comfortable with this technique, they can experiment with different yarn combinations, colors, and patterns – opening up a world of creative possibilities!
Experimenting with Colors and Patterns
As you progress with your weaving journey, it’s time to get creative and experiment with colors and patterns! You’ve already mastered the basics of weaving, now it’s time to add some personality to your projects. Let’s explore how to mix and match different color combinations, textures, and patterns using techniques like twill or herringbone.
To start experimenting, try combining two or three colors that complement each other. For example, you could pair blue with green, yellow with orange, or red with purple. Remember, the key is to balance warm and cool colors to create a visually appealing effect. You can also add texture by incorporating different yarn weights or types, like smooth cotton or chunky wool.
Let’s try a simple twill pattern. Twill creates a diagonal weave that adds depth and interest to your project. To make a twill fabric, you’ll need two sets of yarn: one for the warp (the threads going lengthwise) and another for the weft (the threads going widthwise). Alternate between the two colors in a specific sequence to create the twill effect.
When working with herringbone patterns, focus on creating a reversible fabric. This means that your project looks the same from both sides! To achieve this, alternate the direction of your warp and weft yarns after each row. For example, if you start by weaving in one direction, switch to the opposite direction for the next row.
By experimenting with different color combinations and patterns, you’ll discover new ways to express yourself through weaving. Don’t be afraid to make mistakes – they often lead to unexpected but beautiful results!
Creating Complex Designs
As you’ve mastered the basics of weaving, it’s time to take your skills to the next level by creating complex designs and patterns. This is where things can get really exciting! Not only will you be challenging yourself creatively, but you’ll also learn to experiment with new techniques and textures.
To start, try introducing more colors into your design. You can do this by adding multiple threads or yarns at once, allowing the kid to weave in a striped or multi-colored pattern. This is a great way to build on their existing skills while encouraging them to think outside the box. For example, you could have them create a chevron pattern using two different colors.
Another strategy for creating complex designs is to incorporate different textures into your weaving. Try using materials like yarn with beads, tassels, or even fabric scraps. This will add depth and visual interest to their design, making it truly unique. For instance, you could have them weave a border around the edges of their project using a textured yarn.
Remember to encourage experimentation and creativity throughout this process! By allowing kids to try new things and make mistakes, they’ll develop problem-solving skills and learn to think critically about their designs.
Safety Precautions and Tips for Weaving at Home
When weaving at home, it’s essential to take some extra precautions to avoid accidents and ensure a fun and safe experience. Let’s go over some important tips together!
Choosing Hypoallergenic Yarns
When it comes to weaving at home with kids, choosing the right yarn is crucial, especially if they have sensitive skin or allergies. Not all yarns are created equal, and some can cause irritation or allergic reactions.
Look for yarns labeled as “hypoallergenic” or “breathable.” These types of yarns are designed to minimize exposure to potential allergens like dyes, chemicals, or fibers that can cause skin problems. Some examples of hypoallergenic yarns include those made from natural fibers such as cotton, bamboo, or merino wool.
When shopping for yarn, check the ingredient list or manufacturer’s claims about the yarn’s composition. Avoid yarns with harsh chemicals like bleach, formaldehyde, or synthetic dyes that can exacerbate skin issues. Opt for yarns treated with gentle finishes that promote softness and ease of use.
For kids with severe allergies or sensitive skin, consider using yarns made from plant-based materials, such as hemp or linen. These fibers are naturally resistant to dust mites, mold, and mildew, making them a great choice for weaving projects at home.
Preventing Eye Strain and Fatigue
When working on weaving projects at home, it’s essential to prioritize eye health and comfort. Prolonged exposure to yarns, threads, and other materials can cause eye strain and fatigue, especially for kids.
To avoid this, make sure you’re maintaining good posture while working on your loom or frame. Sit up straight with your feet flat on the floor or a footrest, keeping your shoulders relaxed and your hands at a comfortable height. This will help prevent straining your neck and back muscles.
Take regular breaks every 20-30 minutes to stretch, move around, and give your eyes a rest. Look away from your project and focus on something distant for a few seconds. You can also try the “20-20-20” rule: every 20 minutes, look at something 20 feet away for 20 seconds.
To manage eye strain while weaving, adjust the lighting in your workspace to reduce glare. Position yourself so that the light source is not directly above or behind you. Finally, remember to blink regularly and avoid rubbing your eyes, as this can irritate them further. By following these simple tips, you’ll be able to enjoy your weaving projects without discomfort or fatigue.
Cleaning Up and Organizing the Workspace
Now that you’ve had fun creating your woven masterpiece, it’s time to clean up and get organized. This is an important step to prevent messes from building up and making it difficult to weave again next time.
First, gather all the materials used during the weaving session, such as yarn, loom, scissors, and any other tools. Put away items that are not being used immediately, like spare yarn or unused threads. This will help keep your workspace tidy and make it easier to find what you need when you’re ready to weave again.
Next, take a few minutes to tidy up the workspace itself. Sweep or vacuum the floor to remove any stray threads or debris. If you’re using a loom, gently store it in a corner or against a wall. Remember to clean your hands and any other tools that came into contact with yarn or dye, as leftover fibers can stick around.
To prevent clutter from building up next time, consider implementing a “one-touch” rule: put away each item as soon as you’re done using it. You can also designate a specific storage area for weaving supplies to keep everything organized and within reach. This will make your weaving sessions more enjoyable and efficient in the long run!
Frequently Asked Questions
How can I adapt weaving for kids with special needs?
Consider using assistive tools like adapted looms or specialized yarns that are easier to handle. Be patient and encouraging, as the process of learning to weave can be more challenging for children with certain abilities. Break tasks into smaller steps and provide one-on-one support when needed.
Can I use recycled materials for weaving projects?
Yes! Repurposing old cardboard, fabric scraps, or yarn from thrift stores is a great way to encourage creativity and sustainability in your child’s weaving journey. Just be sure to clean and prepare the materials before using them.
How do I prevent my child from getting frustrated with mistakes?
It’s essential to emphasize that mistakes are an essential part of the learning process in weaving, just like any other skill. Encourage your child to experiment and try again, celebrating their successes and using failures as opportunities for growth.
What if my child wants to create a specific design or pattern?
Encourage them to explore different colors, textures, and techniques to achieve their desired result. You can also provide templates or inspiration images to help guide the process. Remember to let your child take ownership of their project and make decisions about its final look.
Can I teach my child to weave using a loom at home?
Yes! While it’s possible to use a simple cardboard loom, investing in a proper weaving loom can provide more stability and control for kids. Make sure the loom is sturdy and easy to maneuver, and consider starting with simpler projects like finger knitting or DIY yarn balls before moving on to more complex designs.