
Halloween is just around the corner, and you’re probably scrambling to find some creative ways to keep your little ones entertained without breaking the bank. One thing that’s sure to get a big smile from kids is crafting with toilet rolls – yes, those humble tubes of toilet paper! But don’t let their mundane purpose fool you; with a little bit of imagination, they can become spooky spider webs, ghostly sentinels, or even creepy critters. As a parent or caregiver, you’re likely looking for eco-friendly and budget-friendly ideas that are fun and easy to execute. In this article, we’ll show you just how simple it is to create some truly terrifying (and adorable) Halloween crafts using toilet rolls that your kids will love.
Introduction to Toilet Roll Crafts
Get ready to roll out some spooky fun as we dive into the world of toilet paper tube crafts, perfect for little monsters on Halloween. We’ll explore creative ways to reuse them!
Why Toilet Rolls are Perfect for DIY Projects
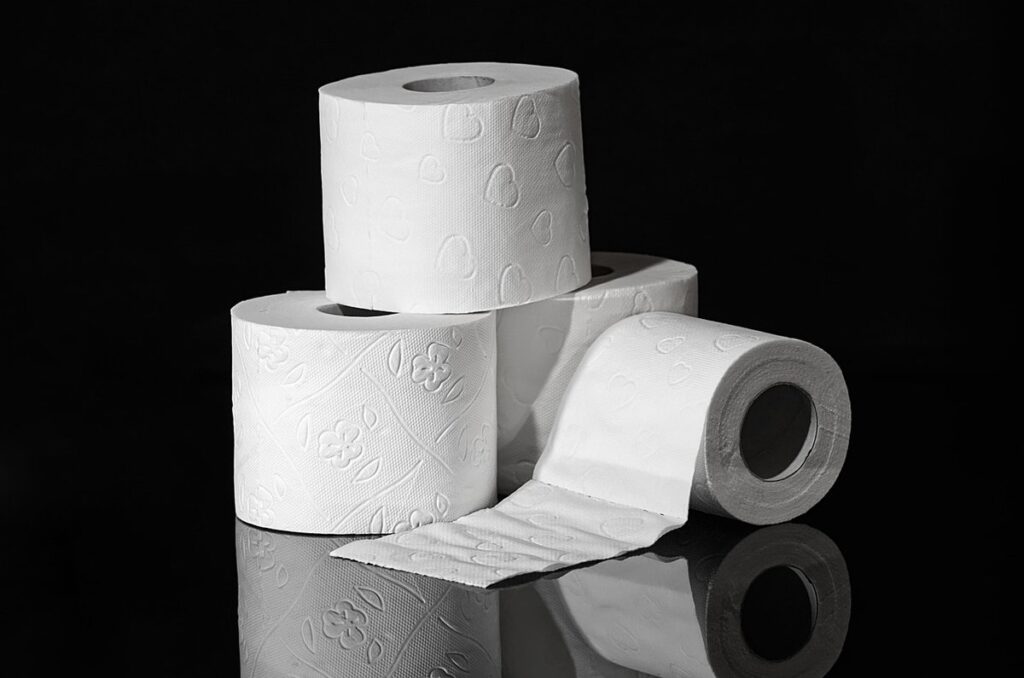
When it comes to crafting with kids, you’ll want materials that are not only fun but also budget-friendly and environmentally conscious. That’s where toilet rolls come in – a humble hero of the DIY world! These everyday items can be transformed into an array of creative projects, making them perfect for a family craft session.
One of the main advantages of using toilet rolls is their affordability. You likely have a stash at home that’s just waiting to be repurposed. Plus, they’re made from recycled materials, reducing waste and minimizing your carbon footprint. This eco-friendly aspect makes them an excellent choice for kids’ activities, teaching them about sustainability and creative reuse.
To get started, encourage the kids to gather some toilet rolls, scissors, glue, and other basic craft supplies. You can then ask them to brainstorm ideas – from spooky ghosts to festive snowmen. The possibilities are endless! With a little imagination and creativity, you’ll be amazed at what your family can create together.
Exploring Different Shapes and Sizes
When working with toilet rolls for Halloween crafts, it’s essential to understand that not all of them are created equal. Some can be used whole and untouched, while others may require a little creativity to transform into the desired shape or size.
For instance, if you’re making witches’ hats, you might need to use uncut toilet rolls as is. Simply wrap them in black paper or felt, add some glitter or decorations, and voila! You have a spooky hat that’s perfect for any witchy character. However, if you want to create smaller tubes for potion bottles, you’ll likely need to cut the larger rolls into shorter sections.
To give you an idea of what works best, here are some general guidelines: standard-sized toilet rolls work well for most crafts, while mini-rolls or travel-sized ones can be used for smaller details like tiny vases or miniature lanterns. Keep in mind that experimenting with different shapes and sizes is all part of the creative process, so don’t be afraid to get a little messy and try new things!
Toilet Roll Spider Webs and Creations
Get ready for some creepy-crawly fun as we explore creative ways to use toilet rolls to make spider webs, ghosts, and other spooky decorations for your little ones’ Halloween parties!
DIY Spider Web Garland
Creating a DIY spider web garland using toilet roll tubes is an easy and fun activity to do with kids. To get started, you’ll need some basic materials: toilet paper rolls, scissors, glue, string or twine, and a black paint pen. You can also add some extra embellishments like fake spiders, beads, or small toys to give your garland a more dramatic look.
To make the spider web design, cut out strips from the toilet roll tubes, about 1-2 inches wide and 6-8 inches long. You’ll need several strips for each section of the garland. Glue two strips together, forming an “X” shape, to create the foundation of the web.
Next, begin weaving the strips into a web pattern by gluing them onto the string or twine. You can alternate directions and angles to create a more realistic spider web effect. To add some extra details, use the black paint pen to draw on fake spiders or other creepy-crawly creatures.
Hang your garland in a doorway, along a wall, or even across a table to create a spooky atmosphere for Halloween. With these simple steps, you and your kids can create a unique and eye-catching decoration that’s sure to impress!
Toilet Roll Spiders and Insects
Get creative and make some spooky friends with these fun toilet roll spider and insect crafts. You can use them to decorate your home or as party favors for a kid’s Halloween gathering.
To create a toilet roll spider, you’ll need a toilet paper tube, black paint or markers, wiggly eyes, and some glue. Paint the tube black and attach the eyes. Use the glue to add eight thin legs made from pipe cleaners or construction paper strips. You can also add some fake spiders for an extra creepy touch.
For bats, you can use the same toilet roll tubes and decorate them with some gray or brown paint and a few black wings cut out from cardstock. Add some googly eyes and hang them up to create a spooky mobile.
You can also make other Halloween creatures like ghosts, rats, or even monsters using toilet rolls as the base. The possibilities are endless, and kids will love getting creative with these eco-friendly materials. So grab your art supplies and let’s get crafting!
Toilet Roll Ghosts and Bats
Get ready for some spooky fun as we dive into creating toilet roll ghosts, bats, and other creepy creatures that are perfect for Halloween decorations. Let’s make some howling good crafts!
Easy Toilet Roll Ghost Craft
Making a toilet roll ghost is an easy and fun Halloween craft that kids will love. To get started, you’ll need one toilet roll per child, some white glue, scissors, and a few decorations of their choice. Begin by cutting a slit at the top of each toilet roll to create a neck opening. This will help your ghosts look like they’re floating rather than just sitting there.
Next, apply a small amount of white glue to the inside of the toilet roll, making sure not to get it on the outside. Help your child wrap a piece of tissue paper or gauze around the middle section of the roll, folding the edges under as you go. This will create the ghostly body. They can use their imagination to create different shapes and designs.
For decoration, kids can add eyes, mouths, or other features using markers, paint, or even beads. You could also hang your ghosts in a window or from the ceiling for an eerie effect. Some other ideas include adding cotton balls for a puffy cloud effect or creating a garland with multiple ghosts hanging together. With these simple steps and some creativity, you’ll have a spooky yet adorable toilet roll ghost to enjoy this Halloween season.
Transforming Toilet Rolls into Hanging Bats
Transforming toilet rolls into hanging bats is a fun and creative way to add some spooky ambiance to your home this Halloween. To get started, you’ll need some basic crafting supplies like scissors, glue, and string or twine. You can also use paint, markers, or stickers to decorate your bats if desired.
First, cut the toilet roll in half lengthwise to create two bat shapes. You can then cut out small triangular pieces from the top of each shape to create a pointy nose and ears for your bat. Next, cut out small curved lines along the edge of each piece to give them a more bat-like appearance.
To hang your bats, simply tie some string or twine around the top of each one, leaving enough room to hang them in a window or along a wall. You can also add some decorative touches like glitter, stickers, or even fake spiders for an extra spooky effect. With these simple steps, you and your kids can create a flock of ghostly bats to haunt your home this Halloween season.
Other Halloween Crafts Using Toilet Rolls
Now that you’ve made some spooky toilet roll ghosts and bats, let’s get creative with more fun crafts using these humble tubes. You’ll love these other Halloween ideas!
Toilet Roll Pumpkin Craft
Create a spooky pumpkin from toilet rolls with paint and embellishments. This craft is perfect for kids who love Halloween and are eager to get creative. You’ll need some cardboard tubes (from paper towel rolls), orange and green paint, scissors, glue, and other embellishments like glitter, stickers, or markers.
Start by cutting the cardboard tubes into equal-sized sections to create the pumpkin’s layers. Paint each section orange and let them dry completely. Once they’re dry, use a hot glue gun to attach the painted sections together in a layered effect, overlapping each one slightly to create a 3D pumpkin shape. Use green paint for the stem and leaves.
To add some extra spookiness, decorate your pumpkin with glitter, stickers, or markers. You can also add some fake spiders or cobwebs using yarn or string. Hang your toilet roll pumpkin in a window or on a wall to create a fun Halloween display. This craft is easy to customize, so encourage kids to let their imagination run wild and get creative!
Decorating Toilet Rolls with Yarn, Stickers, and Markers
To add an extra layer of fun to your toilet roll crafts, why not try decorating them with yarn, stickers, and markers? This is a great way to encourage kids to get creative and express themselves. Let’s start with yarn – you can wrap it around the toilet roll in different patterns or textures, or use it to create pom-poms that can be glued on top. For example, you could make a spider web design by wrapping black yarn around the toilet roll in a spiral pattern.
Stickers are another great option – kids love sticking things onto their crafts and can get very creative with where they place them. You could add a spooky face to your toilet roll using white or orange stickers, or create a festive Halloween scene with black cats and bats. Markers can also be used to draw on designs, patterns, or even tell a story. Encourage kids to use their imagination and have fun with the process – after all, it’s okay if their creations don’t turn out perfectly! Some examples of what they might make include ghostly shapes, spiders, bats, or jack-o-lanterns.
Displaying Your Creations
Now that you’ve crafted your spooky toilet roll masterpieces, let’s talk about how to proudly display them in a way that’ll make everyone who sees them scream…with delight!
Tips on How to Display Your Toilet Roll Crafts
Displaying your toilet roll Halloween crafts is an exciting part of the creative process. You want to showcase your child’s finished projects with pride and create a spooky atmosphere that matches the holiday theme. To achieve this, consider dedicating a specific area for displaying your child’s crafts. This could be a shelf or a wall in their bedroom, playroom, or even a hallway.
Transforming the display into a haunted space is easy and fun. Use cardboard boxes or paper bags to create spooky archways, doorframes, or even a haunted mansion backdrop. Hang cobwebs made from black cotton balls or yarn, and add some fake spiders for an eerie touch. You can also use small LED lights or fairy lights to create a glowing effect, adding to the spookiness.
Don’t forget to label each craft with its title, your child’s name, and the date it was created. This will help you track their progress and create a sense of accomplishment. With these simple ideas, you’ll be able to showcase your child’s toilet roll crafts in a safe, creative manner that adds to the festive atmosphere of Halloween.
Photo Shoot Ideas and Inspiration
Capturing the magic of your toilet roll creations is just as important as making them. You want to showcase your child’s creativity and hard work to family and friends, but how do you take great photos? Start by setting up a simple backdrop or using a colorful tablecloth to add visual interest.
When it comes to lighting, natural light is always the best option. Place your creation near a window for soft, even illumination. Avoid harsh overhead lights that can create unflattering shadows. You can also use a reflector or a piece of white cardboard to bounce light onto your subject.
Encourage your child to pose with their creation, and don’t be afraid to get creative yourself! Use fun props like fake spiders, bats, or other Halloween-themed items to add an extra layer of fun to the photo. Consider using a polaroid camera or a smartphone app with a vintage filter to give your photos a unique, DIY feel.
Finally, experiment with different angles and compositions to capture your child’s creation from multiple perspectives. Get down low and shoot from eye level for a more intimate shot, or try a bird’s-eye view for a dramatic effect. With a little practice and patience, you’ll be snapping amazing photos of your toilet roll masterpieces in no time!
Conclusion and Final Thoughts
Now that you’ve made a roll with your toilet paper crafts, let’s take a moment to reflect on what we’ve learned and how to keep the spooky spirit alive all year round.
Recap and Encouragement
As we wrap up our toilet roll Halloween crafts for kids extravaganza, we hope you’ve had as much fun reading about these creative ideas as we did sharing them with you! From spooky spiders to ghostly treats, we’ve seen how a humble toilet roll can be transformed into a masterpiece.
Remember, the best part about these projects is that they’re perfect for little ones to get creative and have fun while learning. So don’t just stop at reading – grab some supplies and get crafty with your mini-me! Encourage them to experiment, try new things, and most importantly, not be afraid of making a mess.
In fact, it’s the imperfections that often make these crafts truly special. Who needs perfect straight lines or symmetrical designs when you can have wobbly ghosts and lopsided spiders? By embracing the chaos, your child will develop their problem-solving skills, build confidence in their creativity, and most importantly, have a blast.
So don’t wait any longer – get crafting, be creative, and happy Halloween!
Additional Resources and Ideas
For those who want to take their toilet roll Halloween crafts to the next level, there are plenty of additional resources and ideas to explore. One great place to start is by checking out some popular crafting websites and blogs that specialize in kid-friendly projects. Sites like Pinterest, YouTube, and Craftsy offer a wealth of tutorials, videos, and guides to help you get creative.
You can also try branching out into different materials and textures, such as felt, foam, or even recycled cardboard. These add an extra layer of depth and dimension to your crafts, making them more engaging for kids. For example, you could create a spooky graveyard using toilet rolls, felt tombstones, and some strategically placed fake spiders.
If you’re looking for more inspiration, consider joining online crafting communities or forums where parents share their own DIY projects and ideas. You can also try visiting local craft stores or attending workshops to learn new techniques and get hands-on experience. Whatever you choose, remember to have fun and be creative – it’s all about embracing the process with your kids!
Frequently Asked Questions
Can I use any type of toilet roll for these crafts?
Toilet rolls made from recycled materials are perfect for eco-friendly Halloween crafts. You can also repurpose cardboard tubes or paper towel rolls, but toilet rolls work best due to their smooth surface and consistent shape.
How do I get my kids to be creative with the craft process?
Encourage your little ones to let their imagination run wild! Set a timer for 10-15 minutes and challenge them to create as many unique crafts as possible. Provide various materials like paint, markers, glue, and yarn to keep things exciting.
Can I reuse toilet rolls in future Halloween crafts?
Absolutely! Toilet rolls can be reused multiple times by cleaning and drying them thoroughly between uses. Store them in a dry place for next year’s spooky season or use them throughout the year with different themes and decorations.
How do I display my finished craft creations?
Get creative with your display options! Use twine, string, or yarn to hang toilet roll ghosts or spiders from windows, doors, or even the ceiling. You can also create a spider web garland by attaching toilet rolls to a piece of cardboard or a large piece of paper.
Are these crafts suitable for young children?
Yes, these crafts are perfect for toddlers and preschoolers due to their simplicity and ease of use. Just be sure to supervise your little ones during the crafting process and provide guidance when needed to ensure they stay safe with materials like scissors and glue.