
The holiday season is just around the corner, and you’re likely already thinking about fun activities to do with your little ones. One of our favorite Christmas traditions is decorating the tree with colorful baubles. But this year, why not take it up a notch and get creative with some painted Christmas bauble ideas? Not only will making your own baubles be a blast for kids, but they’ll also add a personal touch to your holiday decor.
In this article, we’ll show you how to make your own painted Christmas baubles with your kids. From winter wonderland themes like snowflakes and reindeer, to art tips on how to create the perfect sparkle effect, we’ve got everything you need to get started. Plus, we’ll share some amazing display ideas to showcase your little artists’ work. So grab some paint, glitter, and a few simple materials, and let’s dive into the world of Christmas bauble painting with kids!
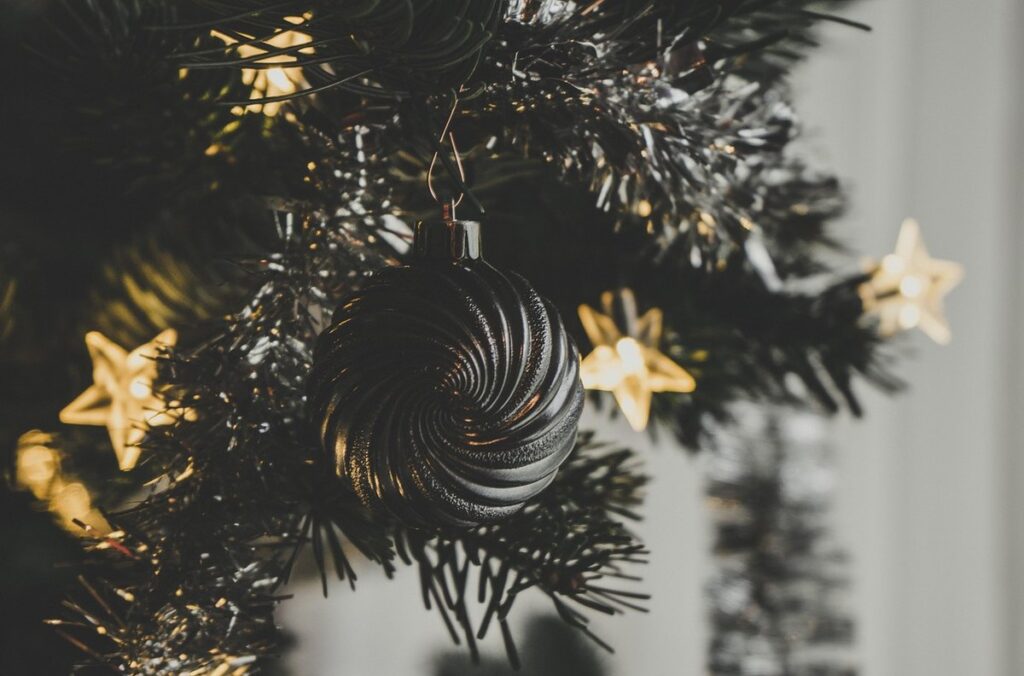
Introduction to Christmas Bauble Painting
Get ready to bring some festive fun into your home as we explore the basics of painting baubles, a simple and creative activity perfect for kids. We’ll show you how to get started.
What are Christmas Baubles?
Christmas baubles are a beloved holiday decoration that add a touch of festive cheer to our homes during Christmas. But have you ever wondered where this tradition came from? The history of Christmas baubles dates back to 16th century Germany, where they were known as “tree ornaments” or “glass balls”. They were initially made by skilled glassmakers who created intricate designs and shapes using a combination of glassblowing and cutting techniques.
The popularity of Christmas baubles soon spread throughout Europe and beyond. In the Victorian era, Christmas trees became a staple in many homes, and with them came the tradition of decorating the tree with ornaments, including baubles. Today, Christmas baubles come in an array of shapes, sizes, and materials, from glass and plastic to metal and ceramic. They’re a popular choice for decorating Christmas trees, wreaths, and even garlands.
As we explore the world of Christmas bauble painting, it’s essential to understand their significance and the joy they bring to families during the holiday season. Whether you’re creating your own baubles or buying them pre-made, there’s something special about these festive decorations that makes them a timeless tradition.
Importance of Arts and Crafts for Kids During Holidays
Engaging children in arts and crafts activities during the holidays is not only a fun way to spend quality time together but also offers numerous benefits for their development. One of the most significant advantages is cognitive development. Arts and crafts help children develop problem-solving skills, hand-eye coordination, and critical thinking. They learn to express themselves creatively, exploring different materials, textures, and colors.
During holidays like Christmas, arts and crafts activities can be especially valuable in fostering fine motor skills. Activities such as painting baubles require precision and control, which helps children refine their pincer grip and dexterity. This skill is essential for everyday tasks, from tying shoelaces to using utensils while eating.
Moreover, engaging in creative activities during holidays encourages creativity and self-expression. Children can experiment with various techniques and materials, discovering new ways to bring their ideas to life. For example, they can decorate baubles using different textures like glitter, stickers, or even decoupage paper. This freedom to explore and express themselves helps build confidence and stimulates imagination.
Materials Needed for Bauble Painting
Get ready to decorate those baubles! To start creating your magical masterpieces, you’ll need some essential materials that we’ve outlined below.
Essential Art Supplies for Bauble Painting
When it comes to bauble painting with kids, having the right art supplies can make all the difference. To get started, you’ll need a few essential items that will help bring your designs to life.
First and foremost, you’ll need paint. Choose water-based acrylic or tempera paint specifically designed for use on glass. These types of paint are non-toxic and easy to clean up, making them perfect for kids. You can also consider using specialized bauble painting kits that usually include everything you need to get started.
In addition to paint, you’ll need a variety of brushes in different sizes and shapes to help create intricate designs. Look for brushes with synthetic or natural fibers that won’t damage the glass surface. A small paintbrush is ideal for detail work, while a larger brush can be used for broader strokes.
Other essential supplies include glue, either hot glue or a strong adhesive like E6000, which will come in handy for attaching any additional decorations. Don’t forget to have some paper towels on hand for cleaning up spills and wiping off brushes. With these basic art supplies, you’re ready to start creating unique and personalized baubles that your kids will love.
Choosing the Right Baubles for Painting
When it comes to choosing the right baubles for painting, there are several factors to consider. The material of the bauble is a crucial aspect to think about. Glass baubles are a popular choice because they can be easily painted and sealed, but they can also be fragile and prone to breaking if dropped. On the other hand, plastic baubles are more durable and less expensive, making them a great option for kids.
Consider the size of the bauble as well. Smaller baubles are perfect for little hands to paint, while larger ones may be too overwhelming. You can also look for baubles with unique designs or textures that will add an extra layer of interest to your artwork.
Another factor to think about is the shape and design of the bauble. A spherical shape can be a bit tricky to paint, but it’s also very forgiving if mistakes are made. A more symmetrical shape like a circle or oval is usually easier for kids to paint neatly.
Design Ideas for Christmas Bauble Painting
Get creative and bring your little ones’ imagination to life by transforming plain glass baubles into beautiful works of art with these fun and easy design ideas! From sparkly snowflakes to festive holly leaves.
Winter Wonderland Themes
Create magical winter wonderlands on your Christmas baubles with our enchanting Winter Wonderland themes! Imagine sparkling snowflakes gently falling onto a serene snowy landscape, complete with towering pinecones and frosty trees. These breathtaking scenes will transport your little ones to a world of festive fun.
To get started, begin by painting a soft blue or grey background to represent the winter sky. Use delicate brushstrokes to add fluffy white clouds and a sprinkle of glitter for an extra touch of magic. Next, use fine-tip brushes to paint intricate snowflakes in shades of white, silver, or pale blue. You can also use stencils or stickers to create more uniform designs.
For added depth, incorporate pinecones and branches into your design. Use brown or green paint to bring these elements to life, and don’t forget to add some sparkle with glitter or rhinestones. Remember, the most important thing is to let your child’s imagination run wild! Encourage them to experiment with different colors and textures to create a truly unique winter wonderland on their bauble.
Fun and Whimsical Designs for Kids’ Rooms
Painting baubles with fun and whimsical designs is an excellent way to get kids involved in the Christmas decorating process. Who says you can’t have a cartoon character or two on your tree? Let’s get creative!
Think of their favorite characters, such as Mickey Mouse, Minnie Mouse, or even Elsa from Frozen. You can also paint festive patterns like snowflakes, reindeer, or candy canes. The possibilities are endless! Consider using bright colors and bold lines to make the design pop.
If you’re feeling crafty, why not try painting a miniature scene? A winter wonderland with tiny pine trees, snowmen, or even a festive train chugging along would be adorable. You could also paint a mini gingerbread house or a plate of cookies – yum! Use your imagination and let the kids take charge.
Remember to use acrylic paints specifically designed for glass baubles. These are usually labeled as “non-toxic” and “food-safe,” giving you peace of mind while letting the little ones get creative. Encourage them to experiment with different techniques, like dripping paint or using stencils. The result will be a one-of-a-kind Christmas decoration that’ll make your tree stand out from the rest!
Step-by-Step Guide to Painting Christmas Baubles
Now that you’ve chosen your bauble design, let’s get creative and transform it into a beautiful piece of art! Follow these easy steps to paint your Christmas baubles like a pro.
Preparing the Baubles for Painting
Before you start painting your Christmas baubles, it’s essential to prepare them properly. This involves cleaning and preparing the surface of each bauble to ensure a smooth, even finish. Start by washing the baubles with soap and warm water to remove any dirt or grime that may have accumulated during storage. Use a soft-bristled brush to gently scrub away any stubborn stains.
Next, dry the baubles thoroughly with a lint-free cloth or paper towel. This is crucial, as any remaining moisture can interfere with the paint’s adhesion and cause it to peel off prematurely. Once the baubles are dry, use a gentle primer specifically designed for plastics to create an optimal surface for painting. Follow the manufacturer’s instructions for application and drying times.
Now your baubles are ready for painting! Make sure to choose a well-ventilated workspace and use high-quality paints suitable for plastic surfaces. This will help ensure that your creations last throughout the holiday season.
Painting Techniques for Different Effects
When it comes to painting Christmas baubles, one of the most exciting parts is experimenting with different techniques to achieve unique effects. Let’s dive into some fun and creative ways to add visual interest to your baubles.
To give your baubles a metallic finish, try using metallic paint or adding a thin layer of clear varnish over regular paint. This will give them a shiny, reflective appearance that catches the light beautifully. You can also use a spray varnish for an extra-glossy finish. For a more subtle effect, mix some metallic powder into your regular paint to create a gorgeous marbled look.
For textured backgrounds, try using a palette knife or a household item like a fork or toothbrush to apply thick layers of paint. This will add a fun, tactile element to your baubles. You can also use stencils or stickers to create intricate designs and patterns on the surface of the ball. The possibilities are endless, and it’s amazing how much personality you can bring to each bauble with just a few simple techniques!
Displaying Your Handmade Christmas Baubles
Now that you’ve created your beautiful handmade baubles, let’s get creative with how to display them proudly on your Christmas tree. We’ll show you some unique ways to showcase your masterpieces!
Decorating the Tree with Painted Baubles
Now that you’ve spent time painting and creating your unique handmade Christmas baubles, it’s time to think about how to display them on the tree. This is where the fun really begins! You can use your painted baubles as ornaments or create a beautiful focal point on the tree by grouping similar colors or themes together.
One idea is to alternate between plain and painted baubles to add visual interest to your tree. For example, if you have a number of painted baubles in bold reds and greens, intersperse them with some plain white ones for a striking effect. You can also group all the painted baubles together on one branch to create a colorful display.
Don’t be afraid to get creative with where you place your painted baubles. Consider hanging them from the tree’s lower branches or creating a garland using the larger baubles. Remember, the key is to have fun and make it personal – use the painted baubles in a way that reflects your child’s personality and style!
Using Painted Baubles in Home Decor and Gift Ideas
Painted baubles can add a personal touch to your home decor and make thoughtful gifts for loved ones. To incorporate them into your holiday display, consider filling stockings with painted baubles instead of traditional candy or small toys. This adds an extra layer of meaning and excitement as the recipient unwraps their stocking.
You can also use painted baubles to create beautiful garlands that adorn your staircase, mantel, or Christmas tree. Simply thread a string through each bauble and hang them in a pattern that suits your style. For a more rustic look, tie a ribbon around the string of baubles before hanging.
When it comes to gifting, consider filling small containers or jars with painted baubles and attaching a personalized label or card with the recipient’s name. This makes for a thoughtful and unique gift that can be used year after year. You can also use painted baubles as decorations for your dinner table, adding a pop of color and whimsy to your holiday meal.
Tips and Tricks for Making Christmas Bauble Painting with Kids Easier
We know how much fun it can be to get creative with your kids, but let’s face it – painting baubles together can sometimes feel more chaotic than festive!
Encouraging Creativity and Fun
When it comes to making Christmas bauble painting with kids a success, encouraging creativity and fun is crucial. This is where the magic happens, and memories are created! To foster an environment that sparks imagination, try the following:
Make it a collaborative process by involving each child in the design decision-making from the start. Ask them to choose their favorite colors or themes, and let them help you pick out the perfect baubles for their project. This will give them a sense of ownership and excitement about the process.
Encourage experimentation with different painting techniques, such as stamping, swirling, or dripping paint. You can also provide various materials like glitter, stickers, or stencils to add extra flair. The key is to let kids take risks and try new things – it’s amazing what they come up with!
Set the scene by playing festive music, baking some holiday treats, or even setting up a hot chocolate station. These little touches can create a cozy atmosphere that makes the experience feel more like a special treat rather than a chore.
Managing Messes and Expectations
It’s inevitable – messes will happen when painting baubles with kids. But, we can minimize the chaos and set realistic expectations to make this activity more enjoyable for everyone involved.
To start, it’s essential to accept that some level of mess is unavoidable. Instead of trying to eliminate it entirely, focus on containing it. Cover your work surface with newspaper or a plastic tablecloth, and have smocks or old shirts ready for kids to wear. This simple step can save you from scrubbing paint off surfaces later.
Be clear with your child about what’s expected in terms of clean-up. Explain that we’ll take our time to wash the brushes and put away materials after we’re done painting. Make it a team effort by letting them help with cleaning up, so they feel invested in keeping things tidy.
Set realistic expectations for the finished product, too. Remember that these baubles are meant to be imperfect and personalized. Encourage your child’s creativity and don’t worry if their design doesn’t turn out exactly as planned. With a little preparation and flexibility, you can have a blast creating Christmas decorations with your kids while minimizing messes and stress.
Frequently Asked Questions
Can I use any type of paint for painting Christmas baubles?
Yes, but it’s best to use acrylic or tempera paint specifically designed for ceramics or glass, as they will adhere well to the bauble surface and withstand potential heat from a lit tree. Make sure to follow the manufacturer’s instructions and test a small area first.
How can I prevent my child from getting overwhelmed with too many design ideas?
No worries! Encourage your child to start with simple designs and gradually introduce more complex themes as they gain confidence and skill. This approach will help build their creativity and make the experience enjoyable for both of you.
Can I reuse or repurpose old baubles for this activity?
Absolutely! Cleaning and preparing old baubles can add a unique touch to your child’s artwork. Just be sure to wash them thoroughly and let them dry completely before painting. This will also help reduce waste and make the activity more environmentally friendly.
What if my child wants to create three-dimensional designs on their baubles?
You can definitely try 3D designs! Use a combination of paint, glitter, or even decoupage to add texture and depth to your child’s artwork. Encourage them to experiment with different materials and techniques to achieve the desired effect.
How do I store my painted baubles after they’re dry, so they don’t get damaged?
Store your painted baubles in a dry, cool place away from direct sunlight. You can also consider using acid-free tissue paper or bubble wrap to protect them during storage. This will help preserve the colors and prevent damage over time.