
As a parent or educator, you’re always on the lookout for fun and engaging activities that encourage creativity and learning in kids. One natural and eco-friendly material that can spark imagination is the humble pinecone! Not only do pinecones come in an array of shapes and sizes, but they also offer endless possibilities for creative exploration. In this article, we’ll delve into the world of easy pinecone crafts for kids, showcasing unique projects that go beyond the ordinary. From making bird feeders to exploring sensory play, our collection will inspire you to think outside the box and get crafting with your little ones. Whether you’re a seasoned crafter or just starting out, these ideas are perfect for promoting creativity, fine motor skills, and an appreciation for nature. Get ready to unleash your child’s inner artist!
Introduction to Pinecone Crafts
Welcome to the world of pinecone crafts, where imagination and creativity come alive! In this section, we’ll explore some fun and easy projects perfect for kids.
What Are Pinecones?
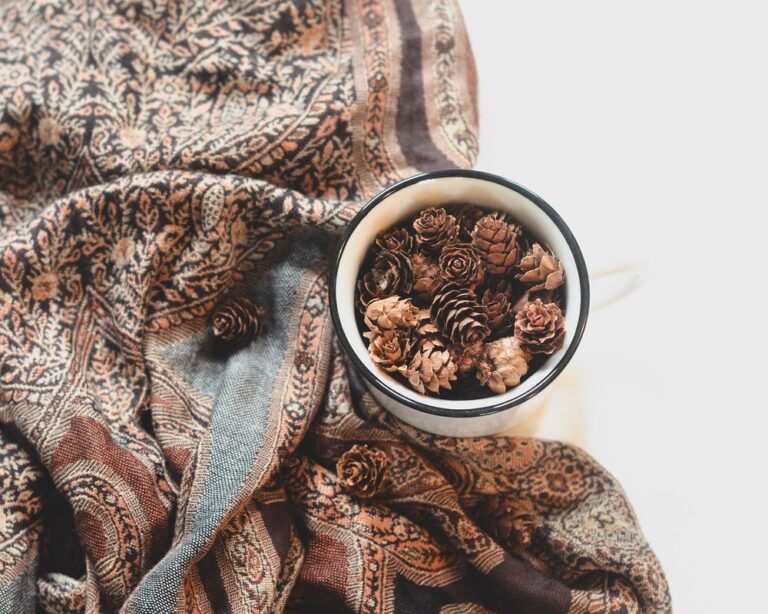
Pinecones are one of nature’s most fascinating and versatile creations. These hard-shelled reproductive structures come from coniferous trees, like pines, spruces, and firs. Found in various shapes, sizes, and colors, pinecones play a vital role in the life cycle of these trees, helping them reproduce by dispersing seeds.
In nature, pinecones are an essential part of the ecosystem. They provide food for various animals, from birds and squirrels to insects and small mammals. As they mature and fall from the tree, pinecones become a valuable resource for crafty people. With their unique textures, patterns, and sizes, pinecones can be transformed into a wide range of creative projects.
To get started with using pinecones creatively, simply collect them from your yard or a nearby park (make sure to ask permission first). You can also purchase pinecones at craft stores or online. When working with pinecones, remember to clean and dry them thoroughly before using them in your crafts. This will help prevent any dirt or moisture from affecting the final product. With a little imagination, pinecones can be turned into beautiful ornaments, decorations, and even jewelry.
Benefits of Using Pinecones in Kid’s Craft Projects
Using natural materials like pinecones in kid’s craft projects is an excellent way to encourage creativity and foster their love for art. By incorporating pinecones into various crafts, you’re providing a platform for children to express themselves and develop essential skills. One of the primary benefits is promoting fine motor skills, which are crucial for hand-eye coordination, dexterity, and overall physical development.
As children work with pinecones, they’ll engage their senses, exploring texture, smell, and visual appeal. This sensory experience not only enhances their creativity but also helps them develop a deeper connection with nature. For instance, you can fill a vase with pinecones and add some decorative items for a beautiful centerpiece or have the kids create pinecone bird feeders by threading nuts onto pinecone “hangers.”
This type of creative play encourages experimentation, risk-taking, and problem-solving skills in children. By allowing them to work with natural materials like pinecones, you’re giving them the freedom to explore, express themselves, and develop essential life skills that extend far beyond the craft itself.
DIY Pinecone Bird Feeders for Kids
Get ready to create a fun and easy bird feeder project that’s perfect for little hands! We’ll guide you through making adorable pinecone bird feeders that kids will love.
Materials Needed for a Basic Pinecone Bird Feeder
To make a basic pinecone bird feeder, you’ll need some easily accessible materials. Let’s start with the essentials: a few pinecones, some peanut butter, and a variety of bird seeds. You can choose a mix of sunflower seeds, Nyjer seeds, or any other type that attracts birds in your area.
Next, gather some glue – white school glue or hot glue will work well for this project. A piece of string or twine is also necessary to hang the feeder from a tree branch. You may want to have some scissors on hand to cut the string to size.
To secure the seeds to the pinecone, you can spread a layer of peanut butter evenly across its surface. This sticky substance will help hold the seeds in place as they dry. Be sure to cover all surfaces for maximum seed retention.
Once you’ve assembled your feeder with glue and seeds, tie the string around the top of the pinecone, leaving enough room to hang it from a tree branch later. With these basic materials and a little creativity, you’re ready to create a simple yet effective bird feeder that will attract feathered friends to your backyard.
Step-by-Step Instructions for Making a Pinecone Bird Feeder
To make a pinecone bird feeder, you’ll need the following materials: a pinecone, peanut butter, birdseed, string or twine, and scissors. Start by spreading a layer of peanut butter on the pinecone using a butter knife. Make sure to cover it evenly, but don’t worry if some gets stuck in your hair – it’s all part of the fun!
Next, roll the pinecone in a plate of birdseed until it’s fully covered. You can use any type of seed you like, but sunflower seeds and suet work well for this project.
Now it’s time to add a hanger made from string or twine. Cut a piece of string long enough to hang the feeder from a tree branch, then tie it around the top of the pinecone using a knot. Make sure it’s secure so the birds don’t come tumbling down!
Hang your bird feeder in a nearby tree and watch as the birds enjoy their tasty snack. Be sure to refill with fresh seed regularly, as the peanut butter will attract other critters like squirrels and raccoons.
Remember, you can customize this project by using different types of seeds or even adding some fruit, such as dried cranberries or orange slices, for a sweet treat.
Tips for Customizing Your Pinecone Bird Feeders
Now that you’ve created your DIY pinecone bird feeder, it’s time to give it some extra personality! Customizing your bird feeder is a great way to make it more visually appealing and attract different types of birds. One simple way to customize is by using different types of seeds or nuts. Suet, peanut butter, and sunflower seeds are all excellent options that will provide a nutritional boost for the birds.
If you want to add some extra flair, consider adding small bells or other decorative items like pine needles, twigs, or even small pieces of ribbon. Just be sure not to use anything too heavy or cumbersome, as it may weigh down the bird feeder and make it difficult for the birds to access the food.
You can also experiment with different shapes and sizes of pinecones to create unique bird feeders. For example, you could use large pinecones to create a showy bird feeder that’s perfect for a prominent spot in your garden.
Pinecone Decorations and Ornaments for Homes and Rooms
Let’s add some festive flair to your home with creative pinecone decorations and ornaments that are fun and easy to make, perfect for kids of all ages!
Ideas for Using Pinecones in Home Decor
Get creative with pinecones and add a touch of nature to your home decor! Pinecones can be used in various ways to create stunning decorations that are perfect for any room. One of the most popular ideas is to use them as a base for wreaths. Simply glue the pinecones onto a wire or foam ring, and you’ve got a beautiful winter wonderland-inspired decoration.
You can also create garlands by threading pinecones onto twine or ribbon, adding some evergreen branches and ribbons to give it a festive look. For a more dramatic centerpiece, arrange pinecones in a vase or bowl with some candles, pine sprigs, and ribbons. This creates a warm and inviting ambiance for any dining table.
To add some extra sparkle, you can spray paint the pinecones gold or silver, or use them as a base for DIY ornaments by gluing on some glittery decorations. For kids, this is an excellent opportunity to get creative and experiment with different materials and designs. With these simple ideas, you’ll be well on your way to creating unique and beautiful pinecone decorations that add warmth and character to any room!
Making a Pinecone Wreath
Making a pinecone wreath is a fun and creative project that can add a rustic touch to any room. To get started, you’ll need some wire (you can use floral wire or a hot glue gun), plenty of pinecones, and a few other basic materials like scissors, twine, and decorations of your choice.
Begin by cutting the wire into long pieces, which will serve as the base for your wreath. You can shape them into a circular form to create the foundation of your design. Next, start attaching the pinecones using glue or wire. Simply apply a small amount of glue to the stem of each pinecone and attach it to the wire frame.
As you add more pinecones, experiment with different patterns and textures to give your wreath some visual interest. You can also include other materials like dried flowers, berries, or ribbons to complement the natural look of the pinecones. For a finishing touch, tie a length of twine around the top of the wreath to create a simple hanger.
Remember, the beauty of making a pinecone wreath lies in its imperfections – so don’t worry if it’s not perfect! With a little patience and creativity, you can create a unique and eye-catching decoration that will add warmth and coziness to any room.
Displaying Your Pinecone Creations in the Home
Now that you’ve created these beautiful pinecone decorations and ornaments with your kids, it’s time to think about how to showcase them in your home. This can be the most exciting part of the process – getting creative with display ideas!
Consider using a decorative bowl or vase to group multiple pinecone creations together. This is perfect for a coffee table centerpiece or a side table vignette. Alternatively, you could use a wooden board or a rustic tray to create a more rustic and earthy look.
For individual pieces, try attaching them to a ribbon or twine and hanging them on the wall or from a mobile. You can also use a 3D frame or a shadow box to add an extra layer of depth and dimension. Don’t be afraid to experiment with different materials like pinecones, leaves, and other natural elements to create a cohesive look.
Some rooms that are perfect for showcasing your pinecone decor include the living room, dining area, or even a nursery. Use your creativity to tie in the pinecone decorations with the existing decor and make it a statement piece in the room. With a little bit of imagination, you can turn these natural elements into beautiful works of art that add warmth and personality to any space!
Pinecone Sensory Play Activities for Kids
Get ready to unleash your little one’s creativity as we delve into some amazing pinecone sensory play activities that are perfect for curious kids! From tactile exploration to art projects.
Introduction to Sensory Play with Pinecones
Sensory play is an essential part of childhood development, allowing kids to explore and engage with their environment through sight, sound, touch, taste, and smell. By incorporating pinecones into sensory activities, you can provide your little ones with a unique opportunity for creative expression, fine motor skills development, and relaxation.
When children engage in sensory play, they experience the world around them in a hands-on way, stimulating their senses and promoting learning through exploration. This type of play is especially beneficial for young minds as it helps to calm anxiety, reduce stress, and develop problem-solving skills. Pinecones offer an excellent medium for sensory exploration due to their varied texture, smell, and shape.
To get started with pinecone sensory play, try collecting a variety of pinecones in different sizes and shapes. Fill a container or bin with them and let your child dig in, exploring the textures and smells. You can also add other natural materials like leaves, twigs, or sand for added depth and interest. Encourage your child to collect specific types of pinecones or create patterns using them – this will help develop their fine motor skills and creativity.
Ideas for Pinecone-Themed Sensory Bottles
Creating sensory bottles using pinecones is an excellent way to engage kids in hands-on exploration. These bottles are perfect for little ones who love to investigate and experiment with different textures and smells. To create a pinecone-themed sensory bottle, you’ll need the following materials:
* A clean glass bottle with a tight-fitting lid
* Water or oil (depending on the desired consistency)
* Pinecones of various sizes and shapes
* Glitter, beads, or small toys for added texture and interest
* Food coloring (optional)
Fill the bottle about 1/4 full with water or oil, leaving enough space for the pinecones. Add a few pinecones, making sure they’re fully submerged in the liquid. If using glitter or beads, add them on top of the pinecones for an extra sensory experience. If you’d like to color your mixture, now’s the time to add a few drops of food coloring.
This sensory bottle is perfect for exploring tactile sensations and developing fine motor skills. As children shake the bottle, they’ll see the pinecones floating around, creating a mesmerizing effect. You can also experiment with different types of liquid, like corn syrup or honey, to create unique textures and smells. Encourage your child to predict what will happen when you add more pinecones or change the ratio of water to oil – it’s an excellent way to foster problem-solving skills!
Setting Up a Pinecone Sensory Bin
Creating a sensory bin with pinecones is an excellent way to encourage kids to engage their senses and explore the natural world. To set one up, start by choosing a container that’s large enough for your child to comfortably reach into and dig around. You can use a plastic tub, a wooden crate, or even a cardboard box – whatever works best for your space.
Next, decide on the base material you’d like to use. Pinecones can get heavy, so it’s essential to choose something with some weight to keep them stable. Sand is an excellent option as it’s easy to clean up and allows kids to build and create structures. Rice or beans are also great alternatives, providing a fun texture for kids to explore.
Add the pinecones on top of your chosen base material, making sure they’re evenly distributed. You can add other natural elements like leaves, twigs, or small rocks to enhance the experience. Make it easy for your child to get started by placing a few pinecones within reach and encouraging them to dig in and explore. Remember, the goal is to have fun and learn through tactile exploration!
Nature Crafts Using Pinecones: Leaf-Themed Projects
Get creative and bring the outdoors in with these adorable leaf-themed projects using pinecones, perfect for kids to make and display in their own nature-inspired decor. You’ll love how easy they are!
Introduction to Leaf-Themed Crafts
As we explore the world of pinecone crafts for kids, let’s not forget about another wonderful natural material that can be used in various creative ways: leaves! Leaves are a treasure trove of colors, textures, and shapes, making them an excellent addition to our pinecone-themed projects.
Not only do leaves add a pop of color and interest to any craft, but they also hold a special significance in many cultures. In some parts of the world, leaves are used in traditional medicine, while in others, they’re celebrated for their symbolic meanings. For example, in Japan, red maple leaves represent good luck and longevity.
To incorporate leaves into your pinecone crafts, start by collecting different types of leaves from nature or using artificial ones in various colors and textures. You can glue them onto a pinecone-adorned canvas or use them to create a beautiful collage. Experiment with layering, overlapping, or arranging leaves in a pattern to add depth and visual interest.
Consider adding some twigs, flowers, or other natural elements to enhance the overall look of your leaf-themed craft. With a little creativity, you can turn pinecones and leaves into stunning pieces of art that will be cherished for years to come.
Making a Pinecone and Leaf Collage
To create a beautiful pinecone and leaf collage, you’ll need some basic materials. Start by gathering a variety of real or artificial leaves in different shapes, sizes, and colors. You can also use dried flowers, twigs, and other natural elements to add texture and interest to your collage.
Next, arrange the leaves on a flat surface or a piece of cardboard to visualize your design. Consider creating a focal point with larger leaves or using smaller ones to fill in gaps. Once you’re satisfied with your arrangement, start gluing the leaves onto a large sheet of paper or cardboard.
Don’t forget to incorporate pinecones into your design! You can place them randomly throughout the collage or use them as a border around the edges. To add extra depth, sprinkle some glitter or use other embellishments like beads or sequins. When working with artificial leaves, you can also experiment with different patterns and designs by layering multiple colors.
Remember to work slowly and carefully, allowing each layer of leaves to dry before adding more. This will help prevent your collage from becoming soggy or discolored. With a little patience and creativity, you’ll have a stunning pinecone and leaf collage that’s sure to impress family and friends!
Ideas for Using Real Leaves in Pinecone Projects
When working with pinecones, it’s easy to forget that they’re often paired with another beautiful natural element: real leaves. Adding leaves to your projects can add a new level of depth and interest, but they can be fragile and prone to damage. To incorporate leaves into your crafts, you have several options.
You can press the leaves between sheets of paper towel or blotting paper to remove excess moisture and flatten them out. This will help prevent wrinkles and tears when you use them in your project. For a more rustic look, try drying the leaves by tying them with twine or string and hanging them upside down. Over time, they’ll become brittle and stiff.
Another option is decoupaging: gluing the leaves directly onto other materials like paper, cardstock, or even pinecones. You can use a strong adhesive like Mod Podge, which dries clear and protects the leaf from damage. Experiment with layering different types of leaves or colors to create unique patterns and designs.
Remember that not all leaves are created equal – some may be too delicate for pressing or decoupaging, so choose sturdy ones like oak or maple leaves for best results.
Safety Precautions When Working with Pinecones
When working with pinecones, it’s essential to take some extra precautions to ensure a safe and enjoyable crafting experience for you and your little ones. Let’s cover the important safety tips you need to know.
Handling Sharp Objects and Materials
When working with pinecones and materials for crafts, it’s essential to prioritize handling sharp objects carefully. This is where accidents can happen, especially if kids are involved. Make sure scissors are out of reach when not in use, and consider using rounded-tipped craft scissors specifically designed for children.
If you’re using glue guns, supervise your child closely as they learn how to hold the gun safely. Teach them to keep their fingers away from the nozzle and never touch the hot glue stick. It’s also crucial to store glue guns safely when not in use, ideally out of reach of little hands.
Don’t underestimate the potential for injury from pine needles either – they can be surprisingly sharp. When handling pinecones with your kids, demonstrate how to gently pinch or brush away stray needles to prevent pokes and scratches. Encourage them to wash their hands thoroughly after handling pinecones, especially if they have any open cuts.
Remember, being mindful of these potential hazards will help create a safe and enjoyable crafting experience for everyone involved.
Allergies and Sensitivities to Certain Materials
When working with pinecones and other materials for craft projects, it’s essential to be aware of potential allergies and sensitivities. Some common culprits include pinecones themselves, especially if they’re from certain types of trees or have been exposed to pollutants.
Pine nuts, often used in craft projects, can cause allergic reactions in some individuals. Symptoms may range from mild skin irritation to more severe anaphylaxis. If you suspect a child has a nut allergy, it’s best to substitute with alternative materials like dried beans or corn kernels.
Adhesives and glues can also trigger sensitivities. Some children may react to the strong scents or chemicals in these products. Look for hypoallergenic alternatives or opt for natural adhesives like honey or cornstarch.
To minimize risks, make sure to supervise children closely during craft sessions. Encourage them to wear protective gear like gloves and masks when handling materials that might cause irritation. If you notice any adverse reactions, discontinue the activity immediately and seek medical attention if necessary.
Conclusion and Encouragement for Further Exploration
As we wrap up our pinecone crafts journey, I hope you’ve had as much fun creating with these natural treasures as your little ones have! Now, let’s talk about how to keep exploring and making.
Recap of Key Takeaways from This Article
Now that you’ve made it through this article, let’s recap some of the key takeaways and ideas we covered for creating wonderful crafts with pinecones for kids. One of the main points was experimenting with different materials to complement the pinecones – think glue, scissors, paint, and even glitter! We saw how simple items like yarn and pipe cleaners can be used to create a range of interesting textures.
We also explored some great techniques for crafting with pinecones, from making decorative garlands to creating adorable ornaments. One idea was using hot glue to attach the pinecones to wooden dowels or branches, allowing kids to easily hang their creations. Another technique involved decorating the pinecones themselves by painting or gluing on additional embellishments.
Some other ideas that stood out were making pinecone bird feeders, crafting a giant pinecone centerpiece for the holiday table, and even using natural elements like twigs and leaves to create a 3D forest scene in a jar. These projects not only encourage creativity but also get kids engaged with nature.
Encouraging Kids to Explore and Create with Nature
As we’ve explored various crafts using pinecones for kids, it’s essential to encourage them to explore and create with nature beyond this single project. By doing so, you’ll be fostering a lifelong love for nature-based crafts and developing their creativity.
To inspire kids, start by leading by example. Show them how fascinating the natural world is, not just as a source of materials but also as an environment that’s full of stories to tell. Explain why pinecones are important in the ecosystem or how they’re used by animals for food or shelter.
Make it hands-on and fun! Organize regular outdoor activities where kids can collect different types of leaves, branches, rocks, or feathers. Use this treasure hunt as a chance to teach them about botany, geology, or ecology. Then, challenge them to create something new using these materials – whether it’s making leaf rubbings, building twig sculptures, or even creating collages with nature-found items.
By doing so, you’ll be nurturing their curiosity and creativity, helping them see the world as a vast playground where imagination knows no bounds.
Frequently Asked Questions
Can I use pinecones from my own backyard for craft projects?
Yes, using pinecones from your own yard can be a great way to encourage children to explore nature and collect materials locally. However, make sure to check the types of trees in your area to ensure you’re collecting from healthy and sustainable sources.
How do I store and dry pinecones for future use in crafts?
To preserve pinecones for future projects, gather them when they’re dry and gently brush off any debris or dirt. Store them in a paper bag or envelope with silica gel packets to absorb moisture. You can also air-dry them by tying them in small bunches and hanging them upside down.
What are some alternative materials I can use as a substitute for glue when working with pinecones?
When crafting with children, it’s essential to have safe alternatives to traditional adhesives. Try using honey, cornstarch paste, or even natural resin as a glue substitute. These options promote creativity and reduce the risk of chemical exposure.
How do I handle potential allergies or sensitivities when working with pinecones in crafts?
Some children may be sensitive to certain materials used in craft projects. Be prepared by having hypoallergenic alternatives on hand, such as fragrance-free adhesives or natural dyes. Encourage parents and caregivers to inform you of any known allergies before starting a project.
Can I use artificial pinecones for crafts if I don’t have access to real ones?
While real pinecones are ideal for sensory play and natural exploration, artificial alternatives can be a suitable substitute in some projects. Choose high-quality, realistic replicas that mimic the texture and appearance of real pinecones. This way, you can still encourage creativity without relying on nature’s resources.