
As the leaves start to change colors and the crisp air sets in, it’s the perfect time to get creative with your little ones. Fall is a season that’s rich in texture, color, and natural wonders, making it an ideal time for kids to explore their artistic side. But why settle for boring old crafts when you can make learning fun? In this article, we’ll show you how to bring the magic of fall into your home with 5 easy and engaging art projects that are perfect for kids. From making leaf rubbings to crafting pinecone bird feeders, these seasonal activities will encourage creativity, imagination, and a love for nature that will last long after the seasons change.
Introduction to Fall Art Projects
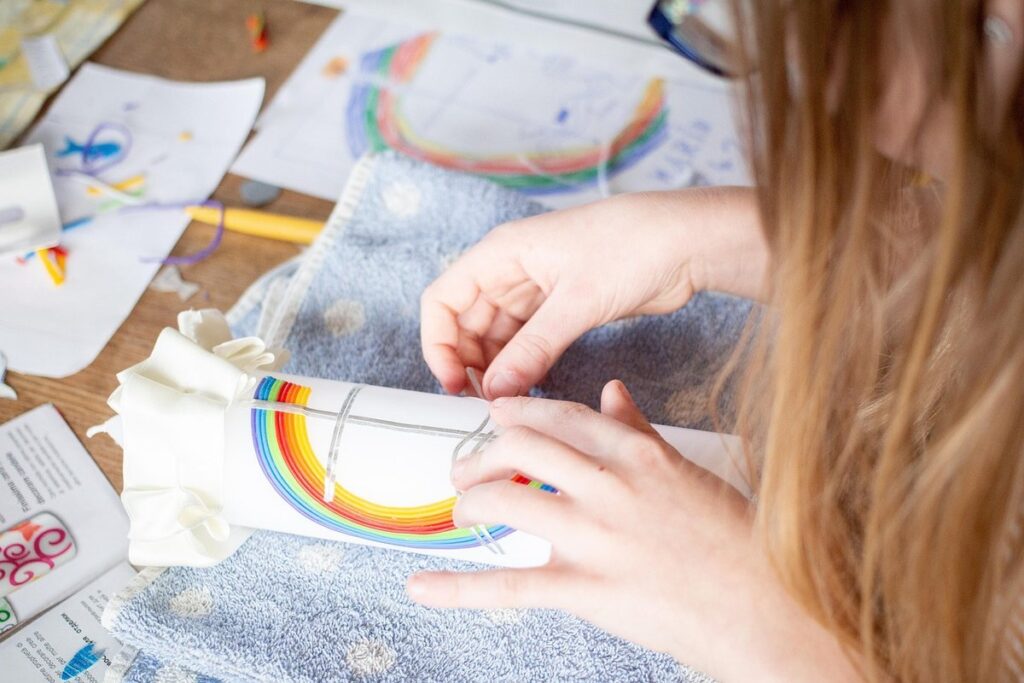
Get ready for a season of creativity as we dive into some fun and easy fall art projects that kids will love making at home. These simple ideas are perfect for a cozy autumn afternoon.
Importance of Arts and Crafts in Childhood Development
Engaging children in arts and crafts activities is not just fun, but it also plays a vital role in their cognitive, emotional, and social development. Through creative expression, kids learn to develop essential skills that will benefit them throughout their lives.
Arts and crafts help improve cognitive skills such as problem-solving, critical thinking, and creativity. For instance, when kids engage in fall-themed art projects like leaf rubbings or pinecone bird feeders, they practice spatial reasoning, color recognition, and fine motor skills. These activities foster a sense of curiosity and encourage children to explore their surroundings.
Emotionally, arts and crafts help kids develop self-expression, confidence, and self-esteem. By creating something with their own hands, kids feel a sense of accomplishment and pride in their work. This builds resilience and helps them cope with challenges. Socially, arts and crafts promote teamwork and collaboration, as kids learn to share materials, take turns, and appreciate each other’s creations.
Make time for arts and crafts activities in your child’s daily routine, even if it’s just 10-15 minutes a day. This can be as simple as coloring together or making a handmade card for a family member.
Brief Overview of the Article’s Content
As you dive into the world of fall art projects with kids, this article will be your ultimate guide to creating a season of creativity and fun. In the following pages, we’ll explore five easy and engaging art projects that are perfect for little ones to enjoy during the autumn months.
You can expect to discover a range of projects that cater to different age groups and skill levels, from simple leaf rubbings to more complex collage-making techniques. We’ll also provide step-by-step instructions and helpful tips to ensure a stress-free creative experience for both you and your child.
Our projects are designed to be adaptable and open-ended, allowing kids to express their imagination and creativity while having fun exploring the season’s themes and textures. You’ll find inspiration in natural materials like fallen leaves, acorns, and pinecones, as well as a variety of art supplies that will bring autumn’s vibrant colors to life.
Whether you’re a seasoned artist or a first-time crafter, this article will equip you with the confidence and know-how to embark on a series of fun and memorable fall art projects with your kids.
Project 1: Leaf Rubbings and Pressing
Get ready to explore the natural world through art, as we dive into making leaf rubbings and pressed leaves that are perfect for a fall-themed craft. It’s an easy and fun project!
Materials Needed for Fall Leaf Rubbings
To get started with creating beautiful fall leaf rubbings, you’ll need to gather some essential materials. Begin by collecting a variety of fallen leaves from trees such as oaks, maples, and birches. You can also use artificial leaves if you don’t have access to real ones. Next, grab a pack of white paper or tracing paper – the smoother the better for creating detailed rubbings.
In addition to your leaves and paper, you’ll need some coloring tools. Crayons, colored pencils, or even charcoal can work well for adding color and texture to your leaf rubbings. You may also want to have a few pieces of cardboard on hand to use as backing sheets when pressing your artwork.
Other useful materials include scissors, glue, and a brayer or credit card (for applying pressure when pressing the artwork). If you’re feeling ambitious, you could even try using natural materials like flower petals, seed pods, or small twigs to add extra interest to your leaf rubbings. With these basic supplies, you’ll be well on your way to creating stunning fall-inspired art with your kids!
Step-by-Step Instructions for Creating Leaf Rubbings
Creating leaf rubbings is a fun and creative way for kids to explore the natural world around them. To get started, you’ll need a few simple supplies: paper, a pencil or crayon, and of course, some leaves! Begin by placing a leaf under a sheet of paper, making sure it’s flat and even.
Next, place a piece of paper on top of the leaf, tracing the shape and veins with your pencil. Press down gently to ensure a clear outline. If you want more detail, try using a crayon to add color and texture. Experiment with different leaves and techniques to create unique effects.
Tips: Use real leaves for the best results – artificial ones won’t give the same level of detail. Consider adding a second layer of tracing to build up the lines and patterns. You can also use the rubbings as a starting point for further art projects, like collages or paintings.
Tips for Preserving Leaves with Pressing
Pressing leaves is a fun and easy way to preserve them for your leaf rubbings. One of the simplest methods is air-drying. To do this, place the leaves between two sheets of paper towels or blotting paper, making sure they don’t overlap. Place another sheet on top and weigh it down with something heavy like a book. Leave it alone for 2-3 weeks in a cool, dry spot. The moisture will evaporate, leaving you with crisp, delicate leaves.
If you want to speed up the process or achieve more vibrant colors, consider using a leaf press. These are specialized tools designed specifically for pressing leaves. They work by applying pressure, which helps to flatten and preserve the leaves. You can also use everyday items like heavy books or a flower press to get similar results. When using a press, make sure to add some paper towels or blotting paper between each layer of leaves for extra support.
Keep in mind that some leaves are more delicate than others. Those with soft edges or thin veins may not hold up well under pressure. Experiment with different methods and see what works best for your specific leaves.
Project 2: Pinecone Bird Feeders
Get ready for a fun and easy fall art project that will bring some joy to your backyard birds! We’ll show you how to create adorable pinecone bird feeders in just a few simple steps.
Materials Needed for Pinecone Bird Feeders
To create a pinecone bird feeder, you’ll need some basic materials that are easy to find around the house. Start by collecting a few large pinecones, as these will serve as the base of your bird feeder. You’ll also need a jar or container filled with peanut butter – creamy or crunchy works equally well.
Next, gather a variety of bird seeds, such as sunflower seeds, suet, and millet. These will provide the essential nutrition for your feathered friends. Additionally, you might want to include some chopped nuts like peanuts or almonds for extra crunch.
To assemble the feeder, use a spoon or butter knife to spread a generous amount of peanut butter onto each pinecone. This sticky substance will act as a glue to hold the seeds and other ingredients in place. Once the pinecones are fully coated, roll them in a plate or tray filled with bird seed, pressing gently to ensure everything sticks together.
Finally, use string or twine to hang your finished bird feeder from a nearby tree branch. With these simple materials and a bit of creativity, you’ll have a delightful DIY project that will attract birds to your yard all season long.
Step-by-Step Instructions for Creating Pinecone Bird Feeders
Let’s get started on creating those adorable pinecone bird feeders! This fun and easy project is perfect for kids of all ages to enjoy during the fall season. To make one, you’ll need a few simple materials: a pinecone, some peanut butter or cream cheese, birdseed, string or twine, and a stick or branch.
Begin by spreading a generous amount of peanut butter or cream cheese onto the pinecone, making sure to cover it evenly. This will act as the “glue” that holds the birdseed in place. Next, roll the pinecone in a plate of birdseed until it’s completely covered. The more seed you use, the fuller your feeder will be!
Now, tie a length of string or twine around the top of the pinecone to create a loop for hanging. You can also add a few decorations like glitter, stickers, or even a small bell to make it more appealing to the birds. Finally, attach the pinecone feeder to a nearby tree using the stick or branch as a hanger.
Hang your finished bird feeder in a sunny spot and watch as the birds enjoy their tasty treat! Remember to refill the seed periodically to ensure the birds keep coming back for more. With these simple steps, you’ll have a delightful pinecone bird feeder that’s sure to bring joy to both kids and wildlife alike.
Decorating Tips for Pinecone Bird Feeders
Now that you’ve crafted your pinecone bird feeder, it’s time to add some extra flair with natural decorations. This is where kids can get creative and let their imagination shine. Collect various natural materials like dried leaves, twigs, acorns, and even small pinecones to use as embellishments.
Start by applying a thin layer of glue to the finished bird feeder, then gently press on your chosen decorations. For added texture, try gluing on some soft moss or lichen. If you’re feeling adventurous, use a mixture of water and corn syrup to create a sticky paste that’ll hold heavier items like pinecones in place.
Consider using natural dyes like turmeric or coffee to stain the pinecone bird feeder, giving it a rich, earthy tone. Let kids experiment with arranging their decorations in different patterns and shapes – they might be surprised by how unique each design turns out. Remember to keep the decorations balanced so your finished bird feeder remains stable and secure for hanging outside. Encourage kids to observe how the natural materials change over time as they blend with the surrounding environment.
Project 3: Fall-themed Collage
Let’s get creative with our third project, a beautiful fall-themed collage that’s perfect for kids to practice their fine motor skills and explore different textures. We’ll show you how to make one together!
Materials Needed for Fall-themed Collage
To create a beautiful Fall-themed collage with your little ones, you’ll need some essential materials. Start by gathering a variety of colorful papers that resemble leaves, such as yellow, orange, red, and brown construction paper. You can also use newspaper clippings or magazine cutouts featuring autumnal images like pumpkins, acorns, or trees.
In addition to the paper, you’ll need some basic crafting supplies. A good quality glue stick is a must-have for any collage project. Make sure it’s washable and safe for kids to handle. Scissors are another crucial tool for this activity. Choose child-friendly scissors with blunt tips to prevent accidents. You may also want to include other materials like ribbons, lace, or fabric scraps to add texture and interest to your design.
Don’t forget the background paper! A large sheet of brown construction paper or a textured paper pad can provide a great base for your collage. You can also use a pre-made canvas or cardboard piece if you prefer. Finally, have some fun with it by incorporating real-life elements like dried leaves, twigs, or artificial flowers to give your project an authentic Fall feel.
Step-by-Step Instructions for Creating a Fall-themed Collage
Creating a fall-themed collage is an exciting and creative project for kids to express their love for the season. To get started, gather a variety of materials such as construction paper, scissors, glue, and magazines that feature fall images like leaves, pumpkins, and apples.
Begin by giving each child a large piece of construction paper or a canvas to serve as the base of their collage. Next, have them flip through the magazines and cut out images that remind them of fall, such as pictures of acorns, squirrels, or cozy sweaters.
Encourage kids to arrange the cut-out images on their base in a way that represents their favorite season. They can create a landscape with mountains and trees, or design a scene with pumpkins and leaves. Once they’re happy with the layout, have them glue the images into place.
To add some extra texture and depth to their collage, provide materials like tissue paper, felt, or even real leaves that kids can use to create backgrounds or accents. As they work on their collage, ask open-ended questions like “What’s your favorite part of fall?” or “How do you think the colors in this picture make you feel?”
Tips for Encouraging Creativity in Kids’ Collage Making
Encouraging creativity in kids’ collage making is an essential part of their artistic development. One way to do this is by providing a wide range of materials and textures for them to experiment with. Consider adding items like leaves, twigs, acorns, and other natural elements that can be pressed between pages or glued onto the paper. You can also incorporate various fabrics, ribbons, or lace to add texture and interest.
Another way to foster creativity is by giving kids open-ended prompts or themes. Instead of telling them what to create, ask them to make a collage about their favorite fall season activity, such as apple picking or visiting a pumpkin patch. This will allow them to think critically and come up with unique ideas.
You can also try providing unconventional materials like magazine cutouts, newspaper clippings, or even old book pages. These can be used to create interesting patterns and textures that add depth to the collage. The key is to encourage kids to explore and experiment without worrying about making mistakes. By doing so, you’ll give them the freedom to express themselves and develop their own creative voice.
Project 4: Homemade Candles
Create warm and cozy ambiance in your home with a fun fall project that’s perfect for kids to make – homemade candles infused with autumn scents. We’ll guide you through this easy DIY candle-making process.
Materials Needed for Homemade Candles
To get started on making homemade candles, you’ll need to gather some essential materials. You can find these supplies at most craft stores or online.
First and foremost, you’ll need wax – this is the main component of a candle. You can choose from various types, such as paraffin, soy, or beeswax, each with its unique characteristics and benefits. For kids, it’s best to start with a beginner-friendly option like paraffin wax.
Next up are the wicks. These come in different sizes and materials, including cotton, paper, or even synthetic fibers. Choose a wick size that suits your candle design and ensure it’s centered and straight.
A melting pot is also crucial for this project. You can use a double boiler setup or a dedicated candle-making pot specifically designed for melting wax. This will help you to heat the wax evenly without burning it.
Other necessary materials include a thermometer (for monitoring the temperature), colorants (if desired), fragrances, and molds to shape your candles into various forms. Make sure to follow proper safety precautions when working with hot equipment and flammable materials.
Step-by-Step Instructions for Creating Homemade Candles
Creating homemade candles is a fun and rewarding DIY project that can be tailored to suit various skill levels. To get started, gather the necessary materials: natural wax (such as soy or beeswax), essential oils for fragrance, cotton wick, melting pot, thermometer, colorants (optional), and mold.
Begin by melting the wax in the melting pot until it reaches a temperature of around 180-200°F. Stir occasionally to prevent burning. Next, add a few drops of essential oil to the melted wax, ensuring not to exceed the recommended amount (typically 1-3% of the total wax weight).
Allow the mixture to cool slightly before carefully placing the cotton wick into the center of the mold. Pour the wax mixture over the wick and allow it to solidify completely. To remove from the mold, dip the edges in warm water.
Tips: Experiment with different essential oils for unique fragrances and colors. Keep the melting temperature steady to prevent unevenness or bubbles.
Safety Precautions for Working with Wax and Heat
When working with wax and heat to create homemade candles for Project 4, it’s essential to take necessary safety precautions to avoid accidents. Always supervise children while they’re melting wax, as the temperature can rise quickly and cause burns. To prevent this, make sure the workspace is away from any flammable materials or overhanging objects.
When handling hot equipment, use oven mitts or heat-resistant gloves to protect your hands. Never leave a lit candle unattended, and ensure that children understand not to touch the melted wax or the wick. If you’re using a double boiler to melt the wax, keep it at a low temperature (around 180-190°F) to prevent overheating.
It’s also crucial to store flammable materials like matches and lighters safely out of reach of children. When working with wax, make sure the area is well-ventilated to avoid inhaling fumes. If you notice any unusual odors or discoloration while melting the wax, discontinue use immediately and consult an adult for assistance.
By following these simple safety guidelines, you can minimize risks and ensure a fun and successful candle-making experience with your kids.
Project 5: Nature-inspired Painting
Get ready to bring the outdoors into your child’s art space with our next project, where leaves, branches, and more become vibrant brushstrokes on a canvas. Let’s dive in!
Materials Needed for Nature-inspired Painting
To create stunning nature-inspired paintings with your kids, you’ll need to gather some essential materials. Start by collecting a variety of papers that can serve as your canvas. Construction paper, watercolor paper, and even brown paper bags can add texture and interest to your artwork.
Next, grab a selection of paints that will help bring the outdoors in. Acrylic paints are a great choice for kids, as they’re easy to clean up and come in a range of vibrant colors. Consider using earthy tones like ochre, sienna, and umber to evoke the feel of leaves, rocks, and trees.
In addition to paint, you’ll need some brushes with varying widths and textures to create different effects. Natural materials like sponges, twigs, and even a leaf or two can also be used to add unique textures and patterns to your artwork.
Other essential supplies include glue, scissors, and maybe even some natural objects like pinecones or dried flowers that you’ve collected on a walk. Don’t forget to have plenty of water and soap nearby for cleaning up spills and washable paintbrushes.
Step-by-Step Instructions for Creating Nature-inspired Paintings
Let’s get creative with nature-inspired paintings! To create these beautiful pieces, you’ll need some natural materials and a few simple art supplies. Start by collecting leaves, twigs, rocks, and other outdoor elements that catch your eye. You can also use flowers, seeds, or even shredded paper to add texture.
Next, prepare your painting surface by applying a coat of gesso or acrylic paint. This will help the natural materials adhere better. Now, it’s time to get creative! Arrange your natural materials on the canvas in a way that inspires you. You can create patterns, shapes, or even replicate the textures and colors of nature.
To add some extra details, use a mixture of water and food coloring to paint subtle hues onto the canvas. This will help blend the natural elements with your painting. For example, you could paint a soft blue wash over a leaf arrangement to evoke a sense of misty morning air. Remember, there’s no right or wrong in nature-inspired paintings – it’s all about experimenting and having fun!
Tips for Encouraging Kids to Explore Nature in Their Artwork
Encouraging kids to explore nature when making art is an essential part of nurturing their creativity and connection with the environment. Here are some fun and engaging ways to encourage kids to incorporate nature into their artwork:
When collecting materials for nature-inspired painting, take your child on a scavenger hunt around the yard or neighborhood to gather leaves, twigs, rocks, and other natural treasures. Encourage them to observe the colors, textures, and shapes of each item, and ask them to think about how they can use these elements in their artwork.
To further inspire their creativity, try incorporating real leaves into your art project. Simply press the leaves between two sheets of paper or cardstock to flatten them, and then cut out intricate designs or patterns using scissors or a craft knife. These natural shapes can add depth and interest to their paintings.
You can also use nature’s colors palette as inspiration for your artwork. Gather acorns, berries, and other natural materials to create a color wheel of earthy tones that kids can draw from when creating their masterpiece.
Conclusion: Making Arts and Crafts a Part of Your Fall Routine
As we wrap up our favorite fall art projects for kids, let’s talk about how to make arts and crafts a fun and regular part of your family’s routine this season.
Recap of Projects Covered
As we wrap up our exploration of easy fall art projects for kids, let’s take a moment to recap all the fun and creative ideas we’ve covered. We began with some delightful Leaf Rubbings, where kids can create beautiful, detailed impressions of leaves by placing them under a sheet of paper and rubbing gently with a crayon or pencil.
Next up was the Pinecone Bird Feeder project, where kids can repurpose pinecones to make a tasty snack for their feathered friends. Simply dip the pinecones in peanut butter, roll in birdseed, and attach a string – voila! A simple yet effective way to get your kids involved with nature.
We also explored Fall Collage-making, which is perfect for little ones who love crafting and exploring textures. Gather old magazines, scissors, glue, and let the creativity flow as kids cut out fall-themed images to create their own collage masterpieces.
Tips and variations for each project are included throughout the article, so be sure to check back if you need a refresher or want to try something new. With these easy and engaging projects, your little ones will have a blast expressing themselves creatively this fall season!
Importance of Continuing to Engage with Arts and Crafts
As you settle into the rhythm of fall, it’s essential to remember that arts and crafts activities are not just for back-to-school season. Continuing to engage with these creative pursuits throughout the fall season is crucial for kids’ cognitive, emotional, and social development.
Engaging in regular arts and crafts activities helps children develop their fine motor skills, hand-eye coordination, and problem-solving abilities. As the seasons change, kids need opportunities to express themselves creatively and explore new materials and techniques. For example, you can try making leaf rubbings using real leaves collected from your yard or neighborhood.
Additionally, arts and crafts provide a healthy outlet for kids’ emotions and energy levels during the fall season. With Halloween festivities, Thanksgiving preparations, and cozying up by the fireplace, there’s no shortage of inspiration to get creative! Make time for regular arts and crafts sessions with your child, even if it’s just 15-20 minutes each day.
Remember, it’s not about creating perfect art; it’s about having fun and exploring your creativity together.
Frequently Asked Questions
How can I adapt these fall art projects for older kids or teenagers?
To cater to the interests of older kids, consider adding more complexity to the projects by incorporating additional materials or techniques. For example, you could add textures, patterns, or abstract elements to their artwork. This will challenge them creatively and allow them to express themselves in a more sophisticated way.
What if I don’t have access to natural materials like leaves or pinecones?
Don’t worry! You can easily substitute these materials with synthetic alternatives or repurpose items from around the house. For instance, you could use paper leaves or artificial flowers instead of real ones. This will ensure that your kids can still enjoy the project without having to venture outdoors.
How do I encourage my child to be creative and think outside the box?
The key is to provide a supportive environment where they feel free to experiment and make mistakes. Encourage them to take risks, explore different textures and colors, and express their thoughts and feelings through art. You can also display their artwork in prominent places around the house to foster pride and motivation.
Can I use these fall art projects as educational tools for homeschooling?
Absolutely! These projects are designed to be fun and engaging while promoting learning and development. By incorporating them into your homeschooling routine, you can help your child learn about seasons, nature, and science in a hands-on way. Be sure to adjust the complexity level according to their age and skill level.
What safety precautions should I take when working with wax or heat for homemade candles?
When working with wax or heat, it’s essential to maintain proper ventilation and ensure that your child is at a safe distance from the equipment. Also, use protective gear like gloves and goggles to prevent burns or eye injuries. Be sure to follow all manufacturer instructions and take regular breaks to avoid fatigue.