
Pine cone crafts are a great way to get creative with nature, and they’re perfect for kids! With just a few simple materials, you can create beautiful and unique decorations that add a personal touch to your home. But why settle for boring store-bought ornaments when you can make your own using pine cones? Not only is it fun and educational, but it’s also an excellent way to teach your little ones about the importance of recycling and sustainability.
In this article, we’ll show you how to make a variety of easy and creative pine cone crafts that are perfect for kids. From festive holiday ornaments to bird feeders and more, we’ve got step-by-step guides and safety tips to ensure a fun and stress-free crafting experience. By the end of this post, you’ll be armed with the knowledge to create your own pine cone masterpieces and inspire a new generation of crafty kids!
Introduction to Pine Cone Crafts
Let’s get creative with pine cones! In this next part, we’ll explore the basics of using pine cones as a craft material and some super fun project ideas for kids.
What Are Pine Cones?
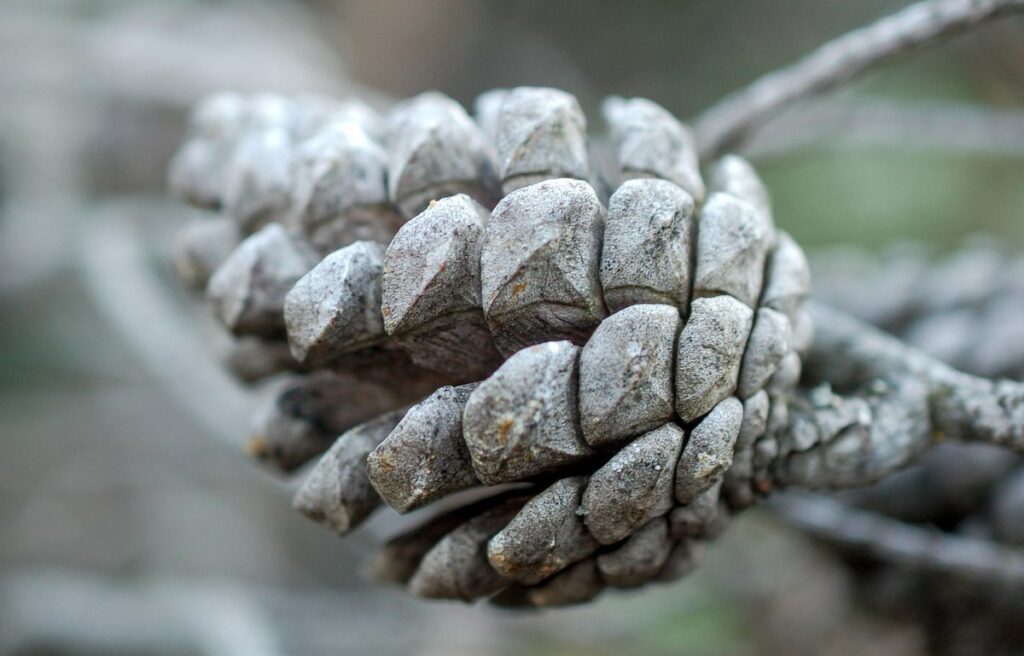
Pine cones are an essential and fascinating part of nature. You might have noticed them lying on the ground in parks, forests, or even your own backyard after a tree has shed its load. Pine cones are the reproductive structures of pine trees, responsible for producing seeds that will grow into new trees.
As they mature, pine cones turn brown and open up to release their seeds, which are carried away by wind, animals, or water. This process is crucial for the survival and propagation of pine tree species. In nature, pine cones come in different shapes, sizes, and colors depending on the type of tree they belong to.
In many cultures, pine cones have also been used symbolically and ritually. For example, in some Native American traditions, pine cones are believed to possess spiritual significance and are used in ceremonies and rituals for purification and protection.
As a crafty parent or caregiver, it’s wonderful that you’re interested in exploring the world of pine cone crafts with kids! By doing so, not only will they learn about the importance of these natural wonders but also develop their creativity and problem-solving skills.
Benefits of Using Pine Cones in Crafts
Using pine cones in crafts is not only fun and creative but also offers numerous benefits for kids. One of the most obvious advantages is their natural beauty. Pine cones have an inherent charm that can add a touch of rustic elegance to any craft project. Their unique shape, texture, and color make them a great addition to various art forms.
Moreover, using pine cones in crafts provides an excellent opportunity for kids to learn about nature and the environment. By working with pine cones, children can develop an appreciation for the natural world and understand the importance of conservation. For instance, you can collect pine cones from your backyard or a nearby park, teaching kids about the different types of trees that produce them.
Pine cone crafts also promote fine motor skills, hand-eye coordination, and creativity in children. As they work with pine cones, kids develop problem-solving skills and learn to think outside the box. Plus, it’s an excellent way to reuse and recycle natural materials, reducing waste and promoting sustainability.
Gathering Materials: Where to Find Pine Cones
When it comes to creating pine cone crafts with kids, one of the most important steps is gathering the materials. But where can you find these prickly yet perfect craft supplies? The answer is all around you! You can collect pine cones from various sources, depending on your location and preferences.
Start by checking your own backyard or neighborhood park. Pine trees are common in many areas, and fallen pine cones can be easily collected. Simply walk through the area with a bucket or bag to gather as many pine cones as you need. If you’re unable to find any locally, try visiting nearby trails or nature reserves. Many parks also offer designated collecting areas for natural materials like pine cones.
For an added twist, consider using artificial pine cones from craft stores or online retailers. These can be a great option if you live in an area with few pine trees or want to ensure consistency in your crafts. Remember to always check local regulations before collecting any natural materials, and make sure to clean and dry the pine cones thoroughly before using them for crafting purposes.
Types of Pine Cone Crafts Suitable for Kids
Let’s dive into the fun world of pine cone crafts and explore some creative projects that kids can make, from wreaths to ornaments and more. We’ll discover the perfect ideas for little hands to get crafty!
Decorative Pine Cone Ornaments
Decorating pine cones with glue, glitter, and other materials is a fun and easy way to create beautiful ornaments for your home. To get started, gather a few basic supplies: pine cones of various sizes, white glue, glitter in different colors, scissors, string or twine, and any additional embellishments you like (such as stickers, sequins, or beads). Begin by applying a small amount of glue to the pine cone and sprinkle with glitter. Make sure to cover the entire surface for maximum sparkle.
To add extra flair, try layering multiple colors of glitter or using different shapes and sizes of sparkly materials. You can also use glue to attach other decorative items like stickers or beads directly to the pine cone. Once dry, tie a length of string or twine around the top of the ornament to create a loop for hanging.
For an added touch, let your kids get creative with paint or markers on the pine cones before gluing on the glitter. This can add an extra layer of personality and make each ornament truly unique.
Pine Cone Bird Feeders
Making a pine cone bird feeder is an entertaining and educational craft for kids that teaches them about nature and wildlife. To make one, start by collecting pine cones of varying sizes. Spread peanut butter on each pine cone, making sure to cover it evenly. This will act as the “glue” to hold the birdseed in place. Next, roll the peanut-butter-coated pine cone in a plate or tray filled with birdseed until it’s fully coated. Some kids might find this step fun, watching the birdseed stick to the peanut butter.
As an added touch, consider adding a few suet balls or sunflower seeds for extra nutrition and interest. Once your feeder is complete, simply hang it from a nearby tree using a piece of twine or fishing line. Kids will love watching the birds visit their handmade creation, and it’s not uncommon to see several species visit in a single day.
Tips: To make this craft even more engaging, have kids predict which types of birds they think will be attracted to their feeder based on the birdseed used.
Pine Cone Potpourri
Creating pine cone potpourri is a fun and easy project that kids can help with. To make this craft, you’ll need some basic materials like pine cones, dried flowers, essential oils, and a few household items. Start by gathering a variety of pine cones in different shapes and sizes. You can also add some decorative items like ribbons or twine to give it a personal touch.
Next, choose your favorite essential oils and add a few drops to the mixture. Some popular options include lavender, peppermint, and eucalyptus. Mix the essential oils with some dried flowers like rose petals, baby’s breath, or marigold. You can also use other dried flowers or herbs like mint, chamomile, or thyme.
To assemble the potpourri, place a layer of pine cones at the bottom of a decorative jar or container. Add a layer of dried flowers and essential oils on top of the pine cones. Repeat this process until you reach the top of the jar, finishing with a layer of pine cones. This is where kids can get creative and add their own personal touch.
This potpourri mixture will not only look beautiful but also have a lovely scent. You can use it to freshen up your home or give it as a thoughtful gift to friends and family.
Materials Needed for Pine Cone Crafts
Now that we’ve gathered ideas and inspiration, it’s time to think about what you’ll need to bring those creative pine cone crafts to life. Let’s take a look at the materials required for some fun and easy projects.
Collecting and Preparing Pine Cones
When it comes to crafting with pine cones, having the right materials is essential. Collecting and preparing pine cones requires some effort, but it’s a fun process that kids can enjoy. Start by collecting pine cones from your backyard or a nearby park. Look for cones with interesting shapes, sizes, and colors – this will add visual appeal to your crafts.
Once you’ve collected enough pine cones, rinse them gently with water to remove any dirt or debris. This is also a good time to sort the cones into different categories based on their size and shape. You can use smaller cones for ornaments or garlands, while larger cones are better suited for wreaths or centerpieces.
Drying is an essential step in preparing pine cones for crafting. You can air-dry them by placing them in a single layer on a paper bag or tray. Alternatively, you can speed up the process by placing them in a low-temperature oven (150°F – 200°F) for a few hours. Whichever method you choose, make sure to dry the pine cones completely before using them in your crafts.
When selecting pine cones, look for those that are free from mold or mildew. This will ensure that they last longer and maintain their texture. Also, be mindful of any regulations in your area regarding the collection of plant materials. With these simple steps, you’ll have a batch of clean, dry pine cones ready to use in all sorts of creative projects!
Other Essential Crafting Materials
When working with pine cones, there are several essential materials you’ll need to create a variety of fun and creative crafts. In addition to pine cones themselves, some must-haves for your craft station include glue – both white school glue and hot glue guns work well for different projects.
You’ll also want to have a selection of scissors on hand, as they’re perfect for cutting out shapes or trimming excess materials from your pine cone creations. Paint is another essential item in your crafting arsenal, allowing you to add color and personality to your finished projects. Markers and colored pencils can be used to add more detailed designs or patterns.
Other useful items include a craft knife or X-Acto knife for precision cutting, a paintbrush for applying even coats of paint, and a surface protector like newspaper or a tablecloth to contain any messes. Don’t forget to have some paper towels or cleaning wipes on hand for easy cleanup. By having these basic materials at the ready, you’ll be well-equipped to tackle a wide range of pine cone craft projects with your kids.
Tips for Working with Kids in the Craft Room
When working with kids in the craft room, it’s essential to ensure their safety and engagement. First, make sure the space is child-friendly by clearing any breakable items and covering work surfaces with paper or a tablecloth.
To keep kids occupied and creative, provide them with a variety of pine cone crafts that cater to different ages and skill levels. For younger children, try simple activities like painting or decorating pine cones with glue and glitter. Older kids can engage in more complex projects such as making pine cone bird feeders or wreaths.
Encourage kids to explore their creativity by offering an assortment of materials like string, beads, sequins, and artificial snowflakes. Supervise children closely, especially when using scissors or hot glue guns, to avoid any accidents.
To make the crafting experience even more enjoyable for kids, consider setting up a ‘make-and-take’ station where they can create their own pine cone crafts to take home. This not only keeps them engaged but also allows parents to relax and observe their child’s creativity unfold.
Safety Precautions and Tips
Before you start crafting with pine cones, it’s essential to follow some basic safety guidelines to ensure a fun and hazard-free experience for your little ones. This includes handling sharp objects and hot glue guns carefully.
Allergic Reactions to Pine Cones
When working with pine cones on crafts, it’s essential to be aware of potential allergic reactions. While rare, some people may experience skin irritation or respiratory issues due to the plant sap and resin found in pine cones. If you’re planning a craft session with kids, make sure to take necessary precautions.
Start by checking if anyone participating has any known allergies to pine trees or other plants that produce similar sap. If you notice any redness, itching, or swelling after handling pine cones, wash the affected area immediately and apply a topical cream or ointment. In severe cases, consult a doctor for further guidance.
To minimize risks, ensure your workspace is well-ventilated, and avoid crushing or breaking pine cones to release their sap. Instead, opt for whole or slightly opened cones that can be handled carefully without releasing too much resin. By being mindful of these precautions, you can create fun and engaging crafts with your kids while prioritizing their safety and well-being. Remember, it’s always better to err on the side of caution when introducing new materials into a craft session.
Proper Handling of Crafting Materials
When working with various materials to create pine cone crafts for kids, it’s essential to handle and store crafting supplies properly to avoid accidents. Start by teaching children the correct way to hold scissors, glue, and other tools to prevent injuries.
Make sure kids understand that sharp objects like scissors should be held firmly but gently in a comfortable grip, with their dominant hand guiding the blade and the non-dominant hand supporting it. This will help them develop control and avoid accidents.
When handling sticky substances like glue, supervise children closely and encourage them to use the correct amount needed for each project. It’s also crucial to store materials safely, such as keeping scissors in a designated container out of reach when not in use and labeling containers with their contents.
Labeling your supplies is an easy way to ensure everyone knows what they are working with. By being mindful of how you handle crafting materials, kids will be more likely to develop safe habits that can benefit them in other areas of life as well.
Encouraging Creativity in Kids
When working with kids and pine cone crafts, it’s essential to create an environment that encourages creativity and imagination. One way to do this is by providing a variety of materials and letting them take the lead in the creative process.
To foster their creativity, try giving open-ended projects that don’t have a specific end result. For instance, you can give your child a pine cone, some glue, and a few different types of string or yarn, and ask them to create something entirely new. This allows them to experiment with different textures and colors without feeling confined by a set outcome.
Another approach is to provide examples of what others have created using pine cones, but don’t show them the final result. Ask your child to come up with their own ideas based on what they’ve seen, rather than simply replicating someone else’s work.
Remember, the goal is to let your child’s imagination run wild and see where it takes them. Be patient, and offer guidance only when needed. By giving them the freedom to create, you’ll be amazed at what they come up with!
Advanced Pine Cone Crafts for Older Children
For older kids who are ready for a creative challenge, we’ll explore more intricate and detailed pine cone craft projects that will test their skills. These ideas are perfect for refining their crafting techniques.
Mosaic Art Using Pine Cones
Creating mosaic art using pine cones is a more advanced craft project that’s perfect for older children who have some experience with crafting. This project combines natural elements like pine cones with man-made materials like tile pieces to create unique and beautiful artworks.
To start, gather the necessary materials: a variety of pine cones in different shapes and sizes, white glue, a surface to work on, tile pieces in various colors, and a design or pattern in mind. Children can choose from pre-designed templates or freehand their own design.
The process begins by applying a thin layer of white glue to the surface and arranging the pine cones into the desired shape or pattern. Once the pine cones are secure, children can start adding tile pieces to fill in any gaps and create texture and depth. This is where creativity really shines – kids can experiment with different patterns, colors, and textures to create a one-of-a-kind piece.
As they work, encourage children to think about the colors and shapes of the tile pieces and how they relate to the natural world of pine cones. For example, they could arrange tiles in a gradient pattern to mimic the sunset hues or create a geometric design using different tile colors.
When working with this project, remember that patience is key – it may take several days for the glue to dry completely, allowing children to admire their finished artwork without the risk of damage. This project offers an excellent opportunity for kids to develop fine motor skills, problem-solving abilities, and critical thinking while expressing themselves creatively through art.
Pine Cone Wreaths
Making a pine cone wreath is a fun and creative project that older children can enjoy. To start, gather materials such as pine cones of various sizes, wire (preferably floral wire), scissors, hot glue gun (for adult use only), decorative items like ribbons or bows, and a Styrofoam or foam ring to serve as the base of the wreath.
Begin by sorting the pine cones according to size so you can create a visually appealing design. Next, start attaching the pine cones to the wire using floral tape or hot glue (with adult assistance). You can arrange them in a circular pattern or get creative and make a more abstract design. Once you’ve attached all the pine cones, trim any excess wire and fluff out the cones for a more natural look.
To add some extra flair, use decorative items like ribbons or bows to tie around the base of the wreath or hang a few sprigs of greenery from it. Encourage your child to experiment with different materials and designs to make their pine cone wreath truly unique. With patience and practice, they’ll be creating beautiful pine cone wreaths in no time!
Pine Cone Collages
Creating a pine cone collage is an excellent way to encourage older children to think creatively and experiment with different textures and colors. To get started, gather a variety of pine cones in different shapes and sizes, along with other materials like leaves, flowers, and twigs. You’ll also need a suitable adhesive, such as white glue or a hot glue gun.
Begin by laying out the base of your collage on a piece of cardboard or paper. Encourage children to arrange their pine cones in a composition that appeals to them, considering balance, texture, and color. Once they’re happy with the arrangement, have them apply glue to the back of each pine cone and attach it to the base.
For added depth and interest, suggest incorporating other natural materials like leaves or flowers into the collage. You can use a mixture of glue and water to create a more subtle bond between the elements, allowing for easier removal if needed. Encourage children to experiment with different layering techniques and textures, such as pressing pine cones into a bed of dried flowers or arranging them on top of a leafy branch.
Conclusion and Next Steps
Now that you’ve created some amazing pine cone crafts, it’s time to wrap up our project and think about where to go next with your creative skills.
Recap of Key Takeaways
As we come to the end of our journey into the world of pine cone crafts for kids, let’s recap some of the key takeaways. We’ve discussed the numerous benefits of engaging children in craft activities, from promoting creativity and fine motor skills to providing a calming outlet for stress.
We explored various types of crafts that can be made using pine cones, including decorative vases, bird feeders, and even gift decorations. Each project offers a unique opportunity for kids to learn new techniques and express themselves through art.
Of course, safety is always a top priority when it comes to crafting with children. We highlighted the importance of adult supervision, proper tool handling, and using protective gear such as gloves and goggles. By following these simple precautions, kids can enjoy the creative process while staying safe.
Remember, the beauty of pine cone crafts lies in their simplicity and adaptability. Encourage your child’s imagination by experimenting with different materials, shapes, and colors. With a little creativity and patience, you’ll be amazed at the incredible creations they come up with!
Encouraging Further Exploration
As you and your little ones have just started exploring the world of pine cone crafts, it’s only natural to wonder what other creative possibilities await. Don’t worry if you’ve exhausted our initial ideas – there are countless ways to repurpose these versatile decorations. To encourage further exploration, let’s dive into a few more ideas that’ll spark imagination and creativity.
Consider making pine cone bird feeders or even ornaments by dipping them in paint or glitter for a colorful touch. You can also create a stunning centerpiece by arranging pine cones of different shapes and sizes with some decorative twigs and pebbles. For an eco-friendly approach, use natural materials like leaves, flowers, or seeds to create a unique arrangement.
To discover more ideas, you can explore websites like Pinterest, which has a treasure trove of DIY crafts and tutorials. Many online communities also share their creations, providing valuable inspiration and tips for beginners. By experimenting with different pine cone arrangements and exploring various themes, you’ll soon find yourself creating masterpieces that’ll make everyone smile. So don’t be afraid to get creative – the world of pine cone crafts is full of endless possibilities!
Frequently Asked Questions
How Do I Clean and Prepare Pine Cones for Crafting?
Make sure to gently brush off any dirt, leaves, or debris from the pine cones using a soft-bristled brush. You can also soak them in warm water mixed with a few drops of mild dish soap to remove any stubborn residue. Dry the pine cones thoroughly before starting your craft project.
What If I Don’t Have Access to Pine Cones in My Area?
Don’t worry! You can also purchase dried or artificial pine cones online or at local craft stores. Some craft suppliers even offer a variety pack with different shapes and sizes. Consider purchasing them for added convenience, especially if you’re short on time.
Can I Use Fresh Pine Cones Instead of Dried Ones?
Yes, but be aware that fresh pine cones may not hold their shape well when used in crafts. They can also make a mess with sap or pollen. If you still want to use fresh pine cones, consider using them for projects like wreaths or potpourri where the natural scent and texture are desired.
How Can I Encourage Kids to Be Creative with Pine Cones?
Encourage kids to experiment with different materials and techniques, like gluing pine cones onto a picture frame or making a mobile with multiple pine cone components. You can also provide a variety of craft supplies and challenge them to come up with their own unique ideas.
Are There Any Health Risks Associated with Using Pine Cones in Crafts?
No, but it’s essential to note that some people may be allergic to pine pollen or sap. If you have sensitive skin or allergies, consider wearing gloves when handling pine cones. Always supervise children while they work on craft projects involving pine cones.