
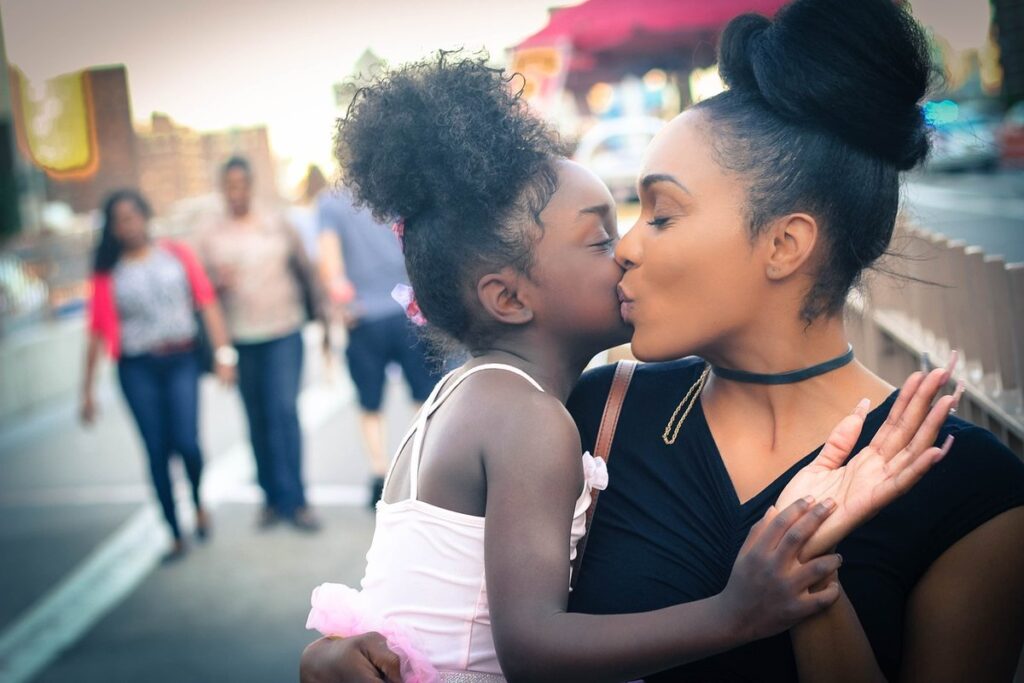
Are you struggling to find the perfect way to show your mom how much she means to you this Mother’s Day? Don’t worry, we’ve got you covered. Creating DIY cards with your kids is not only a fun activity but also a great way to make Mom feel special and loved.
You can easily create unique and heartfelt Mothers Day cards using simple materials like paper, glue, scissors, and paint. With these easy DIY ideas and tips, you’ll be able to craft something truly personalized and meaningful for mom. This article will share some creative ways to involve your kids in the process of making a special card for Mother’s Day. Get ready to make this day even more memorable with the help of your little ones!
Why Make Your Own Mother’s Day Cards?
Let’s be honest, store-bought cards can get a bit… generic. Making your own Mother’s Day card is a thoughtful way to show Mom you care and put your personal touch on the day.
Importance of Personalized Gifts
When you give someone a gift that’s been thoughtfully crafted just for them, it sends a powerful message: “I care about you and I’m willing to put in the effort to show it.” That’s especially true when it comes to handmade Mother’s Day cards from kids. What makes these gifts so special is the personalized touch they bring.
A handwritten note or drawing from your child conveys that you’ve taken the time to think about what mom loves and wants to make her happy. It’s not just a card – it’s a declaration of love and appreciation. Even if the artistic skills are limited, the thought behind it shines through. Remember, it’s the heart that matters, not perfection.
To take it a step further, consider incorporating personal details that your child knows mom will appreciate. This could be a favorite hobby, inside joke, or memory you’ve shared together. The more specific and sincere the gesture is, the more it will mean to mom. By putting in this extra effort, you’re showing your child that they matter just as much as the gift itself – and that’s what makes handmade cards truly unforgettable.
Breaking the Tradition: Why Store-Bought Cards Might Not Be Enough
Store-bought Mother’s Day cards have become a staple for many families, but they often fall short in conveying the true sentiment of love and appreciation. These pre-made cards can come across as impersonal and lacking in creativity. For instance, if you walk into most greeting card stores, you’ll find the same generic designs and messages repeated over and over again.
A DIY Mother’s Day card, on the other hand, offers an unparalleled level of personalization and originality. By involving your child in the creative process, they can express their unique personality and relationship with mom in a way that store-bought cards simply can’t match. For example, you could encourage your child to draw or paint a picture of themselves and mom doing something special together.
By making your own Mother’s Day card, you’re not only saving money but also creating an irreplaceable keepsake that will be cherished for years to come. With a little creativity and imagination, the possibilities are endless – from handprint art to heartfelt poems, every DIY card is a reflection of love and effort that speaks volumes about your child’s appreciation for mom.
Materials and Supplies Needed
Now that you have some great ideas for DIY Mother’s Day card designs, let’s take a look at what materials and supplies you’ll need to bring your creations to life.
Basic Crafting Tools and Equipment
When it comes to creating beautiful DIY Mother’s Day cards with your kids, having the right basic crafting tools and equipment is essential. You’ll be surprised at just how much you can create with a few simple supplies.
First and foremost, you’ll need a good pair of scissors. Kids love using safety scissors or blunt-tipped craft scissors that are designed for little hands. These types of scissors are perfect for cutting paper, cardstock, and even lightweight fabric. Don’t forget to also have a pair of adult scissors on hand for more precise cuts.
Glue is another must-have when it comes to crafting with kids. Choose a washable glue stick or a school glue that’s easy to clean up. You can also use double-sided tape or a hot glue gun (with adult supervision, of course!) for added dimension and texture.
A paper cutter or craft knife is also a great addition to your crafting arsenal. These tools allow you to make precise cuts in cardstock and other materials. Remember to always supervise young children when using these types of tools.
Decorative Materials: Paper, Stickers, and More
When it comes to making DIY Mother’s Day cards for kids, decorative materials can add an extra layer of fun and creativity. Let’s explore some popular options that can inspire young artists.
Stickers are a great starting point – they come in various shapes, sizes, and designs, from simple hearts to intricate flowers. Kids love sticking them onto the card, creating patterns and images that reflect their personality. Consider using washable stickers or those with a textured finish for added interest.
Stamping is another fun technique that can add depth and dimension to your design. Choose alphabet or shape stamps in different colors to create a personalized message or image. Ribbons and bows are also easy to use, adding a touch of elegance to the card. Simply glue them onto the design or use them as a border.
Glitter is a classic choice for DIY cards – but be mindful not to overdo it! A pinch of glitter can add magic to your design without overwhelming the card. For a more subtle look, try using metallic paper or foil stickers that catch the light.
Easy DIY Card Ideas for Kids
Let’s get creative and make some special handmade cards for Mom. In this next part, we’ll share easy DIY card ideas that kids can make themselves!
Simple Handprint Cards
Creating adorable handprint cards is a wonderful way to capture your child’s tiny impression on Mother’s Day. Not only are they easy to make, but they also become treasured keepsakes for years to come. To create these simple yet charming cards, you’ll need just a few basic supplies.
Gather a piece of cardstock or construction paper, washable paint or markers, and a paintbrush (optional). You can choose your child’s favorite colors or stick with traditional pink and red for a classic look. If using paint, have your little one dip their hand in the paint and stamp it onto the paper to create a unique design. For a more refined look, you can use a paintbrush to help guide their handprint.
If markers are more your child’s speed, encourage them to draw around their hand with their favorite color. You can even add some fun embellishments like glitter, stickers, or stamps to make the card truly special. Remember, it’s all about having fun and celebrating Mom in a way that feels creative and personal to your child.
For an extra-special touch, have your child write “I love you, Mom” or their name on the inside of the card. This thoughtful gesture will surely melt Mom’s heart.
Photo Collage Cards
Creating photo collage cards is a thoughtful and personalized way for kids to show their love and appreciation on Mother’s Day. Start by gathering pictures from special memories you’ve shared together as a family, such as vacations, birthdays, or everyday moments. You can also include photos of the child’s artwork, sports achievements, or other milestones.
Encourage your little ones to get creative with the collage process! Let them choose their favorite photos and arrange them in a way that tells a story or expresses their love for Mom. You can use glue, scissors, and other craft supplies to create a visually appealing design.
For example, you could make a collage of pictures from a family vacation, with captions or quotes that describe the memories they made together. Or, create a “Mom’s Favorites” collage featuring photos of her most-loved moments as a mom.
Tips: Use a mix of big and small pictures to add visual interest. Encourage your child to write captions or messages under each photo to make it more personal. Have fun with the process, and don’t worry if it gets messy – that’s all part of the creative journey!
3D Flower Cards
Creating beautiful flower designs is a great way to add an extra touch of love and care to your handmade Mother’s Day cards. With just some paper, glue, and a little creativity, you can make stunning 3D flower cards that will surely delight the moms in your life.
To start, cut out petal shapes from colored paper, making sure they are all identical so your flowers look uniform. You’ll need multiple layers of petals to achieve the 3D effect. Next, apply a thin layer of glue to the center of each petal and gently attach it to the center of the flower. Continue adding more layers, allowing each one to dry before adding the next.
For an added dimension, try using foam or paper strips to create the center of your flowers. This will give them a raised look that’s both visually appealing and textured. Experiment with different colors and petal arrangements to make each card unique – just like Mom!
Tips and Tricks for Perfect DIY Cards
Now that you’ve created your adorable DIY Mother’s Day cards, let’s dive into some expert tips to take them from cute to truly special. Get ready to elevate your craft!
Encouraging Creativity and Experimentation
When working on DIY Mother’s Day cards with kids, it’s essential to encourage creativity and experimentation. This means creating a safe space where they can try new techniques and materials without fear of making mistakes.
One way to do this is by setting clear expectations that it’s okay to fail. Let your child know that making mistakes is an essential part of the creative process and that you’re there to support them, not judge their work. This mindset shift will help them feel more confident in exploring different ideas and techniques.
You can also try incorporating various materials like paint, markers, glue, and scissors into your craft session. Encourage kids to experiment with layering colors, textures, and shapes to create unique designs. For instance, you could use a combination of watercolor paints and glitter glue to add an extra touch of sparkle to their artwork.
Remember to lead by example! Show your child that it’s okay to try new things and make mistakes by being willing to take risks yourself. By doing so, you’ll not only inspire their creativity but also create lasting memories together.
Making it Count: Adding Meaningful Messages Inside the Card
When it comes to creating a DIY Mother’s Day card for kids, it’s not just about slapping together some construction paper and glue. The real magic happens when you add meaningful messages or personal anecdotes that make the card truly special.
Think back to all the sweet memories you’ve made with your mom – from lazy Sunday mornings to helping her in the kitchen on a busy weeknight. Write down those tiny moments, no matter how insignificant they may seem, and include them inside the card. For example, you could write something like: “Mom, I remember the time we made pancakes together and you let me wear your favorite apron – it was the best day ever!”
You can also try incorporating inside jokes or special phrases that are just between the two of you. This will make the card even more personal and meaningful to your mom. For instance, if she always says “I love you more than ice cream,” write that on the inside of the card – it’ll bring a smile to her face every time.
Don’t forget to include messages of appreciation and gratitude as well. Expressing how much your mom means to you will make her feel loved and cherished. Some examples might be: “Thank you for being my rock, Mom,” or “I’m so lucky to have a mom like you.”
Avoiding Overcomplication: Tips for Simplicity
When working with kids on DIY Mother’s Day cards, it’s easy to get caught up in making something overly elaborate and complicated. However, this can often lead to frustration for both you and the child, resulting in a card that may not even resemble what they initially envisioned.
To avoid overcomplicating things, try to keep the design process simple by focusing on one or two main elements. This could be a single color palette, a few basic shapes, or a short phrase written in a fun font. By keeping things straightforward, you’ll find that your child’s creativity is able to shine through more effectively.
Consider providing examples of simple yet effective designs for DIY cards, such as hand-drawn flowers, polka dots, or simple stickers. These types of elements can be combined in countless ways to create unique and personalized cards without feeling overwhelmed by too many options. By keeping things easy and fun, you’ll not only save yourself time but also help your child feel more confident in their creative abilities.
DIY Mother’s Day Card Projects for Different Ages
Whether you’re a preschooler or a preteen, we’ve got fun and creative DIY card projects that will help your little ones show their love and appreciation to mom. Let’s get crafting!
Preschooler-Friendly Crafts: Simple and Adorable Ideas
Preschoolers love to create and express themselves through art, making them perfect candidates for DIY Mother’s Day card projects. When it comes to involving preschoolers in crafting their own cards, simplicity is key. Here are some adorable ideas using materials like playdough, crayons, and finger paints.
For a fun playdough project, try shaping the dough into heart shapes or letters that spell out “Mom” or “I Love You.” Let your child’s creativity shine by adding facial features to their handprint, foot print, or finger paint artwork. Finger painting is another great way to encourage little artists, and you can even use stencils or stamps with pre-made designs.
To make it even more special, have your child decorate a card with crayons or markers. They can draw pictures of their favorite things, like flowers, animals, or toys. Don’t forget to include a personal message that says how much they love and appreciate their mom. Remember, the most important thing is to have fun and make it a bonding experience for both you and your child!
School-Age Kids’ Projects: More Complex and Intricate Designs
For school-age kids who have mastered basic crafting techniques, it’s time to take their DIY Mother’s Day card projects to the next level. These children are now ready for more complex and intricate designs that showcase their creativity and skills.
One technique you can try with older kids is layering. This involves creating multiple layers of paper or cardstock to add depth and dimension to their design. For example, you can have them cut out a flower shape from one piece of paper and then use another color to create the center. They can also use stencils to add intricate patterns or designs to their card.
When introducing layering techniques, start with simple projects like creating a 3D flower using multiple layers of colored paper. As they become more confident, encourage them to experiment with different shapes and colors. Stenciling is another technique that’s perfect for school-age kids who want to add intricate details to their cards. They can use stencils in various shapes and sizes to create patterns or designs on their card.
Conclusion
Now that you’ve created some beautiful DIY Mother’s Day cards, it’s time to wrap up our creative process with a few final thoughts and inspiration for next year. Let’s recap what we’ve learned together!
Final Thoughts on DIY Mother’s Day Cards
As we come to the end of our DIY Mother’s Day card-making journey, it’s essential to remember that the most crucial element behind these handmade cards is not just the creativity and effort put into them but also the love and appreciation they convey. When kids create their own cards for their mothers, they’re not just making a gift; they’re expressing their feelings and gratitude in a way that’s truly unique and personal.
Handmade cards are often the most cherished mementos families keep long after Mother’s Day has passed because of the thought and effort that goes into each one. They become a tangible representation of the love and bond between family members, serving as a reminder of the special moments shared together.
As you continue to explore your creativity with DIY projects, remember that it’s not just about the end result but also the process itself. The laughter, chatter, and quality time spent with your kids while making these cards are what truly make them special. Encourage your little ones to experiment with different materials, colors, and designs until they find a style that feels authentic to them.
To take their creativity to the next level, try incorporating activities like stamp-making, stenciling, or even 3D elements into your DIY card project. These small additions can add an extra layer of depth and personality to each card, making it truly one-of-a-kind.
Frequently Asked Questions
What if my child is not artistic, can they still make a meaningful Mother’s Day card?
While artistic skills are not necessary to create a heartfelt DIY card, you can encourage your child to express their love and appreciation through words or simple drawings. Focus on the thought and effort rather than the aesthetic appeal.
How do I involve younger children in the crafting process without making it overwhelming for them?
For preschoolers, start with simple projects like handprint cards or finger painting. Use large sheets of paper, washable paint, and encourage their creativity while keeping expectations low. For older toddlers, introduce basic cutting skills and let them help assemble the card.
What if I’m short on time, can I still create a DIY Mother’s Day card with my kids?
Absolutely! You don’t need to spend hours crafting an elaborate design. Keep it simple by using pre-cut shapes or stickers. Focus on making the experience enjoyable for your child and have them help you assemble the final product.
Can I use recycled materials for our DIY cards, and are they a good idea?
Yes! Using recycled materials is a great way to teach children about sustainability while creating something unique and personalized. Think old maps, music sheets, or cardboard tubes – get creative with what you can repurpose!
How do I balance letting my child’s creativity shine with ensuring the final product is still meaningful for Mom?
Encourage your child to express themselves freely, but also guide them towards adding a personal message or inside joke that will make the card special for mom. This way, they’ll feel proud of their creation and know it’s loved by both you and mom.