
The holiday season is just around the corner, and you know what that means – it’s time to get creative with your Christmas decor! Making Christmas cone decorations with kids can be a fun and memorable experience for the whole family. Not only do these adorable cones add a festive touch to your home, but they also make wonderful gifts or party favors. But before you start crafting, have you thought about how to make them safe for little hands? And what about display ideas to show off your child’s masterpiece?
In this article, we’ll guide you through the process of making and decorating Christmas cone decorations with kids, including essential materials and step-by-step guides. We’ll also share creative variations, safety considerations, and brilliant display ideas to enhance your holiday celebrations. Whether you’re a parent looking for a fun activity or a party host seeking unique decor ideas, we’ve got you covered. Let’s get crafting!
Understanding the Concept of Christmas Cone Decorations
Let’s dive into the concept behind these adorable decorations and explore why kids love them so much, and what makes them a holiday favorite.
What are Christmas Cone Decorations?
Christmas cone decorations are a delightful and festive way to add some holiday cheer to your home. Essentially, they’re decorated paper cones that can be filled with treats, ornaments, or other small gifts. The significance of Christmas cone decorations lies in their ability to spark imagination and creativity, making them an excellent activity for kids.
One of the best things about Christmas cone decorations is how easy they are to make. All you need is a paper cone, some glue, scissors, and your child’s imagination. You can fill the cones with popcorn, candy, or small toys, or even use them as mini gift holders. This fun activity encourages kids to think creatively and get involved in the holiday preparations.
To get started, grab a paper cone from a craft store or make one yourself using a brown lunch bag. Let your child’s creativity shine by decorating the cone with paint, markers, stickers, or any other materials they like. Fill the cone with their favorite treats, and voila! You have a unique Christmas decoration that’s both functional and adorable.
History of Christmas Cone Decorations
Christmas cone decorations have been a beloved tradition for centuries. The history of these festive ornaments dates back to 16th century Germany, where they were known as “Tannenbaum” trees. These early cones were made from paper or straw and adorned with candles, fruit, and other natural elements.
As German immigrants brought their traditions to the United States, Christmas cone decorations evolved and became a staple of American holiday decor. In the mid-19th century, glassblowers in Italy began crafting delicate, colorful cones that could be hung on walls or placed on tables. These Italian-made cones were highly prized for their beauty and craftsmanship.
Today, Christmas cone decorations come in a wide range of materials, from paper and straw to metal and glass. While traditional techniques remain popular, modern designs often incorporate innovative materials and techniques. Regardless of style or material, the cultural significance of these ornaments remains unchanged – they evoke feelings of warmth, joy, and connection to family and community.
When decorating with Christmas cones, consider adding personal touches like photos, ribbons, or other sentimental items to make the display truly special.
Importance of Christmas Cone Decorations in Modern Times
Christmas cone decorations are more than just a festive touch to your home’s holiday decor. They play a significant role in maintaining family traditions and creating lasting memories for kids during the Christmas season. In modern times, these decorations have become an essential part of many families’ holiday celebrations.
One reason why Christmas cone decorations remain popular is their versatility. You can decorate them with various themes, from classic red and green to more modern designs like snowflakes or gingerbread men. This flexibility allows you to create a unique look that reflects your family’s personality and style. For example, you could use a natural theme with pinecones, twigs, and ribbons for a cozy cabin feel.
Another reason for their enduring popularity is the role they play in teaching kids about the importance of tradition and community during the holiday season. Decorating the Christmas cone can become a fun and collaborative activity that fosters bonding between family members and neighbors. By making it a regular part of your holiday routine, you’ll create memories that will last long after the decorations are put away.
Materials Needed for Christmas Cone Decorations
To make these adorable Christmas cone decorations, you’ll need a few simple materials that we’re excited to share with you below! Let’s get started on making this holiday season even more special.
Essential Items: Cones, Glue, and Decorations
To get started on creating those adorable Christmas cone decorations with your kids, you’ll need some essential items. Let’s begin with the basics: cones of various sizes! You can choose between small, medium, and large cones to accommodate different age groups or artistic styles.
When it comes to glue, a hot glue gun is perfect for adults who want more control over the application process. For kids, however, a washable school glue stick is a safer option that’s easy to clean up. Make sure you have a pair of scissors on hand for cutting string, ribbon, or other embellishments.
Now, let’s talk decorations! This is where the fun begins. You can use glittery garlands, colorful tinsel, or even recycled materials like old CDs and beads to add some sparkle to your cones. Other ideas include stickers, stamps, and markers – just be sure to choose kid-friendly supplies that won’t cause messes.
Consider investing in a few cone-specific decorations like mini ornaments or festive-themed picks. These will help add an extra touch of whimsy to your creations.
Additional Supplies: Ribbons, Stickers, and More
While Christmas cone decorations are beautiful on their own, there’s always room for extra flair. That’s where additional supplies come in – ribbons, stickers, and more can transform your kid’s creations into one-of-a-kind masterpieces.
Start with ribbons: you can use them to create a beautiful bow at the top of the cone or wrap them around the middle for a fun, striped effect. Consider using different textures, like satin or velvet, to add depth and interest. If you’re feeling crafty, try cutting out shapes from ribbon to create unique embellishments.
Stickers are another great way to get creative – use them to decorate the cone itself, or as accents on the gift that’s wrapped around it. Let your kids’ imagination run wild with fun designs like snowmen, trees, and bells. Don’t forget about other supplies, too: glitter, pom-poms, and felt shapes can add a pop of color and personality.
When using additional supplies, remember to encourage experimentation and creativity in your kids. After all, that’s what Christmas cone decorations are all about! With a little imagination, the possibilities are endless – and the results will be truly unique and special.
Step-by-Step Guide to Creating a Basic Christmas Cone Decoration
Now that you have your cone, let’s get creative and follow these easy steps to turn it into a beautiful and personalized Christmas decoration for your little ones!
Preparing the Cone Base
Before we start adding those festive decorations to our cone base, let’s make sure it’s prepared just right. This is where the fun begins! Take a step back and admire your blank canvas – now it’s time to add some glue and get creative.
Apply a thin layer of hot glue along the edges of the cone base, making sure to cover the entire area. Don’t worry if it gets a bit messy; we can clean up as we go. This will help secure any decorations you’re about to add, ensuring they stay put throughout the decorating process.
While the glue is still wet, start arranging your initial decorations, such as ribbons or garlands. You can choose a theme or stick with a mix-and-match approach – the possibilities are endless! Think about what you want your cone decoration to look like and where to place each item carefully. Once everything is in place, let it dry completely before moving on to the next step.
This foundation will set the stage for all the beautiful decorations we’ll be adding next. With our cone base prepared and decorated with these initial touches, we’re one step closer to creating a stunning Christmas decoration that your little ones will love!
Adding Layers of Decorations
Now that you’ve got your cone shape and base covered, it’s time to add some personality with layers of decorations. This is where the fun really begins! Think about what makes a Christmas tree so magical – the ornaments, garlands, and baubles all work together in harmony.
To create your own layered look, start by grouping similar items together. For example, you can use small balls or pom-poms for one layer, and larger ornaments for another. Don’t be afraid to mix textures either – smooth glass beads with rough-finish pinecones will add depth and visual interest to your cone.
When working with fragile materials like glittery tinsel or delicate doilies, handle them carefully to avoid breakage. To achieve a specific effect, such as creating a gradient or ombre look, try layering different colored items in sections, starting from the bottom of the cone and working upwards.
Finishing Touches: Tying the Ribbon and Final Inspections
Now that you’ve added all the decorative elements to your Christmas cone, it’s time to put the finishing touches on your masterpiece. This is where attention to detail really makes a difference, so take your time and have fun with it!
First, tie the ribbon around the top of the cone in a neat bow. You can use a simple knot or get creative with a festive design like a snowflake or holly leaf pattern. Remember to adjust the length of the ribbon to fit the size of your cone, so it’s not too long or too short.
Next, inspect your decoration for any stray glitter or sparkles that may have escaped during assembly. Use a soft brush or a lint roller to gently remove any excess decorations from hard-to-reach areas like crevices and corners.
Finally, step back and admire your handiwork! Make any necessary adjustments to the bow or placement of decorations before calling it complete. With these finishing touches, your Christmas cone decoration is now ready to be proudly displayed in a window or on a wall.
Creative Variations on Traditional Christmas Cone Decorations
Add a festive touch to your tree without breaking tradition, with these unique and playful twists on classic Christmas cone decorations that kids will love. From pops of color to fun themes, get creative!
3D Effects with Recycled Materials
Get creative with your Christmas cone decorations by incorporating recycled materials to give them a unique twist. One way to add depth and interest is by using 3D effects that not only save the environment but also spark imagination in kids.
You can use cardboard tubes from toilet paper rolls, egg cartons, or paper towel rolls to create shapes like snowflakes, stars, or even a mini Christmas tree. Simply cut out the design, fold it into a desired shape, and glue it onto the cone using a hot glue gun (with adult supervision). For added texture, use recycled fabric scraps like old t-shirts or felt to create festive holly leaves, red berries, or even a Santa hat.
For a more dramatic effect, try creating 3D scenes by gluing small objects like beads, buttons, or even candy canes onto the cone. You can also make paper snowflakes using recycled newspaper and glue them onto the cone in a swirling pattern to resemble falling snow. With these creative ideas, you’ll not only be giving your Christmas cone decoration a unique look but also teaching kids the value of reuse and recycling.
Nature-Inspired Designs Using Real or Artificial Elements
Get ready to bring the outdoors in with nature-inspired designs that will make your Christmas cone decorations truly one-of-a-kind! You can create a unique look by incorporating real or artificial elements found in nature.
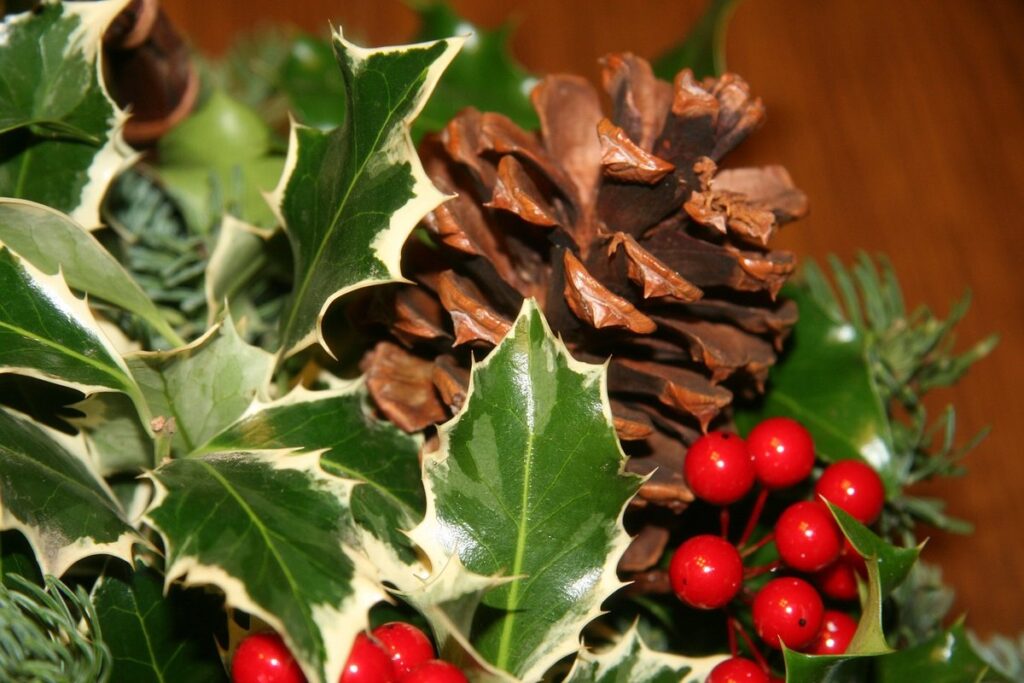
For a more rustic and earthy feel, collect some pinecones from your backyard or a nearby park. Glue them onto the cone using hot glue, creating a pattern or simply covering it entirely. Add some greenery like eucalyptus leaves or ferns to give it a lush look. If you’re short on time or want an artificial alternative, use fake pinecones that come in various sizes and colors.
To create a more dramatic effect, use larger branches or twigs as the base of your design. You can also use wire or floral tape to attach smaller elements like acorns, berries, or even seashells (for a coastal touch). Remember, the key is to have fun and experiment with different textures and colors!
If you’re looking for an eco-friendly option, consider using natural materials like woven reeds, bamboo sticks, or dried flowers. These can add a charming and whimsical touch to your cone decorations.
Unique Shapes and Forms: Spheres, Stars, and More
Ditch the traditional cone shape and get creative with Christmas decorations! Who says cones have to be boring? With a little imagination and some crafty skills, you can turn your Christmas tree into a stunning work of art. Let’s talk about unique shapes and forms that can add an extra wow factor to your holiday decor.
Imagine transforming your cone into a sphere or a starburst masterpiece. You can achieve this by gluing smaller ornaments or beads onto the cone in a spherical pattern, creating a 3D effect that sparkles from every angle. For a star-shaped tree, arrange the ornaments in a symmetrical pattern, with each point reaching outwards like a celestial body. If you’re feeling adventurous, try using different materials like popsicle sticks, felt, or even recycled materials to create an eco-friendly design.
The possibilities are endless when it comes to pushing the boundaries of traditional cone designs. Don’t be afraid to experiment and come up with your own one-of-a-kind creations. With a little bit of creativity and some patience, you can turn your Christmas tree into a showstopper that’s sure to impress family and friends alike!
Safety Considerations and Tips for Working with Kids
When working on Christmas cone decorations with kids, safety is top of mind – that’s why we’ve put together some essential tips to keep your little ones safe and happy while creating. Let’s dive in!
Preparing Young Children for Craft Activities
When it comes to working with young children on craft activities, especially ones as fun and festive as Christmas cone decorations, preparation is key. Before diving into the creative process, take some time to set clear expectations for the activity.
Start by explaining the project’s objective and what you hope to achieve together. This will help your child understand the purpose behind the activity and give them a sense of direction. Be specific about what materials they’ll be using and how to handle them safely.
Next, make sure to provide necessary supervision at all times. This is crucial when working with small children and potentially sharp objects or materials that can cause harm if mishandled. Position yourself close to your child as you work together, and be prepared to intervene if needed.
Remember to keep the atmosphere relaxed and encouraging. Praise their efforts and celebrate small accomplishments along the way. With these simple steps in place, you’ll be well on your way to creating a fun and engaging experience for both you and your young artist.
Handling Glue and Sharp Objects Safely
When working on Christmas cone decorations with kids, it’s essential to handle glue and sharp objects safely. This means being mindful of their age and skill level, as well as the type of materials you’re using.
Glue can be a sticky situation (pun intended!) when it comes to little ones. To avoid any accidents, make sure to choose washable, non-toxic glue that’s specifically designed for kids’ projects. Also, supervise closely while they’re applying the glue to ensure they don’t get it in their eyes or on sensitive skin.
When handling sharp objects like scissors, always demonstrate proper cutting techniques and handle them carefully yourself. For younger children, consider using blunt-tipped scissors or craft knives with safety features that prevent accidents.
To take it a step further, set up a “glue station” where kids can safely apply glue to their cones without having to juggle materials or worry about sharp objects nearby. By being aware of these simple precautions and taking the necessary steps, you’ll create a fun and safe environment for your little ones to get creative with their Christmas cone decorations.
Displaying and Enjoying Your Finished Masterpieces
Now that you’ve created your special Christmas cone decorations, let’s talk about showcasing them proudly around the house! Showcase your little artist’s masterpieces on a mantel, dining table, or anywhere else in your home.
Ideas for Showcasing Your Creations at Home or School
Once you’ve finished creating your beautiful Christmas cone decorations, it’s time to showcase them proudly. Here are some ideas for displaying your masterpieces at home or school:
At school, consider participating in a holiday craft fair or exhibit where you can show off your cones alongside other students’ creations. This is a great way to get feedback and display your artwork publicly. You could also set up a special display case in the classroom with a sign that says “Student Artwork” or “Holiday Creations.” Make sure to ask your teacher for permission first, of course!
At home, you can create a festive holiday display on a mantel, coffee table, or windowsill. Arrange the cones in a decorative pattern and add some greenery, candles, or small ornaments to create a cozy ambiance. You could also set up a special “Kids’ Art Gallery” area in your living room where family members can admire their creations.
Another idea is to use your Christmas cone decorations as gift tags for presents or place them on top of Christmas cookies or cupcakes. Whatever you choose, be sure to have fun and enjoy the fruits of your labor!
Incorporating Them into Holiday Traditions
As you finish creating your handmade Christmas cone decorations with your kids, it’s time to think about how to incorporate them into your holiday traditions. One fun way to do this is by exchanging them as gifts within the family. Set a challenge for each member of the household to create their own unique design, and then have everyone draw numbers to see who gets which one. This adds an element of excitement and surprise to the process.
Another idea is to use your handmade decorations as a way to add a personal touch to your holiday decor. For example, you could display them on the tree or mantel alongside store-bought ornaments, creating a beautiful mix of textures and colors. Alternatively, hang them from the staircase or along walls to create a festive and fun atmosphere.
You can also involve your kids in other ways, like making it a family tradition to add a new handmade decoration each year, so you end up with a collection over time. This will make each holiday season feel special and unique, as you reminisce about past creations. By incorporating these handmade decorations into your holiday traditions, you’ll create lasting memories for years to come.
Troubleshooting Common Issues and Improving Your Skills
We all encounter problems while decorating, but don’t worry, we’ve got some practical solutions to help you overcome common issues. Let’s dive into troubleshooting and skill-building tips!
Addressing Technical Challenges with Glue or Materials
When working with delicate materials like paper and glitter, it’s not uncommon for glue to become a culprit of sorts. If you find that your glue is becoming too runny, apply a small amount to the surface first and then add more as needed – this helps prevent excess from oozing out.
In some cases, glue may not be sticking at all. Try applying a thin layer of clear varnish or hairspray over the area where the glue should adhere. This creates a sticky surface for the materials to bond with. On the other hand, if your decorations are falling apart because they’re too delicate and easily torn, consider swapping out traditional glue for a more robust adhesive like hot glue.
If using glitter-heavy decorations, you might encounter issues with glue not drying quickly enough or creating clumps when combined with the sparkly bits. Use a well-ventilated area and ensure your workspace is clean to minimize messes.
Refining Techniques to Achieve Professional-Looking Results
Refining your techniques is crucial to achieving professional-looking Christmas cone decorations. With practice, you can perfect your skills and create stunning cones that will be the envy of all who see them.
To refine your technique, start by paying attention to the quality of your materials. Make sure your paper or cardstock is crisp and free of wrinkles, as this will affect the overall appearance of your cone. You can also experiment with different textures and weights to add depth and interest to your design. For example, you could use a heavy cardstock for the base and lighter weight paper for the decorative elements.
When it comes to decorating, focus on balance and harmony. Avoid overcrowding your cone with too many embellishments, as this can make it look cluttered and messy. Instead, choose a few key decorations that complement each other and work together to create a cohesive look. For instance, you might pair bold red ribbons with delicate white snowflakes.
To take your cones to the next level, try experimenting with different folding techniques and shapes. You can use a bone folder or credit card to crisp up folds and create sharp creases. Don’t be afraid to get creative and try new things – it’s all part of the process of refining your skills!
One key technique to master is how to attach decorations without them falling off. This is especially important for items like sequins, glitter, and other lightweight embellishments. You can use a hot glue gun or double-sided tape to secure these elements in place. Alternatively, you could try using a small dot of white glue to attach smaller decorations.
To add an extra touch of professionalism to your cones, pay attention to the finishing details. Make sure all edges are smooth and even, and that any excess paper or cardstock is neatly trimmed away. You can also use a ruler or other straightedge to create crisp, clean lines and sharp angles.
As you refine your technique, keep in mind that practice makes perfect. Don’t be discouraged if your first few cones don’t turn out as expected – with time and patience, you’ll develop the skills and confidence to create truly stunning decorations. Remember to have fun and enjoy the process of creating something beautiful!
Frequently Asked Questions
Can I use recycled materials to create unique Christmas cone decorations?
Yes, using recycled materials can add an extra layer of meaning to your decorations. Consider repurposing old cards, newspaper, or fabric scraps to create a one-of-a-kind design. This approach not only reduces waste but also makes the crafting process even more fun and eco-friendly.
How do I prevent my child’s Christmas cone decoration from toppling over?
To prevent your child’s creation from tipping over, consider adding a weight to the base of the cone or using a sturdy stand. You can also encourage your child to decorate the base with heavy materials like beads or sequins for added stability. With a few simple precautions, you’ll have a beautiful and stable display.
Can I make Christmas cone decorations ahead of time?
While it’s possible to prepare some elements in advance, we recommend assembling and decorating the cones closer to the actual holiday event. Freshly crafted decorations tend to look more vibrant and engaging, plus they’re a fun way to involve your kids in the last-minute preparations.
What if I’m short on time or my child gets frustrated during the crafting process?
Don’t worry – it’s normal for crafting sessions with young children to be unpredictable! If you need to speed up the process, consider pre-cutting materials or having extra decorations on hand. You can also try taking breaks and coming back to the project when everyone is refreshed.
Can I use these Christmas cone decorations as gifts or party favors?
Absolutely! Your child’s handmade decorations make thoughtful gifts for friends, family members, or even coworkers. Simply fill the cones with treats or small goodies, add a personalized note, and you’ll have a one-of-a-kind gift that shows you care.