
Get ready to deck the halls with your mini-makers! The holiday season is just around the corner, and you’re probably itching to get crafty with your kids. Why not try making some adorable Christmas crafts using one of nature’s most festive materials: pine cones? Not only are pine cone crafts a great way to reuse and recycle, but they also make for thoughtful gifts or decorations that add a personal touch to your holiday decor.
In this article, we’ll show you how to create some easy and fun pine cone ornaments, wreaths, and garlands with your kids. You’ll find step-by-step tutorials, helpful safety tips, and plenty of inspiration to get you started on a memorable crafting experience. Whether you’re a seasoned crafter or just looking for a way to spend quality time with the little ones, we’ve got you covered! So grab some pine cones and let’s get creative!
Introduction to Pine Cone Crafts
Get creative and inspired as we dive into the world of pine cone crafts, perfect for kids of all ages who love making something special this holiday season. We’ll explore fun projects to try at home.
What are Pine Cones?
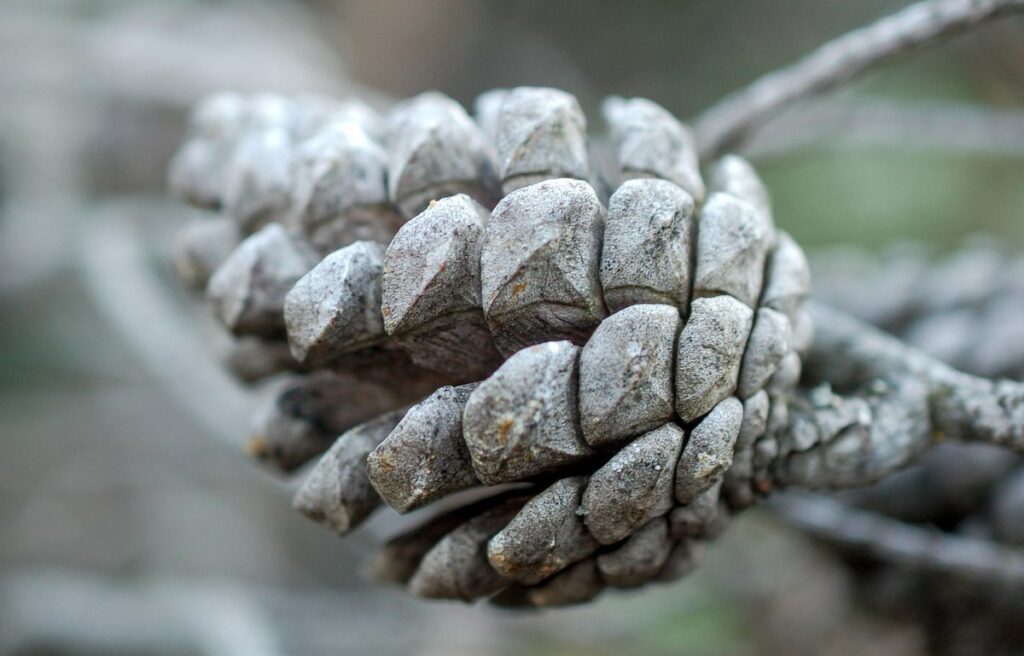
Pine cones are a natural wonder that can add magic to your Christmas crafts. These small, woody reproductive structures come from coniferous trees like pine, spruce, and fir. They play a crucial role in the life cycle of these trees, helping them to spread seeds and propagate new growth.
In nature, pine cones serve as a vital means for trees to reproduce. The scales on the cone open to release seeds, allowing them to disperse and grow into new trees. This process is essential for maintaining forest ecosystems and promoting biodiversity. As a crafting material, pine cones offer endless possibilities due to their unique texture, shape, and size.
One of the reasons pine cones make great crafting materials is that they’re readily available in nature. Simply collect them from your backyard or nearby park, and get creative! You can paint, glue, or decoupage them to create beautiful ornaments, garlands, or gift decorations. With their natural beauty and versatility, it’s no wonder pine cones have become a staple in many Christmas crafts.
Benefits of Crafting with Kids
Engaging kids in crafts is an excellent way to spend quality time together as a family and reap numerous benefits. One of the most significant advantages of crafting with kids is that it helps develop their fine motor skills. Activities like gluing, painting, and threading pine cones can improve hand-eye coordination, dexterity, and overall manipulation abilities. This skillset is essential for future academic and professional success.
Crafting also encourages creativity in children. By experimenting with various materials and techniques, they learn to think outside the box and express themselves freely. For instance, decorating pine cones with glitter, paint, or markers allows kids to explore different colors, textures, and patterns, promoting self-expression and imagination.
Moreover, crafting with kids fosters family bonding and creates lasting memories. Working together on a project like making pine cone crafts encourages teamwork, communication, and mutual support. It’s an excellent opportunity to engage in quality conversation, share laughter, and enjoy each other’s company while creating something special. So, grab some pine cones, glue, and paint, and get crafting with your little ones!
Preparing Pine Cones for Crafts
Now that you’ve collected your pine cones, it’s time to get them ready for crafting! Learn how to clean and dry them perfectly in just a few simple steps.
Cleaning and Drying Pine Cones
Before you can start getting creative with pine cones, they need to be cleaned and dried. This might sound like a simple task, but it’s essential for ensuring your crafts turn out well and last long. When pine cones are fresh, they’re often sticky with sap, which can make them difficult to work with.
To clean the pine cones, start by gently brushing off any loose debris or dirt using a soft-bristled brush or a small, dry paintbrush. For tougher sap residue, you can dampen a cloth with water and wipe down the cone. However, be careful not to soak it, as this can cause the pine cone to fall apart.
Once they’re clean, let the pine cones air-dry completely. This might take anywhere from a few days to a week or two, depending on how dry your environment is. You can speed up the process by placing them in a low-temperature oven (150°F – 200°F) for 2-3 hours. Just make sure they’re spread out and not touching each other.
Once dry, the pine cones are ready to be used in various crafts, from decorating vases to making wreaths. With proper cleaning and drying, your creations will have a longer lifespan and look more vibrant.
Decorating Techniques for Pine Cones
Get creative with decorating techniques for pine cones to make them truly special. One of the most popular ways to decorate pine cones is by painting them. You can use acrylic paint and let your kids’ imagination run wild with bright colors, stripes, or patterns. For a more realistic look, you can even use watercolor paints to give the pine cones a soft, earthy tone.
Another fun way to decorate pine cones is by adding some sparkle with glitter. Simply spray a light coat of adhesive onto the pine cone and sprinkle with your favorite color of glitter. Shake off any excess and voila! Your pine cone is now shimmering with festive flair. Be sure to use washable glue or a water-based adhesive to avoid any mess.
You can also add some elegance with ribbons or twine. Simply tie a ribbon around the stem of the pine cone for a beautiful, rustic look. This adds a lovely texture and creates a natural contrast between the smooth pine cone and the soft ribbon. You can use wired ribbons for more structure or choose sheer fabrics for a softer effect.
To take it to the next level, you can combine these techniques – paint the pine cone first, then add glitter on top of the paint, or wrap with ribbon after gluing on some sparkly decorations. The possibilities are endless!
Easy Christmas Craft Ideas with Pine Cones
Get creative with pine cones and make some magical memories with your little ones as we explore fun and easy DIY projects perfect for a snowy holiday season.
Pine Cone Ornaments
Creating pine cone ornaments is a fun and easy Christmas craft idea that kids will love. All you need are some pine cones, glue, and decorative materials like glitter, ribbons, and paint. Start by collecting pine cones of varying sizes to create unique ornaments.
To make the ornaments, apply a generous amount of glue to each pine cone, covering it evenly. Then, let your child’s creativity shine by decorating the pine cones with their favorite materials. They can add glitter for a sparkly effect, tie ribbons around the base for a more rustic look, or paint on designs and patterns.
Encourage kids to experiment with different combinations of decorations to create one-of-a-kind ornaments. For example, they could glue on some dried cranberries or small pine branches to give their pine cone ornament a festive feel. Once the glue is dry, hang the ornaments on your Christmas tree or use them as gift tags for a personal touch.
This craft idea not only produces beautiful results but also teaches kids about patience and creativity.
Pine Cone Wreaths
Creating a pine cone wreath is a fun and creative way to add some natural beauty to your home for the holiday season. To make one, start by collecting an assortment of pine cones in various sizes. You’ll need about 20-25 cones for a standard-sized wreath.
Next, gather your materials: a wire or foam wreath base, hot glue gun, twine or ribbon, and some decorative items like evergreen sprigs or red berries. Begin by gluing the smallest pine cones to the base in a random pattern, making sure not to overcrowd it.
As you add more cones, start arranging them in a circular motion, overlapping them slightly as needed. Use your hot glue gun to secure any stray cones or decorate with some greenery and berries. Finish by attaching a ribbon or twine to hang your masterpiece.
This project is perfect for kids aged 8-12 who can handle the hot glue gun under adult supervision. It’s also a great way to get creative and have fun together as a family. By adding some decorations like glitter, stickers, or paint, you can make it even more personalized and unique.
Pine Cone Garland
Making a pine cone garland is a fun and easy Christmas craft that kids can help with. To get started, gather some pine cones of various sizes, a length of thread or twine, and some embellishments like ribbon, beads, or bows. You’ll also need a pair of scissors and a needle.
Begin by threading the largest pine cone onto the thread, leaving about an inch of space at the top for tying a knot. Then, add smaller pine cones, spacing them out evenly along the length of the garland. To add some extra flair, tie a ribbon or bow around one of the pine cones, or string a few beads between them.
As you work on your garland, encourage kids to get creative with their embellishments. They can use glitter glue to decorate the pine cones or thread small ornaments onto the garland. When you’re finished, hang your pine cone garland in a window or along a mantel for a festive touch. This project is perfect for a family craft day and makes a great DIY gift for friends and neighbors.
More Complex Christmas Craft Ideas with Pine Cones
Get creative and make some truly special decorations for your home with these more advanced pine cone crafts, perfect for older kids and crafty adults alike. From intricate designs to unique ornaments, we’ve got you covered!
Pine Cone Centerpieces
Creating stunning centerpieces for your Christmas table can be a fun and creative activity to do with kids. One of our favorite ideas is to combine pine cones, candles, and evergreen branches to create a beautiful centerpiece that’s perfect for the holiday season.
To start, gather some materials: pine cones, green candles (or tea lights), evergreen branches, floral wire, and a hot glue gun. Begin by arranging a few sprigs of evergreen around the base of a candle holder or vase. Then, take your pine cones and begin to arrange them in a pattern around the evergreen branches. You can use floral wire to attach the pine cones to each other or to the evergreen branches if needed.
Once you have your pine cone arrangement looking the way you like it, add some candles to complete the look. Be sure to place them safely away from anything flammable. Finally, step back and admire your beautiful centerpiece! With a little creativity and some festive materials, you can create a stunning centerpiece that will be the envy of all your holiday gatherings.
This project is perfect for kids because it allows them to get creative with materials they love – pine cones and evergreen branches. Plus, who doesn’t love candles?! It’s an easy and fun way to get into the holiday spirit.
Pine Cone Tree Decorations
One of the most unique and festive ways to decorate your Christmas tree is with pine cone ornaments and garlands. Not only are they a great way to repurpose natural elements from your yard, but they also add a rustic charm to your holiday decor.
To create pine cone ornaments, start by collecting clean and dry pine cones. You can use hot glue to attach a string or twine to each pine cone, creating a loop for hanging on the tree. Alternatively, you can tie a small piece of ribbon around the top of each pine cone to create a more elegant look.
For garlands, simply thread multiple pine cones onto a string or twine, leaving a small space between each one. You can also add other natural elements like dried cranberries, eucalyptus leaves, or popcorn for added texture and visual interest.
Consider grouping similar-sized pine cones together to create a cohesive look on your tree. You can also experiment with different types of pine cones, such as large cypress cones or small spruce cones, to add some variety to your decor.
Pine Cone Gift Toppers
Pine cone gift toppers are a fantastic way to add a personal touch to your holiday gifts. Not only do they look beautiful, but they’re also incredibly easy to make! To get started, gather some pine cones in various shapes and sizes. You can use real or artificial ones, depending on what you have available.
To create a simple yet elegant gift top, start by gluing a few pine cones together using hot glue. Arrange them in a way that creates a visually appealing shape, such as a triangle or a circle. Once they’re secure, tie a ribbon around the top of the cone group to conceal any excess glue and add a pop of color.
For a more elaborate design, try adding some decorations like glitter, beads, or even small ornaments to your pine cone arrangement. You can also experiment with different types of ribbons, such as velvet or burlap, for added texture and interest. The possibilities are endless, so don’t be afraid to get creative! With a little imagination, you’ll have a beautiful gift top that’s sure to impress.
Safety Precautions for Kids While Crafting
When crafting with pine cones, it’s essential to supervise your little ones and teach them basic safety precautions to avoid accidents. This will help you enjoy the experience together safely.
Handling Sharp Objects
When working with pine cones and other materials for Christmas crafts, it’s essential to teach kids how to handle sharp objects carefully. This might seem like a no-brainer, but it’s crucial to remember that small hands can easily get hurt if they’re not aware of the potential dangers.
Start by introducing your child to the concept of handling scissors safely. Show them how to hold the blades away from their body and how to cut in a controlled motion. It’s also essential to teach them how to properly dispose of used scissors, such as putting them down on a safe surface or handing them over to an adult.
Another crucial aspect is teaching kids about the importance of being mindful of sharp points on pine cones. If your child accidentally pokes themselves with a pine cone, it can be painful and might even lead to bleeding. To avoid this, encourage them to use a pair of tweezers to handle small pine cones or have an adult assist with bigger ones.
By following these simple guidelines, you’ll be able to create a safe environment for your child to explore their creativity while crafting with pine cones.
Allergies and Sensitivities
When working with pine cones and other natural materials in Christmas crafts for kids, it’s essential to be aware of potential allergies and sensitivities. Some children may have allergic reactions or skin irritations when exposed to certain substances.
Common allergens found in crafting materials include latex, dyes, adhesives, and tree resin. Pine cones themselves can cause skin irritation in some individuals due to their sap content. To identify potential allergies or sensitivities, pay attention to any redness, itching, or swelling after exposure to a specific material.
Before starting the craft session, inform parents about the materials being used and encourage them to share any concerns or allergies they may have. Take necessary precautions by using hypoallergenic adhesives, choosing dye-free options when possible, and washing hands frequently. Consider doing a patch test on a small area of skin before proceeding with a particular activity. Be prepared to provide alternatives or stop the craft altogether if an allergy is suspected. By taking these precautions, you can ensure a safe and enjoyable crafting experience for all kids involved.
Conclusion: Making Memories with Pine Cone Crafts
As you finish up your pine cone crafts, take a step back and admire the beautiful creations you’ve made. These simple yet meaningful projects are more than just fun activities for kids – they’re a way to create lasting memories of the holiday season. By involving your children in the process, you’re teaching them about patience, creativity, and the value of handmade gifts. Take time to cherish these moments and remember that it’s not just about the end product, but also the journey.
To make these experiences even more special, consider displaying the finished crafts prominently around the house or giving them as thoughtful gifts to family members. This will help you and your kids appreciate the effort and love that went into making each piece. By doing so, you’ll be creating a treasure trove of memories that will be cherished for years to come.
Frequently Asked Questions
How do I store pine cones to keep them fresh for future crafts?
Store pine cones in an airtight container or plastic bag, making sure they’re completely dry before sealing. This will help preserve their shape and prevent mold growth.
Can I use artificial pine cones if I don’t have access to real ones?
Yes, artificial pine cones can be a great alternative when working with children or in areas where real pine cones are scarce. Look for high-quality artificial options that mimic the texture and appearance of real pine cones.
What’s the best way to involve younger kids in decorating pine cone crafts?
Younger kids love messy art projects! Set up a space where they can glue, paint, or decorate pine cones without worrying about making a mess. Use washable paints and provide smocks to keep clothes clean.
How do I dry pine cones quickly if I’m short on time?
Yes, you can speed up the drying process by placing pine cones in a low-temperature oven (150°F – 200°F) for a few hours or using a food dehydrator. Make sure they’re completely dry before using them for crafts.
Can I use different types of pine cones, like cedar or cypress?
While these coniferous trees produce interesting pine cones, they may not be suitable for all crafts due to their unique characteristics and potential allergens. Stick with traditional pine, spruce, and fir pine cones for most projects.