
Are you looking for a fun and creative way to encourage your child’s artistic side while also promoting learning and self-expression? Look no further than blow painting! This exciting art activity is perfect for kids, allowing them to unleash their creativity and imagination as they experiment with different techniques and colors. Not only is blow painting an enjoyable hobby, but it also offers a range of benefits for children, including improved fine motor skills, enhanced creativity, and a sense of accomplishment. In this article, we’ll explore the world of blow painting for kids in more detail, covering the basics of how to get started, tips and tricks for success, and some inspiring examples of what your child can create with just a few simple steps. Get ready to discover the magic of blow painting!
Benefits of Blow Painting for Children
Blow painting is a fun and creative activity that offers numerous benefits for children, from improving fine motor skills to encouraging self-expression. Let’s explore these advantages together!
Encourages Creativity and Self-Expression
Blow painting is an excellent medium for children to unleash their creativity and express themselves through art. As they blow paint onto a surface, kids develop their imagination and learn to think outside the box. The process of creating unique patterns and designs encourages experimentation and innovation, helping build confidence in their artistic abilities.
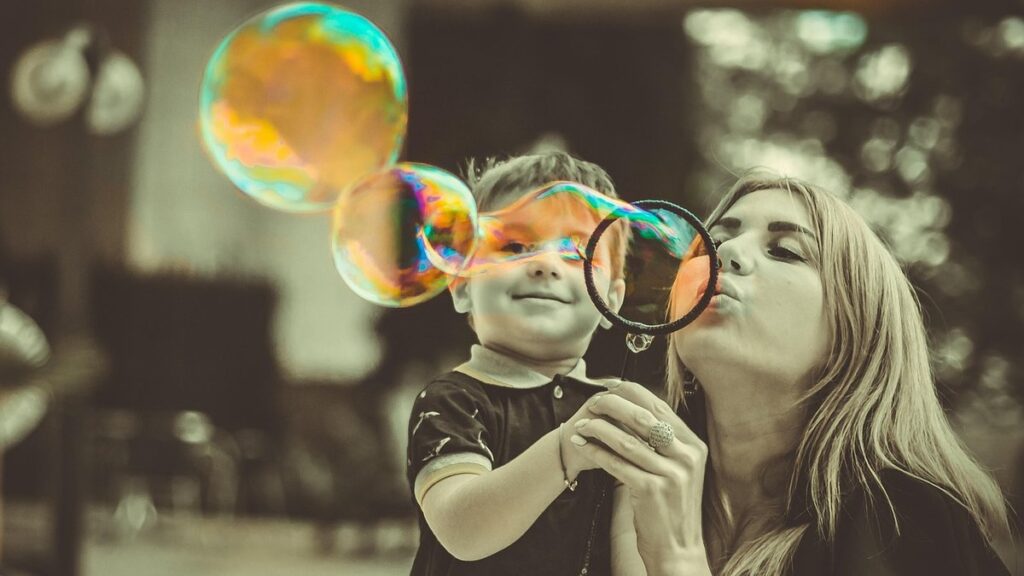
One of the key benefits of blow painting is its ability to enhance fine motor skills. Children must coordinate breath control with arm movement to achieve the desired effect, which strengthens hand-eye coordination and dexterity. This skill-building activity also helps develop hand strength, essential for future art projects that require precision and detail.
As children engage in blow painting, they feel a sense of pride and accomplishment as their artwork takes shape before their eyes. This experience fosters confidence in self-expression, allowing kids to explore various styles and themes without fear of making mistakes. By embracing this creative outlet, parents can encourage their little ones to explore the world of art and discover new passions.
For maximum benefit, consider setting up a dedicated blow painting station with various colors, shapes, and textures for kids to experiment with. Encourage them to try different techniques, such as layering or blending, to achieve unique effects. By providing a supportive environment, you’ll be helping your child develop their artistic voice and style.
Supports Learning and Development
Blow painting is an activity that not only brings joy and creativity to children but also offers numerous benefits for their learning and development. As a parent or caregiver, you’re likely eager to provide your child with activities that promote cognitive growth, hand-eye coordination, and creative thinking.
One of the most significant advantages of blow painting is its ability to enhance cognitive development. By encouraging children to experiment with different colors, textures, and techniques, blow painting stimulates their problem-solving skills and critical thinking. For instance, if a child wants to create a particular design but realizes they’ve run out of a specific color, they’ll need to think creatively about how to achieve the desired effect using available materials.
Through blow painting, children also develop hand-eye coordination as they carefully control the flow of paint onto their artwork. This fine motor skill is essential for various activities in life, from writing and drawing to sports and other creative pursuits. Moreover, blow painting fosters creativity by allowing children to express themselves freely without worrying about making mistakes.
In addition to these benefits, blow painting provides an excellent opportunity for children to develop their spatial awareness and visual processing skills. By observing the flow of paint and anticipating how it will spread on the paper, children practice their ability to visualize and predict outcomes.
Easy to Set Up and Prepare
Setting up a blow painting activity for kids is incredibly easy and straightforward. To get started, you’ll need to gather a few basic materials, which are likely already on hand or easily accessible. These include paper or canvas, blow pipes, paint, and a workspace with good ventilation.
Before beginning the project, make sure your child’s workspace is safe and well-ventilated. This means clearing any clutter from the area and positioning the painting surface away from direct sunlight and heat sources. If you’re using a table or other flat surface, cover it with newspaper or a plastic sheet to protect against paint spills.
To prepare your child for blow painting, start by demonstrating basic techniques, such as holding the blow pipe correctly and moving it in smooth motions across the paper. Show them how to experiment with different colors and patterns, and encourage them to get creative with their designs. With minimal setup and preparation, kids can dive right into this fun and engaging art activity, developing their fine motor skills and creativity in the process.
Getting Started with Blow Painting
Let’s get started! In this next part, we’ll go over the basic supplies you’ll need to begin your blow painting journey and some essential tips for creating beautiful artwork.
Choosing the Right Materials
When it comes to getting started with blow painting, choosing the right materials is crucial. As a beginner, you’ll want to select paints, blowpipes, and surfaces that are suitable for this unique technique.
For paints, consider using specialized blow paint or acrylics specifically designed for art projects. These types of paints are usually formulated to be lightweight and have good flow characteristics, making them perfect for blowing through a straw. Some popular brands include Tulip, DecoArt, and Apple Barrel. You can find these at most craft stores or online.
When it comes to blowpipes, you’ll want one that’s sturdy and has a comfortable grip. Look for plastic or wooden pipes with a smooth surface, as these will allow the paint to flow easily. Some pipes even come with interchangeable tips, which is great for experimenting with different effects. For beginners, a 6-8 inch pipe is a good starting point.
For surfaces, you can use paper, cardstock, or even fabric. However, for blow painting, it’s best to start with smooth, thick paper like watercolor or Bristol board. This will help prevent the paint from bleeding or feathering as you blow it onto the surface.
Basic Techniques and Safety Precautions
When getting started with blow painting, it’s essential to focus on safety and proper techniques. First and foremost, make sure you’re wearing protective gear. This includes a dust mask or respirator, goggles, and old clothes that can get dirty.
Proper blowing technique is also crucial in preventing accidents. Hold the straw at a 45-degree angle, with the opening of the straw close to the surface being painted. Take slow, gentle breaths, allowing the paint to flow smoothly onto the canvas. Avoid blowing too hard or too fast, as this can cause the paint to splatter and spread unevenly.
Remember that blow painting is a fun and creative activity, but it does require some care and attention to detail. Make sure you’re working in a well-ventilated area, away from drafts and other distractions. By following these basic safety tips and using proper blowing techniques, you’ll be able to enjoy the process of creating beautiful art without worrying about accidents or messes.
When cleaning up, make sure to dispose of any leftover paint and materials responsibly, and wash your hands thoroughly with soap and water.
Tips for Encouraging Children’s Creativity
When engaging with kids in blow painting, it’s essential to create an environment that encourages creativity and self-expression. Encourage children to experiment with various techniques, such as swirling colors or dripping paint, to achieve unique effects.
Offer constructive feedback by asking open-ended questions about their artwork, like “What made you choose those colors?” or “How do you think this piece could be improved?” This approach helps children develop critical thinking and problem-solving skills while fostering a sense of ownership over their creations.
Support decision-making in the artistic process by involving your child in selecting paints, colors, and even designing the painting’s layout. For instance, ask them to pick two or three favorite colors from a palette or suggest shapes and patterns for a collaborative piece.
To further stimulate creativity, try setting up “art stations” with various materials like sponges, brushes, or stencils. Let your child rotate through these stations, making choices about what they’d like to add or experiment with next.
Exploring Different Blow Painting Techniques
Let’s get creative and explore some fun blow painting techniques together, from swirling colors to intricate designs, you’ll be amazed at what you can create!
Splat Painting and Textured Effects
Splat Painting and Textured Effects are an absolute blast for kids to explore with blow painting! By manipulating paint flow through blowing and movement, you can create one-of-a-kind textures, patterns, and designs that add a whole new level of fun and creativity to their artwork.
To get started, try using a brush or spatula to apply thick layers of paint to the surface. Then, have your child blow gently on the paint to splatter it and create unique textures. You can also experiment with different blowing techniques, such as blowing in short bursts or sweeping the paint back and forth across the surface.
For added visual interest, try using a combination of wet and dry painting techniques. For example, you could use a wet brush to apply paint to one area, and then blow on it to create a splattered effect before letting it dry and repeating the process in another area. This will give your child’s artwork a fun, layered look with different textures and patterns throughout.
Layering and Color Mixing
Blow painting is all about creativity and experimentation. One of the most exciting aspects of this technique is layering colors to create unique shades and effects. When you apply multiple layers of paint, it’s like building a story – each layer adds depth and dimension.
To get started with layering, begin by applying a base coat that sets the tone for your artwork. This could be a light wash or a bold stroke, depending on what you’re trying to achieve. As you add subsequent layers, remember that less is often more. Apply thin coats, allowing each layer to dry completely before adding the next.
By mixing different hues, you can create an array of new shades and colors. For example, combine a blue base coat with yellow highlights for a beautiful shade of green. Experiment with layering colors in complementary pairs – red and green, or orange and blue – to create striking contrasts. Remember, it’s okay if things get messy – that’s all part of the fun! Encourage your child to try different combinations and see what magical results they can achieve.
Advanced Blowing Techniques and Experimentation
Now that you’ve mastered some basic blow painting techniques, it’s time to take your creativity to the next level! In this section, we’ll explore advanced blowing techniques and experimentation with unusual surfaces and materials.
Pushing boundaries is all about experimenting with new ways of thinking. Try blowing paint onto unconventional surfaces like fabric, wood, or even glass. You can also try using different shapes and sizes of blow pipes to achieve unique effects. For example, a smaller pipe will give you more control over the flow of paint, while a larger one will create bigger, more dramatic splatters.
To add an extra layer of texture and interest to your artwork, incorporate various materials into the process. Glitter, beads, or even sequins can be added directly to the wet paint for an extra burst of color and sparkle. You can also try using household items like straws, sponges, or even combs to create unique patterns and textures.
Remember, the most important thing is to have fun and experiment freely! Don’t be afraid to make mistakes – they can often lead to unexpected and exciting results.
Displaying and Celebrating Blow Painting Masterpieces
Now that you’ve created your amazing blow painting masterpieces, it’s time to showcase them proudly! Let’s dive into some creative ways to display and celebrate your artwork.
Preparing Artwork for Display
When you’ve finally completed that beautiful blow painting masterpiece, it’s time to share it with the world! But before you can display your art proudly, there are a few things to consider. Cleaning and drying your artwork is essential to prevent damage and ensure its longevity.
First, gently wash your artwork with soap and warm water, using a soft-bristled brush to remove any excess paint or debris. Rinse thoroughly and let it air-dry completely – this may take several hours or overnight depending on the thickness of the paint. Be patient; rushing the drying process can lead to cracking or fading.
Once dry, you’ll want to consider framing your artwork. This not only adds a professional touch but also helps protect it from dust and damage. When choosing a frame, select one that complements the colors and theme of your piece. For example, if your blow painting features bright hues, choose a white or neutral-colored frame to let the art shine.
As for preservation, consider applying a clear coat of varnish or spray to seal in the colors and prevent fading over time. This is especially important if you plan to display your artwork in direct sunlight. By taking these simple steps, you’ll be able to enjoy and preserve your masterpiece for years to come.
Encouraging Children to Share Their Work
When it comes to blow painting with kids, displaying and celebrating their masterpieces is just half the fun. But what about encouraging them to share their work with others? This can be a daunting task for some children, especially if they’re introverted or perfectionists. However, sharing art with others can have a profound impact on building confidence and a sense of accomplishment.
Here’s a tip: start small. Encourage your child to share their artwork within the family first. You might say something like, “Hey kiddo, why don’t you show Grandma what you created today?” or “Let’s put up some of our favorite blow paintings in the hallway for everyone to see.” As they become more comfortable sharing with others, gradually expand their audience.
When receiving feedback from others, it’s essential to teach your child that constructive criticism is not a personal attack. Explain that everyone has different opinions and that it’s okay if not everyone likes their artwork. By doing so, you’ll help them develop a growth mindset and become more open to trying new things and taking risks in the creative process.
Creating a Gallery or Art Show
When it’s time to showcase their masterpieces, consider hosting an in-home exhibition where family and friends can admire their artwork. This intimate setting allows kids to share their creativity with loved ones while feeling comfortable and at ease. You can set up a few easels or display boards around the house, add some string lights, and voilà – you have an instant gallery!
Alternatively, consider showcasing their work in a local art gallery. Many galleries host children’s art exhibitions or offer classes, which is a great way to expose your little artists to different mediums and styles. If this isn’t feasible, look into community art events where kids can display their artwork alongside other talented young artists.
To make the experience even more enjoyable, encourage kids to write artist statements about their pieces, describing the inspiration behind each work of art. This adds a personal touch and allows viewers to appreciate the creative process that went into creating each masterpiece. As a parent or guardian, be sure to take plenty of photos to capture the excitement on your child’s face as they share their artwork with others!
Frequently Asked Questions
What are the best surfaces for blow painting, and how do I prepare them?
You can use a variety of surfaces, such as paper, canvas, or even fabric, but make sure they’re clean and dry before starting. Apply a thin layer of gesso to create a smooth surface for optimal results.
Can blow painting be done indoors with minimal mess, and what precautions should I take?
Yes, blow painting can be done indoors without creating too much mess. Use a drop cloth or plastic tablecloth to cover your workspace, and have children wear old clothes or smocks to protect their clothing from paint splatters.
How do I encourage my child to experiment with different colors and techniques in blow painting?
Encourage experimentation by providing a variety of colors and materials, such as metallic paints or texture sprays. Also, demonstrate different techniques yourself, like layering and blending colors, to inspire your child’s creativity.
What safety precautions should I take when children are engaging in blow painting activities?
Ensure the workspace is well-ventilated, and have kids wear protective gear like goggles to prevent eye irritation from paint splatters. Supervise them closely while they’re blowing paint, especially if they’re using strong colors or metallic paints.
Can adults also enjoy blow painting as a creative outlet, and what tips would you recommend for them?
Yes, adults can definitely benefit from blow painting as a form of relaxation and self-expression. To get started, try experimenting with different techniques, such as layering and blending colors, and don’t be afraid to make mistakes – they can often lead to new and interesting effects!