
If you’re looking for a fun and engaging way to encourage your child’s creativity, fine motor skills, and cognitive development, consider introducing them to the world of cardboard looms. These simple yet effective tools can be made at home using cardboard boxes and everyday materials, making them an accessible and budget-friendly option for kids of all ages.
By creating their own cardboard loom, children can learn valuable skills such as problem-solving, pattern recognition, and hand-eye coordination, while also exploring the world of weaving and textile arts. In this article, we’ll take you through a step-by-step guide on how to make and use a cardboard loom, complete with fun projects and ideas to get your child started on their creative journey. Whether you’re a parent or educator looking for new ways to engage young minds, read on to discover the benefits of cardboard looms for kids.
Benefits of Cardboard Looms for Children’s Development
Using a cardboard loom can have numerous benefits for children’s cognitive, fine motor, and creative development, making it an excellent tool for early learning. Let’s explore these advantages in more detail.
Fostering Creativity and Self-Expression
Using a cardboard loom is an excellent way to encourage children to think creatively and explore their imagination. By providing a versatile tool that can be used to create various types of weaving projects, you’re giving them the freedom to experiment with different colors, textures, and patterns.
As they work on their project, children will naturally start to express themselves through art, allowing their personality and style to shine through in their design choices. This process helps build confidence and self-expression, essential skills for children to develop as they grow.
To maximize this benefit, try these tips: encourage your child to choose a color palette that reflects their mood or interests, suggest experimenting with different materials like yarns or threads of varying textures, and most importantly, let them take ownership of the project. By doing so, you’ll be fostering an environment where creativity and self-expression are valued and nurtured.
Remember, it’s not about creating a perfect piece of art; it’s about the process and journey your child is on. So sit back, watch them have fun, and enjoy the experience together!
Developing Fine Motor Skills and Hand-Eye Coordination
Weaving on a cardboard loom is an excellent way to engage young children in physical activity while promoting their fine motor skills, hand-eye coordination, and dexterity. The repetitive motion of threading yarn through the loom’s slots helps build finger strength and control, essential for everyday tasks like tying shoelaces or buttoning shirts.
As children weave, they develop the ability to manipulate small objects with precision, a skill that translates to other areas of life. For instance, weaving on a cardboard loom can help improve hand-eye coordination by requiring kids to watch where their fingers are moving and anticipate the next step in the process.
To maximize these benefits, consider starting with simple projects like creating straight or curved strips of woven fabric. As children become more confident, they can experiment with different colors, patterns, and textures, encouraging creativity and exploration while refining their fine motor skills. Be sure to provide a comfortable workspace for your child, making it easy for them to sit and work on the loom without straining their neck or back.
Enhancing Cognitive Abilities through Problem-Solving
When children engage with cardboard looms, they’re not just creating a simple toy – they’re developing essential cognitive skills that will benefit them throughout their lives. As they learn to navigate the weaving process, kids are naturally drawn into a world of critical thinking, problem-solving, and analytical reasoning.
As they experiment with different colors, patterns, and textures, children begin to think creatively about how these elements interact with one another. They might ask themselves questions like “How can I create a symmetrical pattern?” or “What will happen if I use a thicker yarn?” These internal monologues are the seeds of critical thinking, as kids start to analyze their actions and predict outcomes.
As they encounter obstacles or unexpected twists in their project, children learn to think on their feet – adjusting their approach, trying new techniques, or even starting over from scratch. This iterative process teaches them that problems can be broken down into manageable parts, allowing for a deeper understanding of the weaving process as a whole.
Choosing the Right Cardboard Loom for Your Child
When it comes to choosing a cardboard loom for your child, there are several factors to consider to ensure they have a fun and successful experience.
To make an informed decision, you’ll want to think about your child’s age and skill level.
Types of Cardboard Looms: Simple vs. Complex Designs
When it comes to choosing a cardboard loom for your child, one of the most important decisions is selecting a design that suits their age and skill level. Cardboard looms come in a variety of designs, ranging from simple to complex patterns.
Simple cardboard looms are ideal for young children, typically aged 3-6 years old. These looms have few pegs or spindles and require minimal threading. They’re perfect for introducing your child to the basics of weaving and are often designed with bright colors and fun shapes. For example, a simple cardboard loom might feature a single row of pegs with large holes, making it easy for small hands to thread yarn.
On the other hand, complex cardboard looms are better suited for older children aged 7-10 years old. These designs typically have multiple rows of pegs and may require more intricate threading patterns. They’re great for kids who want to create more elaborate weavings and are often designed with additional features like tensioning mechanisms or adjustable pegs. When choosing a complex loom, consider your child’s skill level and be prepared to assist them with more challenging aspects of the design.
Ultimately, the type of cardboard loom you choose will depend on your child’s individual needs and abilities. Consider their age, skill level, and interests when making your selection. With a little patience and practice, your child can create beautiful and unique weavings using either simple or complex cardboard looms.
Materials Needed for a DIY Cardboard Loom
To make a DIY cardboard loom at home, you’ll need to gather some essential materials. Start by collecting cardboard tubes from paper towel rolls or toilet paper rolls. These will serve as the warp and weft of your loom. You can also use sturdy cardboard sheets for additional support.
For cutting and shaping the cardboard tubes, you’ll need a good pair of scissors or a craft knife. Be sure to choose one that’s safe for your child to handle. Glue will come in handy for securing the tubes together and holding them in place. You may also want to have some tape on hand for extra reinforcement.
Don’t forget to grab some string, yarn, or twine to create the warp threads. These will be attached to the cardboard tubes using glue or tape. Finally, gather any decorative materials your child might like to add, such as paint, markers, or stickers. With these simple materials, you’ll have everything you need to create a functional and fun DIY cardboard loom for your child.
Safety Precautions When Using Cardboard Looms
When working with cardboard looms, it’s essential to prioritize your child’s safety. This means being present and attentive while they weave and craft on their loom. Proper supervision is crucial to prevent accidents and ensure the child uses the loom correctly.
To start, make sure you’re in a well-lit area where your child can easily see what they’re doing. This will help them avoid accidents caused by tripping or bumping into objects. Next, keep an eye on your child’s hands and fingers to prevent them from getting caught between the cardboard pieces or the weaving mechanism.
When handling materials, teach your child to handle scissors carefully, using both hands if necessary, and always keeping their fingers away from the blades. For younger children, consider using blunt-tipped scissors or safety scissors with a finger guard to minimize the risk of injury.
By following these simple precautions, you can create a safe and enjoyable weaving experience for your child. Remember to be patient and guide them gently as they learn to navigate the cardboard loom.
Creating Your Own Cardboard Loom: A Step-by-Step Guide
Now that you’ve gathered your materials, let’s dive into creating your cardboard loom by following these easy steps to craft a fun and functional weaving tool for kids. We’ll break it down into manageable chunks.
Gathering Materials and Setting Up the Loom
Gathering materials for your cardboard loom is an exciting part of the process. You’ll need to collect some basic supplies, which can be found around the house or purchased at a craft store. Start by gathering a large piece of cardboard, preferably a cereal box or similar shape that can serve as the base of your loom.
Next, you’ll need some straws or plastic tubes to create the warp threads. You can also use yarn or twine if you have it on hand. Cut the straws or tubes into equal lengths, about 6-8 inches long. This will give you a good starting point for creating your warp.
Now, let’s move on to setting up your loom. Place the cardboard base on a flat surface and draw a grid with a ruler and pencil. The grid should have rows and columns, with evenly spaced markings to help guide your warp threads. Start by placing the straws or tubes along the top row of the grid, spacing them out evenly. Use a small amount of glue to secure each straw in place, making sure they’re straight and even. As you add more rows, use the previous row as a reference point to keep everything aligned.
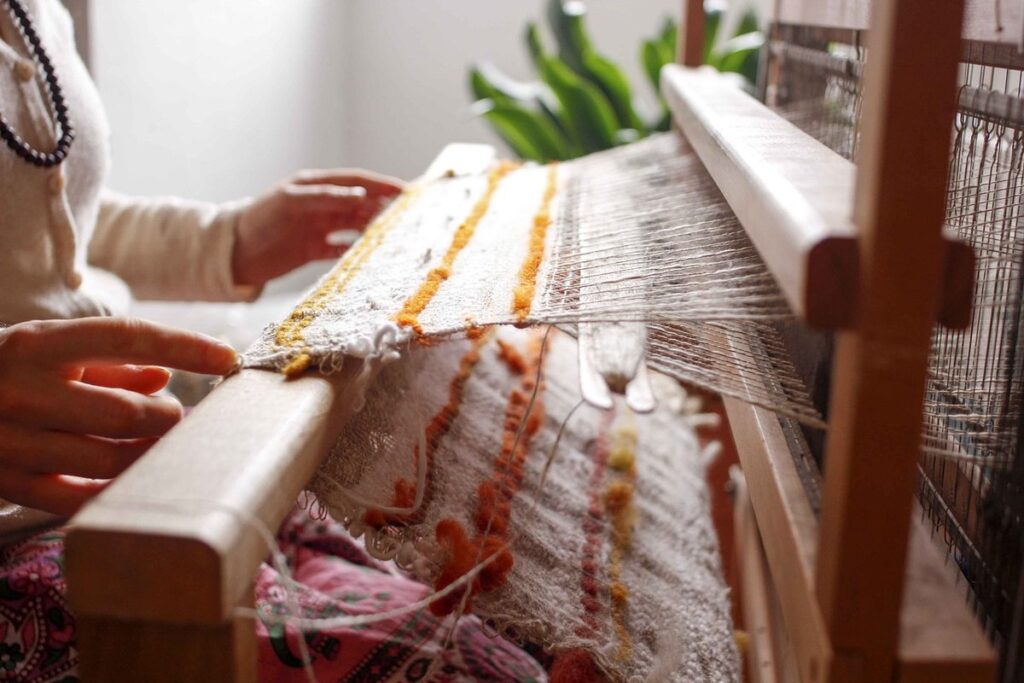
Weaving Techniques for Beginners and Advanced Users
Now that you’ve built your cardboard loom, it’s time to explore the world of weaving! Don’t worry if you’re new to this craft – we’ll start with simple techniques and gradually move on to more complex ones. For beginners, let’s begin with the basic over-under weave.
To create this simple pattern, take two strands of yarn and pass one strand over the other, then under, and so on. This will give you a classic, textured look. To add some visual interest, try experimenting with different colors or yarn weights.
As you gain confidence, move on to more intricate patterns like the herringbone weave or the twill pattern. For these, you’ll need to pass the yarn over two or three strands before going under, creating a subtle diagonal line. Don’t be afraid to mix and match different techniques – this is where the magic happens!
If you’re feeling adventurous, try incorporating textures by using different yarn types, like fuzzy or felted wool. To add some extra dimension, experiment with wrapping yarn around the warp threads in a specific pattern.
Remember, practice makes perfect! Don’t worry if your first attempts don’t turn out exactly as expected – keep experimenting and soon you’ll be creating beautiful, unique pieces that showcase your creativity.
Tips and Tricks for Encouraging Kids to Get Creative with Cardboard Looms
Encouraging kids to tap into their creativity with cardboard looms can be a fun and rewarding experience for both you and your little ones. One great way to do this is by incorporating color theory into the weaving process. For example, you can challenge them to create a piece using only primary colors or to mix different hues to achieve specific shades.
Another idea is to experiment with various materials that can be added to the loom, such as beads, sequins, or even fabric scraps. This not only adds texture but also introduces kids to different techniques and patterns. You could ask them to create a piece using only natural fibers like wool or cotton, or try combining synthetic and natural materials for interesting effects.
Remember, the goal is to encourage experimentation and exploration, so be sure to give your child the freedom to make mistakes and learn from them. With patience and guidance, they’ll soon become experts in weaving unique pieces that showcase their individual creativity.
Projects and Ideas for Using Cardboard Looms
Now that you’ve set up your cardboard loom, it’s time to get creative! We’ll share some fun projects and ideas to help you take your weaving skills to the next level.
Simple Scarves and Wall Hangings
When you’re just starting out with your cardboard loom, it’s essential to begin with simple projects that will help you get familiar with the tool. One of the best ways to do this is by making decorative items like scarves and wall hangings.
To make a scarf, start by warping the cardboard loom with yarn or thread. Then, begin weaving in a simple over-under pattern. You can experiment with different colors and textures to create a unique design. For instance, try using a soft pastel pink for the warp and a contrasting blue for the weft.
For wall hangings, consider using thicker yarns or threads that will give your piece more texture and visual interest. You can also add embellishments like beads, sequins, or even fabric scraps to give it a personalized touch. Remember to keep your design simple, especially if you’re new to weaving. A geometric pattern or a simple repeating motif is perfect for beginners.
As you work on these projects, don’t be afraid to experiment and try new things. You can use different yarns, colors, and techniques to create unique pieces that reflect your personality. And most importantly, have fun!
More Complex Projects: Bags, Purses, and Home Decor Items
When kids master basic projects on their cardboard looms, it’s time to take their skills to the next level by creating more complex and intricate designs. Bags and purses are a great way to do this, as they require working with larger pieces of cardboard and incorporating multiple colors. To get started, encourage your child to design a pattern or choose a pre-made one from online resources. They can then use their loom to weave the bag’s body, adding a sturdy bottom and straps for handles.
Home decor items are another exciting project that kids can tackle with a cardboard loom. Coasters, placemats, and even wall hangings can be created using a variety of yarns and weaves. For example, your child could make a set of coasters with different patterns or textures to add visual interest to any room.
To take their projects to the next level, remind kids to experiment with different materials and techniques. This might involve trying new colors, yarn weights, or even incorporating other craft supplies like ribbons or buttons. By doing so, they’ll develop problem-solving skills and learn that mistakes can often lead to unexpected and delightful results.
Troubleshooting Common Issues with Cardboard Looms
We know that even the most eager little weavers can run into problems when working with cardboard looms, and it’s time to tackle those tricky issues head-on. Let’s get started on fixing common mistakes together!
Dealing with Tangles and Knots
Dealing with tangles and knots is one of the most frustrating things that can happen when working with a cardboard loom. It’s not uncommon for kids to get their yarn caught on the edges or between the slats, resulting in a knotted mess. To prevent this from happening, it’s essential to teach your child how to handle the yarn carefully and gently.
To avoid tangles, start by having your child thread the yarn through the loom with one end, leaving a small tail at the beginning. This will make it easier to untangle if needed. When working on a project, encourage your child to keep the excess yarn organized and tidy, using a small container or clip to manage the loose ends.
When a tangle does occur, don’t panic! Gently tease out the knot by starting from one end and working slowly towards the other. You can also use a paperclip or a blunt object like a pencil to carefully separate the tangled fibers. Remember, prevention is key – taking small steps to prevent tangles in the first place will save you (and your child) time and frustration in the long run.
Handling Breakage or Damage to the Loom
When working with cardboard looms, it’s inevitable that breakage or damage will occur at some point. If this happens, don’t panic! Instead, take a deep breath and assess the situation.
If the damage is minor, such as a torn edge or a bent corner, you can try repairing it using glue or tape. For more extensive damage, like a cracked board, you might need to replace the affected section with a new piece of cardboard. Make sure to match the texture and color as closely as possible for a seamless fix.
However, if your loom is beyond repair, consider making a new one! This can be a fun opportunity to get creative and try out different design ideas or colors. You can use old cereal boxes, file folders, or other cardboard materials to create a brand-new loom.
Remember, the process of repairing or replacing a cardboard loom is all part of the learning experience. It’s an excellent chance for kids to develop problem-solving skills, think creatively, and take ownership of their projects. So don’t worry if your loom breaks – just get creative and start anew!
Conclusion: The Rewards of Cardboard Looms for Kids
Now that you’ve learned how to set up and use a cardboard loom, let’s recap the rewards your child has gained from this fun and educational experience.
Reflecting on the Benefits and Fun Aspects of Cardboard Looms
As you continue on this creative journey with your child and cardboard loom, it’s essential to step back and appreciate the numerous benefits that come with this simple yet ingenious tool. Not only is it a cost-effective alternative to traditional looms, but it also offers a world of possibilities for creative development and enjoyment.
One of the most significant advantages of using cardboard looms is the boost they provide to your child’s fine motor skills and hand-eye coordination. As they manipulate the yarn or string on the loom, they’ll be developing their dexterity and precision, setting them up for future success in activities like knitting, crochet, or even playing musical instruments.
But beyond these practical benefits lies a realm of creative expression that cardboard looms unlock. By experimenting with different colors, patterns, and textures, your child will be encouraged to think outside the box (or in this case, the loom!) and explore their imagination. This process not only fosters self-confidence but also helps develop problem-solving skills as they navigate through challenges like tangled yarn or uneven tension.
To maximize the fun aspects of using cardboard looms with your kids, try incorporating games and activities into your sessions. For example, you can challenge them to create a specific design within a set time limit, or have them guess the pattern before weaving it. These lighthearted approaches will not only make the experience more enjoyable but also help build their patience and persistence.
By embracing the cardboard loom as a tool for creative development, you’ll be providing your child with a lifelong skillset that extends far beyond the confines of the playroom or craft space. So sit back, relax, and let the fun begin – and remember to cherish those moments when your child exclaims, “Look at what I created!”
Frequently Asked Questions
What are the best materials for a DIY cardboard loom, and how can I ensure they are safe for my child to use?
When creating a DIY cardboard loom, it’s essential to choose materials that are non-toxic and sturdy enough to withstand repeated use. Cardboard boxes, craft sticks, and yarn or string are excellent options. To make the loom safer, consider using washable markers or paint and avoid any small parts that can be easily detached.
How do I handle tangles and knots when working with a cardboard loom, especially for beginners?
Dealing with tangles and knots is a common challenge when using a cardboard loom. To prevent them from forming, encourage your child to weave in small sections and gently tease out any knots as they occur. For more severe cases, try soaking the yarn or string in water to make it easier to untangle.
Can I use a cardboard loom for older children who are new to weaving, or is it better suited for younger kids?
Cardboard looms can be adapted for children of various ages and skill levels. While they’re perfect for introducing young children to the basics of weaving, you can also modify them for older kids by using more complex designs or adding additional features like shuttles or pedals.
What are some simple projects that I can start with when teaching my child how to use a cardboard loom?
Beginners can start with simple scarves and wall hangings made from plain yarn or string. These projects help develop hand-eye coordination, fine motor skills, and basic weaving techniques. As your child becomes more confident, you can move on to more complex projects like bags, purses, and home decor items.
How do I store and maintain a cardboard loom when it’s not in use, and what are some tips for extending its lifespan?
To extend the life of your cardboard loom, store it in a dry place away from direct sunlight. Clean any dust or debris regularly with a soft brush or cloth to prevent damage. You can also reuse or repurpose old cardboard boxes by reassembling them or gluing new cardboard pieces together to create a more durable structure.