
Christmas is just around the corner, and you know what that means – time to get crafty with the kids! Pine cone crafts are a great way to keep little hands busy while creating beautiful decorations for your home. Not only are they easy to make, but they’re also perfect for teaching kids about nature and sustainability. From making pine cone wreaths to crafting ornaments, there are countless ways to get creative with these natural treasures.
In this article, we’ll show you how to make some amazing pine cone crafts that kids will love. We’ll share step-by-step guides on creating adorable pine cone decorations that are sure to become a part of your family’s holiday traditions. Whether you’re looking for a fun activity to do together or a unique gift idea, these easy and creative pine cone crafts have got you covered. So grab some pine cones, glue, and get ready to unleash the creativity!
Introduction to Pine Cone Crafts
Get ready for some fun and easy Christmas crafts that your little ones will love, all made from natural pine cones and a few simple materials. We’ll show you how to bring the magic of nature indoors!
Benefits of Pine Cone Crafts for Children’s Development
Engaging in pine cone crafts can have a profoundly positive impact on children’s development. One of the most significant benefits is the improvement of fine motor skills. As children carefully place glue, threads, and other materials onto the pine cones, they strengthen their hands and fingers, laying the foundation for future activities like writing and drawing.
Pine cone crafts also foster creativity in kids. By experimenting with different textures, colors, and designs, children develop their imagination and learn to think outside the box. This creative expression is essential for cognitive development and can be a powerful outlet for emotional release.
Another valuable skill that pine cone crafts help children develop is problem-solving ability. As they work through various projects, kids encounter challenges like uneven glue application or stubborn thread knots. By persevering and finding solutions to these problems, they build resilience and confidence in their abilities.
In addition to these benefits, arts and crafts activities like pine cone crafting have been shown to enhance focus, hand-eye coordination, and spatial awareness in children. They also provide an opportunity for bonding with parents and caregivers, making the creative process a delightful experience for all involved.
Getting Started with Pine Cones: Tips and Tricks
When it comes to getting started with pine cone crafts, you’ll be thrilled to know that the materials needed are easily accessible and super fun for kids to work with. To begin, gather a few essential items: pine cones (you can collect them from nature or buy them at craft stores), a good quality glue (hot glue gun or white school glue work well), scissors, and an array of decorations such as ribbons, glitter, paint, and beads.
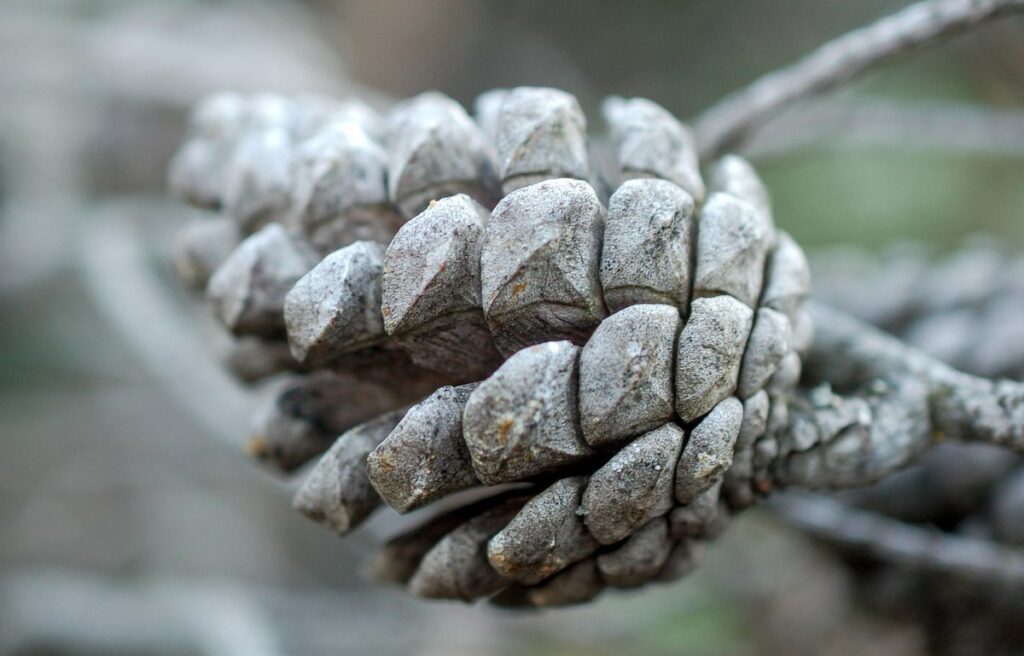
When selecting the right type of pine cones, consider their size, shape, and color. For Christmas crafts, look for cones with a more rustic appearance to evoke a cozy winter feel. If you’re collecting from nature, make sure they are dry and free of debris before bringing them home. To prepare your pine cones, gently wipe them clean with a damp cloth to remove any dirt or sap. This will ensure a smooth crafting experience.
For an added twist, try using different shapes and sizes of pine cones to create a diverse and visually appealing project. Encourage kids to experiment with various decorations to make their creations unique. With these simple steps and materials, you’re all set to start creating wonderful Christmas crafts that will be treasured for years to come!
Simple and Easy Pine Cone Crafts for Kids
Get creative with your little ones using natural pine cones, we’ll show you how to make some adorable and easy crafts perfect for a fun Christmas activity. From ornaments to decorations, there’s something for every child.
Project 1: Pine Cone Wreath
Let’s get started on our first project: making a simple pine cone wreath that’s perfect for kids to create with minimal supervision. To begin, you’ll need some basic materials like wire (you can use floral wire or even a wire coat hanger), hot glue gun (with adult assistance, of course!), and plenty of pine cones in various sizes.
To make the wreath, start by bending the wire into a circle shape to form the base. Then, thread a few pine cones onto the wire to get an idea of how they’ll fit together. Once you have your desired arrangement, begin gluing the pine cones onto the wire, overlapping them slightly as needed. This will give your wreath some depth and texture.
As you work on this project, encourage kids to experiment with different patterns and arrangements. They can try grouping similar-sized pine cones together or mixing large and small ones for a more eclectic look. Don’t worry too much about perfection – the charm of this wreath lies in its natural, rustic beauty!
Project 2: Pine Cone Garland
Create a festive and inviting atmosphere in your home by making a beautiful pine cone garland. This project is perfect for kids who love crafting and decorating. To make a pine cone garland, you’ll need some basic materials such as pine cones, string or twine, scissors, and any desired decorations like beads, ribbons, or artificial flowers.
Start by threading the string through each pine cone, spacing them out evenly to create a visually appealing design. You can also add decorations between the pine cones for extra flair. For example, you could thread a bead or two onto the string before adding another pine cone, creating a fun and colorful pattern. If you want to get creative, try using different types of string like yarn or raffia in various colors to match your home’s holiday decor.
Some other materials that can be used for decorations include glittery pipe cleaners, small ornaments, or even artificial berries. Get the kids involved by letting them choose their favorite decorations and add them to the garland as they go along. With a little patience and imagination, you’ll have a stunning pine cone garland to hang on your mantel or staircase in no time!
Project 3: Pine Cone Ornaments
To make individual pine cone ornaments, gather the following materials: pine cones, glue, glitter, and a string or twine. Show kids how to spread a thin layer of glue all over the pine cone, encouraging them to cover it evenly. Next, sprinkle some glitter on top, letting them choose their favorite colors or stick with traditional red and green for a festive look.
Explain that the glue needs time to dry completely before handling the ornaments carefully by the string. You can also add some beads, sequins, or other embellishments to make each ornament unique. As they work, remind kids to be creative with the glitter distribution and not to worry about making a mess – it’s all part of the fun!
This project is perfect for younger children who are just starting to develop their fine motor skills. Encourage them to experiment with different glue-to-glitter ratios or even try using other materials like beads or small bells inside the pine cone. The end result will be an adorable, sparkly ornament that they can hang on the tree or give as a gift.
More Advanced Pine Cone Crafts for Kids
Now that you’ve mastered the basics of pine cone crafts, it’s time to get creative and take your projects to the next level with these more advanced ideas. Get ready for some fun!
Project 4: Pine Cone Bird Feeder
For Project 4, let’s get creative with our pine cone bird feeder. This project requires some more effort and planning but is totally worth it for the kids to see their hard work pay off. To make this project a success, you’ll need peanut butter, birdseed, pine cones, a string or twine, and a few other basic materials.
Begin by spreading a generous amount of peanut butter on each pine cone, making sure to cover them evenly. Then, roll the pine cones in a plate of birdseed to get them nice and coated. This will not only provide food for the birds but also give the feeder its natural look. Once you’ve finished with the peanut butter and seeds, tie a string around the top of each cone, leaving enough room to hang it from a tree.
When choosing a location to hang the bird feeder, consider a spot that’s safe and easy for the kids to access. Make sure it’s at least 10 feet off the ground to avoid attracting pests like squirrels or raccoons. Also, keep in mind that different types of birds prefer different locations, so you may need to experiment with a few spots before finding the perfect one.
As an added bonus, you can use this project as an opportunity to teach your kids about different bird species and their habitats. This will help them develop a deeper appreciation for nature and its creatures. With proper installation and maintenance, these pine cone bird feeders can attract all sorts of fascinating birds to your backyard.
Project 5: Pine Cone Potpourri Bowl
Get creative and make a beautiful Pine Cone Potpourri Bowl using natural elements that evoke the warmth of winter. This project is perfect for kids to practice their fine motor skills while experimenting with different textures and scents.
To create this bowl, start by gathering pine cones of various sizes, some evergreen branches, a few cinnamon sticks, a handful of potpourri spices (like dried orange slices, rose petals, or star anise), and a small container to hold the mixture. Begin by arranging the pine cones in a decorative pattern on the bottom of the bowl, followed by a sprinkling of evergreen branches and a pinch of potpourri spices. Add a few cinnamon sticks for extra fragrance.
As the centerpiece, this Pine Cone Potpourri Bowl is perfect for gifting to family members or friends who appreciate handmade decorations. To make it even more special, consider adding a personalized gift tag with a message like “Warming Wishes” or “Season’s Greetings.” Present it in a decorative basket or bag filled with scented candles and hot cocoa mix for an extra-special treat.
Project 6: Pine Cone Gift Tags
Getting creative with gift-giving is one of the most exciting aspects of Christmas. What if I told you that your little ones can create personalized pine cone gift tags to add an extra touch to their loved ones’ presents? This fun and easy DIY project is perfect for kids aged 6+, who can get involved in making something truly special.
To start, gather materials like pine cones, white glue, ribbons, scissors, and some decorative items like glitter, sequins, or stickers. Begin by applying a small amount of glue to the top of each pine cone, then carefully place it onto the gift tag or card. This will help secure the pine cone in place.
Once the glue is dry, let your kids get creative with the ribbons! They can choose from various colors and patterns to match their loved one’s style. Simply tie a ribbon around the neck of the pine cone, adjusting its length as needed. To add some extra flair, encourage them to sprinkle glitter or apply stickers around the pine cone for a beautiful, personalized touch.
This project teaches kids about creativity, fine motor skills, and giving back – a perfect combination for the holiday season!
Using Pine Cones in Seasonal Decorations
Get creative and add a personal touch to your Christmas decorations by learning how to use pine cones in fun and easy DIY projects that kids will love making. We’ll share some fantastic ideas!
Tips for Displaying Pine Cones Indoors
Displaying pine cone crafts indoors can add a beautiful and rustic touch to your holiday decor. To get started, choose a prominent location for your display, such as a console table, mantel, or coffee table. Consider combining your pine cones with other decorations like candles, evergreen branches, and festive ornaments.
You can also create a vignette by grouping pine cone crafts together on a decorative tray or platter. This adds texture and visual interest to the arrangement. For example, pair a bowl of pine cones with some holiday-themed books, a vase filled with red berries, and a few candles for a cozy ambiance.
To make your display more dynamic, experiment with different heights and textures by stacking pine cone arrangements or placing them on top of decorative objects like vases or wooden logs. Additionally, consider incorporating natural elements like pine needles, twigs, and holly to bring in a festive touch. With these tips, you can create a beautiful and eye-catching display that complements your holiday decor.
Ideas for Pine Cone Outdoor Decorations
Get creative and bring some natural charm to your outdoor space with pine cone decorations. Imagine strolling through your yard on a crisp winter evening, surrounded by the warmth and magic of the holiday season. Pine cones can add a touch of rustic elegance to your outdoor decor, and they’re incredibly easy to work with.
Start by creating a beautiful pine cone wreath for your front door or wall. Simply glue pine cones onto a wire or foam base in a random pattern, or create a more uniform look by arranging them symmetrically. You can add some evergreen branches or ribbons around the edges for extra flair.
Another great idea is to hang pine cone garlands along your porch or staircase. Drill a small hole into each pine cone and thread a string or twine through it, then tie a knot at the end of each one to secure them in place. You can add some fairy lights or candles to create a cozy ambiance.
When creating centerpiece arrangements for your outdoor tables, group several pine cones together and surround them with evergreen branches, holly berries, or other seasonal foliage. Add some decorative stones or pinecones for extra visual interest. These simple yet elegant decorations will surely be the highlight of your holiday gatherings!
Safety Precautions When Working with Pine Cones
When working with pine cones, there are a few important safety precautions to keep in mind to ensure you have fun and stay safe while crafting with them this holiday season.
Allergic Reactions and Skin Irritation
When working with pine cones, it’s essential to be aware of the potential risks associated with allergic reactions and skin irritation. Pine pollen can trigger allergies in some individuals, causing symptoms such as sneezing, itching, and congestion. Additionally, the oils present in pine cones can cause skin irritation, particularly for those with sensitive skin.
To minimize these risks, make sure to work in a well-ventilated area, and avoid touching your face or eyes while handling pine cones. If you’re planning to use a craft project that involves applying adhesives or other substances to the pine cones, be cautious not to get any of these materials on your skin.
Before starting your project, wash your hands thoroughly with soap and water, and consider wearing gloves to prevent direct contact with the pine cones. Regularly cleaning your workspace can also help reduce the accumulation of pollen and oils that may exacerbate allergic reactions or skin irritation.
Remember, it’s always better to err on the side of caution when working with new materials, especially if you’re unsure about any potential allergies or sensitivities. If you experience any symptoms such as itching, redness, or swelling after handling pine cones, discontinue use and consult a medical professional for advice.
Fire Hazards and Electrical Appliances
When working with pine cone crafts, especially during the holiday season when electrical appliances are more commonly used, it’s essential to be mindful of fire hazards. Electrical appliances such as hot glue guns, string lights, and heaters can easily ignite flammable materials like dry pine cones or craft supplies.
To avoid accidents, always keep electrical appliances at least 3 feet away from your pine cone crafts. This buffer zone will help prevent overheating and reduce the risk of sparks igniting nearby materials. When using a hot glue gun, ensure it’s placed on a stable surface and never leave it unattended.
When working with string lights or fairy lights, inspect them for any damaged cords or frayed wires before use. Keep the lights away from water and avoid overloading them with too many pine cone decorations.
Remember to supervise children while they work on their pine cone crafts, especially when using electrical appliances. Encourage them to be cautious and remind them that some materials can catch fire easily. By taking these simple precautions, you’ll ensure a fun and safe crafting experience for everyone involved.
Conclusion and Final Tips
Now that you’ve made some beautiful pine cone crafts, let’s wrap up with a few final tips to make your holiday season even more special. Here are some ideas to get you started!
Recap of Key Projects and Techniques
As we wrap up our holiday crafts with pine cones for kids, let’s take a moment to recap some of the main projects and techniques covered. We started with the Pine Cone Wreath, where kids learned how to create a beautiful centerpiece using just a few simple materials.
The Snowball Fights Garland was another fun project that kids loved making. By gluing pine cones onto a string in a random pattern, they created a festive garland perfect for decorating their room or giving as a gift. For younger kids, the Pine Cone Ornaments were a great way to practice fine motor skills while creating a thoughtful present for family members.
One of the key takeaways from this article is that pine cones can be used in so many different ways – not just as decorations! They can also be used in sensory play, as part of nature-inspired crafts, or even as a math tool for measuring and counting. Parents, remember to encourage your kids to experiment and come up with their own unique projects using pine cones.
We hope these projects have inspired you and your little ones to get creative this holiday season!
Encouraging Continued Creativity with Pine Cones
As you and your little ones have had so much fun creating with pine cones during the holiday season, it’s natural to wonder: what happens when Christmas comes to a close? The good news is that pine cones are a versatile craft material that can be enjoyed year-round. To encourage continued creativity with pine cones throughout the year, try these ideas.
Store them in an easily accessible container or jar, and watch as your child’s imagination sparks with new project ideas each time they dig in. You can also collect different types of pine cones from various trees and branches, observing their unique shapes, sizes, and textures to inspire artistic exploration.
Use pine cones in seasonal crafts beyond Christmas, such as a spring-themed vase filler or a summer bird feeder. Get creative with paint, glue, glitter, and other embellishments to add new textures and colors to your pine cone creations. With these ideas, the possibilities for continued creativity are endless, and you’ll be delighted by the imaginative projects that emerge from your little ones’ minds!
Frequently Asked Questions
Can I use artificial pine cones instead of natural ones?
Yes, you can definitely use artificial pine cones as a substitute for natural ones, especially if you’re looking for a more durable option or if the natural ones are hard to come by. However, keep in mind that they might not have the same texture and smell as real pine cones.
How do I store pine cones after crafting with them?
To preserve your pine cone crafts, it’s essential to store them properly. You can wrap them in tissue paper or place them in airtight containers to prevent moisture from accumulating. This will help keep your decorations fresh for the holiday season.
Can kids use hot glue guns safely while making pine cone crafts?
Yes, with adult supervision and proper training, children can learn how to use hot glue guns safely. Make sure they understand the basic safety precautions, such as keeping their fingers away from the nozzle and using a low-temperature setting.
How do I reuse or repurpose old pine cone decorations?
Get creative and think outside the box! You can repurpose old pine cone decorations by updating their look with new ribbons, glitter, or paint. Alternatively, consider using them as plant markers or decorative accents for vases and candle holders.
Can I make pine cone crafts with other materials besides glue and string?
Absolutely! Feel free to experiment with different materials like beads, sequins, or even recycled materials like bottle caps or fabric scraps. This will add an extra layer of creativity and uniqueness to your pine cone crafts.