
The holiday season is upon us, and what better way to get into the spirit than to create some magical Christmas projects with pine cones that your little ones will adore? Not only are these crafts an absolute delight for kids to make, but they also offer a range of benefits for their cognitive development. Arts and crafts activities like these can help improve fine motor skills, hand-eye coordination, and creativity – all essential for young minds. In this article, we’ll explore some fun and easy Christmas projects with pine cones that are perfect for kids, from decorative tree ornaments to clever gift toppers. We’ll also dive into the benefits of arts and crafts activities for children’s development, so you can see why these projects are a great way to spend quality time with your little ones this holiday season.
Introduction to Pine Cone Crafts
Welcome to our world of pine cone crafts, where we’ll show you how to create simple and fun Christmas projects using these natural wonders with your little ones. Let’s get started!
Why Pine Cones Make Great Crafting Material
Pine cones are an excellent choice for kids’ crafts because of their unique natural texture and shape. Their irregular shapes add a touch of whimsy to any project, making them perfect for kids who love to get creative. Plus, pine cones are readily available during the holiday season, often found on trees in your own backyard or easily gathered from nearby parks.
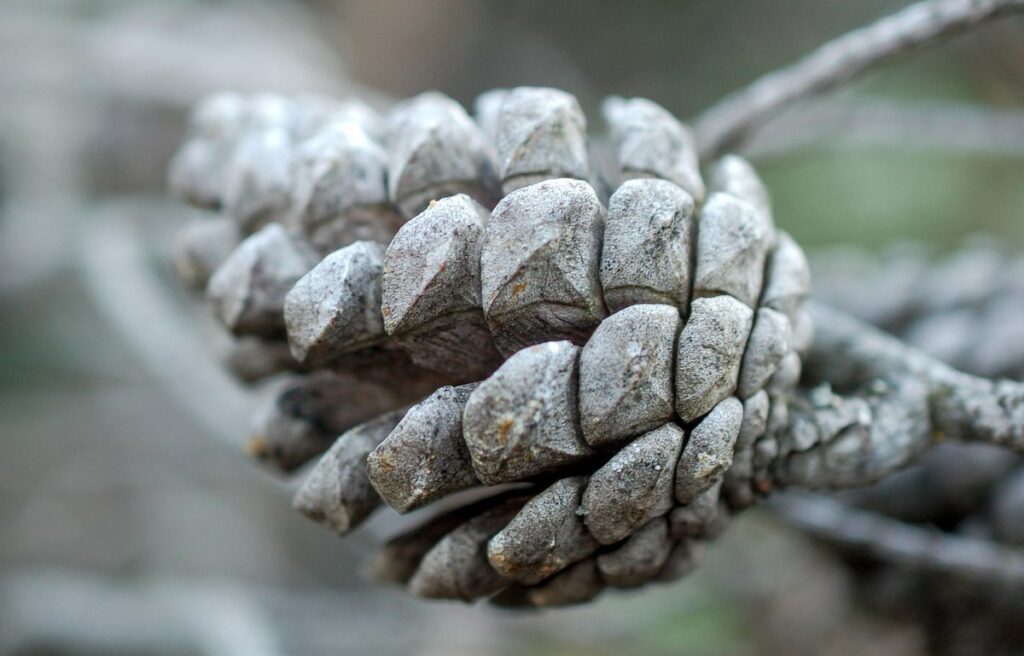
The natural texture of pine cones also provides a great opportunity for kids to explore and learn about the natural world. They can observe the intricate details of the cone’s scales, learn about the different types of pine trees, and even discover how the cones help seeds disperse.
One of the best things about using pine cones in crafts is that they’re incredibly versatile. Kids can paint them, glue them onto cards or ornaments, use them as decorations for the tree, or even turn them into little bird feeders by filling them with peanut butter and seeds. With a little imagination, the possibilities are endless!
Benefits of Engaging in Artistic Activities with Kids
Engaging kids in artistic activities is one of the best ways to stimulate their creativity and overall development. Research has shown that arts and crafts can play a significant role in enhancing children’s cognitive abilities, particularly when it comes to problem-solving and critical thinking. Through activities like pine cone crafts, kids learn to think creatively and approach challenges from different angles.
Fine motor skills are also greatly improved through arts and crafts. When children engage in activities such as threading beads or painting, they develop the hand-eye coordination and dexterity needed for everyday tasks. For example, decorating a pine cone with glue, glitter, and other materials can help refine their fine motor control and hand strength.
Arts and crafts projects like pine cone crafts also provide an excellent outlet for self-expression, allowing children to tap into their imagination and creativity. By giving them the freedom to choose colors, textures, and designs, we encourage them to think outside the box and explore new ideas. As a parent or caregiver, you can further enhance this experience by providing a variety of materials and encouraging kids to experiment with different techniques and styles.
Pine Cone Christmas Tree Decoration Ideas
Get creative and add a natural touch to your tree with our fun and easy pine cone Christmas tree decoration ideas that kids will love making. From rustic to elegant, we’ve got you covered!
Creating a Festive Tree Topper
Creating a tree topper using pine cones is a fun and creative way to add a personal touch to your Christmas tree. To get started, gather some pine cones of varying sizes and shapes, as well as some decorative items like glitter, beads, or small ornaments. You can also use ribbons, twine, or yarn to create a more rustic look.
Begin by selecting the largest pine cone as the base of your tree topper. Glue it securely to a sturdy stick or wire, making sure it’s straight and even. Then, start adding smaller pine cones around the base, overlapping them slightly to create a full and lush appearance. You can use hot glue for this step.
Add some decorative flair by sprinkling glitter or beads over the pine cones. For a more rustic look, wrap twine or yarn around the sticks between the pine cones. Finally, top off your tree topper with a small ornament or decoration that represents the theme of your Christmas tree. With these simple steps, you can create a beautiful and unique tree topper using pine cones that will add a special touch to your holiday decor.
Decorating the Tree Trunk with Pine Cones
Decorating the tree trunk with pine cones is a great way to add some extra festive flair to your Christmas tree. To get started, gather a variety of pine cones in different colors and textures – you can use natural ones or spray paint them in fun colors like red, gold, and silver.
Begin by wrapping a piece of ribbon or twine around the trunk of the tree to create a base for your decoration. This will help the pine cones stick in place and add a decorative touch. Next, start gluing the pine cones to the tree, starting at the bottom and working your way up. You can arrange them in a random pattern or create a more structured design by grouping similar colored pine cones together.
For an extra special look, try layering different textures and colors of pine cones on top of each other. For example, you could start with a base layer of small brown pine cones, then add a middle layer of medium-sized gold ones, and finally top it off with a few large red pine cones. With a little creativity, the possibilities are endless!
Pine Cone Ornaments for the Christmas Tree or Indoors
Get creative and add some natural charm to your holiday decor by making pine cone ornaments that can be hung on your tree or displayed indoors. This section shares two fun designs to try!
Making Decorative Pine Cone Ornaments
Creating unique ornaments using pine cones is a fun and easy project that kids will love. To get started, gather materials like pine cones, glue, string, and other embellishments such as glitter, ribbons, or small bells. Begin by collecting a variety of pine cones in different shapes and sizes to create a diverse set of ornaments.
Next, apply a thin layer of glue to the top of each pine cone and attach a length of string, leaving enough room for hanging. Let the glue dry completely before moving on to the next step. To add some extra flair, kids can use glue to attach small decorations like glitter, beads, or even small pieces of fabric.
Some ideas for embellishments include:
* Sprinkling glue-dusted pine cones with red and green glitter for a festive touch
* Wrapping small bells around the base of each cone for a musical effect
* Tying a length of ribbon around the top of the cone for a more rustic look
With these simple steps, kids can create a beautiful set of one-of-a-kind ornaments to decorate their Christmas tree or use as gift tags. The best part? These pine cone ornaments will last for years to come, making them a thoughtful and eco-friendly addition to your holiday decor.
Adding a Personal Touch to Your Ornaments
When it comes to making your pine cone ornaments truly special, adding a personal touch is where the magic happens. This is an excellent opportunity for kids (and adults alike!) to get creative and make their decorations stand out from the crowd.
You can start by using paint to add colors and patterns to your pine cones. Try mixing different shades of blue and red to create a beautiful winter wonderland scene, or go for a more subtle look with pastel hues. Another idea is to use glitter – this is especially fun for kids who love getting sparkly! Apply a small amount of glue to the pine cone and sprinkle on some glitter, then let it dry completely before adding a string to hang.
For an extra-special touch, consider using other embellishments like stickers, rhinestones, or even small pieces of fabric. You can also try decoupage using cut-out shapes from old Christmas cards or wrapping paper. The possibilities are endless, and it’s all about experimenting with different materials until you find the combination that works best for your project.
Some additional tips to keep in mind: use a clear coat of varnish to seal in any paint or glitter, and make sure the embellishments are securely attached so they don’t fall off. With these ideas, you’ll be able to create truly one-of-a-kind pine cone ornaments that reflect your personality and style.
Pine Cone Garland and Wreath Projects
Create a beautiful and fragrant pine cone garland for your mantel or staircase, while also making adorable wreaths to adorn your front door.
Creating a Pine Cone Garland for the Mantel
Making a pine cone garland is a fun and easy DIY project that can add a warm, natural touch to your mantel during the holiday season. To start, gather some wire (you can use floral wire or copper wire) and begin threading pine cones onto it, leaving about 2-3 inches between each one. This will give you a good starting point for creating a visually appealing garland.
As you thread the pine cones, you can also add some decorations to give your garland extra flair. Some ideas include sprinkling on some artificial snowflakes, adding a few sprigs of evergreen, or threading on some small ribbons or twine. You can also use a hot glue gun to attach decorations directly to the wire.
To finish off your garland, simply tie off the end with some extra wire and hang it up on your mantel. You can customize this project to fit your personal style by using different types of pine cones, adding more or less decorations, and experimenting with different colors and textures. Have fun making your own unique pine cone garland!
Designing a Festive Pine Cone Wreath
Let’s get creative and design a stunning festive pine cone wreath that will add a warm touch to your home’s entrance. To start, gather the necessary materials: a wire frame (you can use a grapevine wreath or a circular wire mesh), pine cones of various sizes, some floral wire, a hot glue gun, and decorative items like ribbons, bows, or pine branches.
Begin by attaching the largest pine cones to the wire frame using floral wire. Space them evenly apart to create a balanced look. Next, fill in any gaps with smaller pine cones, working your way around the wreath. Use hot glue to secure any particularly large or unstable pine cones.
Now it’s time for embellishments! Wrap some ribbon or twine around the base of the wreath for a rustic touch, or attach a few bows to add a pop of color. You can also add some dried flowers or greenery like eucalyptus to give your wreath a more lush look. Hang your finished pine cone wreath on your front door, and enjoy the warm ambiance it brings to your home.
DIY Pine Cone Gift Toppers and Centerpieces
Turn pine cones into adorable gift toppers and centerpieces with our easy DIY projects that are perfect for kids to create this holiday season. Get creative and add a natural touch to your Christmas decor!
Creating Unique Gift Toppers with Pine Cones
Making special gift toppers is a great way to add that extra personal touch to your gifts. With just a few simple materials, you can create unique and thoughtful gift toppers that will make your presents stand out. To get started, gather some pine cones, ribbons, and other embellishments like bows or flowers.
To make the gift topper, begin by selecting a pine cone that complements the color of your ribbon or wrap. Next, tie a length of ribbon around the top of the pine cone, leaving a small loop at the end for attaching it to the gift. You can also add some embellishments like bows or flowers to give it a more festive look.
Some ideas to make it even more special include adding a personal message or the recipient’s name on a small tag attached to the ribbon. Another idea is to use different colored ribbons or textures to create a themed gift topper, such as a winter wonderland theme with blues and whites, or a forest theme with greens and browns.
Remember, the most important thing is to have fun and be creative! With these simple steps, you can make beautiful and unique gift toppers that will add an extra layer of thoughtfulness to your gifts.
Designing Festive Pine Cone Centerpieces for the Holiday Table
Creating beautiful centerpieces for your holiday table is easier than you think, and it’s an activity that kids will love to help with! To design festive pine cone centerpieces, start by gathering materials like pine cones, candles, evergreen branches, ribbons, and ornaments. You can use a combination of these items or stick to just one or two for a more minimalist look.
For a simple yet elegant centerpiece, arrange a cluster of pine cones around a pillar candle or mercury glass votive. Add some greenery like sprigs of rosemary or fir branches to bring in a natural element. Finish the look by wrapping a ribbon around the base of the candle or tying it around the stem of the pine cone.
If you want to add more sparkle, incorporate ornaments into your design. You can thread them onto evergreen branches or place them among the pine cones. Just be sure not to overdo it – sometimes less is more!
Tips and Tricks for Working with Pine Cones in Kids’ Crafts
Transform your pine cone projects into kid-friendly masterpieces with these expert tips on gluing, decorating, and arranging them to create unique Christmas crafts. With a few simple tricks, you’ll be amazed at what kids can achieve!
Safety Precautions When Handling Pine Cones
When working with pine cones in kids’ crafts, it’s essential to take safety precautions seriously. One of the primary concerns is the risk of splinters. Pine cone scales can be sharp and easily detach, causing discomfort and even injury if not handled carefully. To avoid this, make sure your child washes their hands thoroughly after handling pine cones and gently brush off any loose scales before proceeding with the craft.
Some children may also experience allergic reactions to certain types of pine trees or resin found in pine cones. If you suspect a child has an allergy or sensitivity, consider using alternative materials for crafts that involve large quantities of pine cones. Always supervise your child when handling pine cones and be mindful of any signs of discomfort, such as redness, itching, or swelling.
To minimize risks, it’s also crucial to store pine cones properly. Keep them away from direct sunlight and moisture, which can cause mold growth. Regularly inspect the pine cones for signs of decay or damage before using them in crafts with children. By taking these simple precautions, you can create a safe and enjoyable experience for kids while working on Christmas projects involving pine cones.
Encouraging Creativity in Kids’ Pine Cone Projects
When working with pine cones in kids’ crafts, it’s not uncommon for them to get stuck on traditional ideas like painting or gluing them onto wreaths. While these projects are certainly fun and festive, they can also stifle creativity. To encourage your little ones to think outside the box, try presenting them with a blank canvas – literally! Set up a craft station filled with an assortment of materials, such as glitter, sequins, ribbons, and stickers, and let their imagination run wild.
Some specific ideas to get you started include:
• Creating a pine cone forest by gluing multiple cones together to form a mini landscape
• Transforming pine cones into festive ornaments by wrapping them in yarn or twine
• Using pine cones as the base for mini bird feeders, complete with seeds and string
• Designing pine cone masks using paint, markers, and other embellishments
By providing kids with these versatile materials and encouraging experimentation, you’ll be amazed at the unique creations they come up with. Remember to remind them that there’s no right or wrong way – it’s all about having fun and expressing their individuality!
Conclusion and Final Thoughts
Now that you’ve completed these fun and creative Christmas projects, it’s time to wrap up with a few final thoughts on what made them so special for your little ones.
Recap of the Fun and Easy Christmas Project Ideas
Now that we’ve explored all these fun and creative Christmas project ideas using pine cones with kids, let’s take a moment to recap some of our favorites. Who says holiday crafting has to be complicated? Not us! Our collection of projects is designed to bring joy and excitement to both you and your little ones.
From the ease of Pine Cone Wreath Making to the whimsy of Pine Cone Garland Crafting, there are plenty of options to suit every skill level and age group. The Pine Cone Ornaments project, for instance, requires just a few simple materials and can be completed in under 30 minutes. Meanwhile, the DIY Pine Cone Bird Feeder is perfect for older kids who want to get their hands dirty.
Remember, the key to making these projects enjoyable is to keep things simple and let your imagination run wild! Encourage your child’s creativity by letting them pick out the materials and design their own pine cone masterpiece. With a little bit of glue, some string, and a handful of pine cones, you’ll be amazed at what your kids can create. And don’t worry – it’s okay if things get messy – that’s half the fun!
Encouraging Readers to Get Creative with Pine Cones
As we conclude our Christmas projects with pine cones for kids series, I want to leave you with a final thought: encouraging readers to get creative with pine cones! With just a little bit of imagination and some basic materials, the humble pine cone can become a masterpiece.
To get started, try collecting different shapes and sizes of pine cones. You might be surprised at how a simple grouping or arrangement can create a beautiful centerpiece for your holiday table. Next, think about incorporating other natural elements like evergreen branches, holly, or mistletoe to add texture and depth to your design.
Consider creating a “Pine Cone Station” where kids can get creative with various embellishments such as glitter, paint, and ribbons. This is a great way to encourage them to think outside the box (or pine cone!) and come up with unique designs that reflect their personality. Some ideas might include making garlands, wreaths, or even decorative vases using pine cones as the main attraction.
Frequently Asked Questions
How do I store pine cones to keep them fresh for crafting projects?
Store pine cones in a dry, cool place, away from direct sunlight. You can also vacuum-seal them in airtight bags or containers to preserve their natural texture and prevent moisture buildup.
Can children with allergies or sensitivities participate in pine cone crafts?
Yes, with proper precautions! Wear gloves when handling pine cones, and make sure kids wash their hands thoroughly after crafting. If your child has severe allergies, consider using artificial pine cones as a substitute.
How can I encourage creativity in my child’s pine cone craft projects?
Encourage experimentation by providing various materials like glitter, paint, or ribbons for them to add a personal touch. Also, let them choose which project they want to work on and how they’d like to decorate their finished pieces.
Are there any specific safety precautions I should take when handling pine cones with kids?
Yes! Make sure kids understand not to put pine cones in their mouths or eyes. Adult supervision is essential when working with sharp objects, glue guns, or other materials that can cause harm if mishandled.
Can I use artificial pine cones as a substitute for real ones?
Yes, but be aware that they may not have the same natural texture and appearance as real pine cones. Artificial pine cones can still make great crafts, especially when paired with glitter, paint, or other embellishments to add visual interest.