
Christmas is just around the corner, and you know what that means – time to get creative and deck the halls! But why settle for the same old decorations year after year? This holiday season, let’s try something new and fun with a unique DIY project: making Christmas decorations with lollipop sticks. Perfect for kids of all ages, this activity is an excellent way to keep little ones engaged, entertained, and learning while creating memories that will last a lifetime. In this article, we’ll take you by the hand through a step-by-step guide on making garlands, ornaments, and more using these versatile lollipop sticks. Get ready to unleash your creativity and make your home shine with these easy-to-make decorations that are sure to become a family favorite.
Introduction to Holiday Crafting
Welcome to our festive crafting guide, where we’ll show you how to get creative with lollipop sticks and make your home shine with magical Christmas decorations!
Benefits of Using Lollipop Sticks in Christmas Decorations
When it comes to adding a personal touch to your holiday decorations, lollipop sticks can be a game-changer. These versatile and affordable materials offer endless possibilities for creative expression, making them an ideal choice for kids who love to get crafty during the holidays.
Not only do lollipop sticks bring a unique charm to traditional decorations, but they also provide an excellent way to encourage kids to participate in the decorating process. By incorporating these colorful sticks into your arrangements, you can create visually appealing and festive displays that are sure to spark imagination and creativity. For instance, you can use them as mini tree ornaments, add them to a vase filled with evergreen branches, or even craft a stunning centerpiece for your holiday table.
To get started, gather a collection of lollipop sticks in various colors and shapes, along with some basic crafting supplies like glue, scissors, and decorative items. Let the kids take the lead in designing their creations, and be amazed at what they come up with! By embracing this fun and interactive approach to decorating, you’ll not only create beautiful holiday displays but also foster a sense of creativity and self-expression that will last long after the season is over.
Materials Needed for This Project
To get started on making these adorable Christmas decorations with lollipop sticks, you’ll need to gather some essential materials. Let’s begin with the stars of the show: lollipop sticks! You can use either regular-sized lollipop sticks or the mini ones for a more delicate look.
You’ll also need a few crafting tools like scissors, a craft knife (for adults), and a glue stick or hot glue gun to secure your creations together. For a more polished finish, consider investing in a pair of round-tipped scissors specifically designed for cutting small objects. These will help you achieve smooth cuts without crushing the sticks.
When it comes to adding color and personality to your decorations, paint is your best friend! You can use acrylic or tempera paint in various colors, depending on your child’s preference. A few drops of glitter glue can also add a sparkly effect, perfect for festive embellishments. Don’t forget to get some construction paper or cardstock for the bases and any additional design elements.
Remember, you likely have many of these materials already at home, so don’t feel like you need to buy anything new. Get creative with what you have on hand and see how your child’s imagination sparks some unique decoration ideas!
Tips for Choosing Age-Appropriate Crafts
When it comes to choosing age-appropriate crafts for kids using lollipop sticks for Christmas decorations, consider their skill levels and attention spans. For younger children aged 3-5, opt for simple projects like stick snowflakes or basic ornament creation. Use large lollipop sticks and let them decorate with stickers, glitter, or markers.
For older kids aged 6-8, introduce more complex designs like candy cane trees or stick wreaths. They can use smaller sticks, glue guns (with adult supervision), and more intricate decorations. Be mindful of their attention span and break the project into manageable tasks to avoid frustration.
Pre-teens aged 9-12 can tackle more advanced projects like creating stick lanterns or decorative centerpieces. Encourage them to experiment with different materials and techniques, but still provide guidance and support as needed. Remember, the goal is to foster creativity and have fun while making holiday decorations!
Preparing Lollipop Sticks for Decorating
Before you start decorating your lollipop sticks, let’s get them ready by preparing them for paint and other embellishments. This involves a few simple steps to ensure they’re perfect for your holiday creations!
Cleaning and Drying the Sticks
Before you start decorating those adorable lollipop sticks, it’s essential to give them a good cleaning and drying. This might seem like a minor step, but trust us, it makes all the difference! A quick clean and dry will ensure that your decorations adhere beautifully and don’t come off easily.
To clean the lollipop sticks, simply dip each one into a bowl of warm soapy water for about 10-15 seconds. This will help loosen any dirt or debris. Then, use a soft-bristled brush to gently scrub away any stubborn stains. Rinse each stick thoroughly with clean water to remove any soap residue.
Next, dry the sticks completely using a paper towel or let them air-dry on a wire rack. This might take about 30 minutes to an hour, depending on the humidity in your area. To speed up the process, you can also use a hair dryer on a low setting to gently blow warm air over the sticks.
By taking this extra step, you’ll be amazed at how much easier it is to decorate your lollipop sticks! The glue will stick better, and your decorations will stay put for weeks to come.
Cutting and Shaping the Sticks (Optional)
Cutting and shaping lollipop sticks can be an optional but creative step in preparing them for decorating. Depending on the project, you may need to trim sticks to a uniform length or create custom shapes to fit specific designs.
One common reason to cut lollipop sticks is to ensure they are all the same height when creating a large display or arrangement. This can be done using a craft knife or pruning shears. Simply hold the stick firmly and carefully make a clean cut at the desired length. Alternatively, you can use a paper trimmer for a more precise cut.
If your design requires specific shapes, such as bending sticks into arches or curves, you can use a heat gun to gently warm the stick and shape it while still pliable. Be cautious not to apply too much heat, which can cause the stick to crack. Another method is using wire cutters to snip lollipop sticks into smaller pieces for intricate designs or patterns.
Remember to always supervise children when handling sharp objects, and encourage them to use their imagination when cutting and shaping sticks. This creative process can be just as fun as decorating!
Basic Christmas Decorations with Lollipop Sticks
Get creative and add some festive flair to your home with these super simple, fun ideas for making basic Christmas decorations using lollipop sticks that kids will love!
Simple Garland Ideas
Creating beautiful garlands with lollipop sticks is an amazing way to add a personal touch to your Christmas decor. Let’s dive into some simple yet stunning ideas that are perfect for kids to make.
First, we have snowflakes! Who doesn’t love these delicate and intricate designs? To create a snowflake garland, you’ll need white or light-colored lollipop sticks, scissors, glue, and string or twine. Simply cut out the shapes of your desired snowflakes from the sticks, assemble them on a piece of string, and hang up to add some winter wonder to your space.
Next up are stars! This is a great way to create some magic in your home. To make star garlands, you’ll need gold or silver-colored lollipop sticks (or paint plain ones for a more rustic look). Cut out triangular shapes from the sticks, assemble them on string with glue or a hot glue gun, and you’re done!
Lastly, let’s not forget about letters! You can create personalized garlands using your child’s name or favorite holiday message. To make letter garlands, use colored lollipop sticks (or paint plain ones) to spell out the words, attach them on a string with glue or hot glue gun, and hang up for everyone to see.
These ideas are sure to bring some festive fun into your home!
Decorating the Tree with Lollipop Stick Ornaments
To add some extra sparkle to your Christmas tree, let’s make some adorable lollipop stick ornaments! With just a few simple materials and a bit of creativity, you can create unique and personalized decorations for your tree. Start by gathering various shapes and sizes of lollipop sticks, along with some colorful string or twine.
For a traditional look, try making some classic bell-shaped ornaments. Simply cut the lollipop stick into desired lengths, wrap the string around each one to create a loop, and tie it off with a knot. Add some festive ribbons or bows for extra flair. You can also experiment with more intricate designs by layering multiple sticks together or adding small beads or sequins.
To make an angel ornament, cut two lollipop sticks to the same length, and glue them together at one end, forming a T shape. Decorate with glitter, stickers, or paint, and attach a loop of string to hang on your tree. This is a great project for kids to express their creativity and make something truly special.
Remember, the best part about making lollipop stick ornaments is that you can customize them however you like! Use different colors, shapes, and embellishments to match your unique style and make each one truly one-of-a-kind.
Advanced Christmas Decorations with Lollipop Sticks
Take your lollipop stick creations to the next level by learning how to make intricate wreaths, garlands, and centerpieces that will dazzle family and friends. We’ll show you some fantastic advanced ideas!
Making a 3D Christmas Scene
Building a 3D Christmas scene with lollipop sticks is a fun and creative project that kids will love. To get started, you’ll need to gather some basic supplies such as lollipop sticks, glue, scissors, and decorations like pom-poms, beads, or sequins. You can use these materials to create a festive village, snowman family, or even a winter wonderland scene.
To build your 3D scene, start by planning out the design on paper first. Consider what you want to include in your scene, such as buildings, trees, or characters. Once you have a clear idea of what you want to create, begin building your structures using lollipop sticks and glue. You can use the sticks to create walls, roofs, and other architectural features.
Remember to add details like windows, doors, and textures using decorations like pom-poms or beads. You can also use paint or markers to add color and personality to your scene. With a little creativity and patience, you’ll have a 3D Christmas scene that’s sure to delight kids of all ages!
Designing More Complex Ornaments
Creating intricate ornaments with lollipop sticks requires more skill and patience than simpler designs. However, with practice and attention to detail, kids can craft beautiful flowers, animals, and geometric shapes that add a personal touch to their Christmas decorations.
To create flowers, start by cutting the sticks into different lengths for stems and petals. Use hot glue to attach the shorter sticks to the longer ones, creating the center of the flower. Then, wrap the remaining sticks around the center in a spiral motion to form the petals. This technique is called “wrapping,” and it allows kids to create realistic flower shapes.
For animals, use a combination of straight and curved sticks to form the body and limbs. Glue the parts together, adding details like eyes and mouths with small beads or markers. Geometric shapes can be created using simple geometric patterns, such as squares and triangles, which can be combined to form more complex designs.
When designing intricate ornaments, remember that patience is key. It may take a few attempts to get it right, but the end result will be well worth the effort. Encourage kids to experiment with different shapes and techniques to develop their skills and create truly unique decorations.
Safety Precautions and Troubleshooting Tips
Make sure you’re aware of a few essential safety precautions when decorating with lollipop sticks, such as keeping them out of reach of young children. This section also covers troubleshooting tips for common decoration mishaps.
Handling Materials Safely
When working with lollipop sticks and other materials for Christmas decorations, it’s essential to handle them safely to avoid accidents and injuries. One of the primary concerns is the sharp edges of the lollipop sticks, which can cause cuts and scratches.
To minimize risks, make sure to supervise children at all times when they’re handling these materials. You can also provide them with a pair of scissors or a craft knife with blunt tips, allowing them to cut the lollipop sticks safely. If you prefer to avoid sharp objects altogether, you can use pre-cut lollipop sticks.
Storage is another critical aspect of safety. Store your Christmas decorations and materials in a designated area, away from reach of children and pets. Use labeled containers or bins to keep them organized and prevent tripping hazards.
Before each crafting session, inspect the materials for any damage or defects. Check for loose ends, splinters, or sharp edges that could cause harm. By being mindful of these simple precautions, you can create a safe and enjoyable experience for kids while making beautiful Christmas decorations with lollipop sticks.
Common Issues and Solutions
When working with lollipop sticks and Christmas decorations, it’s not uncommon to encounter a few hiccups along the way. One common issue is dealing with brittle or fragile sticks that break easily. To prevent this, try soaking the lollipop sticks in water for about 30 minutes before crafting. This will help make them more pliable and easier to work with.
Another problem you might face is getting the decorations to stay put on the stick. To solve this, use a hot glue gun to attach the decorations firmly. Alternatively, you can try using floral tape or string to secure them in place.
If your child’s creation starts to fall apart due to excess glue or decorations coming loose, don’t worry! Simply trim any excess glue with scissors and reattach any loose decorations. You can also use a small amount of clear nail polish to hold the decorations firmly in place.
Remember, the key to successful crafting is patience and creativity. Don’t be afraid to experiment and try new things – it’s all part of the fun!
Showcasing Your Creations: Displaying and Sharing Christmas Decorations
Now that your decorations are complete, it’s time to show them off! Let’s explore creative ways to display and share your masterpieces with family and friends.
Ideas for Displaying Finished Projects
Now that you’ve completed your Christmas decoration project with lollipop sticks, it’s time to showcase your creation! There are many creative ways to display your finished decorations, and we’re excited to share some ideas with you.
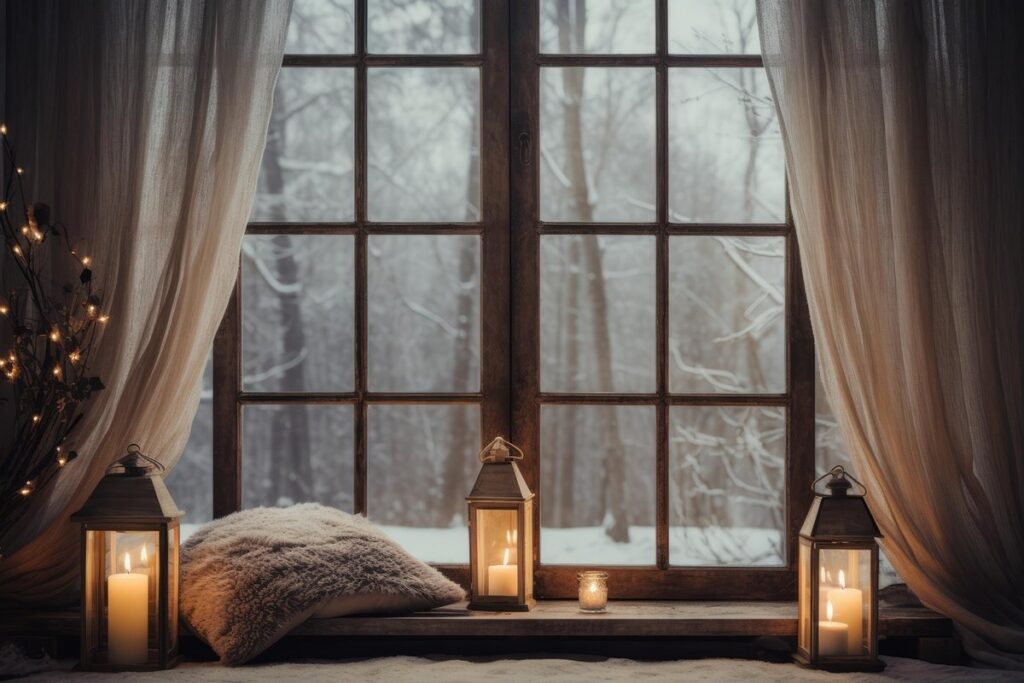
First, consider displaying your decorations in a window. This is a great way to add some festive flair to your home’s exterior while also showcasing your child’s creativity. Simply place the decoration on a windowsill or hang it from a suction cup hook attached to the glass. You can even create a themed display by grouping similar decorations together, such as all of the snowmen or reindeer.
If you’d like to get creative with your display stand, consider making one yourself using materials like cardboard, foam board, or even an old picture frame. This will add a personal touch and make your decoration truly unique. Alternatively, you can use store-bought stands in fun shapes like Christmas trees or Santas. Whatever you choose, be sure to have fun and get creative with it!
Remember, the most important thing is to let your child’s imagination shine through their artwork. By showcasing their creation proudly, you’ll encourage them to continue exploring their creativity and trying new projects.
Taking Photos and Sharing Your Masterpiece with Others
Capturing memories of your Christmas lollipop stick creations is just as important as creating them. Documenting your projects can help you relive the joy and excitement of the holiday season for years to come.
To get started, find a well-lit area with a plain background that will showcase your decoration. Use natural light whenever possible, or invest in a basic photography kit if you plan on taking more photos. Next, consider the angle of your shot – experiment with placing your decoration at different heights and distances to capture its best side.
Before snapping the photo, take a moment to clean any dust or smudges from your decoration. This will help ensure that your masterpiece looks its absolute best in the photo. You can also get creative by experimenting with different camera angles, props, or even using a Polaroid printer for instant gratification.
Conclusion: Embracing Creativity During the Holiday Season
Now that you’ve seen all the fun and creative ways to use lollipop sticks for Christmas decorations, it’s time to tie everything together. Let’s talk about embracing creativity this holiday season!
Recap of Key Takeaways
As we wrap up our festive journey into the world of Christmas decorations with lollipop sticks for kids, let’s take a moment to recap the key takeaways from this article.
We discussed the numerous benefits of involving children in creative activities during the holiday season, including developing their fine motor skills, encouraging imagination and self-expression. By making decorations using lollipop sticks, kids can learn essential crafting skills while having fun at the same time. To get started, we explored various DIY decoration ideas, such as creating snowflakes, trees, and ornaments, which can be customized to fit your child’s unique style.
Remember, it’s all about embracing creativity and encouraging your child’s imagination during this special time of year. Don’t worry too much about perfection – the imperfections and uniqueness of each decoration are what make them truly special. With a little bit of lollipop stick magic, you can create decorations that will be treasured by your family for years to come.
Encouraging Continued Exploration of Holiday Crafting
As you and your little ones have been busy creating festive holiday decorations with lollipop sticks, I’m sure you’ve noticed the spark of creativity that’s been ignited. But don’t let the excitement stop when the season is over! Encouraging continued exploration of creative projects is essential to fostering a lifelong love for making and experimenting.
Here are some ways to keep the creative juices flowing:
* Set up a designated craft station in your home where kids can freely explore and experiment with materials.
* Plan regular family crafting sessions, whether it’s weekly or bi-weekly, to ensure consistent practice and creativity development.
* Encourage kids to take ownership of their projects by letting them choose the next material or theme they want to work with.
* Share your own creative pursuits with your children, demonstrating that adults can be creative too!
By prioritizing continued exploration and making time for creative activities, you’ll not only keep the holiday magic alive but also help shape a lifelong love for crafting and creativity. Remember, it’s never too early or too late to start exploring new possibilities – and who knows, you might just discover the next big thing!
Frequently Asked Questions
How can I adapt this project for a group of children with different skill levels?
To accommodate varying abilities, consider breaking the project into stages or tasks that cater to individual strengths. This way, each child can contribute and feel included while learning at their own pace.
What if my lollipop sticks are bent or warped – can they still be used in decorations?
Yes, you can still use bent or warped lollipop sticks for decorations like 3D scenes or unique ornaments. Get creative with shaping and bending techniques to turn imperfections into interesting design elements.
How do I store and organize my lollipop stick collection for future projects?
To keep your supplies organized, consider categorizing lollipop sticks by length, color, or type. Store them in labeled containers or bins to ensure easy access when working on new projects.
Can I use lollipop sticks for decorations that require more durability and longevity?
Yes, you can make lollipop stick decorations more durable by applying a clear coat of varnish or sealant. This will protect the sticks from moisture and extend their lifespan while maintaining their natural charm.
How do I involve my children in the creative process without creating too much mess?
To minimize mess, consider setting up dedicated crafting stations with contained materials and surfaces for each child to work on. Encourage them to experiment with different techniques while having fun cleaning up together as a family!