
Are you looking for a special way to make this Christmas season truly unforgettable? Creating handmade Christmas ornaments with your loved ones is a great place to start. Not only do these decorations add a personal touch to your tree, but they also become treasured family heirlooms that can be passed down through the generations.
As you craft and display these beautiful glass, ceramic, paper, and felt creations, you’ll be building memories and strengthening family bonds in the process. In this article, we’ll show you how to create a variety of handmade Christmas ornaments, from simple and elegant designs to more intricate and personalized masterpieces. We’ll also share some clever ideas for displaying your handiwork and tips on how to make these ornaments last for years to come. Get ready to spark some holiday magic in your home!
Choosing the Right Materials
When it comes to crafting Christmas ornaments for your family, selecting the right materials is essential to creating beautiful and lasting keepsakes that tell a story. This next step will help you choose just the right supplies.
Types of Glass or Ceramic Ornaments
When it comes to family crafting projects, glass and ceramic ornaments are excellent choices for their beauty and durability. However, not all glass and ceramic ornaments are created equal, so let’s break down the basics of each type.
Glass ornaments have a transparent, non-porous surface that makes them perfect for painting or decoupage. They’re also relatively inexpensive and easy to find in various shapes, sizes, and colors. On the other hand, they can be fragile and prone to breakage if handled roughly. For this reason, it’s essential to supervise children when working with glass ornaments.
Ceramic ornaments, on the other hand, are made from clay that’s been fired at high temperatures, making them more durable than glass. They also offer a wide range of styles and designs, including intricately painted patterns and colorful glazes. Ceramic ornaments can be heavier than glass ones, but they’re less prone to breakage.
When selecting glass or ceramic ornaments for your family crafting project, consider the age and skill level of the participants. Younger children may prefer working with ceramic ornaments due to their durability, while older kids can handle glass ornaments with a little guidance.
Affordable Alternatives to Traditional Ornaments
When it comes to crafting Christmas ornaments, you don’t have to break the bank or harm the environment. There are plenty of affordable and eco-friendly alternatives to traditional materials that still pack a punch when it comes to creativity and charm.
For instance, paper is an incredibly versatile material for crafting ornaments. You can use construction paper, scrapbook paper, or even old book pages to create unique designs. Cut out shapes, decoupage them onto glass balls or paint them with natural dyes for a beautiful, earthy look. Felt is another great option – you can buy it in bulk and use it to make ornaments that are soft, tactile, and incredibly durable.
If you’re looking to get closer to nature, consider using natural elements like pinecones, branches, or evergreen sprigs. Simply spray paint them with a clear coat or add some glue and glitter for a sparkly finish. Not only will these ornaments be budget-friendly and eco-friendly, but they’ll also remind your loved ones of the beauty and wonder of the great outdoors.
Get creative and experiment with different textures and materials to find what works best for you!
Design Ideas for Christmas Ornaments
Get creative and make your own unique ornaments with our collection of design ideas, featuring projects that are perfect for a family craft day. From simple to elaborate, we’ve got inspiration to suit every skill level!
Nature-Inspired Designs
Creating nature-inspired designs for Christmas ornaments is a great way to add a personal touch to your holiday decor. Nature has so much to offer when it comes to unique and beautiful materials that can be used to create one-of-a-kind ornaments.
Let’s start with some simple ideas using leaves, twigs, and flowers. You can collect these items on a walk or in your own backyard. For example, you can press real leaves between sheets of paper or use a leaf-shaped cookie cutter to create delicate designs. Twigs can be used as is or painted for added color. Flowers can be dried and used whole or broken down into smaller pieces to create intricate patterns.
To incorporate these natural elements into your ornaments, try using a hot glue gun to attach them to a string or a Styrofoam ball. You can also add some additional embellishments like glitter, beads, or paint to give your ornament more depth and interest. For instance, you could use dried flowers to create a 3D effect on a glass ornament, or add small twigs to the branches of a paper snowflake ornament. The possibilities are endless when it comes to combining nature’s beauty with creativity!
Personalized Ornaments with Photos
Creating personalized ornaments with family photos is a thoughtful and meaningful way to capture cherished memories. These special keepsakes can be treasured for years to come, serving as a reminder of loved ones and happy times.
To make the most of this idea, start by selecting photos that are significant to your family’s history or traditions. Consider using pictures from milestone events like birthdays, graduations, or holidays. You can print these photos on high-quality paper or cardstock, or even use photo printing services for a more polished finish.
When attaching the photos to glass or ceramic ornaments, choose a strong adhesive that will withstand the test of time. A clear-drying glue or decoupage medium works well for this purpose. Place the photo in the center of the ornament and apply the adhesive, making sure not to cover any intricate designs or patterns. Once dry, hang your beautifully personalized ornament on the tree or use it as a gift tag.
To give your ornaments an extra touch, consider adding embellishments like ribbons, bows, or glitter. This will add texture and visual interest, making each piece truly unique.
Crafting Techniques for Christmas Ornaments
Let’s dive into some fun and creative crafting techniques that will add a personal touch to your family’s holiday decorations, from painting to decoupage. You’ll love these easy ideas!
Glass Painting and Etching
Glass painting and etching are versatile techniques for adding unique designs to your Christmas ornaments. To get started, you’ll need a few basic tools and materials. A glass painting kit usually includes ceramic paint, a palette, brushes, and a sealant. For etching, you’ll require a specialized glass etching cream and a small brush.
To create simple designs using glass painting, start by sketching out your design on paper. Then, use the brush to apply the ceramic paint to the glass ornament, following the lines of your design. Allow the paint to dry completely before applying additional coats or details. For more intricate designs, consider using stencils or stickers.
For a basic etching project, apply a small amount of cream to the back of the ornament and use the brush to spread it evenly over the area you want to etch. Let it sit for several minutes, then rinse with warm water to reveal your design. Be careful when working with glass etching cream, as it can be harsh on skin.
When using either technique, make sure to follow the manufacturer’s instructions and take necessary safety precautions. With a little practice, you’ll be creating beautifully unique ornaments in no time!
Felt and Paper Crafting Techniques
When it comes to creating Christmas ornaments with felt and paper, there are countless techniques you can try. Let’s start with cutting – a fundamental skill for any crafter. Use scissors, rotary cutters, or even craft knives to get the job done. For intricate designs, consider investing in a craft mat or self-healing mat to protect your work surface.
Next up is gluing – an essential step in many ornament-making projects. Choose from hot glue guns, white glue, or even decoupage medium for different effects. When working with felt, use a low-temperature glue gun to avoid melting the fibers.
Shaping is another key technique for creating unique ornaments. You can use everyday objects like cookie cutters, bottle caps, or even cardboard tubes as molds. Alternatively, shape your materials freehand using rolling pins, balls of clay, or even your fingers.
For instance, try cutting out intricate snowflakes from white paper and layering them to create a stunning garland. Or, use hot glue to attach colored felt shapes around a Styrofoam ball, creating a vibrant ornament that’s perfect for any tree branch.
Displaying and Storing Handmade Ornaments
Now that you’ve created your beautiful handmade ornaments, let’s explore how to beautifully display them around the house, as well as store them safely for years to come.
Tips for Displaying Family-Crafted Ornaments
When it comes to showcasing your family’s handmade ornaments, you want to create a festive and cozy atmosphere that reflects the love and care that went into crafting each one. Here are some ideas for displaying your handmade ornaments indoors:
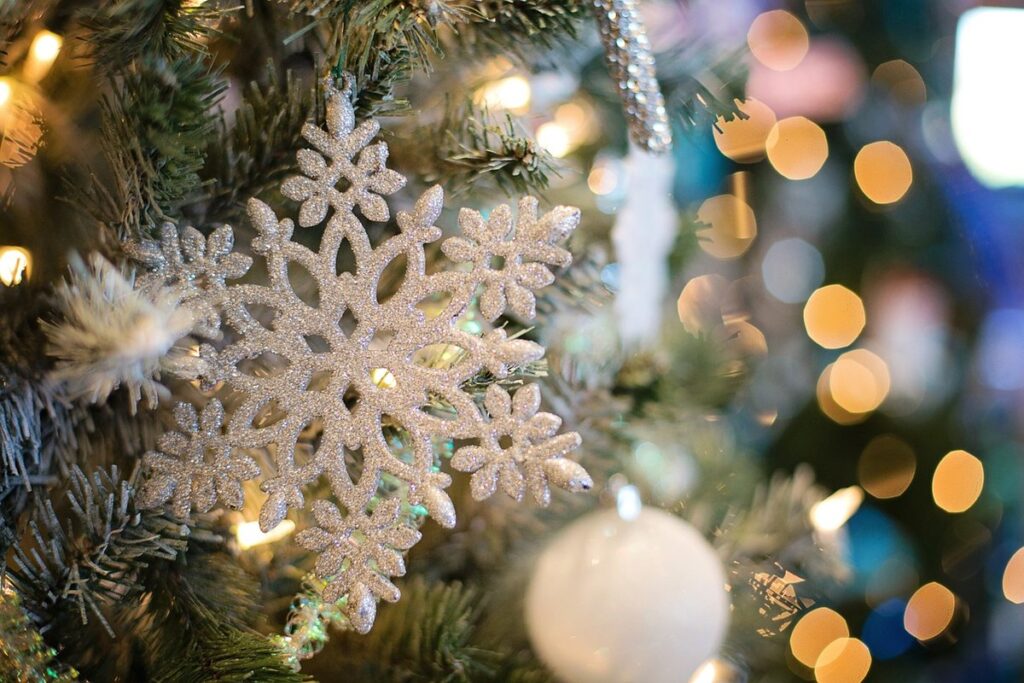
* Hang them on the tree: This is probably the most obvious place to start, but there’s no denying it’s a showstopper! Choose a few of your favorites and hang them on the branches of your Christmas tree, alternating with store-bought ornaments.
* Create a garland: Thread your handmade ornaments onto a piece of twine or ribbon and create a beautiful garland that can be draped over the banister, along a mantel, or across a room.
You can also display your handmade ornaments outdoors by creating a festive porch or patio display. Consider hanging them from the roof, wrapping them around the door frame, or placing them in a decorative planter.
Organizing and Storing Ornaments for Future Years
Storing ornaments properly is crucial to maintaining their beauty and preventing damage over time. To ensure your handmade decorations remain intact for years to come, it’s essential to store them carefully. Start by cleaning each ornament with a soft cloth to remove any dust or debris that may have accumulated.
Next, consider using acid-free tissue paper or bubble wrap to separate the ornaments within storage containers. You can also use dividers made from cardboard or foam core to keep delicate pieces from scratching one another. Clear plastic bins or drawers are excellent choices for storing ornaments, as they allow you to see what’s inside without having to dig through the contents.
Label each container with its contents and date to make it easier to locate specific ornaments in the future. This also helps you plan for next year’s decorating scheme by identifying which ornaments have been stored away. By following these simple steps, your handmade ornaments will remain a cherished family tradition for generations to come.
Making Christmas Ornaments a Family Tradition
Creating a family tradition around making Christmas ornaments is a wonderful way to spend quality time together and make your holiday season even more special and meaningful. In this section, we’ll explore ways to start this tradition with ease.
Ideas for Involving Children in the Crafting Process
Involving children in the process of making Christmas ornaments is not only a fun way to create family traditions but also helps them develop their creativity and fine motor skills. To get started, consider projects that cater to different age groups.
For younger children (ages 2-5), try simple activities like gluing beads onto a string or decorating plain balls with stickers. For older kids (ages 6-12), you can introduce more complex techniques such as painting mini canvases, decoupage, or even making ornaments from clay.
To make the process more engaging, set up a designated crafting station with all the necessary materials within reach. Encourage children to experiment and explore different textures and colors. To prevent messes, cover your workspace with paper or a tablecloth and have wipes on hand.
As you work together, remember to praise their creations and help them refine their designs. This will not only foster their creativity but also create lasting memories for years to come. With patience and practice, your child’s handmade ornaments will become a treasured family heirloom, reminding you of the joyous time spent crafting together during the holiday season.
Passing Down Family Traditions Through Ornament-Making
Creating handmade ornaments is not only a fun and creative activity for families to enjoy together, but it also provides an opportunity to pass down traditions and memories from one generation to the next. By making Christmas ornaments, you can help preserve family history and cultural heritage.
For instance, you could create ornaments that reflect your ancestors’ countries of origin or traditional customs. For example, if you’re of Italian descent, you could make ornaments with a Italian flair, such as handmade ceramic stars or silver-toned nativity scenes. By creating these ornaments, you’ll be able to share stories and memories with your children about where they came from.
You can also involve younger family members in the ornament-making process, teaching them traditional techniques and encouraging them to create their own unique designs. This way, they’ll be able to carry on the tradition long after you’re gone. Some practical tips for passing down traditions through ornament-making include:
* Take photos of your ornaments as you create them, so future generations can see how they were made
* Write stories or notes about each ornament’s significance and meaning
* Create a “tradition book” that outlines the history behind each ornament and its creation process
Frequently Asked Questions
How Do I Store Handmade Ornaments for Future Years?
Storing your handmade ornaments properly is crucial to preserve them for generations to come. Consider using acid-free tissue paper, boxes, or airtight containers to keep them dust-free and protected from moisture.
When organizing and storing ornaments, label each container with the year, family name, or special occasion to make it easy to find specific ornaments in the future. This will also help you track your progress and see how your ornament-making skills evolve over time.
Can I Use Recycled Materials for Handmade Ornaments?
Using recycled materials is a fantastic way to add an eco-friendly twist to your handmade ornaments. You can repurpose old CDs, bottle caps, or cardboard tubes to create unique and creative designs.
When working with recycled materials, be sure to clean and disinfect them thoroughly before using them in your ornament-making project. This will ensure the longevity of your creations and prevent any potential damage.
How Can I Make Handmade Ornaments More Durable?
Making handmade ornaments more durable requires a combination of proper techniques, materials, and storage. Use glass paint or ceramic markers to add designs, as these are less prone to fading than regular paint.
Additionally, apply a clear coat of varnish or sealant to protect your ornaments from dust, moisture, and UV light exposure. This will help maintain their original beauty for years to come.
Can I Make Handmade Ornaments with Young Children?
Making handmade ornaments with young children can be a fun and rewarding experience for the whole family. Start with simple projects like paper snowflakes or felt ball ornaments that require minimal supervision.
As your child grows older, you can introduce more complex techniques, such as glass painting or etching, under close adult supervision. Always prioritize your child’s safety and creativity, encouraging them to experiment and express themselves through the process.
How Do I Display Handmade Ornaments on My Tree?
Displaying handmade ornaments adds a personal touch to your Christmas tree. Hang them from branches using twine, ribbon, or fishing line to create a visually appealing arrangement.
Consider grouping similar ornaments together by color, shape, or theme to add visual interest. You can also use a tree skirt or a decorative tray to showcase your creations and prevent them from getting lost among the branches.