
The holiday season is just around the corner, and you know what that means… quality time with the little ones! But let’s be real, coming up with new and exciting Christmas crafts to do with your kids can get old fast. That’s why we’re excited to share some easy and fun projects that will make this year’s holiday season one to remember. With a few simple materials like pine cones, glitter, and string, you’ll be creating unique and personalized ornaments, wreaths, and more in no time! In this article, we’ll take you through the best Christmas crafts using pine cones for kids, perfect for a family activity that will bring joy and creativity to your home. Get ready to get crafty with us and make this holiday season one for the books!
Getting Started: Materials and Preparation
Before you start creating your own pine cone crafts, let’s make sure you have all the necessary materials and prepare your workspace to get started right away.
Choosing the Perfect Pine Cones
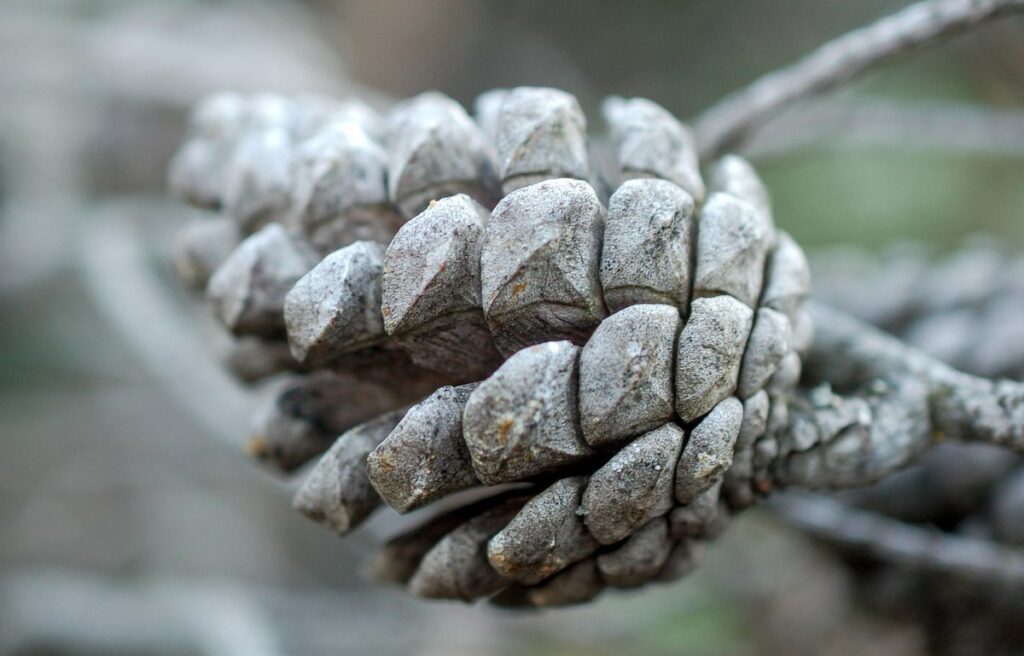
When it comes to creating magical Christmas crafts with pine cones for kids, selecting the perfect pine cones is crucial. You want them to be visually appealing and suitable for various projects. The ideal pine cone should come in different sizes, shapes, and textures to cater to your child’s creativity.
To begin with, collect pine cones from nature by taking a winter walk or visiting a nearby park. Look for diverse types of trees like evergreens, oaks, or pines, as they produce unique pine cones. If you’re short on time or can’t find suitable ones outdoors, head to your local craft store or online retailers.
When choosing pine cones, consider the following factors: size (small, medium, large), shape ( spherical, conical, irregular), and texture (smooth, scaly). This variety will allow kids to experiment with different designs and techniques. For example, small pine cones work perfectly for making ornaments or garlands, while larger ones are ideal for creating decorative centerpieces. By selecting a range of pine cone sizes, shapes, and textures, you’ll be well-prepared to inspire your child’s creativity and imagination in the world of Christmas crafts.
Gathering Essential Craft Supplies
To get started on your Christmas crafts with pine cones, you’ll need to gather some essential supplies. This might seem like a daunting task, but don’t worry, we’ve got you covered. First and foremost, make sure you have a good selection of scissors that are suitable for kids. You can’t go wrong with a pair of kid-friendly blunt-tipped scissors.
Next up, grab some glue – hot glue works particularly well for pine cone crafts, but white school glue is also a great option. Don’t forget to pick up some paint and brushes too! Acrylic paint is a good choice as it dries quickly and comes in a range of festive colors. Speaking of color, glitter is always a fun addition to Christmas crafts – just be sure to use washable glue so you can clean up easily.
Other supplies you might find useful include pine cones (obviously!), ribbon or string for hanging your creations, and a surface to work on. If you’re feeling extra crafty, consider adding some other embellishments like beads, sequins, or even small Christmas-themed decorations. Remember to always supervise kids when using scissors and other sharp objects, and encourage them to get creative with their design choices!
Fun and Easy Crafts: Pine Cone Ornaments
Get creative and make some adorable ornaments for your Christmas tree using pine cones, glue, and a few other simple supplies that kids will love to help with. We’ll show you how!
Making Pine Cone Ornaments with Glue and Glitter
Making pine cone ornaments with glue and glitter is a fun and easy project that kids will love. It’s a great way to get creative and make some beautiful decorations for the Christmas tree.
To start, gather your materials: pine cones, white glue, glue brush, and a variety of glitters in different colors. You can use any type of glitter you like, but be sure to choose ones that are safe for kids to handle.
Begin by applying a thin layer of white glue to one side of the pine cone using the glue brush. Make sure to cover the entire surface evenly. Then, sprinkle some glitter over the glue, pressing it gently onto the pine cone with your fingers or a small tool. Repeat this process on the other side of the pine cone.
Continue adding layers of glue and glitter until you reach the desired thickness and sparkle. Let each layer dry completely before moving on to the next one. This might take some patience, but the end result is well worth it! Once the ornament is complete, hang it from a branch or attach it to a gift with a ribbon.
You can also add some extra embellishments like rhinestones or sequins for an extra touch of glamour. The possibilities are endless and kids will have fun experimenting with different colors and designs.
Creating Pine Cone Wreaths for Your Home
Creating a beautiful pine cone wreath is a fun and easy project that can add a warm and cozy touch to your Christmas tree or mantel. To get started, you’ll need some basic materials such as a wire wreath frame, pine cones, floral wire, hot glue gun, and decorations like ribbons, bows, or ornaments.
Begin by gathering an assortment of pine cones in different sizes and textures to create visual interest. You can collect them from your yard or purchase them at a craft store. Next, take the wire wreath frame and shape it into a circular form. This will serve as the base for your pine cone arrangement.
To attach the pine cones to the frame, use floral wire to tie them onto the wire, starting from the bottom and working your way around the circle. You can also use hot glue to secure larger pine cones in place. Once you’ve added all the pine cones, add some decorative elements like ribbons or bows to give it a festive look.
More Challenging Projects: Pine Cone Decorations and Gift Ideas
Now that you’ve mastered some fun and easy pine cone crafts, it’s time to get creative with more challenging projects like making decorations for your home and gifts for loved ones.
Designing Pine Cone Centerpieces with Floral Foam
Creating a pine cone centerpiece with floral foam is a fun and easy project that can add a warm, natural touch to any Christmas table setting. To get started, you’ll need a few basic materials: pine cones of varying sizes, floral foam, scissors, and some decorative twine or ribbon.
First, cut the floral foam to fit your vase or centerpiece container, leaving about an inch at the top for trimming later. Next, arrange the largest pine cones in the center of the foam, gently pressing them into place. Use smaller pine cones to fill in any gaps, working your way outwards from the center. You can also add some decorative twine or ribbon to tie everything together.
To balance the design, try grouping similar-sized pine cones together and spreading larger ones throughout the arrangement. Don’t be afraid to experiment and move things around until you find a look that feels balanced and visually appealing. Some other ideas for adding visual interest include sprinkling in some artificial greenery or adding a few ornaments or berries. With a little creativity, your centerpiece will be sure to impress!
Making Pine Cone Gift Toppers for Presents
Making Pine Cone Gift Toppers is a fun and creative way to add a personal touch to your presents. Not only do they look beautiful, but they’re also incredibly easy to make! To get started, you’ll need some pine cones, ribbons, and bows. You can use any type of ribbon or bow you like, but it’s best to choose ones that match the theme of the gift.
To create your pine cone gift topper, start by gathering a few pine cones in different shapes and sizes. Next, wrap a piece of ribbon around the base of each pine cone, leaving some extra length at the end. Tie a bow at the top of the ribbon to secure it in place. You can also add a small ornament or bead to the center of the bow for extra embellishment.
This is where things get really fun! To make your gift topper truly unique, try adding a personal touch by incorporating elements that match the recipient’s interests or favorite colors. For example, if you’re giving a gift to a nature lover, consider adding some artificial leaves or twigs to the pine cone arrangement. If it’s a sports-themed present, use ribbon and bows in team colors. The possibilities are endless! With just a few simple materials, you can create beautiful and personalized gift toppers that will make your presents stand out.
Using Pine Cones in 3D Christmas Crafts
Let’s dive into some fun and creative ways to incorporate pine cones into your three-dimensional Christmas crafts, adding a natural touch to your decorations.
Creating a Pine Cone Snowman Scene with Cardboard and Paint
Create a whimsical winter wonderland scene with pine cones as the main attraction. To create this adorable snowman scene, you’ll need some basic materials: cardboard sheets cut into shapes for the base and background, paint for the background and details, and of course, plenty of pine cones in various sizes.
Start by painting the background with a gentle winter scene using blues and whites. Add some fluffy clouds to complete the snowy atmosphere. Meanwhile, create your snowman base out of cardboard, cutting it into a circle shape for stability.
Next, arrange the pine cones on top of the base, creating a haphazard yet lovable snowman appearance. You can use larger pine cones as the body and smaller ones as the head, arms, or even accessories like hats or scarves. To add an extra touch, draw buttons and a face using paint, bringing your pine cone snowman to life.
As you work on this project, encourage kids to experiment with different pine cone arrangements, exploring textures and colors in their creative process. This delightful scene is sure to capture the magic of winter and serve as a beautiful addition to any room during the holiday season.
Building a Pine Cone Nativity Scene for Your Mantel
Building a Pine Cone Nativity Scene for Your Mantel is a fun and creative project that kids will love. To get started, you’ll need some basic materials: pine cones, cardboard, glue, scissors, and some decorative items like twigs, ribbons, or small bells.
Begin by cutting out the shapes of the characters from the cardboard, such as Mary, Joseph, baby Jesus, and the animals. You can use a template or draw them freehand. Cut out the figures carefully, making sure they are symmetrical and even.
Next, hot glue the pine cones to the cardboard figures to create a 3D effect. You can arrange them in various poses, like Mary holding the baby or Joseph standing beside her. Add some details using paint, markers, or small items like beads or sequins.
To make your nativity scene more visually appealing, consider adding some background elements like a cardboard hill or a few sprigs of artificial greenery. You can also use pine cones to create a border around the scene or add some texture with glitter or other embellishments.
Displaying Your Pine Cone Crafts: Tips and Tricks
Now that you’ve created some amazing pine cone crafts, it’s time to show them off! This next part is all about how to beautifully display your creations.
How to Preserve Your Pine Cones for Long-Term Use
When it comes to preserving pine cones for long-term use, it’s essential to take steps to prevent decay and extend their lifespan. One of the most effective ways to do this is by drying them properly. To dry pine cones, simply hang them upside down in a warm, dry place, such as an attic or a cupboard. This will help to remove excess moisture from the cones.
Another method for preserving pine cones is to spray them with a clear coat of varnish or sealant. This will not only protect the cones from decay but also add a glossy finish that can enhance their appearance in your crafts. When using this method, make sure to follow the instructions on the product label and apply the sealant in thin coats.
Air drying is another popular method for preserving pine cones. You can simply place them in an envelope or plastic bag with a desiccant packet and seal it tightly. This will help to absorb excess moisture from the air, keeping your pine cones dry and preserved. By following these simple steps, you can enjoy your pine cone crafts for years to come.
Tips for Showcasing Your Pine Cone Crafts in a Holiday Setting
When it’s time to showcase your pine cone crafts during the holiday season, you’ll want to create an inviting and festive atmosphere that highlights their natural beauty. To do this effectively, consider the following display ideas.
Start by incorporating your pine cone crafts into a beautiful winter wonderland vignette or centerpiece. This can include combining them with other natural elements like branches, evergreen sprigs, and ribbons in complementary colors to create a visually appealing arrangement. For example, you could group several small pine cone decorations together on a wooden tray or platter and surround them with some frosted glass pebbles for added depth.
Another idea is to use your pine cone crafts as part of a mantel display or holiday garland. This can be achieved by threading them onto a string of fairy lights or a rustic twine, along with other natural elements like pinecones, holly berries, and cinnamon sticks. To make the arrangement even more festive, consider adding some glittering ornaments or pinecone-shaped decorations in metallic finishes.
When it comes to displaying individual pieces, think about how you can use them as decorative accents on your holiday table setting. For instance, you could place a small vase filled with pinecones and evergreen sprigs at the center of each table setting, or use a large pine cone decoration as a placemat centerpiece.
Frequently Asked Questions
Can I use artificial pine cones for crafts instead of real ones?
Yes, you can definitely use artificial pine cones as an alternative to real ones, especially if you’re short on time or want a more durable option. However, keep in mind that artificial pine cones may not have the same natural charm and texture as real ones.
How long do my pine cone crafts typically last without preservation?
Pine cone crafts can vary in durability depending on the materials used and how well they’re made. With proper care, some projects like pine cone ornaments or wreaths can last for several years without fading or losing their shape. However, those exposed to direct sunlight or moisture may not last as long.
What are some creative ways to display my pine cone crafts?
To showcase your unique pine cone crafts, consider using a decorative easel, placing them on a tiered server, or creating a festive vignette with other holiday decorations. You can also group similar crafts together for a visually appealing display.
How do I ensure my kids are safe while handling pine cones and crafting materials?
When working on pine cone crafts with children, make sure they’re using proper safety gear like gloves to protect their hands from splinters or sharp edges. Also, supervise them closely when using glue, scissors, or other sharp objects to avoid accidents.
Can I reuse pine cones for multiple craft projects, or do they lose their appeal after one use?
While pine cones can be reused in different crafts, their appearance and texture may change over time, especially if exposed to moisture or direct sunlight. However, you can still repurpose them by adding a fresh coat of paint or glitter to give them a new look for the next project.