
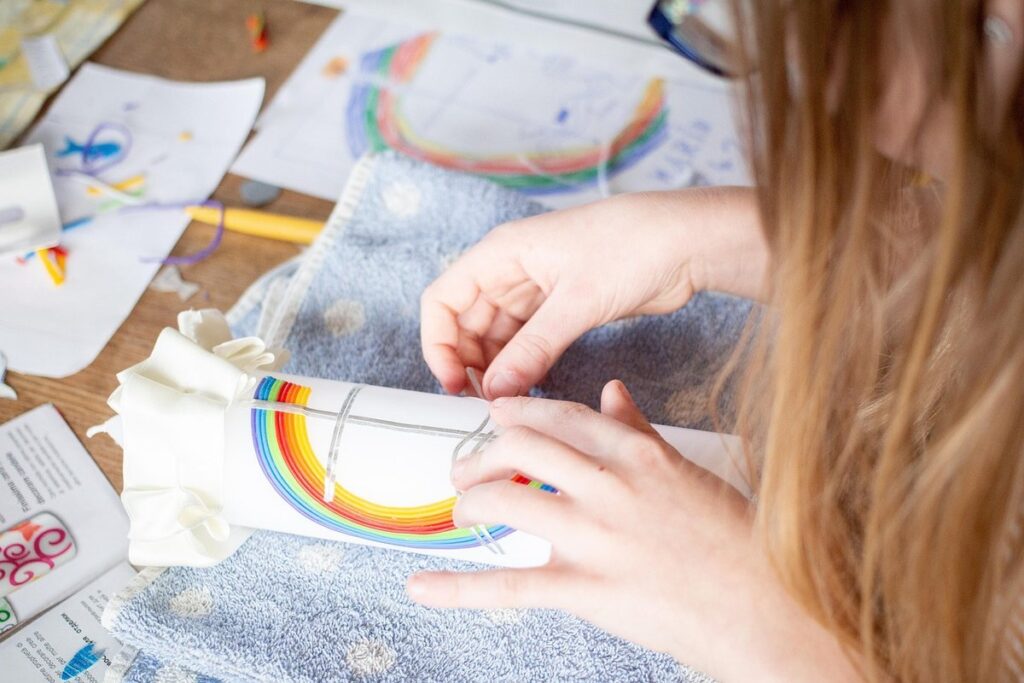
Are you looking for creative ways to engage your 4-year-old in fun and educational activities? Crafting is an excellent way to encourage cognitive, motor, and emotional development in young children. Not only do craft projects provide a platform for self-expression and imagination, but they also help build fine motor skills, hand-eye coordination, and problem-solving abilities. As a parent or caregiver, you want to ensure that your child’s creative pursuits are safe, engaging, and beneficial for their growth.
In this article, we’ll share some exciting craft project ideas suitable for 4-year-olds, along with essential safety tips and guidelines. From simple finger painting techniques to cardboard box creations, we’ve got you covered. Whether you’re a seasoned crafter or a beginner, our project suggestions will inspire you to try new things and have fun with your little one. Get ready to unleash your child’s creativity and watch them grow through the magic of crafting!
Introduction to Crafting with Preschoolers
Welcome to the world of crafting with preschoolers, where imagination and creativity come alive! In this next part, we’ll explore the basics of getting started.
Benefits of Crafting for 4-Year-Olds
When it comes to crafting with 4-year-olds, the benefits extend far beyond just having fun. Engaging in creative activities at this age can have a profound impact on their cognitive, motor, and emotional development.
Cognitively, crafting helps develop problem-solving skills, hand-eye coordination, and fine motor skills. Children learn to think critically as they plan and execute their projects, which builds confidence and encourages experimentation. For example, cutting shapes with scissors or threading beads onto a string requires concentration and focus, essential for developing attention span.
Motor skills are also significantly enhanced through crafting. Activities like painting, drawing, or molding clay help improve hand strength, dexterity, and coordination. This is particularly evident in projects that involve manipulating small objects, such as beading or playing with playdough.
Emotionally, crafting provides an outlet for self-expression, allowing children to communicate their thoughts and feelings through art. It also helps develop a sense of pride and accomplishment, as they see their creations come to life. By engaging your child in crafting activities, you’re nurturing their creativity, encouraging imagination, and fostering a lifelong love of making things.
Essential Supplies for Young Crafters
When it comes to crafting with 4-year-olds, having the right supplies is crucial for success. As a crafty parent or caregiver, you’ll want to ensure you have all the essential materials and tools to help little hands create and explore.
Start with the basics: paper, glue, scissors, and crayons. These are staples in any craft box and will be used frequently. Consider investing in washable markers and paints, which are perfect for young artists who love to make a mess. You’ll also want to have a variety of textures and materials on hand, such as construction paper, felt, and fabric.
In addition to art supplies, don’t forget about the tools needed for more involved projects. A good pair of kid-friendly scissors, safety pins, and tape can go a long way in keeping little fingers safe while still encouraging creativity. Be sure to store all supplies in an accessible and organized manner, making it easy for 4-year-olds to find what they need.
When choosing materials, consider the project at hand and the age group you’re working with. Opt for sturdy supplies that can withstand multiple uses, such as a set of good-quality crayons or markers. By having these essentials on hand, you’ll be well-prepared to take on even the most creative projects!
Finger Painting Fun and Fine Motor Skills
Get ready for a colorful adventure as we explore how finger painting can help develop your child’s fine motor skills while unleashing their creativity.
Introduction to Finger Painting
When introducing four-year-olds to finger painting, it’s essential to set up a safe and enjoyable experience. Start by preparing a dedicated space for art activities, covering the work surface with newspaper, paper towels, or a plastic tablecloth to prevent stains.
Choose high-quality washable paints specifically designed for children’s use. These paints are easy to clean off skin and surfaces, reducing the risk of accidents. You’ll also need a variety of brushes and tools, such as sponges and rollers, to encourage experimentation and creativity.
Before beginning, explain the concept of finger painting to your child and demonstrate how to hold their hand or provide guidance on proper grip. This will help them feel more confident and in control as they start exploring the paint and its textures.
Remember to supervise closely during the activity, providing reassurance and support when needed. Encourage your child to experiment with different techniques, such as swirling, dripping, and blending colors, to develop their fine motor skills and creativity.
Tips for Encouraging Creativity in Preschoolers
When engaging in creative activities like finger painting with preschoolers, it’s essential to create an environment that encourages imagination and experimentation. To do this, set up a space where children can move freely and make mistakes without fear of judgment.
Encourage exploration by providing a variety of materials, such as different colors, textures, and tools. For example, you could include metallic paints, glitter, or even fabric scraps to add depth and interest to their artwork. This will allow them to experiment with different effects and outcomes.
Another crucial aspect is giving children the freedom to make choices about their creative process. Allow them to decide what color palette they want to use or how they want to mix their paint. By doing so, you’ll be teaching them that it’s okay not to have a plan and that sometimes the best results come from taking risks.
As you guide your preschoolers through the finger painting process, remember to ask open-ended questions like “What do you think will happen if we add more color?” or “How can we make this painting even more interesting?” This will help them develop problem-solving skills and encourage continued exploration.
Sample Finger Painting Projects
Finger painting is an excellent medium for promoting fine motor skills development in 4-year-olds. One of the most engaging ways to encourage this growth is through creative projects that require manipulation and control. For example, try setting up a “Painted Landscape” project where children can create their own unique mountain ranges by squeezing different colors onto the paper.
To further enhance fine motor skills, incorporate various tools into your finger painting sessions, such as sponges, stamps, and household items like credit cards or basting brushes. These versatile instruments allow children to experiment with texture, pattern-making, and blending colors in innovative ways. For instance, you can demonstrate how to use a sponge to create textured brushstrokes or how to stamp patterns onto the paper using household items.
To take finger painting projects to the next level, try incorporating everyday objects like fruit or vegetables into your art sessions. This fun twist encourages experimentation with different shapes and sizes while refining fine motor skills through precision control.
Collage Making with 4-Year-Olds
When working on a collage project with your 4-year-old, be prepared to watch them explore colors and textures in a fun and creative way. This process is just as important as the final product!
Materials Needed for Collage Making
When it comes to creating collages with 4-year-olds, having the right materials on hand can make all the difference. Start by gathering a variety of papers that will add texture and interest to their creations. Construction paper, tissue paper, and magazine cutouts are all great options. Consider also including some specialty papers like foil or textured paper for added depth.
Next, think about adhesives. At this age, it’s best to stick with washable glue sticks or school glue. Avoid using liquid glue as it can be messy and difficult for little ones to control. You may also want to have some scotch tape on hand for more precise applications.
Other embellishments can add a fun touch to their collages. Consider including buttons, sequins, or even small pieces of fabric. These can help encourage creativity and experimentation. Be sure to supervise your child closely when introducing new materials, especially if they’re prone to putting things in their mouth. With the right materials at hand, you’ll be amazed at what 4-year-olds can create!
Step-by-Step Guide to Creating a Collage
Creating a collage with 4-year-olds can be a fun and creative activity. To make it easy for them to follow along, let’s break down the process into manageable steps.
Start by gathering materials that will spark their imagination. Collect various types of paper, such as construction paper, magazine cutouts, and old book pages. You’ll also need glue, scissors, and any other embellishments like stickers or stamps. Encourage your child to explore these materials and pick what they like best.
Next, show them how to spread out the paper on a flat surface and decide what shape their collage will be. They can use a large sheet of paper as one piece or separate smaller pieces to create a mosaic effect. Demonstrate how to tear or cut shapes from the paper using scissors or a craft knife. As they get more comfortable, they can start gluing their chosen shapes onto their collage.
Make it interactive by asking open-ended questions like “What shape do you want your flower to be?” or “Can you find something blue in this magazine page?” This will encourage them to think creatively and engage with the process.
Encouraging Thematic Exploration through Collages
When it comes to collage making with 4-year-olds, one way to take their creativity to the next level is by incorporating thematic exploration. This approach not only adds depth and meaning but also helps little ones connect what they’re creating to real-life experiences.
To get started, try focusing on a specific theme such as seasons, holidays, or even emotions. For example, you can ask your child to create a collage using winter-themed materials like glittery snowflakes, blue tissue paper for the sky, and cotton balls for snow. This not only allows them to express their understanding of the season but also encourages them to think critically about what makes winter special.
As they explore different themes, encourage your child to use a variety of textures and materials to add depth and dimension to their collage. For instance, if you’re creating a beach-themed collage, try incorporating real seashells, sandpaper for the sand, or even a piece of blue fabric for the ocean. By experimenting with various materials, they’ll develop a sense of composition and balance that will make their collages truly unique.
By exploring different themes through collage making, your child will not only have fun but also learn essential skills like creativity, problem-solving, and critical thinking. So go ahead, let their imagination run wild, and see what amazing creations they come up with!
DIY Playdough and Sensory Experiences
Get creative and messy with your little ones as we dive into making homemade playdough and creating fun sensory experiences that are perfect for 4-year-olds! From colorful concoctions to tactile treasures.
Homemade Playdough Recipe
Making homemade playdough is an incredibly fun and easy activity that’s perfect for 4-year-olds. With just a few simple ingredients, you can create a batch of soft, squishy, and colorful playdough that kids will love playing with.
To make our classic homemade playdough recipe, you’ll need the following:
* 2 cups all-purpose flour
* 1/2 cup warm water
* 1/4 cup salt
* 2 tablespoons vegetable oil
* Food coloring (optional)
Combine the flour and salt in a bowl, then slowly add in the warm water. Mix until a dough forms, adding more water as needed to achieve the right consistency. If you want to add some color to your playdough, now’s the time to stir in a few drops of food coloring.
Tips for making homemade playdough with 4-year-olds:
* Let them help with measuring out the ingredients – it’s a great way to practice their math skills and get them involved in the process.
* Encourage them to experiment with different colors and textures by adding glitter, scents, or other mix-ins to the dough.
* Make sure to supervise young children while they play with the homemade playdough, as it can be messy and may contain small pieces that can be a choking hazard.
Ideas for Extending Sensory Play with Playdough
To take sensory play with playdough to the next level, consider incorporating different textures, colors, and scents into the experience. You can add sand, rice, or even coffee grounds to create a tactile sensation that’s both fun and educational.
For a color explosion, introduce new hues by mixing in food coloring or natural dyes like beets and turmeric. Experiment with layered doughs by swirling two or more colors together for a marbled effect. To make it even more engaging, shape the playdough into objects that showcase different textures, such as creating a rainbow-colored mountain range using colored sand and rocks.
Take scent exploration to new heights by infusing the playdough with fragrances like peppermint extract or essential oils. You can also hide small toys or other hidden treasures within the dough for an added surprise element. To encourage children’s imagination and creativity, set up different stations where they can explore various textures and colors without distractions.
Some examples of sensory-rich playdough creations include making “cloud dough” by mixing flour and shaving cream, or creating a “moon surface” with glow-in-the-dark paint.
Sensory Exploration through Other Materials
Taking playdough to the next level means exploring alternative materials that offer similar sensory benefits. Consider trying homemade Cloud Dough made from shaving cream and flour. This mixture is perfect for little hands to mold and shape, providing a smooth texture that’s both calming and engaging.
Another great option is making Salt Slime using table salt and glue. The tactile experience of squishing and stretching this slime is sure to delight your child’s senses. You can also add food coloring or glitter to make it more visually appealing. Just be sure to supervise your child during playtime, as the salt can be harsh on skin.
For a more natural approach, try making Goo with gelatin and water. This clear, jelly-like substance is great for exploring texture and temperature. You can also experiment with adding different scents or flavors to enhance the sensory experience.
Remember, these alternatives may not last as long as traditional playdough, but they offer unique benefits that can expand your child’s creative palette. Encourage experimentation and exploration, and be prepared to get messy together!
Cardboard Box Creations
Let’s unleash your child’s creativity by turning ordinary cardboard boxes into extraordinary things, from castles to cars and so much more! We’ll show you simple ways to get started.
Transforming a Cardboard Box into a Masterpiece
When you give a child a blank piece of paper and some crayons, they can create anything from a beautiful landscape to a fantastical creature. But what if we told you that the humble cardboard box can be transformed into an equally impressive masterpiece? At four years old, children are naturally curious and love to explore their creativity through play.
One of the simplest ways to transform a cardboard box is to turn it into a castle or a house. You can decorate it with paint, markers, or even stickers. Your child can use their imagination to create windows, doors, and even a drawbridge. Another idea is to make a robot out of a shoebox. Cut out shapes for the eyes, nose, and mouth, and let your child’s creativity shine by adding movable arms and legs.
To take it up a notch, try cutting holes in different shapes and sizes on one side of the box. Your child can then use a flashlight or a small lamp to create a magical effect inside the box. You can also cut out windows and doors to create a miniature town or city. Whatever you choose, remember to encourage your child’s creativity and imagination as they transform their cardboard box into something truly special.
Tips for Fostering Problem-Solving Skills in Children
As you explore the world of cardboard box creations with your 4-year-old, it’s essential to encourage their problem-solving skills. These skills will benefit them not only in craft projects but also in everyday life. To foster creativity and innovative thinking, try these strategies:
When faced with a new project or challenge, ask open-ended questions like “What do you think we could make?” or “How can we make this box into something special?” This encourages children to think critically and explore different possibilities.
You can also provide a variety of materials and tools for them to experiment with. For example, offer a range of scissors, glues, and tape in different colors and textures. As they work, observe their process and ask questions that guide them without giving away the answer.
Another approach is to model creative problem-solving yourself. If your child gets stuck, don’t hesitate to show them how you would tackle the issue. This demonstrates that it’s okay to make mistakes and that there are often multiple solutions to a problem.
Remember, the goal is not to provide the perfect solution but to encourage your child to think creatively and develop their own unique ideas.
Real-Life Applications of Cardboard Box Crafts
As you’ve been exploring the world of cardboard box crafts with your 4-year-old, you may be wondering what makes these projects more than just fun and games. The truth is, cardboard box creations can have a significant impact on your child’s development and daily life.
One of the most significant benefits of cardboard box crafts is their ability to promote creativity and problem-solving skills. By giving children the freedom to design and build whatever they like, you’re encouraging them to think outside the box (pun intended!) and come up with innovative solutions. This skill is essential for future success in various areas of life.
Cardboard boxes can also be repurposed as practical items around the house. For example, a large cardboard box can become a playhouse, a puppet theater, or even a storage container for toys. By upcycling old boxes, you’re teaching your child the value of reuse and recycling.
Incorporating cardboard box crafts into your daily routine can also help with fine motor skills development. Cutting, gluing, and assembling various materials requires hand-eye coordination and dexterity, essential for future academic success.
Safety Considerations and Supervision
When working on craft projects with 4-year-olds, it’s essential to prioritize their safety and well-being. This section provides guidance on how to supervise and ensure a safe creative experience for your little ones.
Ensuring a Safe Crafting Environment
When it comes to crafting with 4-year-olds, safety should always be our top priority. Children at this age are naturally curious and love to explore their surroundings, which can sometimes lead to accidents. To ensure a safe crafting environment, let’s start by setting up a dedicated workspace.
Designate a specific area for crafting, free from tripping hazards and breakable objects. Cover your work surface with newspaper or a plastic tablecloth to make clean-up a breeze. Make sure all materials are within easy reach to prevent overreaching or straining.
Supervise your child closely while they craft, especially when using scissors, glue, or other potentially hazardous materials. Encourage them to wash their hands thoroughly after handling any messy substances. Store all supplies in labeled containers and out of reach when not in use to avoid accidents.
Finally, always be prepared for spills and messes by having a cleaning kit on hand with paper towels, soap, and water. By taking these simple precautions, you’ll create a safe and enjoyable crafting experience for your 4-year-old.
Strategies for Effective Supervision and Guidance
As you supervise and guide 4-year-olds with their craft projects, it’s essential to strike a balance between allowing them to explore independently and intervening when necessary. This delicate balance can be challenging, but with some awareness and intentional strategies, you can create a safe and supportive environment for young artists.
When children are engaged in creative activities, they often require space to experiment and make mistakes. However, it’s crucial to know when to step in and provide guidance or assistance. A general rule of thumb is to observe from a distance and only intervene when you notice the child exhibiting signs of frustration, anxiety, or confusion.
Here are some practical tips for finding this balance:
* Start with open-ended questions that encourage children to think critically about their project and make informed decisions.
* Offer suggestions or alternatives instead of direct instructions, allowing children to maintain control over their creative process.
* Be mindful of the child’s emotional state and intervene when necessary to prevent frustration or anxiety from escalating.
Encouraging Independence in Young Crafters
As children become more skilled and confident in their crafting abilities, it’s essential to gradually encourage independence. This process can be a delicate balance between allowing them to take ownership of their work and ensuring their safety.
One way to begin is by introducing simple tasks that require minimal supervision, such as sorting materials or fetching specific colors. As they master these small responsibilities, you can introduce more complex projects that demand greater independence. For instance, if your child is working on a collage, start by letting them choose the theme and color scheme, then gradually give them control over the cutting and gluing process.
It’s also crucial to establish clear expectations and guidelines for their independent work. This may include setting boundaries around materials usage or defining what constitutes “acceptable” results. For example, you might allow your child to decide how many glue sticks to use but specify that they must only apply a small amount at a time.
Remember, the key is to strike a balance between guidance and autonomy, allowing your child’s creativity and confidence to flourish while maintaining a safe working environment.
Frequently Asked Questions
How Can I Adapt Finger Painting for Children with Special Needs?
When working with children who have special needs, consider using adaptive tools like finger extensions or modifying the painting surface to accommodate their abilities. Be sure to consult with the child’s healthcare provider before introducing new materials. By adapting your techniques and materials, you can ensure a fun and inclusive experience.
Can I Use Store-Bought Playdough for Sensory Play?
Yes, store-bought playdough is a great option for quick and easy sensory experiences. However, be mindful of potential allergens and opt for brands that use natural ingredients when possible. To extend the play value, consider adding other textures like beads or sand to create unique tactile sensations.
How Can I Encourage Independence in Young Crafters?
Encourage independence by providing a safe and well-organized crafting space where children can freely explore materials without direct supervision. Offer guided activities initially and gradually phase out assistance as their skills develop. This will help build confidence and allow them to take ownership of their creative projects.
What Are Some Safety Tips for Crafting with Cardboard Boxes?
When working with cardboard boxes, ensure the area is clear of tripping hazards and secure any loose flaps or edges to prevent accidents. Supervise children closely while they cut or assemble the box, using safety scissors or blunt-tipped craft knives when necessary. Regularly inspect the workspace for potential choking hazards.
Can I Use Digital Tools or Apps for Crafting with Preschoolers?
Yes, digital tools and apps can be a great way to introduce preschoolers to creative activities like drawing, painting, or collage-making. Many apps offer interactive tutorials, virtual materials, and real-time feedback that can help develop their skills. Consider integrating these resources into your crafting routine to provide variety and engage young learners.