
Are you an 8-year-old looking to unleash your creativity or perhaps a parent searching for fun activities to do with your child? Either way, you’re in the right place! As we all know, kids this age are bursting with energy and curiosity, making them perfect candidates for exploring the world of crafts. Not only will crafting help develop their skills and imagination, but it’s also an excellent way to encourage self-expression and creativity.
In this article, we’ll delve into a range of fun and easy crafts designed specifically for 8-year-olds. From painting and drawing to DIY projects and more, our selection is perfect for kids who are just starting to explore the world of art. We’ll provide step-by-step guides, helpful tips, and inspiring ideas to keep your little one engaged and motivated.
Introduction to Crafting for Kids
Crafting is a wonderful way for kids to express themselves creatively and develop essential skills. In this section, we’ll explore fun projects that are perfect for 8-year-olds just starting out with crafting.
Why Crafting is Important for Children’s Development
When children engage in crafting activities, they experience a wide range of cognitive, emotional, and social benefits that can have a lasting impact on their development. For instance, crafting helps improve fine motor skills and hand-eye coordination as kids learn to manipulate various materials like paintbrushes, scissors, and glue.
Emotionally, crafting allows children to express themselves freely, fostering self-confidence and self-esteem as they bring their ideas to life. When kids create something with their own hands, they develop a sense of pride in their work and feel more connected to the process.
Socially, crafting encourages collaboration and teamwork as kids engage in group projects or share their creations with others. This can help build empathy and communication skills, allowing children to understand and appreciate different perspectives.
To incorporate crafting into your child’s daily routine, consider setting aside a dedicated craft space where they can freely express themselves without distractions. Encourage them to explore various materials and techniques, and provide guidance when needed. With regular crafting practice, you’ll see significant improvements in their cognitive, emotional, and social development.
Choosing the Right Craft Supplies for 8-Year-Olds
When it comes to choosing craft supplies for 8-year-olds, it’s essential to consider their safety and suitability. At this age, kids are naturally curious and love experimenting with various materials. However, some craft supplies can be hazardous or too complicated for them.
To ensure a fun and safe crafting experience, start with the basics. For most crafts, you’ll need basic art supplies like paper, glue, scissors, crayons, markers, and paint. When it comes to paints, choose washable, water-based paints that are easy to clean up. You can also consider using fabric paint or colored pencils for more precise designs.
For specific crafts, you may need additional materials. For example, if you’re making a collage, you’ll need glue sticks, scissors, and various textures like construction paper or fabric scraps. If you’re creating a DIY craft like a bird feeder, you’ll need twine, peanut butter, seeds, and a variety of other materials.
When shopping for craft supplies, read the labels carefully to ensure they’re suitable for children. Some materials can be choking hazards or trigger allergies, so it’s essential to take precautions. Also, always supervise your child during crafting activities and encourage them to use their imagination while following basic safety guidelines.
Handmade Crafts for 8-Year-Olds: A World of Possibilities
Get ready to unlock your child’s creativity as we dive into the magical world of handmade crafts, tailored specifically for curious and enthusiastic 8-year-olds. From paper mache to knitting, the possibilities are endless!
Painting Masterpieces with Watercolors and Acrylics
Painting masterpieces with watercolors and acrylics is an exciting adventure waiting to happen! At this age, children are naturally curious and love experimenting with colors. To create unique artwork, let’s explore some fun painting techniques using these two versatile mediums.
When working with watercolors, start by wetting the paper to create a subtle gradient effect. Dip your brush in the paint and flick it onto the paper to achieve soft, blended strokes. Experiment with different brushstrokes, like dragging or swirling, to add texture and movement to your artwork.
Acrylic paints are perfect for bold, vibrant creations! Use a palette knife to mix colors on the canvas, creating unique textures and patterns. You can also experiment with dripping or pouring techniques by tilting the canvas at an angle. This will allow you to create beautiful, swirling shapes that add visual interest to your art.
Remember, the most important thing is to have fun and be creative! Don’t worry about making mistakes – they often lead to happy accidents that become a part of the masterpiece. Encourage your child to try new things, explore different techniques, and watch their artwork evolve into something truly special.
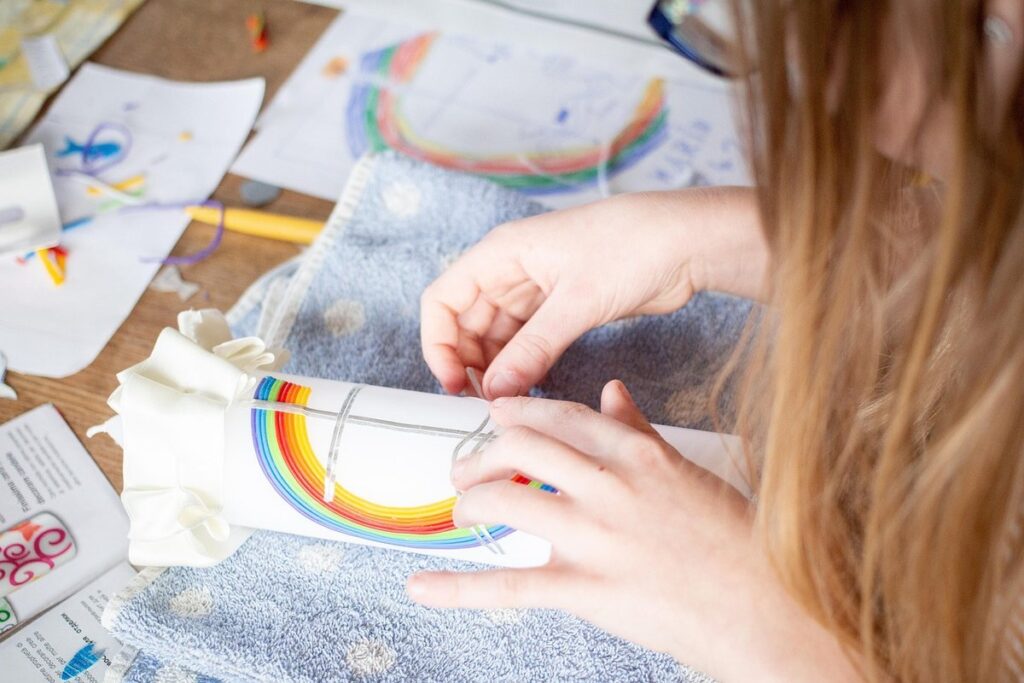
Creating Collage Art with Recycled Materials
Creating beautiful collage art with recycled materials is a fantastic way to encourage creativity and environmental responsibility in 8-year-olds. Start by gathering a variety of materials like old newspapers, cardboard tubes, fabric scraps, and magazine cutouts. These materials are not only eco-friendly but also add texture and interest to the artwork.
To begin, demonstrate how to tear the paper into desired shapes and sizes. Encourage the child to experiment with different tearing techniques, such as ripping, folding, or crumpling. Next, show them how to arrange the torn pieces on a flat surface, overlapping and layering them to create a visually appealing composition.
Consider using items like cardboard tubes to create unique shapes and structures within the collage. For example, you can roll up a tube into a spiral shape and attach it to the artwork using glue or staples. This adds an extra dimension to the piece while promoting problem-solving skills.
As they work on their collages, remind them to have fun and be open to experimentation. Encourage them to think about what message they want to convey through their art, such as a love for nature or a favorite hobby.
DIY Decorations for Kids’ Rooms
Get creative and make your child’s room a reflection of their personality with these fun and easy DIY decoration ideas that they can help with too!
Making Popsicle Stick Picture Frames
Making picture frames is one of the coolest DIY projects you can do with popsicle sticks. And the best part? It’s super easy! With just a few basic craft supplies, you’ll be able to create a unique and personalized frame for your favorite family photo.
To get started, gather the following materials: popsicle sticks, glue, scissors, a ruler or straightedge, and a pencil or marker. You’ll also need a piece of paper or cardboard with a small hole in it to use as a backing for your picture. Now, let’s move on to the fun part!
First, lay out four popsicle sticks side by side on a flat surface. This will be the base of your frame. Next, apply a small amount of glue to each stick and attach them together, making sure they’re evenly spaced. Allow the glue to dry completely before moving on to the next step.
Now it’s time to add some vertical popsicle sticks to create the sides of your frame. Simply repeat the same process as before, gluing the sticks together in a row. Make sure to leave space for the picture and the backing.
Once you have all four sides assembled, attach the backing to the frame using glue or tape. Finally, insert your favorite photo into the frame and voila! You’ve created a one-of-a-kind popsicle stick picture frame. Don’t be afraid to get creative with colors, patterns, and designs – it’s all part of the fun!
Creating Faux Stained Glass Using Contact Paper
Creating beautiful stained glass artwork is not just for professionals anymore! With some simple materials and creativity, kids as young as 8 can give it a try. One fun way to create faux stained glass is by using contact paper. This DIY project is perfect for a rainy day or a craft session with friends.
To get started, you’ll need some colored contact paper, scissors, and a flat surface to work on. Cut the contact paper into shapes and designs that resemble stained glass pieces. You can use stencils or draw freehand to create intricate patterns. Next, arrange the cut-out shapes on a large sheet of plain contact paper, overlapping them slightly to achieve the stained glass effect.
To add some shine and depth, apply a coat of clear contact paper over the design. Press out any air bubbles gently with your fingers or a credit card. And voilà! You have a stunning faux stained glass artwork that’s perfect for decorating a kid’s room or giving as a gift. Encourage kids to experiment with different colors and designs to create unique masterpieces.
Upcycled Crafts for a Sustainable Future
Get creative and make a difference by learning simple upcycling techniques that transform old items into unique, eco-friendly crafts you can use in your daily life. You’ll love it!
Transforming Old T-Shirts into Reusable Bags
Are you tired of throwing away old t-shirts that are still comfy and cozy? Well, we’ve got some awesome news for you! You can turn those old tees into reusable bags, perfect for carrying your favorite books, pencils, or even groceries from the store!
To get started, gather a few old t-shirts with fun designs or colors. Look for ones that have interesting prints or logos – they’ll make great additions to your bag’s design! Now, let’s talk about the steps involved:
First, lay out two of your t-shirt pieces on top of each other, right sides together. Cut around the neck and armholes to create a big square shape. This will be the body of your bag.
Next, cut a rectangle for the strap – you can use an old sock or ribbon if you have one lying around! Then, place it in between the two t-shirt squares and sew along three sides, leaving the top open.
Turn your bag right side out, press it with an iron to smooth out any wrinkles, and voilà! You’ve got yourself a brand new reusable tote bag made from old clothes. Fill it up with books, pencils, or even groceries – it’s time to get creative and make some magic happen!
Remember, this is just the beginning of your upcycled adventure. Get inspired by what you have at home, gather friends and family to join in on the fun, and watch as your old clothes transform into amazing new creations!
Turning Plastic Bottles into Bird Feeders
Creating a bird feeder from a plastic bottle is an excellent way to teach kids about recycling and conservation. Let’s get started! You’ll need:
* A clean, dry plastic bottle (2-liter or 1.5-liter works best)
* Scissors
* Glue or hot glue gun (with adult supervision)
* String or twine
* Birdseed
Cut the top third off the bottle to create a tray for the birdseed. Flip the top upside down and attach it to the main part of the bottle using glue. Make sure it’s secure so the birds can’t get in.
Next, cut a small hole on one side of the bottle for the string. This will be used to hang your feeder. Fill the bottle with birdseed, making sure not to overfill it. Tie the string around the neck of the bottle and you’re done!
Hang your new bird feeder outside and watch as the birds visit their new snack spot. Remember to refill the birdseed regularly so your feathered friends have a steady supply. This project is not only fun but also teaches kids about reducing waste, conserving resources, and taking care of our environment.
Seasonal Crafts for 8-Year-Olds: Celebrating Holidays and Occasions
Get creative with your child as you explore a range of fun and easy seasonal crafts, from Halloween decorations to Christmas ornaments. These projects are perfect for 8-year-olds who love making things!
Making Valentine’s Day Cards with Love
Making Valentine’s Day cards with love is a fun and creative way to celebrate this special holiday. You can start by gathering materials like paper, glue, scissors, and heart-shaped templates. Let the kids’ imagination run wild as they think about what kind of design they want to create.
One idea is to use construction paper in different colors and patterns to make a collage-style card. They can cut out hearts, flowers, or other shapes and arrange them on a piece of cardstock to create a unique design. Don’t forget the glue – it’s an essential tool for bringing their creations together!
Another fun option is to use pre-made heart-shaped templates as a guide. The kids can decorate each template with markers, stickers, or paint, adding personal touches like names, initials, or special messages. For a more intricate look, they can layer multiple hearts on top of each other, creating a 3D effect.
Encourage your little ones to get creative and think outside the box (or heart). With a few simple materials and some imagination, they’ll be making beautiful handmade Valentine’s Day cards in no time!
Creating Halloween Masks from Paper Mache
Creating spooky masks using paper mache is a fun and creative activity that kids will love. To get started, you’ll need some basic materials such as balloons, newspaper strips, glue, scissors, and paint or markers.
Begin by blowing up the balloon to the desired size for the mask. Then, dip each newspaper strip into the glue and wrap it around the balloon, overlapping the edges of the strips as you go. Continue this process until the entire balloon is covered in layers of paper mache. Let it dry completely before popping the balloon inside.
Once the paper mache is dry, use paint or markers to decorate the mask with spooky designs, such as eyes, teeth, and other creepy features. Kids can get creative and add their own personal touches, making each mask unique. For example, they might add some fake spider webs using glue and string or draw a wicked grin on the mask.
With a little patience and imagination, kids can create their own spooky masks to wear for Halloween. Encourage them to experiment with different designs and materials to make it an even more fun and engaging activity!
Tips for Parents: Encouraging Creativity in Kids through Crafting
As a parent, you play a huge role in nurturing your child’s creativity, and crafting is an excellent way to encourage their imagination and self-expression. Let’s explore some practical tips for fostering creative skills through hands-on crafts.
Setting Up a Home Craft Station for Kids
Setting up a home craft station can be an exciting project for kids and parents alike. To create a space that’s both safe and inspiring, consider the following steps.
Start by designating a specific area of your home as the craft zone. This could be a corner of the playroom, a section of the kitchen table, or even a converted closet. Make sure it’s easily accessible and visible for your child to encourage frequent use.
Next, invest in basic supplies that can be used across various projects, such as paper, glue, scissors, and markers. Consider storing these items in labeled bins or baskets to maintain organization. Add some fun and creative touches like a craft cart, a pegboard with hooks, or a chalkboard for brainstorming ideas.
To keep the space safe, cover work surfaces with washable tablecloths or a plastic mat. Store materials that are hazardous or fragile out of reach. Finally, let your child take ownership of the space by allowing them to personalize it with their favorite colors, posters, or artwork. This will not only make the experience enjoyable but also foster a sense of pride and responsibility in maintaining their craft station.
Overcoming Frustration and Embracing Imperfections
As parents, it’s natural to want our children to excel at everything they try. However, when it comes to crafting and creativity, perfectionism can stifle the very thing we’re trying to encourage – imagination and self-expression.
The truth is, mistakes are an essential part of the creative process. They spark new ideas, help us think outside the box, and allow our children to develop problem-solving skills. When your child makes a mistake while crafting, try not to jump in with corrections right away. Instead, ask them what they think went wrong or how they can fix it themselves. This approach will not only teach them valuable critical thinking skills but also show them that mistakes are an opportunity for growth.
To cultivate a growth mindset and celebrate imperfection, set up a “mistake gallery” in your home where you display all the projects your child has created – flaws and all. This will help shift their focus from perfection to creativity and remind them that it’s okay to take risks and try new things.
Frequently Asked Questions
Can I start crafting with materials I already have at home?
You can definitely get creative with what you have on hand! Gather items like paper, glue, scissors, and markers to create simple projects. This will also encourage your child to think outside the box and be more resourceful. As they progress, you can always invest in specific craft supplies.
What if my child gets frustrated or makes a mess while crafting?
It’s normal for kids (and adults!) to get frustrated or make mistakes when trying something new. To minimize messes, work on a protected surface like a tablecloth or newsprint, and encourage your child to experiment with trial runs before making their masterpiece. Also, be sure to praise effort and creativity over perfection.
Can I do crafts with my child if I don’t have any experience?
Absolutely! Crafting is all about having fun and exploring different techniques. You can learn alongside your child, discover new things together, and enjoy quality time bonding over creative projects. Don’t worry if you’re not an expert – the process of creating something beautiful is often more important than the final result.
How can I store my child’s finished crafts and encourage them to display their work?
Displaying their creations will motivate your child to keep crafting! Set up a dedicated space, like a craft station or a designated wall for displaying artwork. Consider using storage bins, baskets, or shelves to keep projects organized and easily accessible.
What if I’m unsure about which crafts are suitable for my 8-year-old’s skill level?
Start with simple projects and gradually move on to more complex ones as your child becomes confident in their skills. Observe your child’s interests and abilities to determine what they can handle, and don’t be afraid to modify or adapt projects according to their needs. You can also refer back to the main article for guidance on specific project suggestions.