
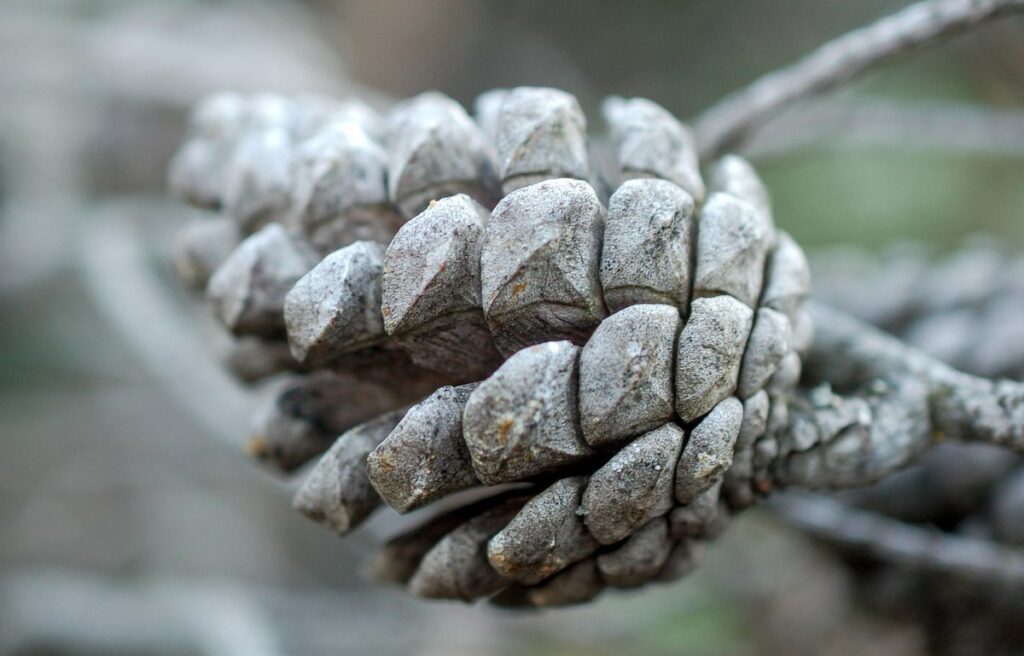
Get ready to unleash your little one’s creativity with some fun and easy pine cone crafts! Pine cones are a treasure trove of creative possibilities, and with just a few simple materials, you can create beautiful and functional projects that will delight both kids and adults. From making bird feeders to crafting garlands, these DIY projects promote imagination, fine motor skills, and most importantly, fun! In this article, we’ll explore some exciting pine cone crafts for kids that are perfect for a rainy day or a family activity. We’ll dive into easy-to-follow instructions and showcase creative ideas that will inspire your child’s inner artist. Whether you’re a crafty parent or just looking for new ways to engage your little ones, this article is packed with inspiration and ideas to get you started on some amazing pine cone crafts!
Introduction to Pine Cone Crafts
Welcome to our world of pine cone crafts! Here, we’ll introduce you to the simple and creative ways to repurpose these natural treasures into fun projects.
What are the Benefits of Crafting with Pine Cones?
Crafting with pine cones is an activity that offers a multitude of benefits for kids. Not only does it allow children to unleash their creativity and imagination, but it also helps develop their fine motor skills. By carefully collecting, sorting, and arranging pine cones, kids can improve their hand-eye coordination and dexterity.
As they work on crafting projects with pine cones, kids are encouraged to think creatively and explore different textures, colors, and shapes. This process not only fosters creativity but also helps children develop problem-solving skills as they experiment with various combinations of materials and techniques.
Pine cone crafts can be tailored to suit different age groups and skill levels, making them an excellent activity for a family or classroom setting. For younger kids, simple projects such as pine cone bird feeders or picture frames can help build confidence in their fine motor abilities. Older children can explore more complex designs, like pine cone wreaths or decorative vases.
By incorporating pine cone crafts into your child’s routine, you’re providing them with an opportunity to learn and have fun at the same time. So, grab some pine cones and get creative – you never know what wonderful masterpieces your kids will create!
Choosing the Right Materials for Pine Cone Crafts
When it comes to creating beautiful pine cone crafts with kids, choosing the right materials is crucial for a successful project. Let’s start with the basics – glue! You’ll need a good adhesive that can hold the weight of the pine cones and any decorations you might add. White school glue or hot glue work well, but if you’re working with smaller kids, consider using a washable glue stick to minimize mess.
In addition to glue, you’ll want some basic craft supplies like scissors, tape, and a craft mat for protection. For decorations, think outside the box – pine cones can be paired with twigs, ribbons, sequins, or even beads to create a unique look. Beads, in particular, are great for adding texture and visual interest. If you’re feeling ambitious, try using wire cutters to shape wire into intricate designs that complement your pine cone creations.
Remember, the key to successful pine cone crafts is experimentation and creativity. Encourage kids to think about what they want their finished product to look like and choose materials accordingly. With a little imagination and some basic supplies, you can create truly one-of-a-kind art pieces that will be treasured for years to come.
Easy DIY Pine Cone Crafts for Beginners
Get ready to create some adorable and easy DIY pine cone crafts that your little ones will love making, using just a few simple materials! This section is perfect for beginners.
Pine Cone Bird Feeders
Creating a pine cone bird feeder is a fun and easy DIY project that kids can enjoy. All you need are some basic materials like peanut butter, bird seeds, and of course, pine cones! Start by spreading a generous amount of creamy peanut butter all over the pine cone, making sure to cover it evenly.
Next, roll the peanut-butter-covered pine cone in a plate or tray filled with bird seeds until it’s fully coated. You can use a variety of seeds such as sunflower seeds, suet, or even nyjer seeds for a more specific bird species. Make sure to press the seeds firmly onto the pine cone so they stick well.
Hang your new bird feeder from a tree using a piece of twine or fishing line, and watch the birds enjoy their snack! It’s essential to place the feeder in an area with minimal predator activity and where the birds can easily access it. With this simple project, you’ll not only create a delightful bird feeder but also provide a fun learning experience for your kids about the importance of bird conservation and feeding them during winter months.
Tips: You can customize your pine cone bird feeder by adding some decorative items like glitter or small beads to make it more attractive. Also, be sure to clean up any leftover peanut butter and seeds from the surface you’re working on to avoid making a mess!
Pine Cone Ornaments
Making Pine Cone Ornaments is a Fun and Easy DIY Project for Kids!
Who says ornaments have to be store-bought? With just a few simple materials, you can create unique and personalized pine cone ornaments that will add a personal touch to your Christmas tree. To get started, gather the following supplies: pine cones, white glue, string or twine, scissors, and any additional decorations you like (e.g., glitter, stickers, paint).
Begin by applying a generous amount of glue to each pine cone, making sure to cover every nook and cranny. While the glue is still wet, tie a piece of string around the top of the pine cone, leaving a small loop for hanging. This will serve as the ornament’s hanger.
Next, let your child’s creativity shine by adding any additional decorations they like. You can use glitter to give it some extra sparkle or paint to make it more colorful. Once everything is dry and in place, carefully remove the pine cone from the glue-covered surface and hang it on the tree.
This project is perfect for kids because it requires minimal supervision and allows them to express their creativity while learning a new skill – a great combination for a fun family activity!
Advanced Pine Cone Crafts for Older Kids
Now that you’ve mastered some basic pine cone crafts, it’s time to get creative and try even more complex projects suitable for older kids. These activities will push their skills and imagination further!
Pine Cone Wreaths
Creating a pine cone wreath is a fun and creative project that’s perfect for older kids to try. To get started, you’ll need some basic materials like wire, glue, and decorations of your choice. You can use floral wire or regular wire, depending on what you have available.
Begin by gathering your pine cones and selecting the ones with the most interesting shapes and sizes. Then, wrap a piece of wire around the base of each cone to create a loop that will attach it to the wreath form. Next, apply a small amount of hot glue to the top of each cone and press it onto the wreath form.
As you add more pine cones to the wreath, shape them into a circular pattern to create a balanced look. You can also use floral tape or green wire to tie in any gaps between the cones. For decoration, consider adding some ribbons, bows, or artificial berries to give your wreath a pop of color.
Tips for older kids: Encourage them to experiment with different materials and decorations to make their wreath unique. Also, remind them to work carefully when handling hot glue and wire to avoid accidents.
Pine Cone Potpourri
As you explore the world of pine cone crafts with older kids, why not create something truly special and fragrant? Making a potpourri mixture using dried flowers, spices, and pine cones is an excellent way to engage their senses while developing their creativity. This project requires minimal supervision, allowing them to take charge of mixing and measuring ingredients.
To start, gather a variety of dried flowers like lavender buds, marigold petals, and rose hips. You can also add whole spices such as cinnamon sticks, cloves, and star anise for extra depth. Collect pine cones in different shapes and sizes to create visual interest. Combine the dried flowers and spices with small pine cones in a large bowl, encouraging kids to experiment with ratios of each component.
For example, try mixing 2 tablespoons of dried lavender with 1 tablespoon of cinnamon sticks and 5-7 small pine cones. Let them arrange the mixture in decorative jars or containers, adding any final touches like ribbons or tags. This fragrant potpourri can be enjoyed throughout the home or given as a thoughtful gift to family members and friends.
Nature-Inspired Pine Cone Crafts
Get creative and bring the outdoors in by making these adorable nature-inspired pine cone crafts that are perfect for kids to enjoy and display around the home.
In this section, we’ll show you how to turn pine cones into beautiful decorative pieces using natural materials like twine, leaves, and more.
Pine Cone Fairy Garden
Creating a Pine Cone Fairy Garden is a delightful project that lets kids’ imaginations soar. This craft combines pine cones with miniatures and fairy-themed decorations to create an enchanting miniature world.
To start, gather materials such as small pine cones, twigs, pebbles, moss, tiny figurines or dollhouse furniture, and string lights (optional). You can also add some artificial flowers or foliage for a whimsical touch.
Begin by preparing the area where your fairy garden will reside. You can use a wooden crate, a terrarium, or even a small planter as the base. Line it with a layer of moss to create a soft, verdant ground.
Now, it’s time to build your miniature landscape! Use twigs and pebbles to form hills, valleys, or streams. Arrange the pine cones in clusters or as single trees, depending on their size. Add tiny furniture and figurines to bring life to your fairy world.
Pine Cone Forest Diorama
Creating a Pine Cone Forest Diorama is an exciting and educational craft for kids. It’s a great way to encourage their creativity while teaching them about the natural world. To start, gather various sizes of pine cones, rocks, soil, moss, and other small twigs or branches.
Begin by preparing a shoe box or any rectangular container as your diorama base. Fill it with soil and add some small rocks for texture. Arrange the larger pine cones to form trees, using glue or floral tape to secure them in place. Add smaller pine cones to create foliage and branches.
Next, use moss to cover the remaining spaces between the pine cones, creating a lush forest floor. Finally, arrange any other natural materials like acorns, leaves, or small stones around the scene. Encourage kids to get creative with their diorama by adding other details such as tiny animals, insects, or even miniature buildings.
This project not only fosters creativity but also introduces children to the concept of ecosystems and the importance of preserving our natural environment. With minimal supervision, kids can create an immersive forest scene that’s both visually appealing and thought-provoking.
Upcycling Old Pine Cones into Unique Crafts
Get creative and breathe new life into old pine cones as we show you how to upcycle them into one-of-a-kind crafts that kids will love making. From decorations to ornaments, we’ve got the ideas!
Pine Cone Garland
Create a stunning pine cone garland to add a touch of nature’s beauty to your home or garden. This fun and easy DIY project is perfect for kids to get creative with upcycled materials.
To start, gather an assortment of pine cones in various shapes, sizes, and textures. You can collect them from your backyard or a nearby park during the fall season when they’re easily available. Next, decide on a color scheme that matches your home decor or garden theme. Choose some paint, markers, or colored string to add a pop of color to your pine cones.
Now, it’s time to get creative! Use glue to attach a length of twine or string to the top of each pine cone. This will serve as the base for your garland. Once all the pine cones are strung together, hang them in a window, along a fence, or across a patio. You can also add some artificial flowers, berries, or other natural elements to give it a more rustic look. With this simple yet elegant garland, you’ll be able to bring the outdoors in and create a unique conversation piece for your home or garden.
Pine Cone Centerpiece
Transforming pine cones into stunning centerpieces is an excellent way to add a natural touch to your home decor. To create a beautiful Pine Cone Centerpiece, start by collecting pine cones of varying sizes and shapes. You can use them as is or paint them with a few coats of metallic paint for added sparkle.
Next, choose a decorative container that complements the color scheme of your room. A mercury glass vase or a wooden bowl will add an earthy feel to your centerpiece. Arrange the pine cones in a balanced composition within the container, leaving enough space between each cone to create visual interest.
To add some greenery to your Pine Cone Centerpiece, tie a few sprigs of fresh rosemary or eucalyptus around the vase using twine or ribbon. This will not only fill the space with fragrance but also bring in a pop of color.
Tips for kids: Encourage them to get creative by experimenting with different shapes and sizes of pine cones. They can also try arranging the pine cones in a pattern, such as a triangle or a circle, to create a unique centerpiece.
Safety Precautions and Tips for Pine Cone Crafts
When working with pine cones, it’s essential to take some simple safety precautions to ensure a fun and injury-free experience for you and your little ones. This section will cover what to watch out for and how to stay safe.
How to Prepare Pine Cones for Crafting
When it’s time to get creative with pine cones, the first step is preparing them for crafting. This might sound like a tedious task, but trust us, it’s worth the extra effort. Cleaning and drying pine cones can be done with just a few simple steps.
Start by gently sweeping off any loose debris or twigs from the pine cone using a soft-bristled brush or a small dustpan. Next, submerge the pine cone in warm water for about 10-15 minutes to loosen any dirt or sap that may be stuck on it. You can also add a tablespoon of white vinegar to help break down any stubborn stains.
After soaking, use a clean cloth or paper towel to gently pat the pine cone dry. This will help remove excess moisture and prevent any mold from forming. Once dry, you can shape or trim the pine cones as needed for your craft project. For example, if you’re making a wreath, you might want to cut off any large branches to create more uniform shapes.
Remember to work in a well-ventilated area and wash your hands thoroughly after handling pine cones, especially if you have sensitive skin. With these simple steps, you’ll be ready to get creative with your pine cone crafts!
Common Mistakes to Avoid in Pine Cone Crafts
When working with pine cones, it’s easy to get caught up in the creative process and overlook some important details. To avoid common mistakes that can ruin a project, let’s take a closer look at what not to do.
Firstly, be cautious when handling hot glue guns or any other heat sources near flammable materials like fabric or paper. A single mistake could lead to a fire hazard, so always keep a safe distance between the heat source and your work area.
Another potential pitfall is using too much glue, which can make the pine cones heavy and awkward to handle. This can also create a mess when they start to fall apart over time.
When it comes to arranging pine cones in a decorative pattern, avoid overcrowding the surface. This not only makes for an uneven design but can also be unstable due to the weight of the pine cones.
Lastly, make sure to clean up your workspace regularly to prevent accidents and keep things organized. A cluttered space can lead to misplaced materials or tools, which can cause delays in your project.
By being mindful of these potential pitfalls, you’ll be able to create beautiful pine cone crafts with ease!
Conclusion: Encouraging Creativity through Pine Cone Crafts
As we’ve explored various pine cone crafts for kids, it’s clear that these natural wonders offer endless opportunities for creativity and imagination. By embracing the simplicity of a pine cone, children can let their minds wander and express themselves in unique ways. To encourage this creative spirit, consider setting up a designated craft station with an assortment of materials, such as glitter, paint, glue, and string. This will allow kids to experiment and explore different techniques without feeling overwhelmed or limited.
Remember, the goal is to foster creativity and self-expression, not perfection. Encourage your child to try new things, make mistakes, and have fun in the process. As they work with pine cones, ask open-ended questions that prompt them to think critically and explore their ideas. With patience, support, and a willingness to let go of expectations, you’ll be amazed at what your little ones can create!
Frequently Asked Questions
Can I use any type of pine cone for these crafts, or are some better suited than others?
You can use various types of pine cones for crafting, but it’s essential to choose ones that are clean and dry. White pine cones work well for many projects, while larger cones like fir or spruce cones might be more suitable for wreaths or other decorative items.
How do I prevent the pine cones from getting moldy or developing an unpleasant odor during the crafting process?
To prevent mold or unpleasant odors, make sure to clean and dry the pine cones thoroughly before starting a project. You can also apply a light layer of varnish or sealant to protect them from moisture. If you’re working on a project that involves water or humidity, consider using artificial pine cones as an alternative.
What’s the best way to store pine cones after they’ve been used for crafting?
To preserve your pine cone creations and keep them fresh, store them in a dry place away from direct sunlight. You can also consider coating them with a clear sealant to protect them from dust and moisture. If you’re saving individual pine cones for future projects, store them in an airtight container or plastic bag.
Can I use pine cone crafts as a way to introduce young children to natural history and the importance of conservation?
Yes, crafting with pine cones can be an excellent way to teach kids about nature and conservation. You can incorporate educational elements into your projects by discussing the types of trees that produce the pine cones, their habitats, and the role they play in ecosystems.
Are there any safety precautions I should take when working with pine cones, especially if children are participating in the crafting process?
Yes, ensure that children handle pine cones gently to avoid pokes or scratches. Also, consider wearing gloves when working with pine cones to protect your hands from sap or oils released by the cones. If you’re using hot glue or other materials, supervise children closely and follow proper safety guidelines.