
Creating beautiful snowflakes with your preschooler is not only a fun winter activity, but also an excellent way to develop their cognitive skills and encourage self-expression. Making art projects like snowflakes helps young children practice fine motor control, hand-eye coordination, and creativity, all while having a blast making something unique and delicate. In this guide, we’ll show you how to make stunning snowflake art projects that are perfect for preschoolers. We’ll cover various techniques and materials, from paper folding to glitter decorations, so you can bring the magic of winter to your child’s fingertips. With these easy-to-follow steps, you’ll be amazed at the intricate designs your little ones can create. Whether you’re a parent or teacher, our guide will inspire you to explore the world of snowflake art with your preschoolers.
Introduction to Snowflake Art
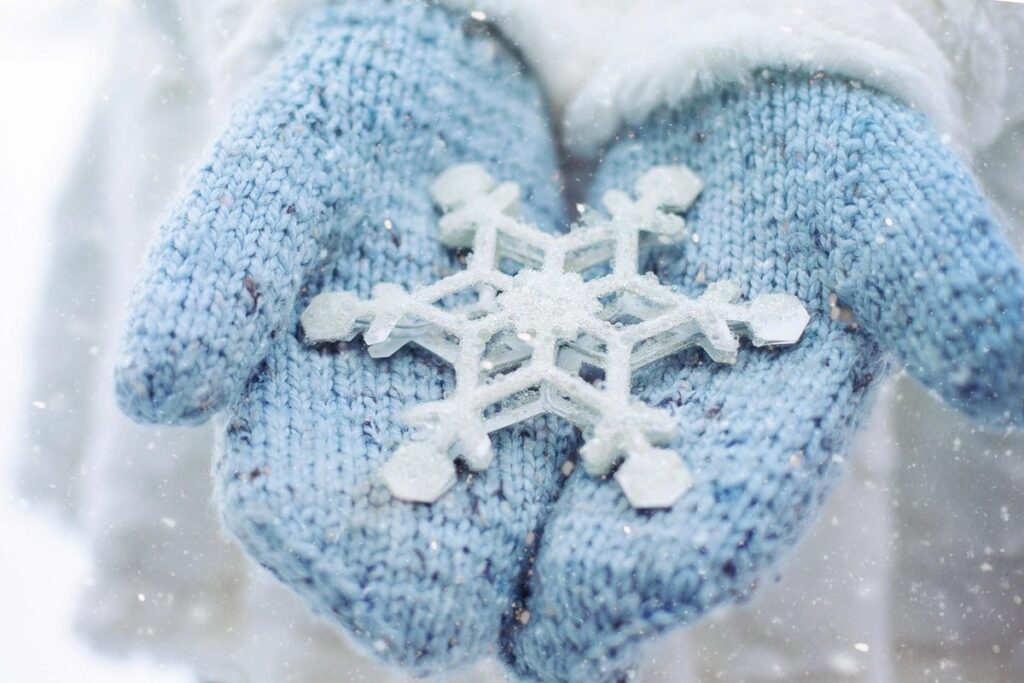
Welcome to the world of snowflake art, where delicate patterns and shapes come together to create beautiful masterpieces. In this introduction, we’ll explore what makes snowflake art so magical for preschoolers.
What is Snowflake Art?
Snowflake art is a captivating and versatile form of creative expression that has been delighting children for centuries. Its origins date back to the early 19th century when naturalist Wilson Bentley began taking photographs of snowflakes, marveling at their intricate patterns and unique characteristics.
What makes snowflake art so enchanting? For starters, each snowflake is a one-of-a-kind masterpiece, showcasing an infinite variety of shapes, sizes, and designs. This inherent uniqueness taps into children’s innate love for discovery and exploration. Moreover, the process of creating snowflakes encourages children to experiment with different techniques, such as folding, cutting, and arranging patterns.
It’s no wonder that snowflake art has become a beloved activity among preschoolers! In fact, studies have shown that engaging in creative activities like snowflake art can boost cognitive development, fine motor skills, and self-expression in young children. As a parent or educator, you can encourage your little ones to get creative with simple materials – paper, scissors, glue, and some imagination – and watch them create their own stunning snowflakes.
Benefits of Snowflake Art for Preschoolers
When it comes to snowflake art projects, preschoolers can reap numerous benefits that go beyond just creating a beautiful piece of artwork. These activities are an excellent way to foster cognitive development, emotional growth, and fine motor skills in young children.
Through snowflake art, preschoolers develop their problem-solving skills as they navigate intricate folds and cuts, promoting critical thinking and creativity. The process of unfolding the paper into unique designs encourages self-expression and experimentation, helping children discover new ways to represent themselves and their ideas.
Fine motor skills are also enhanced through snowflaking, as children practice holding scissors, folding paper, and applying gentle pressure. This activity helps build hand-eye coordination and dexterity, preparing preschoolers for future drawing and writing tasks.
Perhaps most importantly, snowflake art projects cultivate patience, persistence, and self-confidence in young artists. By embracing the process of trial and error, preschoolers learn to appreciate their mistakes as valuable learning experiences, rather than failures. With each new attempt, they become more comfortable taking risks and exploring different techniques, ultimately developing a sense of pride and accomplishment in their creative endeavors.
Materials Needed for Snowflake Art Projects
To create beautiful snowflakes, you’ll need a few simple supplies that can be found around the house or at most craft stores. Let’s take a look at what you’ll need to get started!
Essential Tools and Supplies
When it comes to creating beautiful snowflake art with your preschoolers, having the right materials is essential. You’ll want to start by gathering some basic supplies that can help bring your designs to life.
For paper, you don’t need to break the bank on specialty snowflake paper. Instead, use plain white or colored construction paper (around $1-2 per pack) or even printer paper (around $0.50-1 per ream). You can also repurpose old music sheets, book pages, or even wrapping paper for a unique touch.
Scissors are another must-have for snowflake art projects. Choose kid-friendly scissors with blunt tips to avoid any accidents. You’ll want a good pair of sharp scissors on hand for adults as well, but make sure they’re out of reach from little hands.
Glue is also a crucial tool in creating intricate designs and patterns. Go for washable school glue (around $2-3 per bottle) or even try using stickers or tape for a mess-free alternative.
Other embellishments like glitter, sequins, or small stamps can add an extra layer of fun to your snowflake art projects. You can often find these materials at dollar stores or online for pennies on the dollar.
Alternative Materials for Snowflakes
When it comes to creating unique snowflakes, why stick with traditional materials when you can get creative? Alternative materials can add a whole new level of excitement and interest to your snowflake art projects. Let’s explore some unconventional materials that can be used to create one-of-a-kind snowflakes.
Consider using doilies as a base for your snowflakes. Simply cut out intricate designs from the doily, and then decorate with glitter, sequins, or other embellishments. You can also use sponges to create textured, three-dimensional snowflakes. Dip the sponge in paint or ink, and then stamp it onto paper or cardstock.
For a more rustic look, try using household items like egg cartons or toilet paper rolls as a base for your snowflakes. Cut out intricate designs from the cardboard, and then decorate with markers, crayons, or stickers. You can also use old CDs or DVDs to create shiny, metallic snowflakes. Experiment with different materials and techniques to find what works best for you and your preschoolers.
Basic Snowflake Art Techniques
Create delicate and intricate snowflakes using just a few simple techniques, including folding and cutting, to add some magic to your preschooler’s art projects!
Folding and Cutting Methods
Creating symmetrical snowflakes is all about folding and cutting paper with precision. To get started, take a square piece of paper and fold it in half diagonally to create a triangle. Next, open the paper and fold it in half again, creating another diagonal line that intersects with the first one. This will help you find the center of the paper.
Now, let’s focus on folding techniques: accordion folding is ideal for beginners as it allows for easy repetition of folds. Simply fold the paper in an accordion-like manner by making multiple parallel folds, then unfold to see your design emerge. Another technique is wet folding, which requires a bit more patience but produces stunning results.
When cutting, use sharp scissors and follow the folded lines carefully. Remember that cutting through folded paper can be tricky, so take your time! To create intricate patterns, try cutting along curved folds or use pre-cut designs for younger children. Practice makes perfect, so don’t worry if it takes a few attempts to get the hang of folding and cutting those symmetrical snowflakes.
Adding Embellishments and Details
Now that you’ve created the basic shape of your snowflake, it’s time to add some magic! This is where the fun really begins. You can use various materials to give your snowflake a unique personality. Let’s start with texture.
You can use glitter glue or paint to add a sparkly effect to your snowflake. Simply apply a small amount of glue or paint to the paper, and then sprinkle on some glitter. Shake off any excess, and voila! You’ve added a touch of sparkle to your design. Another option is to use textured stickers or stamps to create patterns and designs.
Color can also play a big role in making your snowflake stand out. Use markers, colored pencils, or crayons to add colors and patterns to your design. Remember, the possibilities are endless! You can try layering different colors, using bold stripes, or even creating a monochromatic look. Encourage your little artists to experiment with different techniques and materials to see what amazing creations they come up with.
Tips: Don’t be afraid to get messy – glitter can spread quickly! Use paper towels to clean up any spills right away. Also, remind your children that less is often more when it comes to adding embellishments – a few carefully placed details can make a bigger impact than over-accessorizing.
Advanced Snowflake Art Projects
Now that you’ve mastered the basics of snowflake art, let’s dive into more complex and creative projects that will challenge your little artists. These intricate designs are perfect for preschoolers looking to take their skills to the next level!
3D Snowflakes and Lanterns
Creating three-dimensional snowflakes and lanterns is an exciting way to take your preschooler’s snowflake art project to the next level. You’ll need some basic materials like paper plates, Styrofoam balls, scissors, glue, and glitter. Start by creating a design on your paper plate or Styrofoam ball using markers, crayons, or paint. Cut out intricate patterns or shapes from white paper or cardstock to create the 3D effect.
To make a snowflake lantern, cut a hole in the center of each paper shape and glue them onto the paper plate or Styrofoam ball, overlapping them to create a layered effect. Add some sparkle with glitter and hang your lantern up in a window for a beautiful display. For three-dimensional snowflakes, use Styrofoam balls as the base and cover them with layers of paper shapes, gluing each one on top of the other.
Remember, patience is key when working on these projects. Encourage your child to take their time and focus on the details. With a little creativity and practice, they’ll be creating stunning 3D snowflakes and lanterns in no time!
Collaborative Snowflake Art Ideas
Collaborative snowflake art projects are an excellent way to foster teamwork and social skills in preschoolers. When children work together on a large-scale project, they learn to communicate effectively, share ideas, and rely on each other’s strengths.
To create a collaborative snowflake mosaic, start by dividing the children into small groups of 3-4. Give each group a large piece of paper or cardboard with a design printed on it, featuring multiple interconnected shapes. Explain that their task is to work together to cut out individual snowflakes and arrange them in a cohesive pattern.
As they work, circulate around the room and encourage children to share their designs and ideas with one another. You can also provide additional materials like glue, scissors, and markers for them to use creatively. This process not only develops fine motor skills but also promotes problem-solving and critical thinking as children figure out how to fit each snowflake into place.
By the end of this activity, you’ll have a stunning large-scale snowflake mosaic that showcases the teamwork and creativity of your preschoolers!
Displaying and Preserving Snowflake Art
Now that you’ve created your beautiful snowflakes, let’s talk about how to showcase them proudly while keeping them safe for years to come. We’ll cover display ideas and preservation tips!
Displaying Snowflakes Indoors and Outdoors
Displaying snowflakes is an exciting part of the art project. You can show off their intricate designs by displaying them indoors and outdoors. Consider hanging them near windows to catch the natural light, which will enhance their delicate patterns.
For a more dramatic display, use mirrors to create a sense of depth and add some sparkle to your snowflake gallery. You can attach the snowflakes to the mirror using a string or a stick so they appear as if floating on air.
Another creative way to showcase your snowflakes is by making mobiles. This will allow you to display multiple snowflakes at once, creating a beautiful and dynamic piece of art. To make a mobile, simply thread a string through each snowflake’s hole and tie the ends together. Hang it from the ceiling or a window, and enjoy watching the snowflakes dance gently in the breeze.
When displaying your snowflakes, keep in mind that they are delicate and can be damaged by direct sunlight or moisture. So, it’s best to place them away from windows with direct sunlight or near a fan to dry any excess moisture quickly.
Preserving Snowflakes for Years to Come
Preserving those delicate snowflakes for years to come can be just as much fun as creating them! As you carefully unfold each beautiful piece of art from your child’s preschool project, you might wonder how to keep their intricate designs looking fresh and vibrant. The truth is, with a little bit of creativity and some simple preservation techniques, you can ensure these masterpieces remain cherished memories for years to come.
One popular method for preserving snowflakes is laminating them. This involves placing the snowflake between two sheets of clear plastic and applying heat to seal it in place. Not only does this protect the paper from dust, moisture, and fading, but it also makes the design easier to display. You can use a laminator at home or send your child’s artwork to a professional service for preservation.
Another creative way to preserve snowflakes is through decoupage. This involves applying layers of varnish over the design to seal and protect it. This technique not only adds an extra layer of protection but also gives the snowflake a glossy, museum-like finish that’s sure to impress visitors. To try this method at home, apply a thin layer of varnish using a brush or foam applicator and let each coat dry before adding more layers.
Framing is yet another beautiful way to display and preserve your child’s artwork. By placing the snowflake in a sturdy frame with UV-filtering glass, you can prevent damage from sunlight and maintain its original beauty for years to come. Consider using acid-free mats or backing boards to add an extra layer of protection and ensure the frame stays flat over time.
When choosing a preservation method, remember that some snowflakes may require more care than others due to their size, material, or fragility. Experiment with different techniques and see what works best for each unique piece of art.
Conclusion
As you’ve completed these fun snowflake art projects, let’s recap what we’ve learned and how your little ones can continue to create and explore.
Recap of Key Takeaways
In conclusion to our exploration of snowflake art projects for preschoolers, let’s recap the key takeaways that will help you unlock their full creative potential.
By incorporating snowflake art into your preschool curriculum, you’ll be providing children with a fun and engaging way to develop essential skills. These include fine motor control, hand-eye coordination, and problem-solving abilities. Moreover, our discussion on various techniques and materials has shown how snowflake art can foster creativity, imagination, and self-expression in young minds.
We’ve also seen the importance of adapting snowflake art projects to meet the needs of individual children, allowing them to work at their own pace and build confidence in their artistic endeavors. Don’t forget to encourage experimentation and exploration with different materials and techniques – it’s through this process that preschoolers can develop a deeper understanding of shape, size, color, and texture.
By making snowflake art projects a regular part of your classroom activities, you’ll be giving preschoolers the gift of creative expression and cognitive development.
Encouragement to Try Snowflake Art at Home
As you’ve explored the wonderful world of snowflake art with your preschooler, we hope you’ve seen the spark of creativity and joy it ignites. But don’t let this fun activity come to an end when the project is finished! We encourage you to keep creating and exploring the possibilities of snowflake art at home.
Try experimenting with different materials, such as glitter paper or colored pencils, to add unique textures and colors to your snowflakes. You can also use everyday objects like scissors, glue, and tape to create intricate designs. Who knows what amazing creations will emerge from your collaborative efforts?
To take your snowflake art to the next level, consider checking out online tutorials or YouTube videos that showcase various techniques and tips. Many websites also offer printable templates and patterns specifically designed for kids, making it easy to get started.
Remember, the most important aspect of snowflake art is the fun you have with your child while creating together. Don’t worry about perfection – celebrate the process and enjoy watching your little artist grow in confidence and creativity.
Frequently Asked Questions
What if my preschooler is having trouble with fine motor skills? Are there adaptations I can make to help them create snowflakes?
If your child struggles with fine motor control, try using larger paper templates or providing assistance with folding and cutting. You can also use pre-cut shapes or stickers to simplify the design process. This will allow your child to focus on creativity while developing their skills in a more manageable way.
How long do snowflakes typically take to make? Can I plan this activity into our busy schedules?
Snowflake art projects can range from 15-60 minutes, depending on complexity and age of the child. For younger preschoolers (3-4 years), aim for shorter sessions with simpler designs. Older children can tackle more intricate patterns in longer periods. Plan ahead by setting a timer or breaking tasks into smaller steps to keep your little ones engaged.
What if I’m short on time but still want to make snowflake art with my preschooler? Are there quick and easy variations?
Don’t worry! You can create stunning snowflakes even on the go. Use pre-made templates, stickers, or stencils for a faster design process. Try folding techniques that don’t require cutting (like accordion folds) or focus on using materials like glue, scissors, and paint to create unique patterns.
Can I use recycled materials to make snowflake art? How do I incorporate eco-friendliness into this activity?
Absolutely! Repurposing old materials is a great way to teach your preschooler about sustainability. Use cardboard, newspaper, or even magazine pages to create unique textures and patterns. Encourage your child to think creatively about how they can reuse items in the home.
How do I preserve my snowflake art projects for longer? Can I display them indoors or outdoors?
To extend the life of your creations, avoid direct sunlight exposure by displaying indoors with gentle lighting. Use acid-free paper and materials to prevent damage over time. For outdoor displays, opt for durable and water-resistant materials like plastic or acrylic, ensuring they withstand various weather conditions.