
As a parent or educator, you’re constantly looking for ways to foster creativity and developmental skills in preschoolers. Introducing your little ones to art activities is an excellent way to encourage imagination and self-expression. One delightful activity that’s perfect for this age group is creating butterfly art! Not only will it bring joy and wonder to their faces, but it also offers a great opportunity to learn about shapes, colors, and patterns. In this comprehensive guide, we’ll take you through the process of creating stunning butterfly art with your preschoolers. From preparation to execution, we’ll cover everything you need to know to make this activity a success. Whether you’re a seasoned teacher or a new parent, get ready to spread your wings (pun intended!) and explore the wonderful world of butterfly art activities for preschoolers!
Introduction to Butterfly Art
Welcome to the world of butterfly art, where creativity and imagination take flight! In this section, we’ll show you how to introduce your preschoolers to the magic of art.
Importance of Arts and Crafts in Early Childhood Development
As you engage your preschoolers with the wonders of butterfly art, it’s essential to understand the importance of arts and crafts activities in their development. These early years are a time of rapid growth, and arts and crafts play a significant role in shaping their cognitive, emotional, and social skills.
Through arts and crafts, children develop problem-solving abilities as they experiment with different materials and techniques. For instance, making a butterfly collage requires them to think creatively about color combinations, texture, and composition – essential skills for future learning. Additionally, these activities foster self-expression, allowing preschoolers to convey their thoughts and feelings in a unique way.
Socially, arts and crafts promote collaboration and sharing among children as they work together on projects. This encourages teamwork, communication, and empathy – vital life skills that extend beyond the art room. By incorporating arts and crafts into your butterfly-themed activities, you’re providing your preschoolers with a solid foundation for future growth and development.
Benefits of Creating Butterfly-Themed Art
Creating butterfly-themed art with your preschoolers is not only fun and engaging but also offers numerous benefits that will enhance their artistic expression and cognitive development. One of the primary advantages of creating butterfly art is that it fosters creativity, allowing children to think outside the box and explore new ways of expressing themselves through color, texture, and pattern.
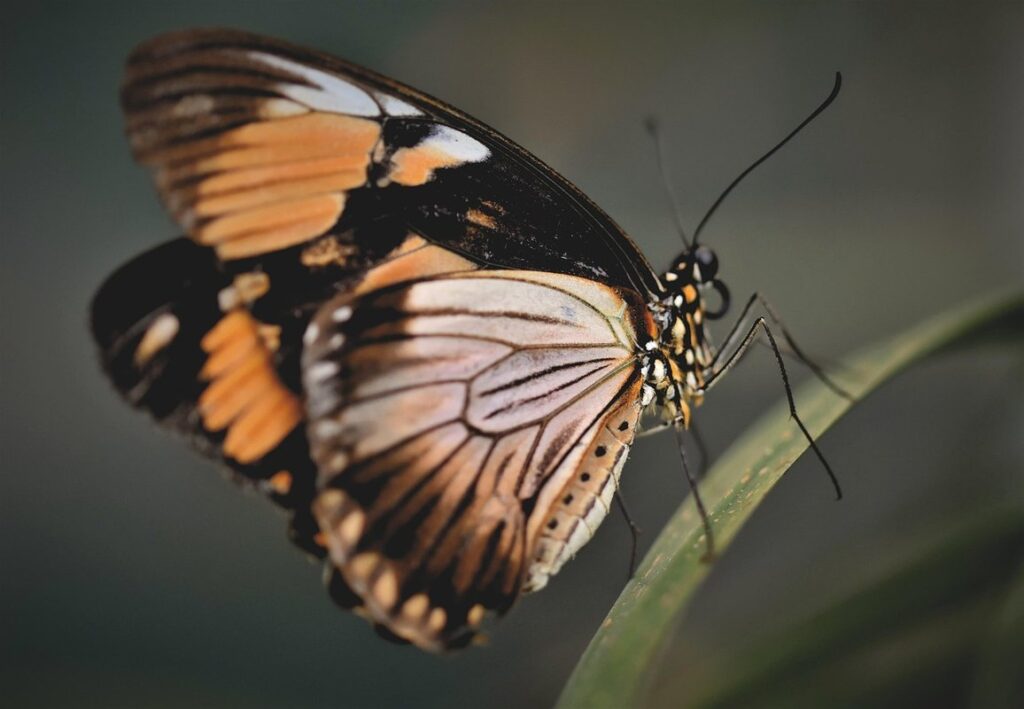
Butterfly-themed art also provides an excellent opportunity for teaching your little ones about nature. You can use this activity to introduce them to the life cycle of butterflies, their habitats, and the importance of conservation. For example, you can create a collage with pictures of different butterfly species, talk about their characteristics, and even make a paper plate butterfly using real leaves and flowers.
Another significant benefit of creating butterfly-themed art is that it encourages fine motor skills development. Activities such as cutting, pasting, and painting require children to use their hands and fingers in various ways, helping to strengthen their hand muscles and improve dexterity. You can also incorporate other materials like pipe cleaners, beads, or feathers into your projects to add an extra layer of complexity and challenge for the children.
Materials Needed for Butterfly Art Activity
To create beautiful butterfly art, you’ll need some simple materials that are easy to find at home. Gather these essentials before getting creative!
Essential Supplies for a Successful Project
To set up a butterfly art activity for preschoolers, you’ll need to gather some essential supplies. These materials will help bring out the creativity and imagination of the children as they create their very own butterflies.
You’ll start with basic art supplies like paper – choose colorful construction paper or even watercolor paper for a more unique look. You’ll also need paint in various colors to allow kids to express themselves freely. Acrylic paint is an excellent option because it dries quickly and washes off easily, making it perfect for little artists.
Additional materials include glue for the body of the butterfly, scissors for cutting out wings and antennae, and a surface to work on like a table or floor mat. Don’t forget some fun embellishments like glitter, stickers, or colorful markers to add extra flair to their creations. You may also want to have some pre-cut shapes available to help with wing and body formation.
Make sure you have enough supplies for each child to create their own butterfly without feeling rushed or restricted by the materials provided.
Tips for Preparing the Workspace
Before starting the butterfly art activity with preschoolers, it’s essential to prepare the workspace to ensure a safe and enjoyable experience for everyone. Begin by covering all work surfaces with newspaper or plastic sheets. This simple step will protect the tables from paint spills and stains, making cleanup easier and less messy.
Next, gather some old towels or smocks for each child to wear while creating their masterpieces. These can be washed later if they get stained, saving you time and effort in cleaning up after the activity. Make sure there’s enough space between the children to prevent any accidental paint splatters from reaching others.
Consider setting up an area with water and soap nearby, so children can easily clean their hands before handling food or other materials. Finally, have a few extra supplies on hand, such as paper towels and wet wipes, in case of unexpected spills or accidents. By taking these simple steps, you’ll be able to create a safe and inviting workspace for preschoolers to explore their creativity and have fun with the butterfly art activity.
Step-by-Step Instructions for Creating Butterfly Art
Now that you have your materials, let’s dive into the fun part – creating beautiful butterfly art step by step. Follow along as we guide you through each delicate stroke.
Designing the Body of the Butterfly
Now it’s time to design the body of our beautiful butterfly! This is one of the most fun parts of creating our masterpiece. We get to decide what colors and patterns will cover our butterfly’s body.
You can use paint, markers, or colored pencils for this step. If you’re using paint, make sure to let it dry completely before moving on to the next part. You can also add layers of paint to create different textures and effects.
If you’re using markers or colored pencils, try mixing colors together to create new shades and hues. For example, if you mix blue and yellow, you’ll get a lovely shade of green! Encourage your child to experiment with different color combinations to find the perfect fit for their butterfly’s body.
Some fun ideas to consider when designing the body include:
• Adding stripes or polka dots for a playful touch
• Creating a gradient effect by blending colors together
• Using sparkly glue or glitter for added shine
• Drawing inspiration from real-life butterflies and their unique markings
Remember, the most important thing is to have fun and let your child’s imagination run wild!
Adding Wings to the Butterfly
Now that you have created the body and antennae of your butterfly, it’s time to add the finishing touches by making its wings. This is the most exciting part of creating a butterfly art project for preschoolers!
You can use various materials such as tissue paper, colored cardstock, or even old book pages to create the wings. Cut out two identical wing shapes and let your child decorate them using crayons, markers, paint, or even glitter glue. You can also provide stickers or stamps for added fun.
To attach the wings to the body, use a strong adhesive such as glue stick or school glue. Start by applying glue to one side of the wing and attaching it to the top of the butterfly’s back, making sure it is centered. Repeat this process with the second wing, positioning it on either side of the first.
Don’t be afraid to get creative! You can also add additional details such as veins or texture to make your wings look more realistic. Encourage your child to experiment with different colors and patterns to create a unique butterfly that reflects their personality.
Encouraging Creativity in Preschoolers During the Activity
As you guide your little ones through the butterfly art activity, it’s essential to create an environment that sparks creativity and imagination. Here are some tips to help encourage those tiny minds to soar!
Promoting Experimentation with Colors and Textures
When it comes to creating butterflies with preschoolers, it’s essential to encourage experimentation with colors, textures, and materials. This not only fosters creativity but also helps develop fine motor skills and problem-solving abilities.
Start by providing a variety of materials such as construction paper, felt, glitter, stickers, and paint in different colors. You can also include natural materials like leaves, flowers, or even butterfly wings (real or fake). Allow each child to explore and choose their favorite materials, encouraging them to think about how they want their butterfly to look.
For instance, you can ask questions like “What color do you think a butterfly’s body should be?” or “How would you make your butterfly sparkle?” This will help children consider different possibilities and experiment with various textures and colors. You can also provide examples of real butterflies and discuss their unique features, inspiring children to incorporate these characteristics into their artwork.
Some other tips include: using sponges to create textured backgrounds, trying out different brush strokes or painting techniques, and even incorporating found objects like sequins or beads. By embracing experimentation, you’ll help preschoolers develop a sense of curiosity and creativity that will stay with them long after the activity is over.
Incorporating Storytelling and Imaginative Play
Storytelling and imaginative play are incredible ways to enhance the butterfly art activity for preschoolers. By incorporating these elements, you’ll not only encourage creativity but also help children express themselves and explore their imagination.
As you begin the activity, ask the children to share a story about butterflies. It could be about their favorite type of butterfly, or perhaps a fantastical encounter with a magical butterfly. Allow them to use their imaginations and create a narrative that sparks their curiosity. You can even encourage them to think about what they would name their butterfly and describe its unique characteristics.
As children paint and draw their butterflies, you can ask open-ended questions like “What do you think your butterfly likes to eat?” or “Where do you think it likes to fly?” This not only engages them in the creative process but also fosters critical thinking and problem-solving skills. By embracing storytelling and imaginative play, you’ll create an environment where children feel free to explore their creativity without limits.
Displaying and Preserving Butterfly Artwork
Now that you’ve created your beautiful butterfly artwork, let’s talk about how to display it proudly at home and preserve it for years to come. We’ll share some creative ideas to get you started!
Ideas for Displaying Finished Butterflies
Now that your preschoolers have finished their beautiful butterfly artwork, it’s time to showcase their creations! Here are some exciting ideas for displaying those finished butterflies:
Display them in a Butterfly Garden: Create a whimsical setting by arranging the butterflies on a large piece of paper or cardboard to resemble a garden. You can add some green construction paper leaves and stems to give it a natural look. This will not only be a great way to display their artwork but also encourage children to observe the different shapes, colors, and textures of the butterflies.
Create a Mobile: Suspend their finished butterflies from a mobile or wind chime in the classroom or hallway. This will add a touch of color and movement to the space while allowing children to appreciate their creations up close. Simply use string or yarn to attach each butterfly to a central hanger, making sure they’re evenly spaced for maximum visual appeal.
Use them as Bookmarks: Turn individual butterflies into bookmarks by laminating them and attaching a small loop at the top. This way, children can carry their artwork with them while reading their favorite books.
Tips for Preserving the Artwork Over Time
When it’s time to preserve the beautiful butterfly artwork created by your preschoolers, you’ll want to take steps to ensure their masterpieces last for a long time. One of the most important things you can do is use fixative spray. This special spray helps prevent the paint or markers from smudging or smearing, making it easier to display and store the artwork.
To apply fixative spray, make sure your child’s artwork is completely dry first. Then, hold the can about 6-8 inches away from the artwork and spritz a light, even coat over the entire piece. Don’t worry if you see tiny specks or smudges after spraying – these usually disappear quickly.
Next, store the artwork in a protective folder or sleeve to prevent dust and dirt from accumulating on the surface. You can also use acid-free paper or cardboard to create a custom storage box for each piece of art. This will help keep the artwork safe and protected from damage over time. By following these simple steps, you’ll be able to enjoy your child’s butterfly artwork for years to come!
Conclusion and Extensions of the Activity
Now that you’ve created some beautiful butterfly art with your preschoolers, let’s wrap up our activity and explore ways to take it further in future sessions.
Recap of Key Takeaways from the Guide
As we conclude our journey through the world of butterfly art activities for preschoolers, let’s take a moment to recap the key takeaways from this comprehensive guide. We’ve explored the importance of creative expression and imagination development in young children, and how butterfly-themed art projects can foster these essential skills.
One of the primary benefits of butterfly art activities is their ability to promote creativity and self-expression in preschoolers. By providing a variety of materials and encouraging open-ended exploration, teachers can help little ones develop their fine motor skills, hand-eye coordination, and problem-solving abilities. We’ve also discussed the importance of sensory experiences, including texture, color, and movement, which are all essential for young children’s cognitive development.
Some practical tips to remember include: using natural materials like leaves, twigs, and flowers to create unique textures; experimenting with different mediums, such as paint, crayons, and markers; and encouraging children to tell stories through their art. By incorporating these strategies into your classroom or home activities, you can help preschoolers develop essential skills that will serve them well in the years to come.
Ideas for Future Art Activities Inspired by Nature
As you and your preschoolers have explored the beauty of butterflies through art, it’s time to spread your wings and explore more nature-inspired projects. The great outdoors is full of fascinating subjects just waiting to be transformed into masterpieces. Consider taking a stroll with your little artists and collecting items like leaves, rocks, or feathers to use in future creations.
You can also try using natural materials like sand, water, and mud to create textured artworks that explore the tactile qualities of nature. For example, make a collaborative mural using paint and a large piece of cardboard, incorporating textures created from different natural materials.
For an added layer of engagement, bring the outdoors into your classroom by setting up a mini “beach” or “forest” area where children can create art inspired by their surroundings. Don’t be afraid to experiment with new techniques and mediums – after all, that’s what makes art so exciting!
Frequently Asked Questions
How can I modify the butterfly art activity for children with special needs?
Be sure to tailor the materials and process to accommodate individual requirements, such as using adaptive tools or simplifying the steps. Also, consider involving parents or caregivers to provide additional support during the activity.
What if some preschoolers struggle to design and create symmetrical wings?
Don’t worry! Symmetry isn’t essential for creativity. Encourage them to experiment with patterns, shapes, and textures instead. You can also provide templates or stencils to help guide their wing design.
Can I use recycled materials for the butterfly body and wings?
Absolutely! Using recycled materials is a great way to teach environmental awareness and promote sustainability. Consider using old paper, cardboard, or fabric scraps to create the butterfly’s body and wings.
How can I display the finished butterfly artwork in the classroom or at home?
Get creative with display ideas! You can hang them from mobiles, create a butterfly garden on a wall, or even make a “butterfly cloud” using string lights. Be sure to involve the children in the decision-making process for a sense of ownership.
What are some ways to extend this activity and keep preschoolers engaged over time?
Try incorporating storytime with a butterfly-themed book, creating a class “butterfly life cycle” chart, or even conducting simple science experiments related to metamorphosis. This will help reinforce learning and encourage continued exploration of the natural world.