
Creating a spider web at home with your kids can be an incredibly fun and educational experience. Not only does it encourage creativity and imagination, but it also introduces them to fundamental STEM concepts like geometry and engineering. Who knows, you might just inspire the next generation of scientists and innovators! In this article, we’ll show you how to create a spider web using everyday materials, teaching your kids about problem-solving, critical thinking, and creativity along the way. We’ll cover everything from choosing the right materials to adding intricate details that make it look like the real thing. By following these easy steps, you can help your kids develop essential skills while having a blast creating their very own spider web masterpiece at home.
Understanding the Basics of Spider Webs
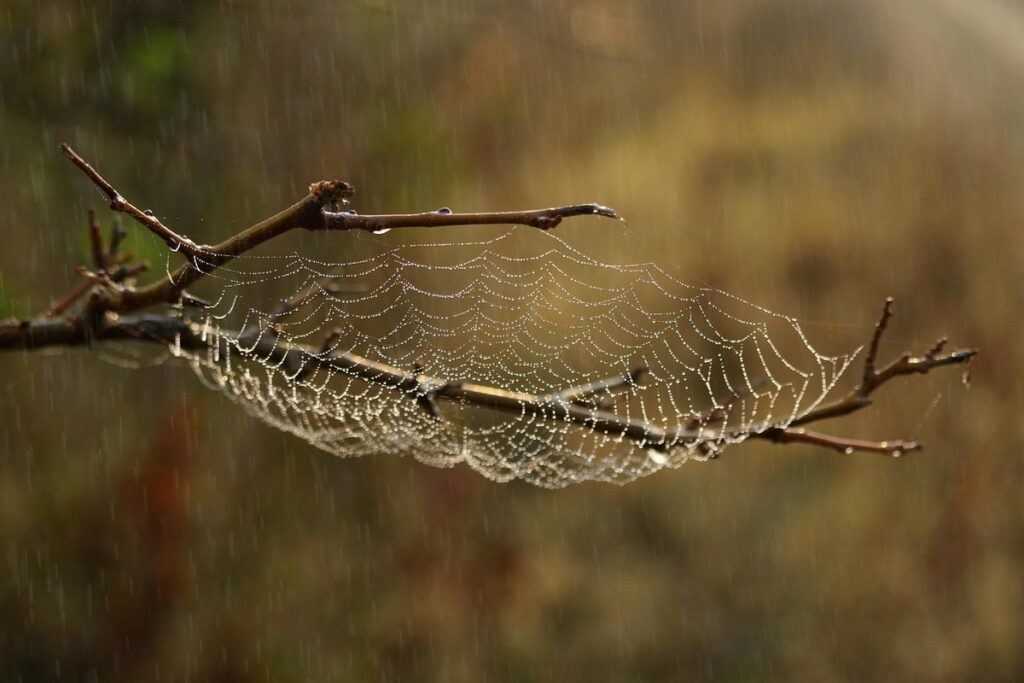
Let’s dive into the basics of spider webs, where we’ll explore how spiders create their sticky and intricate patterns using just a few simple tricks. It’s easier than you think!
What Are Spider Webs Made Of?
So you want to know what spider webs are made of? Well, it’s not as spooky as it sounds! Spider webs are actually incredibly cool and fascinating. They’re like a sticky, stringy network that helps spiders catch their prey.
Spider webs are primarily made up of silk threads produced by the spider’s spinnerets. These threads are super strong and flexible, which is why they can stretch across wide spaces without breaking. The main component of spider silk is a protein called fibroin, which gives it its strength and elasticity. Some types of spider silk even have special properties that help them dry quickly or absorb moisture!
When spiders spin their webs, they mix the silk threads with air to create a lightweight yet incredibly strong material. It’s like a cross between a sticky note and a super-strong rope! The web’s structure is also influenced by the type of spider and its environment – some spiders make intricate patterns while others go for a more simple design.
In fact, scientists have even discovered that certain types of spider silk can be up to 5 times stronger than steel! However, it’s not just about strength; spider webs are also surprisingly sticky. This is thanks to tiny droplets of glue-like substance called viscid fluid, which helps trap insects in the web.
The Purpose of Spider Webs
So, you might wonder why spiders go to so much trouble to build their intricate webs. Well, it’s not just for decoration! Spiders create webs for a few very important reasons.
First and foremost, spider webs are used for catching prey. Spiders spin sticky threads that trap unsuspecting flies, mosquitoes, and even other small insects that get caught in the web. It’s like a spider-sized fishing net! The spider then uses its legs to wrap up the struggling insect and inject it with venom, rendering it helpless before sucking out its insides for a yummy meal.
But webs aren’t just for catching food – they’re also a way for spiders to protect themselves from predators. A spider hiding in its web is much safer than one wandering around on foot, where it might get spotted by a hungry bird or other predator. Webs can even help spiders communicate with each other, as some species use vibrations in the web to send messages to potential mates.
For example, male peacock spiders are known for their impressive courtship displays, where they perform intricate dances and vibrate their webs to attract females. It’s a pretty cool way for these tiny creatures to connect with each other!
Gathering Materials for Your Web
To create a realistic spider web, you’ll need some everyday materials that can mimic the sticky silk threads spun by real spiders. Let’s gather these essentials together!
Choosing the Right Yarn or String
When it comes to choosing the right yarn or string for your spider web at home, you have several options to consider. One popular choice is cotton string or twine, which is easy to find in most craft stores and comes in a variety of thicknesses. This type of string is great for kids who are new to making spider webs because it’s soft to the touch and easy to manipulate.
However, if you’re looking for something more durable, consider using nylon thread or fishing line. These options are perfect for creating more intricate designs or for kids who want a challenge. Just be aware that they can be slippery to handle, so make sure your child has some experience with yarn before switching to these types of materials.
Another option is to use yarn made from natural fibers like wool or silk. These yarns are great for kids who love working with different textures and colors. They’re also a good choice if you’re looking for something that will hold its shape well, even after being handled multiple times.
Regardless of which type of yarn or string you choose, make sure it’s clean and dry before use. This will ensure that your spider web turns out smooth and silky, just like the real thing!
Measuring and Cutting the Thread
Now that you have all your materials ready, it’s time to prepare the thread for creating your spider web. Measuring and cutting the thread correctly is essential for a successful project. For kids aged 6-12, it’s best to start with a shorter length of around 10-15 feet (3-4.5 meters). This will give them enough material to work with without getting overwhelmed.
To measure the thread, simply lay out the desired amount and use a ruler or measuring tape to mark the length. Cut the thread using scissors or a sharp utility knife, making sure not to cut too close to your hand.
If you’re working with younger children or those who are new to this project, consider using pre-cut thread pieces or even yarn to make it easier for them to manage. For older kids, you can challenge them to measure and cut their own thread from a ball of string. Remember to always supervise and guide them through the process.
When cutting the thread, encourage your child to hold the scissors correctly, with their thumb on top of the blade and fingers wrapped around the handle for support. This will help prevent accidents and ensure they can cut the thread safely and easily.
Basic Web Design Principles
When it comes to designing a spider web, there are some basic principles that will help you create a beautiful and functional web for your kid’s craft. This includes considering symmetry and balance.
Understanding Symmetry and Patterns
When creating a spider web at home with kids, it’s essential to understand the concept of symmetry and patterns. Symmetry is all around us in nature – think of flowers, leaves, and even butterfly wings. In spider webs, symmetry creates a visually appealing design that helps the spider catch prey more efficiently.
To apply symmetry when making a web, start by drawing two identical halves on either side of a central axis. This will create a sense of balance and harmony. Next, use a ruler or a straight edge to draw lines radiating out from the center point. These lines should be evenly spaced and symmetrical on both sides.
Think of it like drawing a picture with your non-dominant hand – try to mirror what you’re doing on the other side. This will help create a beautiful, symmetrical web that looks just as impressive as one spun by an actual spider! With practice, kids can develop their fine motor skills and create intricate designs while learning about symmetry in nature.
Creating the Center and Radii of Your Web
Now that we have our eight points of symmetry, it’s time to create the center and radii of our web. The center is where the magic happens, and everything else stems from here. Imagine a dot in the middle of a piece of paper – this will be the center of your web. Use a pencil or a marker to lightly draw a small circle around the dot. This circle will help guide you as you create the radii.
The radii are like the spokes on a bicycle wheel, connecting the center to each point on the edge of our web. To create even spacing and tension, start by drawing lines from the center to each point on the symmetry grid we created earlier. Make sure these lines are evenly spaced and about the same length. As you draw each line, imagine a thread or string being pulled tight – this will help you gauge the correct tension.
Remember, the radii should be evenly spaced and of equal length to create a symmetrical web. If one is longer than the others, your web won’t be as strong or attractive. Don’t worry if it takes some practice to get it just right – with a little patience and persistence, you’ll be creating stunning spider webs in no time!
Advanced Techniques for Adding Realism
Now that you’ve mastered the basics, it’s time to take your spider web creations to the next level with some advanced techniques that add amazing realism and depth! Let’s dive in.
Simulating Spider Silk with Different Textures
When creating a spider web for kids, adding texture and realism can make it even more fascinating. You can experiment with various materials to simulate the unique characteristics of real spider silk. For instance, try using different textures like glitter or beads to give your web some extra sparkle.
To incorporate glitter into your web design, apply a thin layer of glue onto the area where you want the glitter to adhere. Sprinkle it evenly and let the glue dry completely before adding more layers. This will create a beautiful, iridescent effect that’s sure to captivate young minds.
Alternatively, use beads or sequins to create a more intricate pattern on your web. You can string them together with a fine wire or attach them individually using a strong adhesive. Beads of different colors and shapes can add an extra layer of realism to your spider silk simulation. Experiment with various textures and combinations to achieve the desired look, just like how spiders spin their webs in nature.
Consider adding some dimensionality by using fabric paint or markers to draw the web’s framework onto a sheet of paper or canvas. This will give your web a more three-dimensional appearance, making it seem even more lifelike.
Creating a Framework for Support
When it comes to creating a realistic spider web for kids, one of the most important aspects is adding stability and tension to give it that lifelike quality. To do this, you’ll need to create a framework that supports the web. Start by gathering some wire or sticks – bamboo skewers work great too! – and tie them together in a series of triangles, forming a sturdy base.
Think of it like building a skeleton for your web. This will provide the necessary support for the web to hang from, without actually making it visible. Next, begin draping your web material (such as cotton thread or yarn) over this framework, carefully adjusting it to achieve the desired tension. Remember, spiders don’t create perfect webs, so aim for a subtle unevenness in the strands.
By following these steps and using materials like wire or sticks, you’ll be able to add stability and tension to your web, creating a more realistic look that’s sure to delight kids of all ages. Don’t forget to have fun with it – experimenting with different designs and patterns will only add to the realism!
Safety Precautions and Tips for Success
Remember to always supervise your little ones when making spider webs, and follow these essential safety tips and expert-approved tricks to achieve a stunning display.
Working with Fibers Safely
When working with yarns or strings to create a spider web at home, it’s essential to handle them safely to avoid accidents and injuries. One of the most common issues when using yarn is tangles. To minimize this problem, start by sorting the yarn into separate colors before you begin weaving your web. This will prevent tangling and make the process smoother.
When handling long strings or yarns, be mindful of tripping hazards. Keep the workspace clear of clutter, and avoid leaving loose ends on the floor. If you’re working with multiple strands, consider using a tape to secure them in place, keeping them tidy and preventing any potential tripping risks. Additionally, supervise children when they’re handling strings or yarns, as they can easily get tangled around furniture or legs.
To prevent tangles altogether, you can also use yarn clips or small clamps to keep the strands organized while working on your web. This simple precaution will save you time and effort in the long run. By taking these precautions, you’ll be able to create a beautiful spider web with ease, and have fun while doing it!
Displaying Your Masterpiece
Now that you’ve created your masterpiece, it’s time to showcase it proudly! Displaying your finished spider web is a crucial part of the creative process. You’ve worked hard on this project, and it deserves to be seen.
There are several ways to display your spider web, and we’ll explore some ideas below. One popular option is to frame it. This will give your web a professional finish and make it look like a real work of art. Choose a sturdy frame that complements the colors in your web. You can also add a border or a caption to enhance its visual appeal.
Another idea is to hang it in a window, where it can catch the light beautifully. This will create a stunning display that’s perfect for any room in the house. Consider using a clear adhesive putty or a suction cup to secure it firmly. You could also use a string or a thread to create a mini mobile, adding an extra dimension to your web.
Remember, the display is just as important as the creation itself. Have fun experimenting with different ideas and find what works best for you!
Encouraging Creativity and Experimentation
Now that you have a basic web design, let’s talk about how to encourage your little ones to think creatively and try new things while making their own spider webs.
Exploring Different Materials and Techniques
When creating a spider web at home with kids, it’s essential to encourage them to think outside the box and experiment with different materials and techniques. This is where the magic happens, and their imagination runs wild!
Start by gathering an assortment of unconventional materials like yarn, pipe cleaners, cotton strings, or even old CDs. These unusual materials will help your little ones see beyond the traditional white glue and string combination. For instance, you can use a ball of sticky tack to create a 3D spider web on a wall or even use colored pencils to draw intricate patterns within the web.
Another technique is to experiment with various textures by incorporating different fabrics like silk, lace, or felt into your design. You can also try using natural materials like leaves, twigs, and flowers to add an organic touch to your web.
Remember, there’s no right or wrong way to create a spider web – it’s all about having fun and exploring the possibilities! Encourage your kids to take risks, get creative, and see where their imagination takes them. With every new material and technique they try, they’ll develop problem-solving skills, hand-eye coordination, and most importantly, a lifelong love for art and experimentation.
Displaying Your Web and Sharing with Others
Once you and your kids have created their spider webs, it’s time to share them with others! This is a great opportunity for children to take pride in their work and learn about the value of sharing their creations.
Displaying spider webs in classrooms or community spaces is an excellent way to encourage creativity and experimentation among other kids. You can hang them from ceilings, attach them to walls, or even create a spider web gallery in a designated area. Encourage your child to write a short story or poem about their web and display it alongside the web itself.
Some fun ways to share your spider webs include:
* Hosting an art exhibition at school or community center
* Participating in a local craft fair or festival
* Creating a spider web contest with prizes for different categories (e.g. most creative use of materials, best design)
* Displaying them at home and inviting friends over for a spider web showcase
Frequently Asked Questions
What if my child is struggling to come up with a design for their spider web?
Encourage them to observe the natural world, study pictures of real spider webs, or even explore different cultures’ traditional web designs. You can also provide templates or examples to get them started. Remind them that there’s no one “right” way to create a spider web – it’s all about experimentation and having fun!
How do I help my child deal with frustration when their web doesn’t turn out as expected?
Frustration is a natural part of the creative process! Encourage your child to take breaks, step back, and look at their work from different angles. Remind them that mistakes can often lead to new ideas and improvements. You can also offer guidance on basic design principles or suggest alternative materials for a fresh start.
Can I use real spider silk in my web-making project with kids?
No, it’s not recommended. Spider silk is extremely delicate and difficult to obtain, and handling it improperly could damage the fibers. Instead, focus on using synthetic yarns or strings that mimic the look and feel of spider silk. You can also experiment with different textures and materials to create a realistic effect.
How do I display our finished spider web in a way that showcases its intricate details?
Use a frame or display case that allows for good lighting, such as a spotlight or a well-lit shelf. Consider mounting the web on a circular frame or a wire mesh backing to emphasize its symmetry and pattern. You can also create a diorama with rocks, leaves, or other natural elements to enhance the web’s setting.
What if my child wants to take their spider web project to the next level by making it larger or more complex?
Encourage them to experiment with different materials, such as pipe cleaners, beads, or even recycled materials. You can also explore advanced techniques like layering, shading, or adding textured details. Just remember to guide your child safely through these more intricate steps and provide necessary support and supervision.