
Pumpkins are more than just a delicious fall treat – they’re also a treasure trove of creative possibilities for kids. Whether you’re a parent, teacher, or caregiver, incorporating pumpkin crafts into your child’s activities can have a profound impact on their cognitive development and fine motor skills. From decorating to carving, sensory play activities with pumpkins offer endless opportunities for creativity and self-expression.
In this article, we’ll dive into the world of pumpkin craft ideas specifically designed for kids. We’ll explore various projects that cater to different age groups and skill levels, ensuring there’s something for every young artist or crafter. From simple and fun to more intricate designs, our roundup covers a wide range of activities that will keep little ones engaged, entertained, and inspired all season long.
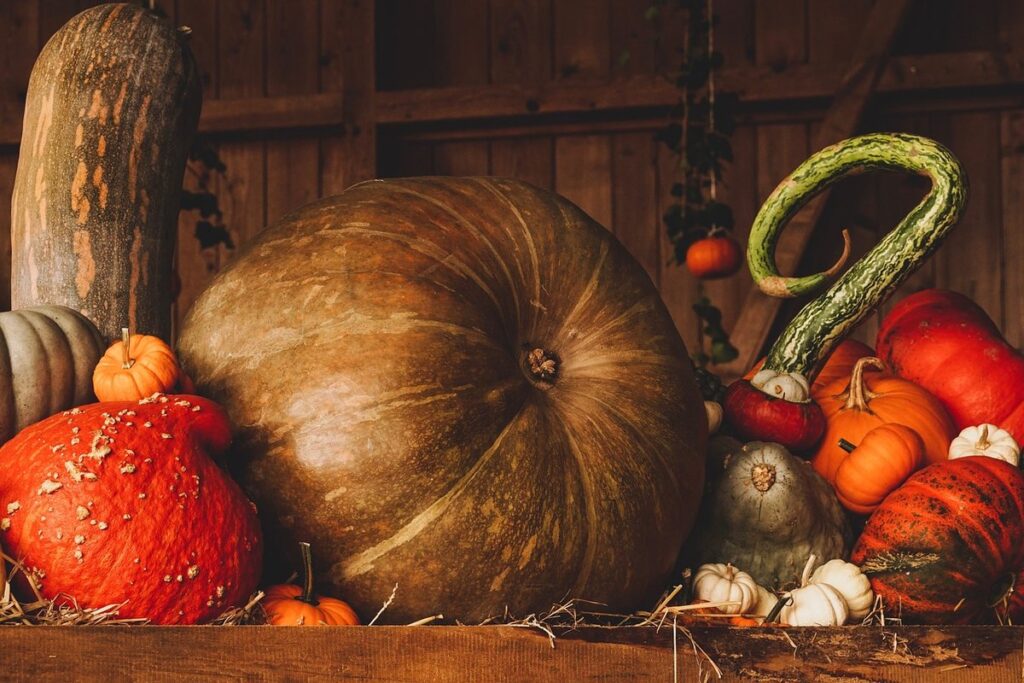
Introduction to Pumpkin Crafts
Getting creative with pumpkins is a fall tradition that’s easy and fun for kids. Let’s dive into some inspiring ideas to make your little ones’ crafting dreams come true!
Benefits of Pumpkin Crafts for Kids
Engaging in pumpkin crafts is an excellent way to nurture a child’s creativity and fine motor skills. By allowing kids to explore various textures and materials associated with pumpkins, they can develop their imagination and dexterity. One of the primary benefits of pumpkin crafts is that they promote cognitive development by introducing children to essential skills such as problem-solving, planning, and execution.
Through activities like painting, carving, or decoupage, kids learn about different techniques and methods for transforming a plain pumpkin into an attractive and creative masterpiece. This process not only enhances their fine motor skills but also encourages them to think creatively and develop their own unique designs.
In addition to promoting creativity and fine motor skills, pumpkin crafts offer a chance for children to explore various textures, colors, and patterns associated with pumpkins. By experimenting with different materials and techniques, kids can better understand the concept of cause-and-effect and develop their critical thinking skills.
Essential Materials for Pumpkin Crafts
To get started with pumpkin crafts, you’ll need some basic materials. Let’s begin with the most essential ones. For many projects, you can use either real or fake pumpkins. Real ones are perfect for kids to carve and decorate, while fake ones provide a longer shelf life and come in various shapes and sizes.
For painting and decorating your pumpkin, you’ll need a variety of paints, including acrylic and tempera. Don’t forget some brushes, sponges, and even stencils if you want precise designs. In addition to paint, glue is another essential material for many projects. You can use hot glue guns for bigger decorations or white glue for smaller details.
You’ll also need scissors, preferably sharp ones, for cutting out patterns and designs from paper or cardstock. Markers and colored pencils are great for adding extra colors and details. Consider using a sealant to protect your pumpkin’s finish and make it last longer. Some projects might require additional materials like glitter, stickers, or even yarn, but these basics will give you a solid foundation to start with.
Easy Pumpkin Decorating Ideas for Toddlers
Get ready to unleash your little artist’s creativity as we dive into some adorable and easy pumpkin decorating ideas that are perfect for toddlers to enjoy! We’ve got simple projects to make Halloween decorating a breeze.
Finger Painting Pumpkins
Get ready to unleash your little artist’s creativity with Finger Painting Pumpkins! This fun and easy activity is perfect for toddlers who love making a mess and creating something beautiful. To get started, gather the necessary materials: a few small pumpkins, finger paints in various colors, paint smocks or old shirts, and paper towels.
Now, let’s dive into the step-by-step process. Begin by placing your toddler’s hands on the pumpkin to create a handprint design. Encourage them to apply gentle pressure to make their mark. Next, introduce different colors and techniques, such as dabbing, swirling, or making stripes. You can also use household items like sponges or Q-tips for added texture.
Remember, the most important aspect of this activity is to let your child’s creativity shine! Don’t worry if the results are a bit messy – it’s all part of the fun. Encourage your toddler to experiment and try new things, just like they would with finger painting on paper. With these simple steps, you’ll be amazed at the unique pumpkin designs your little artist creates.
Sticker and Glitter Magic
Get ready to unleash the creativity in your little ones with some Sticker and Glitter Magic! Toddlers and preschoolers love adding their own personal touches to pumpkins, and we’ve got two super fun and easy ways to do just that.
Start by gathering a variety of stickers specifically designed for kids’ crafts. You can find these at most craft stores or online. Let your child’s imagination run wild as they choose which stickers to apply to the pumpkin. Encourage them to create patterns, shapes, or even tell a story through their sticker designs. For example, you could use stickers with autumnal themes like leaves, acorns, and squirrels.
Glitter is another fantastic way to add some sparkle to your pumpkins! Use washable glitter glue or apply individual sparkles for a more subtle effect. This activity is perfect for little ones who love to experiment with textures and colors. Just remember to supervise closely, as glitter can be messy!
To make things even more exciting, try combining stickers and glitter together. You could create a glittery sticker border around the pumpkin’s edge or add sparkly details to your child’s sticker designs. The possibilities are endless!
Pumpkin Carving Ideas for Older Kids
Looking for some creative and challenging pumpkin carving ideas for your older kids? This section is filled with inspiration to make their jack-o-lanterns stand out.
Basic Safety Precautions for Pumpkin Carving
When it comes to pumpkin carving with older kids, safety should always be top priority. Before you let them get creative with their designs, make sure they understand the basic safety precautions to follow.
First and foremost, proper knife handling is crucial. Teach your child how to hold a knife correctly, with a firm grip and the blade facing away from their body. Show them how to cut in a smooth, gentle motion, rather than sawing back and forth. It’s also essential to choose a kid-friendly knife or a serrated knife with a blunt tip, which is safer for little hands.
Don’t forget about eye protection! A pair of goggles or safety glasses will protect your child’s eyes from any stray pumpkin pulp or flying debris. You can even get creative and decorate the goggles to match their pumpkin design.
Remember to supervise your child at all times while they’re carving, especially if it’s their first time. Encourage them to take breaks, wash their hands frequently, and clean up as they go to avoid accidents. With these basic safety precautions in place, your older kids will be well-equipped to create spooky or adorable pumpkin masterpieces with confidence!
Creative Stencil Designs
When it comes to creating unique and intricate pumpkin carvings, stencils are an excellent tool for older kids to use. Not only do they provide a precise pattern, but they also help to ensure that the design is evenly spaced and symmetrical.
You can find a wide variety of stencil designs online or in craft stores specifically designed for pumpkin carving. Some popular options include spooky jack-o’-lantern faces, cute animal silhouettes, and even intricate patterns like mandalas or Celtic knots. You can also try searching for stencils featuring your child’s favorite cartoon characters or movie villains.
To use a stencil effectively, simply place it on the pumpkin and carve along the lines. Remember to hold the knife at a 45-degree angle and use gentle, sawing motions to avoid applying too much pressure. Older kids can even get creative by layering multiple stencils or combining freehand designs with stenciled elements.
Remember to always supervise your child when carving, especially if they’re using a new stencil design. With a little patience and practice, older kids can create truly impressive pumpkin carvings that will make your porch the envy of the neighborhood!
Recycled Material Pumpkin Crafts
Get creative and think outside the (pumpkin) box by making beautiful decorations from materials you’d normally throw away, like egg cartons and plastic containers. Turn trash into treasure with these fun recycled material pumpkin crafts!
Transforming Old Pumpkins into Planters
Transforming old pumpkins into planters is an excellent way to teach kids about sustainability and reducing waste. As the Halloween season comes to a close, instead of throwing away those carved pumpkins, get creative with them! Cut off the top of the pumpkin and scoop out the insides, leaving about 1-2 inches of flesh around the edges.
This makes for an excellent planter for small plants or herbs like basil or mint. Fill the cavity with potting soil and plant your chosen greenery. You can also add decorative touches like a few rocks at the bottom for drainage or some marigold seeds to create a colorful accent.
To extend the life of your pumpkin planter, make sure it’s in a spot that gets plenty of sunlight but is protected from frost. As the seasons change, you’ll need to harvest your plants before the first frost sets in. This fun and eco-friendly project not only reduces waste but also teaches kids about the importance of giving old items new life.
Some other ideas for repurposing old pumpkins include using them as bird feeders or making decorative candles from the pumpkin’s insides. Get creative, have fun, and watch your kids develop a sense of responsibility towards their environment!
Creating a Collage from Cardboard Boxes
When working with cardboard boxes to create pumpkin-themed collages, you can get creative with materials like construction paper, scissors, glue, and paint. Start by cutting out various shapes from the cardboard to resemble leaves, vines, or even a miniature pumpkin patch. These can be arranged in a collage style on another piece of cardboard, creating a beautiful background for your pumpkin centerpiece.
To add some texture and depth, use brown or green construction paper to create tree bark or stems, which can be cut into strips and layered on top of the cardboard shapes. You can also use paint to add subtle shading and dimension to your design. Encourage kids to experiment with different colors and patterns by using crayons, markers, or colored pencils.
To give it a more finished look, arrange the collage pieces in a circular pattern around a small pumpkin or a paper cutout of one. Secure the cardboard pieces with glue, making sure not to cover any of the design elements. This project is perfect for developing fine motor skills and encouraging creativity, all while reducing waste and creating something unique and special.
DIY Pumpkin Ornaments and Decorations
Get creative and make some festive fun with these easy-to-make pumpkin ornament ideas, perfect for kids to craft and decorate their homes. From paint to glitter, we’ve got you covered!
Making Paper Plate Pumpkins
Making paper plate pumpkins is a fun and easy DIY project that kids can enjoy making. To start, you’ll need a few basic supplies: paper plates, orange construction paper, green construction paper for stems, scissors, glue, and string or twine.
Begin by cutting out the center of each paper plate to create the pumpkin shape. Cut two small slits on either side of the top of the plate to allow for the stem to be inserted later. Cut a long, thin triangle from the green construction paper to create the stem. Attach the stem to the top of the plate using glue.
Cut out leaf shapes from the orange construction paper and glue them around the pumpkin, overlapping them slightly to create a layered effect. Use string or twine to hang your finished pumpkins on doors, walls, or even the Christmas tree. This project is perfect for little hands to get creative with fall colors and patterns.
Felt and Ribbon Ornaments
Creating felt and ribbon ornaments is a fun and easy DIY project that kids can enjoy during the Halloween season. To get started, you’ll need some basic crafting supplies like felt sheets in various colors, scissors, glue, and ribbons of different widths.
Begin by cutting out pumpkin shapes from the felt sheets using a template or drawing a shape freehand. You can also use pre-cut felt shapes to make it even simpler. Next, cut out small strips of ribbon that will serve as stems for your pumpkins. Glue the stems onto the top of each pumpkin, and then add some decorative details like eyes or mouths made from buttons, beads, or markers.
To add an extra touch, use a hot glue gun (with adult supervision) to attach small bows or flowers around the pumpkins. You can also use felt strips to create leaves or vines that wrap around the pumpkins for a more realistic look. With these simple steps, your kids will be able to create a variety of adorable and unique felt and ribbon ornaments that will add a personal touch to their Halloween decorations.
Pumpkin-Themed Sensory Play Activities
Get ready for some seriously fun and engaging activities that will let your little ones explore, create, and learn through pumpkin-themed sensory play. We’ll dive into messy, amazing projects perfect for fall.
Pumpkin Exploration Bin
Create an inviting and interactive space for kids to explore with a Pumpkin Exploration Bin. This sensory bin is perfect for little ones to immerse themselves in the sights, smells, and textures of pumpkins.
To set up this engaging activity, start by filling a large bin or container with dried beans, rice, or sand, providing a base layer that will hold everything in place. Next, add various textured elements such as small pumpkins, gourds, and squash, along with other related items like acorns, leaves, and twigs.
To incorporate smells, you can include dried spices like cinnamon and nutmeg, or even dried pumpkin seeds, which kids can sniff and identify. You can also add scented play dough in orange or yellow to let children explore the sense of smell further. Don’t forget to include small tools and scoops for kids to dig and manipulate the contents.
This sensory bin encourages creativity, curiosity, and fine motor skills development while allowing kids to connect with nature’s elements during the fall season.
Homemade Pumpkin Playdough
Making homemade pumpkin playdough is a great way to engage your little ones in sensory activities while incorporating the festive spirit of fall. You’ll need just a few simple ingredients: 2 cups all-purpose flour, 1/2 cup warm water, 1/4 cup salt, 2 tablespoons vegetable oil, 2 tablespoons cream of tartar, and 1 teaspoon ground cinnamon.
Mix the dry ingredients together in a bowl, then gradually add in the wet ingredients until a dough forms. If it’s too sticky, add more flour. If it’s too dry, add more water. The addition of cinnamon gives this playdough its distinctive pumpkin scent that kids will love.
This homemade playdough is perfect for various sensory activities, such as molding and shaping into jack-o-lanterns, making mini pumpkins, or even creating a giant pumpkin patch on the kitchen table. To make it even more engaging, consider adding some orange food coloring to give it an authentic pumpkin hue.
Tips: Consider saving this playdough in an airtight container when not in use to keep it fresh for future sensory adventures. Also, be sure to supervise young children during play to ensure they don’t put the playdough in their mouths or eyes.
Conclusion: Encouraging Creativity with Pumpkin Crafts
As you’ve seen throughout our pumpkin craft ideas for kids, creativity is just around the corner. Now, let’s explore how to encourage your little ones to think outside the pumpkin!
Tips for Adults to Support Children’s Creative Process
As you watch your child’s creative process unfold with pumpkin crafts, it’s natural to feel a mix of emotions – excitement, pride, and perhaps a bit of frustration when their creations don’t turn out as expected. But remember, the true value lies not in the end result, but in the journey itself.
One key thing to keep in mind is that children are still learning to express themselves creatively, and it’s essential to provide them with space to experiment and make mistakes. When they get frustrated or upset because their pumpkin doesn’t look like they envisioned, try to stay calm and offer reassurance. You can say something like, “I love how you’re thinking about adding more details to your pumpkin! What do you think would happen if we tried this?” This helps shift the focus from the end result to the process.
To further support their creative endeavors, consider encouraging them to follow their interests and explore different mediums. For example, if they’re fascinated by painting, let them try using watercolors or acrylics on a separate project. Similarly, if they enjoy working with textures, suggest adding glitter, stickers, or other materials to enhance their design.
Another crucial aspect is modeling creative behavior yourself. When your child sees you engaging in artistic activities, they’re more likely to be inspired and motivated to do the same. Set aside time each week for a joint crafting session, where you can work on a project together. This will not only strengthen your bond but also provide them with valuable lessons about collaboration and creative problem-solving.
By providing a nurturing environment that encourages experimentation and exploration, you’ll be empowering your child to develop essential life skills – critical thinking, self-expression, and resilience. And who knows? Their creations might just surprise you with their unique charm!
Frequently Asked Questions
Can I use real pumpkins for sensory play, or are artificial ones better?
Using real pumpkins can be messy and may not be suitable for all children, especially those with allergies or sensitivities. Artificial pumpkins can provide a similar sensory experience without the risk of mess or potential health issues. If using real pumpkins, ensure they’re clean and dry before offering them to children.
How can I adapt these pumpkin craft ideas for children with special needs?
To accommodate children with special needs, consider their cognitive and physical abilities when selecting activities. For example, finger painting may be too messy for some children, while sticker art or sensory play might be more suitable. Be prepared to offer adaptations and make necessary accommodations.
What’s the best way to store pumpkin crafts to keep them looking fresh?
To preserve your children’s creations, encourage them to use materials like glue, varnish, or clear acrylic spray to protect their artwork. You can also display their work in a dry, climate-controlled area away from direct sunlight to prevent fading. Rotate displays periodically to showcase new creations.
Can I make these pumpkin craft ideas for kids more challenging by adding complex designs?
Yes, you can increase the difficulty level of pumpkin crafts by introducing more intricate designs or patterns. Consider using stencils, stickers, or even free-hand drawing techniques to add complexity. Be sure to guide your children as needed and encourage them to experiment with new techniques.
How long do these pumpkin craft ideas typically take to complete?
The duration of each project varies depending on the activity and age group. Finger painting pumpkins might take 15-30 minutes, while more intricate designs or carving projects can take several hours or even days to complete. Plan accordingly and be prepared for a time commitment from both yourself and your children.