
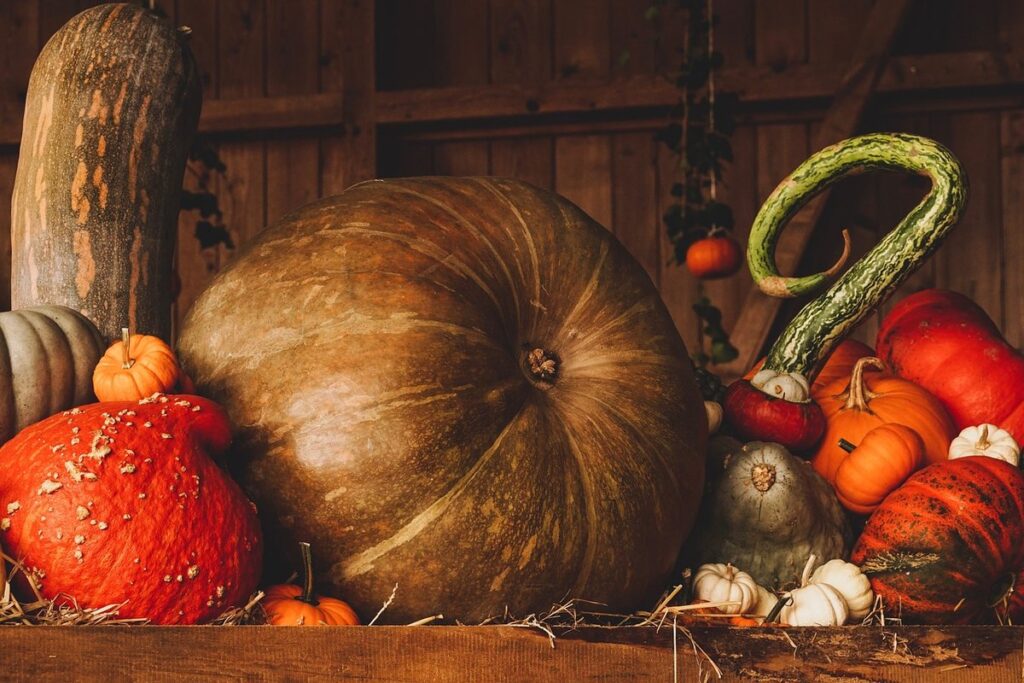
Get ready to spice up your fall season with some gourd-geous DIY fun! As the leaves start to change colors, many parents are looking for creative ways to keep their little ones engaged and entertained. One classic and iconic symbol of autumn is the pumpkin, and with a few simple ideas, you can turn it into a masterpiece for your kids to enjoy.
In this guide, we’ll show you how to bring your pumpkin decorating dreams to life with easy-to-follow DIY projects that are perfect for kids. From seasonal themes like fall landscapes to spooky Halloween designs, we’ve got you covered. Plus, we’ll share some essential safety tips to ensure a fun and mess-free experience for the little ones. Whether you’re looking for a fun family activity or a way to add some festive flair to your home, this article is packed with inspiration and ideas to get you started on your pumpkin decorating journey.
Introduction to Pumpkin Crafting
Welcome to our world of pumpkin crafting, where you’ll learn how to transform ordinary pumpkins into extraordinary decorations and fun projects for kids! This introduction will show you just how easy it is to get started.
Benefits of Pumpkin Crafts for Children’s Development
Engaging children with pumpkin crafts is not only a fun activity but also offers numerous benefits for their cognitive and motor skills. Pumpkin-themed projects can help develop problem-solving abilities, hand-eye coordination, and fine motor control.
Pumpkin carving, for instance, requires precision and patience, which can improve dexterity and hand strength in kids. It’s essential to start with simple designs and gradually move on to more complex patterns as children become more confident and skilled. This incremental approach allows them to build their confidence and master various techniques.
Beyond fine motor skills, pumpkin crafts also stimulate cognitive development by encouraging critical thinking and creativity. By selecting a pattern or design, kids learn to weigh options and make informed decisions, developing their decision-making abilities. Moreover, the process of creating something with their own hands boosts self-esteem and pride in their accomplishments.
As parents or caregivers, you can encourage this developmental growth by providing a variety of materials and tools for your child to experiment with, such as different types of knives, stencils, and markers.
Materials Needed for Pumpkin Crafts
To get started with pumpkin crafting, you’ll need to gather some essential materials. The specific supplies required will vary depending on the project you’re working on, but here are some common items that can be used across multiple crafts.
For painting and decorating pumpkins, you’ll need a variety of paintbrushes in different sizes, as well as acrylic or tempera paint in various colors. You may also want to have some stencils or stickers handy for added designs. Additionally, a drop cloth or old sheets can protect your work surface from any spills or stains.
If you’re making pumpkin crafts with kids, be sure to have some washable markers and colored pencils on hand. These are great for drawing patterns or creating simple designs on smaller pumpkins. For more intricate projects, consider using glue guns, scissors, and other basic crafting tools.
Some other materials that can be useful for pumpkin crafting include ribbons, stickers, and other embellishments to add a finishing touch. Don’t forget to have some newspaper or paper towels nearby to clean up any messes. With these basic supplies on hand, you’ll be well-prepared to tackle a variety of fun and creative pumpkin crafts with your kids!
DIY Pumpkin Decorating Ideas
Get creative and have fun with our favorite fall gourds! This next section shares easy and adorable DIY pumpkin decorating ideas perfect for kids of all ages.
Painting and Dyeing Pumpkins
Get Creative with Painting and Dyeing Pumpkins!
When it comes to decorating pumpkins, painting and dyeing are fantastic ways to let kids express their imagination and creativity. You can use a variety of mediums to achieve unique and interesting effects. Acrylic paints are a great option as they dry quickly and come in a wide range of vibrant colors.
For a more subtle look, watercolors can be used to create soft, blended designs. Natural dyes like turmeric, beets, and coffee can also add an earthy touch to your pumpkins. To dye a pumpkin using natural ingredients, simply boil the ingredient in water for 10-15 minutes, then let it cool before applying it to the pumpkin.
To ensure that your painted or dyed design adheres well, make sure to clean and dry the pumpkin thoroughly before applying any medium. You can also use a primer or a base coat to help the paint or dye stick better. Encourage kids to experiment with different techniques and combinations of mediums for an truly unique result!
Glitter, Stickers, and Other Embellishments
Adding some extra oomph to your pumpkin with glitter, stickers, and other embellishments is an awesome way to make it truly one-of-a-kind. Let’s talk about the fun part – getting creative with glue, glitter, and all sorts of sparkly goodies!
To start, gather a variety of craft supplies like glitter in different colors, glue sticks, scissors, and a bunch of stickers featuring cute designs or patterns. You can also incorporate other materials like sequins, rhinestones, or even fabric scraps to add texture and interest.
When using glue, make sure to apply it sparingly and let the kids get creative with how they spread it around. This will allow them to control the amount of glitter that sticks (literally!). For a more contained mess, try using a glue pen or bottle with a small nozzle.
For stickers, encourage the kids to think about placement – do they want to cover the entire pumpkin or create patterns and designs? This is also a great opportunity for some fun math practice: measuring out equal distances between stickers or counting how many stickers fit around a certain area.
Some other ideas to consider include using fabric paint, markers, or even decoupage glue with tissue paper or magazine cutouts. The possibilities are endless, so let the kids’ imaginations run wild and have fun experimenting with different materials!
Seasonal Themes for Pumpkin Crafts
Get creative and cozy with our favorite seasonal themes that will inspire you to create stunning pumpkin crafts perfect for autumn. Think leaves, owls, and harvest hues!
Autumn Leaves and Branches
Autumn leaves and branches are a wonderful addition to pumpkin crafts for kids. Not only do they evoke the cozy feeling of fall, but they also add texture and depth to your designs. To incorporate these elements into your pumpkin art, start by gathering real or artificial leaves and branches in various shapes and sizes.
You can use hot glue to attach the leaves and branches directly onto the pumpkin, creating a whimsical and organic look. Alternatively, you can paint or draw the leaves and branches onto the pumpkin using acrylic paints or markers. For a more textured look, try using artificial leaves with raised details or adding some green floral tape around the stems.
For a fun twist, use real leaves to create a leaf garland around your pumpkin. Simply thread the stems through a piece of twine or string and hang it around the pumpkin. This adds a beautiful pop of color and brings the outdoors in. Remember, the key is to have fun and be creative! Encourage your kids to experiment with different arrangements and designs until they find one that suits their style.
Harvest and Thanksgiving Decorations
Pumpkins and Thanksgiving go hand-in-hand, but did you know that pumpkins have also become a symbol of gratitude? As we move into the harvest season, pumpkins are a perfect way to teach kids about the importance of giving thanks.
To incorporate this theme into your pumpkin crafts, consider making a Gratitude Garland. Cut out shapes from paper or cardstock and have your child write things they’re thankful for on each one. Then, help them string the shapes together with yarn or twine to create a colorful garland that can be hung in a window or along a wall.
You can also make a Thankful Tree by gluing small pumpkins onto a large paper tree shape. Have your child write reasons they’re thankful for each pumpkin on sticky notes and stick them under the corresponding pumpkin. This is a great way to encourage kids to think about the good things in their lives.
Remember, it’s not just about making crafts – it’s about instilling a sense of gratitude and appreciation in your child that will last long after the harvest season has passed.
Recycled Materials in Pumpkin Crafts
Get creative with what you already have on hand, and learn how to repurpose everyday materials into unique pumpkin decorations for a fun and eco-friendly craft project.
Repurposing Old Containers
Get creative with old containers and turn them into one-of-a-kind pumpkins for your little ones to enjoy. Who says you need to buy new when you can repurpose what’s already at home? Old tubs, buckets, or containers are perfect candidates for this eco-friendly makeover.
To start, gather a variety of containers in different shapes and sizes. You can use old plastic tubs from the store, large buckets from gardening, or even metal drums. Give each container a good cleaning to remove any residual dirt or debris. Once clean, you can get creative with paint, markers, or even decoupage to give your containers some personality.
Add some decorative elements like glitter, stickers, or ribbons to make them look like real pumpkins. You can also add some greenery around the base of each container using leaves or artificial vines for a more realistic look. The key is to think outside the box (or in this case, the container!) and let your child’s imagination run wild with the possibilities. With a little creativity, an old tub can become a work of art that your family will treasure for years to come.
Transforming Old CDs and DVDs
Transforming Old CDs and DVDs into Pumpkin Craft Elements
If you’re looking for creative ways to reuse old CDs and DVDs, consider incorporating them into your pumpkin crafts. These shiny discs can become beautiful mirrors, decorations, or other craft elements that add a unique touch to your pumpkins.
To use an old CD as a mirror, simply glue it onto the surface of your pumpkin using a hot glue gun. You can also add a decorative frame around the CD to give it a more polished look. For example, you could wrap the CD with copper wire or paint a border around it to match your pumpkin’s theme.
Another idea is to use old DVDs as decorations for your pumpkins. Simply cut out shapes from the DVD’s surface using a craft knife, and glue them onto your pumpkin. You can create intricate designs or patterns by layering multiple DVD shapes on top of each other. This technique adds a fascinating texture to your pumpkin crafts.
Remember to clean and dry the CDs and DVDs before reusing them in your crafts, as they may be dusty or have residue from their previous use. With a little creativity, these old discs can become valuable components of your pumpkin decorations, making them truly one-of-a-kind!
Safety Precautions for Pumpkin Crafting
When crafting with pumpkins, it’s essential to follow some simple safety guidelines to ensure a fun and injury-free experience for kids of all ages. We’ll walk you through these precautions together.
Handling Sharp Objects Safely
When working with sharp objects like scissors, knives, or craft knives, it’s essential to teach children how to handle them safely. Start by modeling responsible behavior yourself and demonstrating the proper way to hold and use these tools.
Explain that sharp objects are not toys and should only be used for their intended purpose under adult supervision. Show your child how to grip the tool correctly, with a firm but not overly tight hold. Emphasize the importance of keeping fingers away from the blade or cutting edge at all times.
Practice handling scissors by using large, blunt-tipped ones that are easier for little hands to manage. When introducing knives or craft knives, focus on proper knife safety techniques like cutting away from the body and using a pushing motion instead of sawing.
As you guide your child through these skills, be prepared to stop and correct them if they show signs of frustration or confusion. This will help build confidence and reinforce safe handling practices that will stick long after the pumpkin craft session is over.
Allergy Awareness in Craft Materials
When working with craft materials for pumpkin decorating, it’s essential to be aware of potential allergens that can cause irritation or even life-threatening reactions. Glitter, in particular, is a common culprit when it comes to allergies. Made from tiny pieces of plastic or metal, glitter can easily become airborne and be inhaled, causing respiratory issues.
Paints and dyes used for craft projects can also contain chemicals that trigger allergic reactions. Some children may experience skin rashes, itching, or redness after exposure to certain paints or dyes. To minimize the risk, choose water-based paints and opt for non-toxic dyes whenever possible.
Other materials like sequins, beads, and stickers can also cause problems if ingested. Make sure to supervise your child closely during craft sessions and teach them about the importance of keeping hands away from their mouth when working with small objects.
When in doubt, always read the labels on craft supplies and look for certifications like “non-toxic” or “hypoallergenic.” If you suspect a reaction has occurred, be prepared to treat it promptly with cold compresses or anti-itch creams. By being aware of these potential allergens, you can create a safe and enjoyable craft experience for your child.
Tips and Tricks for a Stress-Free Pumpkin Craft Session
Get ready to make your pumpkin craft session a breeze, as we share our top tips and tricks for minimizing mess and maximizing fun with your little ones!
Preparing the Workspace
Before you and your little ones dive into the world of pumpkin crafting, let’s set up a workspace that’s conducive to creativity and minimizes mess. This will not only save you time cleaning up but also ensure everyone has a blast making their masterpieces.
Start by designating a specific area for pumpkin crafts, free from any fragile or sensitive items that might get damaged. Clear off any clutter and cover the surface with newspaper, a plastic tablecloth, or an old sheet to catch any spills or stray paint. This will make cleanup a breeze in case of accidents.
Next, gather all your materials in one place, like glue, scissors, paint, and various craft supplies. This will prevent you from wasting time searching for what you need and reduce the chances of items getting lost or misplaced. Consider setting up separate stations for different activities, such as painting, decorating, or carving, to keep things organized.
By creating an efficient workspace, you’ll be able to focus on what matters most – enjoying quality time with your kids while exploring their creativity together!
Encouraging Creativity in Children
When working with children on pumpkin crafts, it’s essential to create an environment that encourages creativity and self-expression. One way to do this is by providing a variety of materials and letting them take the lead in their design choices.
For instance, instead of guiding them through a specific pattern or shape, ask open-ended questions like “What kind of face would you like your pumpkin to have?” or “How can we add some texture to our design?” This approach empowers children to think critically and make decisions about their craft.
You can also try introducing new materials or techniques that they haven’t seen before. For example, using paint, markers, or stickers in different colors and patterns can add a level of excitement to the creative process.
Another key factor is to give them permission to make mistakes and learn from them. By saying “we can fix this” instead of “this is wrong,” you send a message that experimentation is valued.
Some fun ways to encourage creativity include making a collage with various textures, creating patterns using stamps or stickers, or even adding some real leaves to create an organic look.
Frequently Asked Questions
What age range are pumpkin crafts suitable for?
Concise, valuable answer…
Pumpkin crafts can be adapted to suit various age ranges, from toddlers who can explore textures and colors to older children who can engage in more complex projects like carving or painting. For younger kids (3-5 years), focus on simple activities like decorating with stickers or stamps, while for older kids (6-12 years), consider more intricate designs or techniques.
Can I use real pumpkin paint or is acrylic better?
Yes, both options are viable, but keep in mind that real pumpkin paint may not adhere as well to the gourd’s surface. Acrylic paints offer better durability and easier clean-up, making them a popular choice for kids’ projects. If using real pumpkin paint, ensure it’s specifically designed for use on pumpkins and follow the manufacturer’s instructions.
How do I store pumpkin crafts to preserve their longevity?
To extend the life of your pumpkin crafts, avoid exposing them to direct sunlight or moisture. Store them in a dry, cool area away from drafts. If you’re using real pumpkins, replace them every week or two to prevent decay and mold growth. Consider using artificial pumpkins or foam bases for longer-lasting decorations.
What safety precautions should I take when working with sharp objects?
Handling sharp objects safely is crucial when engaging in pumpkin crafts. Ensure kids wear protective gloves and eyewear at all times when handling tools like knives, scissors, or carving saws. Always supervise children during these activities, and demonstrate proper cutting techniques to avoid accidents.
Can I reuse pumpkins for future projects or decorations?
Yes, with a little creativity! Clean and dry the pumpkin thoroughly before storing it for reuse. Consider repurposing old containers or materials like cardboard, paper towel rolls, or fabric scraps to create new craft ideas. Get creative and think outside the box (or gourd!) when repurposing pumpkins for future projects.