
If you’re anything like me, you’ve probably spent hours pouring over Frozen memes and YouTube tutorials trying to recreate Elsa’s iconic ice queen look. But let’s be real – those DIY dresses can get pretty pricey, not to mention tricky to make without a sewing background. If you’re itching to create your own DIY Elsa dress but don’t know where to start, you’ve come to the right place! In this step-by-step guide, we’ll walk you through the process of making your very own stunning Elsa-inspired gown – from choosing the perfect pattern and fabric to expert sewing tips and tricks that’ll have you looking like a Disney princess in no time.
Understanding the Inspiration
Let’s dive into the creative process behind our DIY Elsa dress tutorial, where we’ll explore what sparks imagination and transforms a simple idea into a magical reality.
Origins of the Elsa Dress
The Elsa dress has become an iconic symbol of style and individuality, thanks to its debut in Disney’s 2013 hit movie Frozen. But where did this magical gown originate? The design of the Elsa dress was a collaborative effort between film’s costume designer, Jacqueline Durran, and her team.
Their inspiration came from the icy landscapes and frosty atmosphere of Arendelle, the fictional kingdom where the story takes place. To capture this essence, they drew from traditional Scandinavian clothing, incorporating elements like intricate patterns, delicate fabrics, and subtle shimmering effects. The iconic snowflake pattern on Elsa’s dress is a nod to these influences.
Culturally, the Elsa dress has become a symbol of self-expression and empowerment for young girls around the world. Its unique design allows wearers to stand out from the crowd while still conveying a sense of elegance and sophistication. If you’re looking to create your own DIY Elsa dress, take note of these key elements: bold color combinations, intricate details, and luxurious fabrics. By incorporating these features into your design, you’ll be well on your way to recreating this timeless classic.
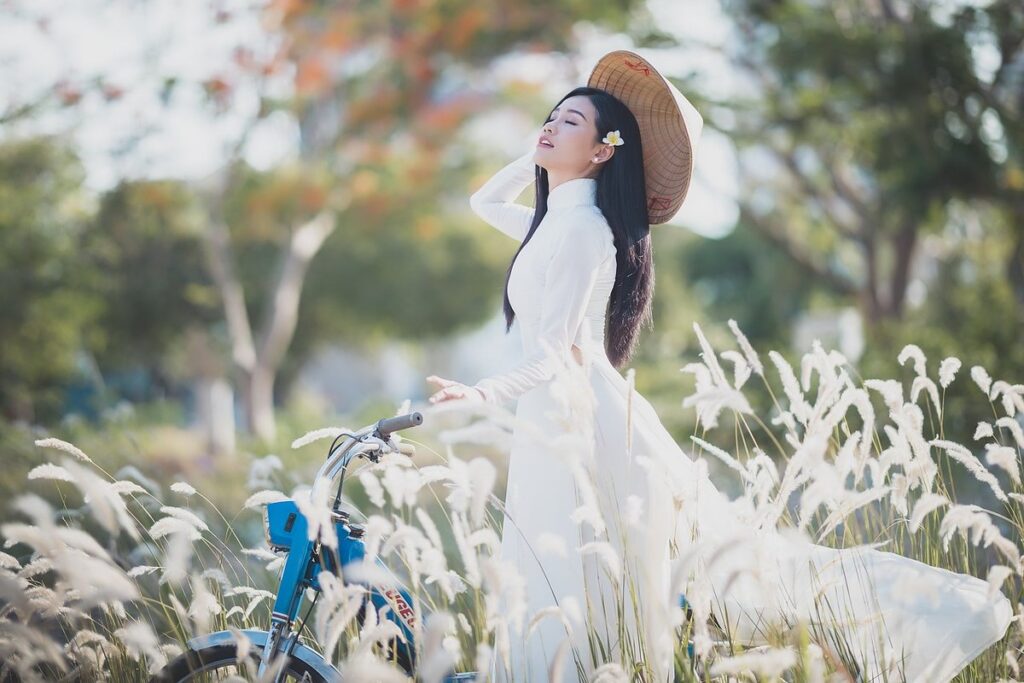
Key Features of the Original Dress
When creating your DIY Elsa dress, it’s essential to get the key features just right. The original Elsa dress is instantly recognizable due to its unique design elements. Let’s break down what makes this dress so iconic.
The sleeves are a crucial part of the Elsa dress. They’re long and flowing, with a slight bell shape at the wrist. To achieve this look, use a pattern or tutorial that includes a full-length sleeve. If you prefer not to sew, consider using a tunic-style top with attached sleeves. This will save you time while still giving your dress an authentic feel.
The collar is another distinctive feature of the Elsa dress. It’s high and rounded, framing the face and adding a touch of elegance. You can create this look by sewing a simple rounded collar to your dress, or use a pre-made one from a craft store.
Finally, let’s talk about the skirt. The original Elsa dress has a full, flowing skirt that falls just above the knee. To replicate this look, use a pattern with a maxi skirt or simply add ruffles and layers to a shorter skirt. Experiment with different fabrics and textures to create a one-of-a-kind effect.
Remember, practice makes perfect when it comes to recreating iconic costumes like Elsa’s. Don’t be afraid to try new techniques and make adjustments as you go along. With patience and creativity, your DIY Elsa dress will be a stunning replica of the original!
Choosing Your Fabric
When it comes to creating a DIY Elsa dress, choosing the right fabric is crucial. Selecting a fabric that’s both durable and comfortable will ensure your dress turns out as magical as you envision.
Materials for a Realistic Look
When it comes to creating an Elsa-inspired gown for your DIY project, choosing the right fabric is crucial. You’ll want materials that not only evoke the icy queen’s regal presence but also hold up well under repeated wear and handling.
For a realistic look, you can’t go wrong with satin, tulle, or velvet. Satin offers a smooth, lustrous finish reminiscent of Elsa’s signature icy blues and silvers. Its durability makes it an excellent choice for garments that will be worn frequently. Plus, its soft sheen catches the light beautifully, adding depth to your gown.
Tulle is another great option, providing a lightweight, airy feel perfect for creating those ethereal, cloud-like layers Elsa is famous for. While it may require some extra stabilization to prevent it from losing shape, tulle can be easily paired with other fabrics to create the illusion of delicate snowflakes or wispy clouds.
Velvet adds an opulent touch to your design, echoing the richness and texture of Elsa’s iconic ice palace. With its luxurious pile and subtle sheen, velvet is ideal for creating intricate details like beading, embroidery, or even a 3D snowflake pattern. Just remember to choose a high-quality velvet that can withstand repeated wear without pilling or losing shape.
Budget-Friendly Options
If you’re on a budget but still want to create an Elsa-inspired dress that looks and feels like the real thing, don’t worry – you can achieve this without breaking the bank. Luxury fabrics like velvet and satin are gorgeous, but they come with a hefty price tag. Instead, consider affordable alternatives that capture the essence of these high-end materials.
For example, you can use a faux velvet or velour fabric, which mimics the luxurious look and feel of real velvet at a fraction of the cost. Another option is to opt for a cotton or polyester blend with a soft, matte finish – it may not be as shiny as satin, but it still has a similar drape and texture.
Some popular budget-friendly fabrics that can work beautifully in an Elsa dress include: • Faux fur (for a more dramatic, snowy effect) • Stretchy knit fabrics like fleece or thermal (perfect for a comfortable, everyday look) • Cotton or polyester prints with icy motifs or snowflakes – these add visual interest without the high price tag.
Remember to choose fabrics that are easy to work with and suitable for your sewing skill level. With a little creativity, you can create an Elsa dress that’s both budget-friendly and breathtakingly beautiful!
Patterns and Tutorials
Now that you’ve got the basics down, let’s dive into the fun part: creating your very own DIY Elsa dress. This next section will walk you through step-by-step patterns and tutorials to bring your icy dream to life.
Free and Paid Patterns
When it comes to creating an Elsa-style gown, having access to reliable patterns is crucial. Fortunately, there are numerous sources offering both free and paid patterns that cater to various skill levels and preferences.
For those on a budget or looking for a quick DIY project, free patterns can be an excellent starting point. Websites like Etsy (yes, you read that right – some sellers offer free patterns!) and Craftsy often have a selection of free Elsa-inspired patterns that are easy to use and modify. Another great resource is Pinterest, where users share their own DIY creations and often provide links to the free patterns they used.
Paid patterns, on the other hand, offer more advanced features like customization options and high-quality designs. Websites like Simplicity Patterns and McCalls offer a range of Elsa-style patterns that can be tailored to individual tastes. These paid patterns usually come with detailed instructions and measurements, making them perfect for those who want a more precise fit.
Ultimately, the choice between free and paid patterns depends on your skill level, budget, and desired outcome.
Step-by-Step Tutorial Examples
Let’s say you’re looking to recreate Elsa’s iconic dress from Frozen. To help you achieve this stunning look, I’ll walk you through some step-by-step tutorial examples that will guide you through the sewing process.
One excellent resource is a YouTube video by Craftsy, which breaks down the process into manageable chunks. The video starts with creating the bodice pattern pieces and then moves on to sewing the fitted top of the dress. The creator also shares tips on how to add the intricate snowflake details that Elsa’s dress is famous for.
Another great example is a blog post by Sew Mama Sew, which provides a comprehensive tutorial on making an Elsa-inspired gown. This guide includes detailed instructions on creating the long, flowing skirt and attaching the fitted bodice. The author also shares some valuable advice on how to choose the right fabric and pattern for your project.
When following these tutorials or watching YouTube videos, remember to take it one step at a time and don’t be afraid to make mistakes – they’re an essential part of the learning process!
Sewing Techniques
To bring your Elsa dress to life, let’s dive into some essential sewing techniques that’ll make your DIY project a success. We’ll cover tips for working with slippery fabrics and more.
Working with Satin and Other Delicate Fabrics
When working with delicate fabrics like satin for your DIY Elsa dress, it’s essential to approach them with care. Cutting is a crucial step where mistakes can quickly accumulate. To minimize waste and achieve accurate cuts, use a rotary cutter or scissors specifically designed for fabric. Always cut away from the body to prevent accidental nicks on yourself or nearby surfaces.
When sewing satin, it’s best to use a sharp needle, preferably one with a large eye to accommodate thicker threads. Use a walking foot or Teflon foot on your machine to help guide the fabric and reduce friction. Satin is notorious for its tendency to slip and slide around during sewing, so keep an even pace and adjust the tension as needed.
Hemming satin can be particularly challenging due to its smooth texture. To prevent fraying, use a blind hem stitch or a narrow zigzag stitch on your machine. Alternatively, apply a small amount of interfacing or stabilizer to the hem area before sewing for added stability. Always press seams flat to minimize bulk and create a crisp finish.
Adding Embellishments
Now that you have your DIY Elsa dress cut and sewn together, it’s time to add those extra touches of magic with embellishments! There are several ways to give your dress a sparkling finish, from beading to sequins, and even appliques. Let’s dive into the world of decorative elements and explore some methods to make your Elsa dress truly enchanting.
One way to add some sparkle is by using beads or sequins. You can sew them directly onto the fabric, or use a hot fix method for an easy application. Consider creating a pattern with your beads, such as a snowflake design on the sleeves or a crown-like shape on the bodice. For a more subtle look, try beading along the edges of the dress or adding a few strategically-placed sequins to create visual interest.
If you’re feeling crafty, why not try appliques? These can range from intricate designs cut out of fabric to three-dimensional shapes like snowflakes or icicles. You can use fusible web for an easy application, or sew them on by hand for a more secure finish. Just remember to choose appliques that complement the overall design and theme of your Elsa dress.
Lastly, don’t forget about embroidery floss! This versatile thread can be used to create intricate stitches and patterns, from simple snowflakes to elaborate floral designs. Consider adding a phrase or quote related to your favorite Disney princess in a decorative font. With these embellishments, you’ll add the final touches to make your DIY Elsa dress shine like ice itself.
Accessories and Finishing Touches
Now that you have your DIY Elsa dress, let’s add some finishing touches! This is where you’ll find ideas for accessories and embellishments to take your look from princess-perfect to show-stopping.
Making a Belt or Sash
Creating a belt or sash to complement your Elsa-inspired gown is a fantastic way to add a finishing touch to your DIY project. To make it durable yet stylish, you’ll want to choose the right materials and techniques.
For a Disney princess-inspired look, consider using satin, grosgrain ribbon, or velvet for your belt or sash material. These fabrics will give your Elsa dress a luxurious and regal feel. You can also use metallic thread or beading to add some sparkle and shine.
To make your belt or sash sturdy enough to hold up your gown without sagging, you’ll want to use a thicker fabric or ribbon with some weight to it. You can also add some interlining or stabilizer to give it extra support. For example, if you’re using satin, consider adding a layer of interfacing between the front and back pieces for added stability.
When sewing your belt or sash, use a 1/4 inch seam allowance and press the seams as you go to help them lie flat. You can also add some decorative stitching or topstitching to give it a finished look. With these simple tips and techniques, you’ll be able to create a beautiful belt or sash that complements your Elsa-inspired gown perfectly.
Hair and Makeup Ideas
When it comes to recreating Elsa’s magical look from Frozen, no two details matter more than her striking hair and makeup. To help you achieve a spellbinding appearance, let’s delve into some breathtaking hairstyle ideas and makeup looks that would make the Queen of Arendelle proud.
For a regal and icy locks look, try a sleek updo with subtle braids framing your face. You can also opt for loose waves with frosty highlights to resemble Elsa’s signature style. To add an extra touch of magic, consider adorning your hair with silver or icy blue clips or pins that echo the color palette of the movie.
When it comes to makeup, Elsa’s pale complexion and icy blue eyes are a great canvas to work with. Go for a soft, ethereal look by applying a light foundation and subtle highlighting on the high points of your cheekbones. Define your brows, then accentuate those piercing blue eyes with a smoky shadow or eyeliner that shimmers like ice.
To add an extra touch of drama, pair this look with some frosty pink lip gloss or sheer lip balm to give your pout a radiant sheen. With these easy-to-replicate tips and tricks, you’ll be sure to channel your inner Elsa in no time!
Tips and Variations
Take your DIY Elsa dress to the next level by trying out these creative variations on a classic design, from fabrics to embellishments. Experiment with different ideas!
Troubleshooting Common Issues
If you’re working on your DIY Elsa dress and encountering some sewing issues, don’t worry – it’s not uncommon! Many sewists face problems with sleeves or hems when using this pattern. Let’s go through some common troubles and their solutions.
One of the most frustrating issues is a wonky sleeve. If your sleeve isn’t hanging straight or is bunching up at the cap, check that you’re sewing the sleeve to the bodice accurately. Make sure to line up the grain lines carefully and use a consistent seam allowance throughout. If the issue persists, try re-threading your machine and taking a closer look at your needle size.
Another common problem is uneven hems. To prevent this, take your time when measuring and marking your hem allowance. Consider using a ruler or seam gauge to ensure consistency along the entire length of the dress. If you notice that your hems are still not even after re-measuring, try folding and pressing the fabric carefully before sewing.
Lastly, if your Elsa dress is lacking the sparkly finish you’re going for, it might be due to puckering or distortion around the neckline or cuffs. To prevent this, use a serger or zigzag stitch on your overlock machine when finishing seams, especially where curves are involved. You can also try steaming the affected areas gently after sewing.
Some other general tips that can help you avoid these issues include double-checking your pattern pieces before cutting out fabric and keeping an eye out for any mistakes while sewing.
Customizing Your Dress
One of the best things about making your own Elsa dress is that you can customize it to fit your personal style. Why settle for a generic look when you can make it truly unique? Let’s talk about some ways you can put your own spin on this iconic dress.
First, consider the color palette. You could stick with the traditional icy blues and whites, or get creative and try a bold new combination. For example, a bright coral and turquoise Elsa dress would be perfect for summer, while a deep plum and emerald green version would add a touch of sophistication to any formal event. Don’t be afraid to mix and match different colors to create a one-of-a-kind look.
Next, think about patterns. You could go with a simple solid color or try something more elaborate like polka dots or stripes. If you’re feeling adventurous, why not try your hand at appliqué or embroidery? Add some fun details like glittery snowflakes or sequins to give your dress an extra wow factor.
Lastly, don’t underestimate the power of accessories! A statement necklace or a pair of bold earrings can completely transform the look of your Elsa dress. Experiment with different embellishments and find what works best for you.
Frequently Asked Questions
Can I customize the Elsa dress pattern to fit my body type?
If you have a unique body shape or size, you can modify the pattern to suit your needs. Start by taking your measurements and adjusting the pattern pieces accordingly. You can also add or remove fabric panels to achieve the desired silhouette. Don’t be afraid to experiment and get creative with the design – after all, that’s what makes DIY so much fun!
How do I prevent my satin dress from becoming distorted while sewing?
Satin can be notoriously finicky when it comes to handling. To prevent distortion, make sure to iron your fabric before cutting and sewing. Use a hot iron with steam to smooth out wrinkles and creases. Also, try using a walking foot or Teflon foot on your sewing machine to help guide the fabric smoothly.
Can I use any type of fabric for an Elsa-inspired dress?
While satin is a popular choice for recreating Elsa’s iconic look, you can experiment with other fabrics like tulle, organza, or even lace. However, keep in mind that these materials may require different sewing techniques and handling methods to achieve the desired effect. Consider the drape, texture, and weight of your fabric to ensure it captures the essence of the Elsa dress.
How do I add realistic-looking snowflakes to my DIY Elsa dress?
To create intricate snowflake patterns, try using a combination of appliqué and embroidery techniques. You can use sheer fabrics or lace for a delicate effect or go bold with metallic threads for a more dramatic look. Practice making simple snowflake shapes on scrap fabric before applying them to your main project.
Can I make a DIY Elsa dress without a sewing machine?
While having a sewing machine can make the process easier, it’s not necessary to create an Elsa-inspired gown. You can use hand-sewing techniques or even try no-sew methods like hot glue or fusible web. Be patient and take your time – with practice and patience, you can achieve professional-looking results without breaking the bank on specialized equipment.