
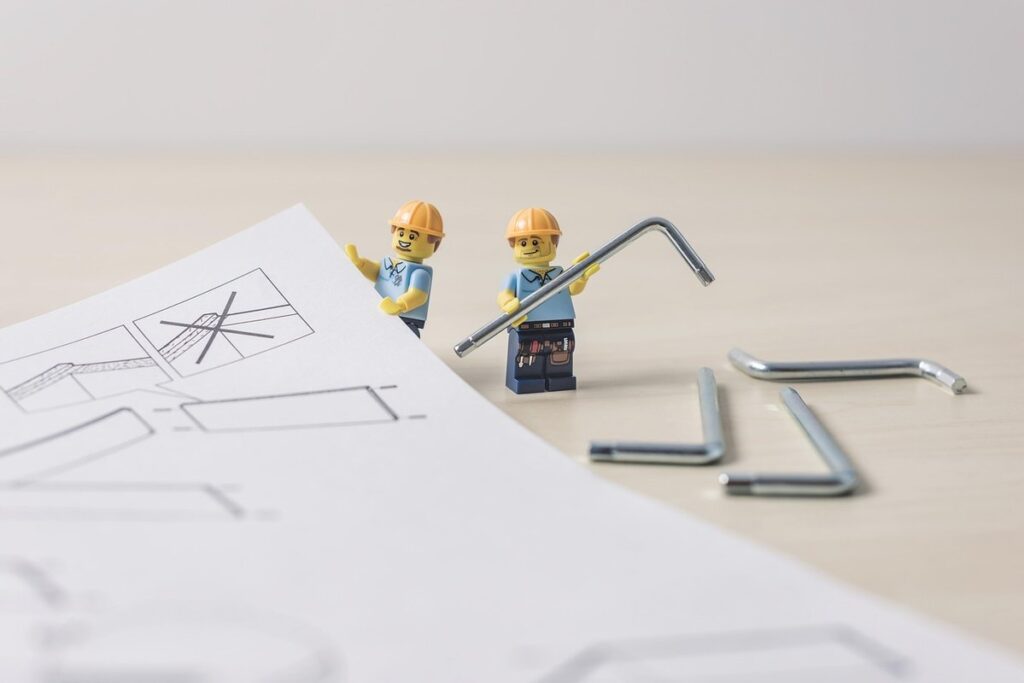
Are you tired of searching for the perfect LEGO storage solution? Do you want to unleash your creativity while building a functional space in your home? Creating a custom LEGO table is an exciting DIY project that can be both fun and rewarding. With a little planning, design expertise, and construction know-how, you can build a one-of-a-kind LEGO table that’s tailored to your family’s needs.
In this article, we’ll take you through the process of designing and building a unique LEGO table from scratch. We’ll cover essential planning steps, provide expert tips on creating an aesthetically pleasing design, and guide you through the construction process. Whether you’re a seasoned LEGO enthusiast or just starting out, our step-by-step guide will show you how to create a functional space that’s perfect for displaying your favorite minifigures, storing excess bricks, and even serving as a gaming station.
Planning Your LEGO Table
Now that you have a good idea of your space and needs, it’s time to plan out your dream LEGO table, including its size, shape, and layout.
Choosing a Theme and Design Style
When it comes to choosing a theme and design style for your LEGO table, there are countless options to consider. But with so many possibilities, where do you start? Let’s break down some popular themes and design styles that cater to different age groups, skill levels, and personal preferences.
For younger builders (ages 4-8), bright and colorful themes like City, Friends, or Duplo are perfect for fostering creativity and imagination. These designs often feature iconic LEGO buildings, vehicles, and characters that kids love. As children grow older (9-12), they may be drawn to more complex themes like Creator Expert, which offers intricate models of famous landmarks, machines, and buildings.
For adults and seasoned builders, more nuanced themes like Architecture or Ideas might appeal to their sense of style and sophistication. These designs often incorporate real-world landmarks, iconic symbols, or abstract concepts that showcase LEGO’s versatility. Consider your own interests, skill level, and the space available when selecting a design. You can also mix and match elements from different themes to create a unique look that reflects your personality.
Measuring and Layout Planning
When it comes to building your dream LEGO table, measuring and planning the layout is crucial. Take some time to measure the available space where you plan to place your table, considering not only its dimensions but also the surrounding area. Think about how much floor space you need for easy access and comfortable working.
To maximize storage and workspace, consider a modular design with adjustable shelves or drawers. This will allow you to customize the layout according to your needs and add or remove components as needed. For example, a LEGO enthusiast might prefer a larger work surface for building and displaying models, while another person might prioritize storage for accessories and bricks.
Consider the “golden ratio” of 1/3 workspace to 2/3 storage when planning your table’s layout. This balance allows you to focus on creative projects while keeping essential supplies within easy reach. When choosing a location, also think about natural light and ventilation to keep your workspace comfortable and well-lit. Take note of any power outlets nearby for your tools and lighting.
Setting a Budget and Material List
Setting a realistic budget for your LEGO table project is crucial to ensure you don’t overspend and end up with financial stress. To determine your budget, consider the size of the table, materials, and features you want to include. A general rule of thumb is to allocate $100-$300 per square foot of surface area.
For a standard-sized table (around 4×2 feet), this translates to a budget of $400-$1200. However, these estimates can vary depending on your location, the type of materials used, and any custom features you want to incorporate.
To create a list of necessary materials, start with the basics: lumber for the frame, plywood or MDF for the top surface, and screws, nails, and wood glue for assembly. Consider using cost-effective options like reclaimed wood or repurposed materials from other projects. You can also find affordable alternatives online, such as second-hand stores or local classifieds.
When it comes to LEGO storage, don’t forget to factor in costs for bins, baskets, or drawers to keep your bricks organized and within reach. Keep in mind that some materials may require special ordering or shipping, so be sure to plan ahead and factor these costs into your budget.
Designing Your LEGO Table
Now that you’ve chosen a location for your LEGO table, it’s time to design one that fits perfectly within its new home. This section will walk you through measuring and planning your custom table layout.
Base Plate and Frame Construction
When building the base plate and frame of your LEGO table, stability and support are crucial to ensure it can hold a significant weight. Start by creating the base plate using 2×4 bricks, as they provide excellent support without taking up too much space. Arrange them in a square or rectangular shape, depending on your table’s design.
Next, add vertical supports between each corner of the base plate to enhance stability and prevent it from toppling over. You can use 1×2 or 2×2 bricks for this purpose. Consider adding diagonal supports for additional reinforcement, which is especially useful if you plan to place heavy items on your table.
To ensure stability, make sure the frame is evenly spaced around the base plate, with no gaps or weak points that could compromise its structural integrity. Use a combination of 1×2 and 2×4 bricks to create a sturdy frame that can withstand everyday use. By following these simple steps, you’ll have a solid foundation for your LEGO table that will last for years to come.
Shelf and Drawer Design
When designing shelves and drawers for your LEGO table, it’s essential to optimize storage space while utilizing available materials efficiently. To achieve this, consider a modular approach where shelves and drawers are designed as separate units that can be combined or reconfigured as needed.
Think about the types of items you’ll be storing: small bricks, plates, minifigures, and other LEGO pieces often require specialized containers to prevent them from getting lost or damaged. Consider using shallow drawers with dividers for smaller items and larger drawers with adjustable shelves for bulkier components like baseplates or model boxes.
For shelving, consider a combination of fixed and adjustable shelves to accommodate different heights of storage needs. Labeling each shelf with adhesive-backed stickers can also help you quickly locate specific items. To maximize vertical space, build your table with built-in cabinets that have doors or drawers to conceal contents when not in use.
Adding Decorative Elements
When it comes to adding decorative elements to your LEGO table, the possibilities are endless. To create a unique and personalized space, consider incorporating lights or intricate details that reflect your personality and style.
One popular way to add some sparkle is with under-table lighting. You can use LED strips, string lights, or even fairy lights to create a warm and inviting ambiance. For example, you could place a strip of LED lights along the edges of the table or underneath it to create a futuristic glow. Not only will this make your LEGO creations stand out, but it’ll also add a touch of magic to your play sessions.
Another way to add visual interest is with intricate details like carvings, etchings, or even mosaics. You can use a Dremel or a carving tool to create custom designs on the table’s surface. For instance, you could carve out a LEGO-inspired pattern or create a mosaic using colored tiles. The key is to have fun and experiment with different techniques until you find what works best for your style.
To take it to the next level, consider adding a focal point like a glass top or a decorative trim around the edges of the table. This will not only add visual appeal but also provide a clean and polished look that complements your LEGO creations.
Building Your LEGO Table
Now that you’ve gathered all the necessary materials, let’s get started on building your custom LEGO table base. In this next step, we’ll guide you through assembling the foundation of your project.
Brick Selection and Organization
When it comes to building your dream LEGO table, selecting the right bricks is just as crucial as choosing the perfect design. With thousands of LEGO pieces at your disposal, the task can be overwhelming. To ensure you’re on the right track, let’s break down the process into manageable chunks.
First, determine what type of designs and themes you want to feature on your table. Are you going for a modern cityscape or a whimsical fantasy world? This will help narrow down the brick selection. Consider the colors, shapes, and sizes of the pieces required for each design element. For instance, if you’re building a desert landscape, you’ll need plenty of sandy-colored bricks.
Next, organize your LEGO collection by sorting them into categories like plates, tiles, beams, and bricks. This will make it easier to find what you need when it’s time to start building. Store frequently used pieces in easy-to-reach locations, and consider labeling bins or containers to maintain order throughout the project. With a clear plan and well-organized bricks, you’ll be ready to bring your LEGO table vision to life.
Base Plate Construction Techniques
When it comes to building the base plate of your LEGO table, there are several techniques you can use to create a sturdy and visually appealing foundation. One popular method is using a combination of bricks and plates to achieve a strong and stable base.
For example, you can start by laying down a layer of 2×4 bricks, which provide excellent support and can help to distribute the weight of the table evenly. Next, you can add a layer of 1×2 plates on top of the bricks, allowing for easy access to the studs while also providing additional stability.
Another technique is using specialized LEGO base plate elements, such as the 32×32 or 48×48 plates, which are designed specifically for creating large, flat surfaces. These plates can be used in conjunction with bricks and other elements to create a strong and rigid base.
When choosing between different types of bricks and plates, consider factors such as the weight capacity you need, the design aesthetic you’re aiming for, and any specific functional requirements your table may have. By experimenting with different combinations and techniques, you can create a unique and customized base plate that perfectly suits your LEGO table project.
Adding Final Details and Touch-ups
Now that you’ve completed the main structure of your LEGO table, it’s time to add the final touches. This is where you get to decide on the finishing details that will make your table truly unique and durable.
First things first, consider applying a coat of varnish or sealant to protect your LEGO pieces from dust and moisture. This will not only extend the life of your table but also give it a glossy finish that catches the light beautifully. You can choose from a variety of clear finishes, such as polyurethane or wax-based products, depending on the look you’re going for.
Another important detail is adding any hardware, like handles or decorative metal accents, to complete the design. Make sure these pieces are securely attached and won’t come loose over time. Don’t forget about the edges – consider applying a small amount of silicone sealant to prevent chipping and fading.
With these final touches in place, your LEGO table is now ready for its debut! Take a step back, admire your handiwork, and get ready to enjoy countless hours of creativity and fun with your new custom-built table.
Finishing and Maintenance
Now that you’ve built your DIY LEGO table, it’s time to put the finishing touches on it. In this next part of our guide, we’ll show you how to keep your creation looking its best.
Sanding and Painting (Optional)
When it comes to giving your DIY LEGO table a smooth finish and extending its lifespan, sanding and painting are optional yet effective techniques you can consider. Sanding helps remove any imperfections or rough edges that may have arisen during the building process, ensuring a professional-looking finish.
To sand your LEGO table, start with a coarse-grit sandpaper (about 120-150 grit) and work your way up to finer grits (220-240) for a smooth finish. Be gentle, as excessive sanding can damage the bricks or weaken their bonds. Use a circular motion, applying even pressure to avoid creating scratches.
As for painting, it’s a great option if you want to add a pop of color or create a unique design on your LEGO table. Choose a water-based paint specifically designed for plastics and follow the manufacturer’s instructions. Apply a primer first to ensure better adhesion and durability. A single coat should be sufficient, but make sure to let it dry completely before adding additional coats.
Remember that painting will conceal any intricate details or designs you’ve created with your LEGO bricks. Weigh the pros and cons before deciding whether sanding or painting is right for your project.
Cleaning and Storage Tips
Cleaning and storing your DIY LEGO table is crucial to maintaining its condition and ensuring it remains a beloved play space for years to come. To protect your creation from dust and moisture, start by regularly wiping down the surface with a soft cloth. This will prevent dust from accumulating and making a mess.
For more thorough cleaning, mix a solution of mild soap and water and gently scrub any stubborn stains or spills. Be sure to dry the table thoroughly after cleaning to prevent water spots. To further protect your LEGO table from moisture, consider applying a clear coat of polyurethane or varnish.
When it’s time to store your LEGO table, keep in mind that the surface can be sensitive to scratches and dents. To prevent damage, cover the table with a breathable cloth or plastic sheet when not in use. You can also disassemble any removable parts, such as chairs or shelves, and store them separately to make cleanup easier.
Additionally, consider keeping your LEGO collection organized by storing it in labeled bins or containers to keep pieces tidy and within reach. This will save you time and effort during playtime, ensuring a smooth and enjoyable experience for builders of all ages.
Troubleshooting Common Issues
When building your DIY LEGO table, it’s not uncommon to encounter some snags along the way. One common issue is wobbly legs, which can be caused by uneven floor surfaces or improperly assembled legs. To resolve this, make sure to level the floor before assembly and double-check that all screws are tightened securely.
Another problem you may face is a loose connection between the table top and base. This can be due to inadequate glue or poorly aligned parts. If you find yourself dealing with this issue, try applying more glue to the affected area and let it dry completely before handling the table.
If your LEGO pieces don’t fit together as they should, check that you’re using the correct parts for the specific design. It’s also essential to keep track of which pieces are where in case of mistakes or lost parts. For particularly stubborn issues, refer back to the original instructions and diagram, adjusting your approach as needed.
Additionally, some users have reported issues with LEGO pieces getting stuck together due to dust buildup. Regularly cleaning your workspace and LEGO pieces can help prevent this problem from arising in the first place.
Conclusion
Now that you’ve completed your DIY LEGO table, let’s summarize what we’ve covered and provide some final tips for keeping it looking its best.
Final Thoughts and Encouragement
As you’ve reached the end of our DIY LEGO table journey, I hope you’re feeling inspired and equipped to create a custom piece of furniture that will bring joy to your little ones for years to come. Let’s recap some key takeaways from this article:
When it comes to choosing the perfect design, remember that simplicity is key. A clean and minimalist look can make it easier for kids to focus on building and playing with their LEGO bricks. Don’t be afraid to get creative and add your own personal touch – after all, a custom-built table can become a beloved family heirloom!
If you’re new to DIY projects or short on time, don’t worry! You don’t need any advanced carpentry skills to build a stunning LEGO table. Start with a simple design, follow the instructions carefully, and take your time. It’s also essential to involve your kids in the process – let them help with measuring, cutting, and assembling the pieces. This will not only make it a fun family activity but also teach them valuable skills.
Now that you have the knowledge and confidence to build your own LEGO table, I encourage you to get creative and share your masterpiece with the world! Take photos of your finished project and share them on social media using a branded hashtag – we’d love to see what you’ve built!
If you’re feeling ambitious, consider sharing your DIY LEGO table creations with other parents in online communities or forums. Not only will you receive valuable feedback and encouragement, but you’ll also be inspiring others to take the plunge and build their own custom tables.
Remember, building a DIY LEGO table is not just about creating a functional piece of furniture – it’s about creating memories with your loved ones that will last a lifetime. Happy building!
Frequently Asked Questions
Can I use a pre-made LEGO table plan or do I have to design everything from scratch?
Yes, you can definitely use a pre-made LEGO table plan as a starting point or reference for your custom project. You can find many free plans online or purchase a DIY book that includes LEGO furniture designs. Feel free to modify and adapt these plans to fit your needs and style. Just keep in mind that working with a plan will still require some design expertise and construction know-how.
How do I ensure the stability and durability of my LEGO table?
To create a sturdy and long-lasting LEGO table, focus on using high-quality base plates and frames made from thick, rigid plastic or wood. Make sure to attach the shelves and drawers securely with screws or other fastening methods. Additionally, use a level tool to ensure your table is perfectly flat and even. This will prevent any wobbling or structural issues.
Can I add electric components like lights or charging stations to my LEGO table?
Yes, you can incorporate electronic elements into your LEGO table project if you have the necessary electrical know-how and safety precautions in place. However, be cautious when working with electricity and ensure that all wiring is secure, hidden from view, and meets local electrical codes. Consider consulting an electrician or following proper DIY tutorials to avoid any potential risks.
How do I store excess LEGO bricks and keep them organized within my table?
One effective way to manage your LEGO collection is by incorporating specialized storage solutions like drawers, shelves, and cupboards into your table design. You can also use small compartments, dividers, or even decorative boxes to categorize and separate different brick types. Don’t forget to label each section for easy identification and access.
What if I encounter problems with the construction process or need extra support?
If you’re facing difficulties during the build process, consider consulting online resources like LEGO forums or DIY communities for troubleshooting tips and advice from fellow builders. You can also reach out to local woodworking classes or experienced contractors for guidance on specific construction techniques. Remember that it’s okay to ask for help when needed – building a custom LEGO table is a challenging but rewarding project!