
As Easter approaches, many parents are on the hunt for fun and creative ways to keep their little ones engaged. Crafting your own Easter eggs is an excellent way to encourage kids’ creativity while making the holiday even more special. Whether you have a toddler or pre-teen, this activity can be adapted to suit different ages and skill levels. From easy decorations like stickers and paint to advanced techniques like decoupage and dyeing, we’ve got a wide range of Easter egg craft ideas for kids in this article. With a few simple materials, you’ll be able to create beautiful and unique eggs that showcase your child’s individuality. In the following article, we’ll take a closer look at various kid-friendly Easter egg crafts, from basic designs to more complex projects.
Introduction to Easter Egg Crafts
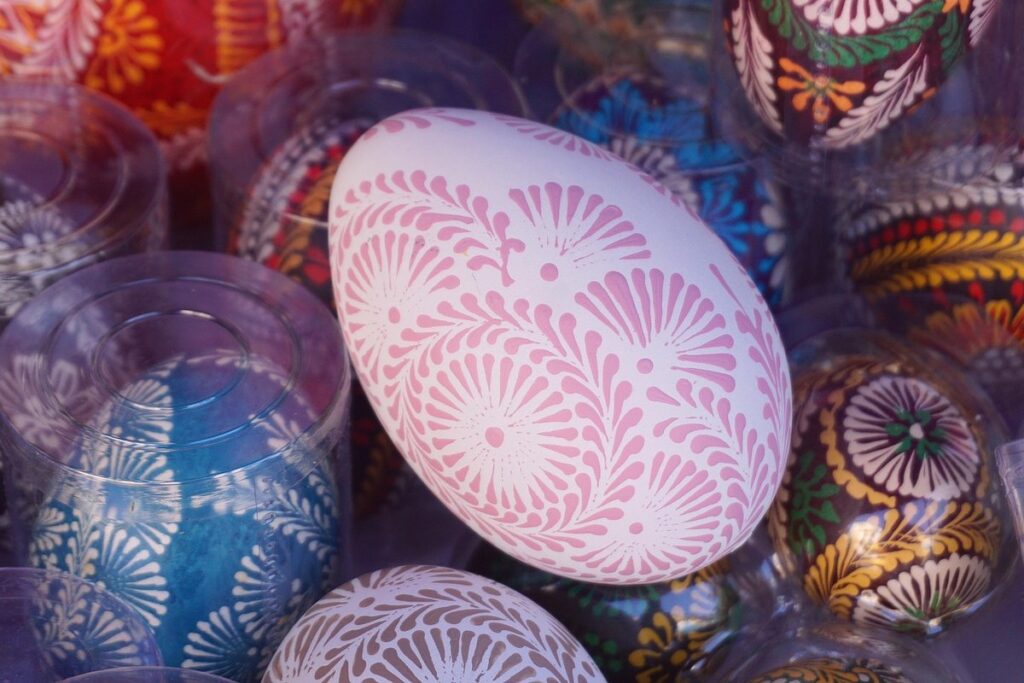
Welcome to our Easter egg crafts for kids, where we’ll dive into the basics of creating beautiful and unique eggs that will delight both you and your little ones. Let’s get started!
Importance of Easter Egg Crafts in Childhood Development
Engaging in Easter egg crafts is not just a delightful activity for kids, but also plays a significant role in their development. These creative pursuits contribute to three essential areas: cognitive, motor, and creative growth.
Cognitively, Easter egg crafting enhances problem-solving skills as children learn to think critically and come up with innovative designs. For instance, they must decide on the colors, patterns, and shapes that will make their egg stand out. This process requires weighing options, making decisions, and adjusting their plan accordingly – all valuable cognitive skills.
Motor development is also significantly impacted through these crafts, as children practice fine motor control by holding small tools, applying glue or paint, and manipulating materials. The intricate details involved in decorating eggs help build hand-eye coordination, dexterity, and precision. By repeating this process, kids’ hand movements become more confident and deliberate.
Finally, creative growth is promoted as children experiment with colors, textures, and designs to express themselves uniquely. They learn that it’s okay to make mistakes and can incorporate those errors into their art, fostering resilience and self-expression.
Brief History of Easter Egg Decorating Traditions
Easter egg decorating is a beloved tradition that spans centuries and cultures. Let’s take a journey through time to explore the fascinating history of Easter egg decorating traditions from around the world.
In ancient Persia (modern-day Iran), eggs were considered a symbol of new life, and decorating them was a revered custom during the spring equinox celebration of Nowruz. The tradition involved intricate dyeing techniques using natural materials like beets, pomegranates, and turmeric to create stunning designs.
As cultures blended and traded ideas, Easter egg decorating spread throughout Europe, where it evolved into a unique fusion of styles. In Ukraine, for instance, the pysanky tradition has been passed down through generations, with artisans creating exquisite designs using wax-resistant techniques.
The arrival of Christianity brought new significance to the Easter egg, which became a symbol of Christ’s resurrection and renewal. Germanic cultures adorned eggs with elaborate patterns, while Italian and Spanish traditions introduced use of bright colors and gold leaf.
Today, we can draw inspiration from these global traditions to create our own unique Easter egg designs, blending old techniques with modern materials and styles. By exploring the rich history of Easter egg decorating, you’ll discover a world of creative possibilities for your next family project or community celebration.
What to Expect from This Guide
As you dive into the world of Easter egg crafts with your little ones, we want to set clear expectations for what’s in store. This comprehensive guide is designed to cater to kids of all ages and skill levels, ensuring that every member of your family can participate and enjoy the creative process.
Within these pages, you’ll discover a treasure trove of innovative ideas for decorating Easter eggs. From simple, mess-free techniques perfect for toddlers to intricate designs suitable for older kids, we’ve got it covered. Our guide includes step-by-step instructions, along with pictures and videos to help illustrate each method. We also highlight essential materials and tools needed for each project.
Throughout this guide, you’ll find tips on how to adapt ideas according to your child’s abilities, making sure everyone feels included and confident in their creative journey. Whether you’re planning a fun family activity or seeking inspiration for a school project, our Easter egg crafts collection is packed with engaging and educational activities that will make the most of this festive season.
Types of Easter Eggs and Materials Used
When it comes to creating your Easter egg masterpiece, you’ll want to know the different types of eggs and materials that can bring your project to life. From wooden eggs to paper mache shells, we’ve got them all covered here!
Paper Mache and Papier-Mâché Easter Eggs
Creating paper mache and papier-mâché Easter eggs is a fun and creative activity for kids. To get started, you’ll need some basic materials: balloons, strips of paper, and glue. You can use regular printer paper or newspaper strips to create the papier-mâché mixture.
Begin by blowing up the balloon to the desired size for your egg. Cut strips of paper into long, thin pieces that are about 1-2 inches wide. Dip each strip into a bowl of water mixed with glue, coating both sides evenly. Wrap the coated strip around the balloon, overlapping each layer as you go. Continue adding layers until you’ve achieved the desired thickness.
As an alternative to balloons, you can use paper mache paste and shape it into egg shapes. This method requires more time and effort but yields a more realistic egg texture. Allow your papier-mâché eggs to dry completely before popping the balloon or removing any excess paper. Once dry, paint your Easter eggs with vibrant colors and decorations for a unique and personalized design.
Natural Dyeing Methods
Dyeing Easter eggs using natural ingredients is not only fun for kids but also an eco-friendly way to create unique and beautiful designs. To get started, you’ll need some common household items like vegetables, fruits, leaves, and flowers that can be used as natural dyes.
Beets, turmeric, and coffee are popular choices for creating vibrant colors. Boil the ingredients in water to extract their color pigments, then soak your eggs in the dye mixture for a few hours or overnight. For example, beets will give you a range of pink to reddish-brown hues, while turmeric produces a lovely yellow color.
You can also experiment with leaves like spinach and kale, which yield soft greens, or flowers like lavender and indigo that produce purples and blues. Some other natural dye sources include pomegranate juice, onion skins, and even tea bags! To achieve multi-colored designs, you can use a combination of these ingredients.
Remember to always supervise children when using natural dyes, as some may cause skin or eye irritation. With a little creativity, your kids will have fun experimenting with different colors and patterns, creating truly one-of-a-kind Easter eggs that are not only beautiful but also sustainable.
Easy and Quick Easter Egg Decorating Ideas
Transform dull eggs into stunning works of art with these fun and easy decorating ideas that kids will love making on their own, without a mess!
Tissue Paper and Crepe Paper Decorations
One fun and easy way to decorate Easter eggs is by using tissue paper and crepe paper. These materials can add a beautiful and colorful touch to your eggs without requiring much effort or mess.
To start, gather the necessary supplies: hard-boiled eggs, tissue paper, scissors, glue, and crepe paper in various colors and patterns. You can choose plain or textured tissue paper for a more unique look.
Begin by cutting strips of tissue paper or crepe paper to desired lengths. You can also crumple the paper for a fun, textured effect. Then, wrap each strip around the egg, overlapping the edges slightly as you go. Secure with glue.
You can also use a single sheet of crepe paper to create a beautiful, layered design on your eggs. Simply cut out petal shapes and layer them on top of one another, securing with glue.
When working with tissue paper and crepe paper, be sure to apply even pressure so that the designs don’t smudge or get damaged. This will ensure your creations last throughout Easter celebrations.
Stickers and Tape Decorations
Get creative with stickers and tape to give your Easter eggs a unique look! This fun and easy technique is perfect for little ones who love adding their personal touch. You can use store-bought stickers or get crafty and make your own DIY sticker creations.
To start, choose a few sheets of stickers that match the Easter theme, like bunny faces, flowers, or Easter eggs. Apply them to your egg using a dab of glue or by simply pressing down on them. To add more details, use colored tape to create stripes, patterns, or even a border around the sticker.
Take it up a notch and make your own stickers! Use cardstock, scissors, and markers to cut out fun shapes like bunnies, chicks, or Easter baskets. Add some glitter or stickers to give them extra flair. Then, use a glue stick to attach these mini decorations to your eggs. This way, kids can get creative and make their very own custom designs.
Remember, the beauty of using stickers and tape is that it’s non-permanent, so don’t worry if things get messy – just peel off the sticker or remove the tape for a new design!
Advanced Easter Egg Crafting Techniques
Take your Easter egg decorating skills to the next level with expert techniques, from intricate designs to unique materials that will amaze kids and adults alike!
Wax Resist Method Using Beeswax or Paraffin Wax
Using wax resist techniques is an excellent way to add intricate designs and patterns to your Easter eggs. This method involves applying a layer of melted wax to specific areas of the egg before dyeing it, allowing you to create beautiful, detailed designs.
You can use either beeswax or paraffin wax for this technique. Beeswax is a natural, eco-friendly option that works well with cold water dyes, while paraffin wax is more versatile and compatible with both cold and hot water dyes. To get started, you’ll need to melt the wax in a double boiler or in a heat-proof bowl set over a pot of simmering water.
Once the wax has melted, use a brush or a cotton swab to apply it to the areas where you want your design to appear. You can create intricate patterns by layering multiple colors of dye and using the wax resist technique to protect certain areas from the dye. Be sure to let each layer dry completely before applying the next one, and don’t be afraid to experiment with different combinations of wax and dye for unique results.
Some popular designs that work well with wax resist include stripes, polka dots, and geometric patterns. You can also use stencils or stickers to create more intricate designs.
Felt and Fabric Decorating Ideas
Get creative with felt and fabric to add an extra layer of texture and personality to your Easter eggs! Working with these materials is a great way to introduce kids to the world of textile art. To start, choose felts or fabrics that complement the Easter theme – think pastel colors, floral patterns, and spring-inspired designs.
For a simple felted design, try using hot glue to attach small felt shapes or strips directly onto the egg. You can also use fabric paint or markers to add intricate details and patterns. Another idea is to decoupage pre-cut images from old books or magazines onto the eggs using a mixture of water and white glue.
For a more complex project, consider creating a mini collage on the egg’s surface using cut-out shapes made from felt or fabric. Use a hot glue gun to attach the pieces in place. You can also experiment with sewing tiny stitches directly onto the egg using embroidery floss. Remember to use a needle specifically designed for working with thin materials to avoid any damage.
Safety Precautions and Tips for Working with Kids
When working on Easter egg crafts with kids, it’s essential to keep them safe while creating. This section will guide you through vital precautions and helpful tips to ensure a fun experience for both of you.
Allergy-Friendly Materials and Alternatives
When working with kids on Easter egg crafts, it’s essential to consider potential allergens and choose materials that are safe for their sensitive skin. Some common culprits include dyes, glitters, and even the eggs themselves.
If you’re planning to dye hard-boiled eggs, look for food-grade dyes or natural alternatives like beet juice or turmeric. Avoid using synthetic dyes, as they can be harsh on some children’s skin. For decorating purposes, consider using washable markers, crayons, or stickers made from hypoallergenic materials.
When it comes to glitters, opt for those labeled as “hypoallergenic” or “skin-friendly.” Some popular alternatives to traditional glitters include glitter glue, sparkly tape, and stick-on gems. If you’re using cardboard or paper eggs, make sure they’re BPA-free and non-toxic.
To take your Easter egg crafts to the next level, think beyond traditional materials. You can use recycled materials like egg cartons, toilet paper rolls, or even old CDs to create unique decorations. For example, paint or draw designs directly onto these materials for a fun and creative twist on classic Easter eggs.
Supervising Children During Craft Activities
When it comes to Easter egg crafts with kids, adult supervision is crucial to ensure everyone has a blast while staying safe. As soon as you start setting up the craft station, make sure to establish a clear understanding of the rules and boundaries with the children involved.
To minimize potential hazards, designate a specific area for the craft activity that’s free from breakable items and electrical outlets. Have all necessary materials within easy reach to prevent kids from having to stretch or climb. For example, store paints, dyes, and other substances out of reach but still accessible for you as the adult supervisor.
Some essential safety measures include wearing protective gear like aprons and gloves to shield against stains and potential allergic reactions. Keep a first aid kit nearby, stocked with essentials like bandages, antiseptic wipes, and pain relievers. In case of accidents or spills, have a plan in place for cleaning up quickly and safely.
Teach the children about basic safety precautions, such as washing hands before starting and after finishing the craft activity. Make sure to model these behaviors yourself, as kids often learn by observing. By being attentive and prepared, you’ll create a fun and safe environment where everyone can enjoy creating their own Easter egg masterpieces.
Displaying and Using Your Finished Easter Eggs
Now that you’ve spent hours decorating those adorable eggs, let’s talk about how to show them off proudly around the house. We’ll share some creative display ideas and fun ways to use your finished Easter eggs!
Display Ideas for Easter Egg Decorations
Easter egg decorations are not just for the kids to enjoy – they can also be a beautiful addition to your home’s decor. Here are some creative ways to display and showcase your finished Easter eggs:
Use an Easter Egg Display: Create a stunning centerpiece by grouping your decorated eggs together in a decorative bowl or vase. You can arrange them in a pattern, such as alternating colors or shapes, for a visually appealing display. Consider adding greenery like ferns or eucalyptus to complement the spring theme.
Mantel Decor: Add some festive flair to your mantel by placing your Easter eggs in a decorative arrangement. You can use a garland or ribbon to tie them together, or simply group them in a beautiful bowl or vase. This is a great way to create a seasonal display that’s easy to set up and take down.
Centerpiece Ideas: Transform your dining table into an Easter wonderland by creating a stunning centerpiece using your decorated eggs. Place a few large eggs on a decorative platter or tray, and surround them with smaller eggs in a pattern of your choice. You can also add some candles, flowers, or other spring-themed decor to complete the look.
Remember, the most important thing is to have fun and be creative!
Incorporating Easter Eggs into Holiday Celebrations
Incorporating decorated Easter eggs into holiday celebrations is an easy and fun way to add some extra personality to your events. Whether you’re hosting an Easter dinner, springtime party, or simply want to brighten up your everyday decor, these beautifully crafted eggs can bring a smile to everyone’s face.
For Easter dinner, consider displaying your finished eggs on the table as centerpieces, or use them as place settings for each guest. You could also create a festive egg display on a sideboard or buffet table, surrounded by fresh flowers and spring-themed decorations. To make it even more special, use some of the eggs as gift holders for small treats or candies.
In addition to Easter dinner, your decorated eggs can be used in all sorts of springtime celebrations, like baby showers or Mother’s Day gatherings. They can also add a pop of color and whimsy to everyday decor, such as adorning a mantel or side table with them. To keep the fun going throughout the season, consider making a few extra eggs for impromptu decorations or gifts for friends and family.
Frequently Asked Questions
How can I adapt Easter egg crafts for children with special needs or disabilities?
Adapting Easter egg crafts for children with special needs or disabilities requires a thoughtful approach to accessibility. Consider using large, easy-to-handle materials and tools, as well as modifying techniques to accommodate fine motor limitations. For example, you can use pre-cut shapes or larger paintbrushes to make it easier for them to participate.
What are some allergy-friendly alternatives to traditional Easter egg decorating materials?
When working with kids who have allergies or sensitivities, opt for hypoallergenic materials and dyes. Consider using natural dyes like beet juice, turmeric, or coffee, instead of commercial dye packets. You can also substitute glue sticks with washable school glue or fabric paint.
Can I use recycled materials to make Easter eggs more eco-friendly?
Absolutely! Get creative with repurposed materials like cardboard, paper towel rolls, and newspaper. This approach not only reduces waste but also teaches children the value of upcycling. You can even decorate pre-used containers like egg cartons or toilet paper tubes.
How do I store and display finished Easter eggs to maintain their longevity?
Proper storage and display are crucial for preserving your creations. Store them in a dry, cool place away from direct sunlight, which can cause fading or discoloration. Consider displaying them on a tiered stand or egg carton holder to showcase each child’s masterpiece without overcrowding.
What safety precautions should I take when working with kids on Easter egg crafts?
When supervising children during craft activities, ensure they wear protective gear like aprons, smocks, and gloves to prevent staining and skin irritation. Also, keep sharp objects and materials out of reach, and always supervise glue and paint use to avoid accidents.