
Easter is just around the corner, and you’re probably thinking about how to make this holiday season extra special for your little ones. One great way to do that is by encouraging their creativity with some fun and easy Easter handicrafts! Not only are these projects a great way to keep your kids engaged and entertained, but they also provide an excellent opportunity to develop their fine motor skills and hand-eye coordination.
As a parent or caregiver, you’re likely looking for ways to make this holiday season both enjoyable and educational. That’s where we come in – our collection of easy-to-make Easter crafts is designed specifically with kids in mind. From decorating eggs to creating DIY decorations, these creative project ideas will help your little ones get into the Easter spirit while learning valuable skills along the way.
Introduction to Easter Craftiness
Welcome to our Easter craftiness corner, where we’ll share some fun and creative ideas for kids to get into the holiday spirit. Let’s dive into some egg-cellent projects!
Why Easter Crafts Matter for Kids
Engaging kids in Easter crafts is more than just a fun activity – it’s an essential part of their development. As they work on creative projects, children are refining their fine motor skills, hand-eye coordination, and creativity.
For instance, activities like coloring eggs or making paper plate bunnies require precision and control, helping improve dexterity in small muscles. Meanwhile, Easter-themed puzzles, mazes, and crafts challenge spatial awareness and problem-solving abilities. These skills may seem simple now, but they lay the groundwork for future academic success and daily life.
Creativity is another vital aspect fostered through Easter crafts. By experimenting with various materials and techniques, kids develop their imagination and critical thinking. Think about it – when children create an Easter egg centerpiece using natural dyes or make a handprint bunny, they’re exercising their artistic expression. This process encourages them to explore, question, and innovate.
As you plan your Easter craft activities, remember that the most important aspect is to let kids take the lead. Allow them to experiment with different materials, even if it means making mistakes. The process of learning and creating together will be a treasured memory for both you and your child.
Brief Overview of Easter Traditions
Easter is a time-honored celebration that brings people together with its rich history and symbolism. At its core, Easter represents the renewal of life and hope, making it an ideal time for creative expression. One of the most iconic symbols associated with Easter is the egg, which has been imbued with spiritual significance across cultures.
The tradition of decorating eggs dates back to ancient times when they were seen as a symbol of new life and rebirth. In many Eastern European countries, eggs are dyed red to represent the blood of Christ. The bunny, another beloved Easter icon, is thought to have originated from pre-Christian fertility goddess worship. According to folklore, the rabbit’s prolific breeding was seen as a sign of abundance and fertility.
As spring begins to awaken from its winter slumber, Easter serves as a poignant reminder of nature’s cyclical renewal. By embracing these themes in your craft projects, you can create meaningful and engaging activities for kids that delve into the heart of Easter traditions.
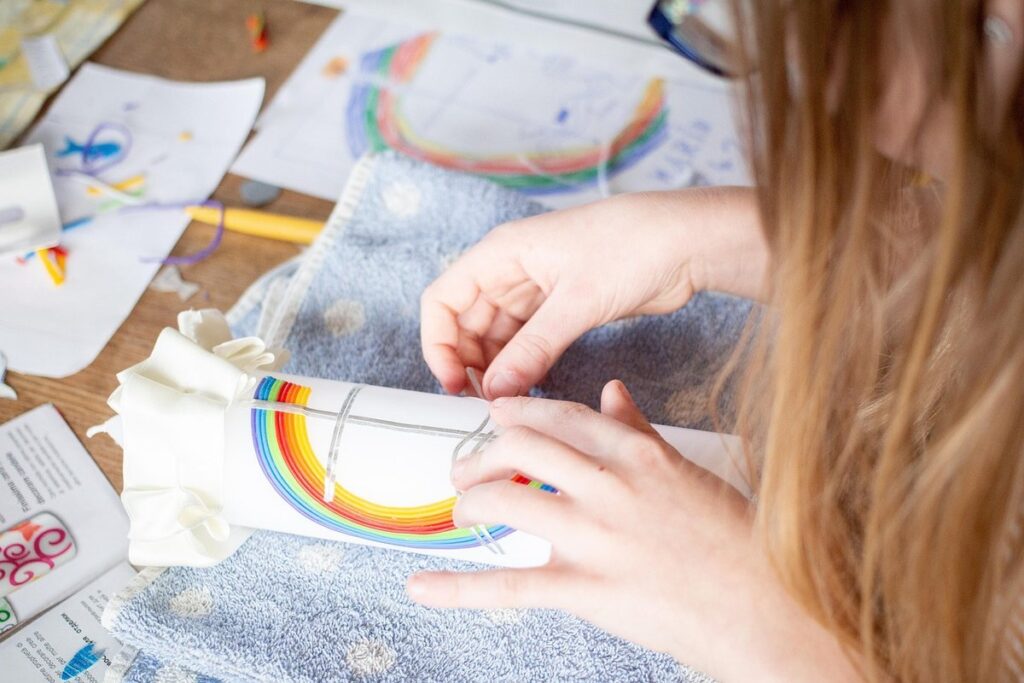
Egg-stra Special Handicrafts
Get creative with these egg-stra special handicraft ideas, from colorful Easter eggs to adorable bunny decorations that are sure to delight your little ones. You’ll find inspiration for a variety of projects here!
Decorated Eggs: Dyeing and Painting Techniques
Let’s get creative with our Easter eggs! Decorated eggs are a classic Easter handicraft that can be tailored to suit any style or skill level. If you’re looking for some inspiration beyond the usual dye kits, we’ve got you covered.
One way to create unique and natural-looking eggs is by using plant-based dyes. Try boiling onion skins, turmeric, or coffee in water to create a range of earthy tones. For a more vibrant approach, consider natural food coloring like beets, blueberries, or raspberries. These colors will not only add depth but also infuse the egg with a subtle scent.
If you prefer a more structured approach, try an egg decorating kit. These usually include various paints and stencils to help your child’s creativity shine through. Alternatively, experiment with unique techniques like wax resist or shibori for intricate patterns and textures. To incorporate shibori into your design, tie knots in a piece of thread around the egg before dyeing – the result will be a beautiful, marbled effect.
For an added touch, encourage your child to get creative with their designs. Suggest adding glitter, stickers, or other embellishments to give the eggs some extra flair. With these techniques, you’ll be on your way to crafting beautifully decorated Easter eggs that are sure to impress family and friends alike!
Paper Mache Easter Eggs
Creating paper mache Easter eggs is a fun and creative activity that kids will love. Not only does it allow them to express their artistic side, but it also helps develop their fine motor skills through the process of applying layers of paper mache.
To get started, you’ll need some basic materials: balloons, newspaper or paper strips, glue, water, scissors, and paint. Blow up a balloon to the desired size for your egg, then cut strips of newspaper or use whole sheets of paper to create a uniform layer. Soak the strips in a mixture of glue and water, apply them to the balloon, and let it dry completely.
Repeat this process several times, allowing each layer to dry before adding the next. Once you’ve built up enough layers, pop the balloon inside and remove it carefully. Your paper mache egg is now ready for decoration with paint or other embellishments. With a little patience and creativity, your kids can create truly unique and beautiful Easter eggs that will be treasured for years to come.
This activity not only encourages creativity but also helps develop fine motor skills through the process of applying layers of paper mache.
Bunny-themed Handicrafts for Kids
Get creative with adorable bunny-themed crafts, from paper plate bunnies to handprint art, perfect for little ones to make and cherish during Easter.
These fun and easy projects are ideal for kids of all ages, encouraging their imagination and creativity while having a blast making something special.
Felt Bunny Craft: A Step-by-Step Guide
Creating a felt bunny is an exciting and easy craft project that kids can enjoy. You can either use pre-cut shapes or make your own DIY shapes from felt sheets. For beginners, using pre-cut shapes is a great way to start as it saves time and ensures accuracy.
To begin with the pre-cut method, take two small circles for the head and ears, and one long oval shape for the body. Cut out two smaller ovals for the front legs and two larger ovals for the hind legs. You’ll also need some black felt for the eyes, nose, and mouth. Place the head circle on top of the body, followed by the ears and attach them with a needle and thread.
For those who prefer DIY shapes, simply use a cookie cutter or draw the desired shape freehand onto the felt sheet and cut it out carefully. This method allows kids to experiment with different textures and patterns. When using pre-cut shapes, you can also add some texture by gluing on some fabric scraps, buttons, or ribbons.
Tips: To make your felt bunny more realistic, use different shades of pink for the ears and body to create a gradient effect. Also, don’t forget to leave space between the head and body to ensure it looks balanced.
Bunny Ear Headband: A Fun Accessories Project
Creating a bunny ear headband is an excellent way to get kids involved in craft-making and add a playful touch to their Easter celebrations. To make one, you’ll need some basic materials like felt sheets (in various shades of pink, blue, or white), scissors, glue, elastic headbands, and some decorative items such as ribbons, buttons, or glitter.
Start by cutting out two identical bunny ear shapes from the felt sheets. You can either use a template or draw the shape freehand. Once cut, glue them to one end of the elastic headband. Make sure they’re securely attached so they don’t come off while wearing.
Encourage kids to customize their headbands with embellishments like ribbons, buttons, or even glitter. For example, you can add some colorful threads to create a bow tie effect or use small buttons to create “eyes” for the bunny ears.
Some fun variations of this project include using different materials like yarn, fleece, or fabric paint to make the headbands more vibrant and personalized. Remember, it’s all about letting kids’ creativity shine through in their handmade creations!
Spring-themed Handicrafts for Easter
As Easter approaches, let’s hop into some fun and creative spring-themed handicraft ideas that your little ones will love making and displaying in their rooms. From eggs to bunnies, we’ve got you covered!
Paper Plate Butterflies and Flowers
Get ready to unleash your little one’s creativity with this fun and easy Easter handicraft! Creating paper plate butterflies and flowers is an excellent way to develop fine motor skills while encouraging imagination. Gather a few simple materials like construction paper, scissors, glue, and some colorful markers.
To make the butterfly wings, start by cutting out two identical shapes from the construction paper. Help your child decorate each wing with markers or paint, adding patterns, colors, or even glitter for extra fun. Next, cut out small circles from another piece of construction paper to create the body of the butterfly. Use glue to attach the wings to the body, and voila! Your little artist has just created a beautiful paper plate butterfly.
For flowers, you’ll need some green paper for the stems and leaves. Cut out multiple petal shapes in various colors and help your child arrange them on the stem. Add some glitter or stickers to make it more interesting. To attach the petals to the stem, use glue. This simple yet engaging activity will keep your little one entertained while developing their fine motor skills. Encourage them to experiment with different colors, patterns, and designs, making each piece unique and special.
Easter Tree Craft: A 3D Masterpiece
Creating a 3D Easter tree is an exciting and creative project that can be tailored to your child’s interests. You’ll need a sturdy base such as cardboard or foam board, some branches (you can use real ones or fake ones made of paper or plastic), and decorations like glitter, stickers, or paint.
To begin, help your child cut out the tree shape from the cardboard or foam board. Make sure it’s large enough to hold several branches. Next, cut a few slits on either side of the trunk to insert the branches. This will create the 3D effect and allow you to arrange the branches as desired.
Now it’s time for decoration! Use glue to attach some colorful decorations like stickers or glitter to the branches and tree base. You can also use paint to add a fun design or pattern to the Easter tree. Let your child’s imagination run wild with this project – they can choose the colors, patterns, and themes that suit their taste.
Some practical tips: use recycled materials whenever possible, and encourage your child to think about what the Easter tree represents (new life, renewal, etc.).
DIY Easter Decorations for the Home
Get creative and make some adorable Easter decorations with your kids at home, using just a few simple materials and some imagination.
This section is packed with fun and easy DIY ideas that are perfect for little ones to get involved and show off their artistic skills.
Paper Bag Bunny Footprint Garland
Create a whimsical Easter decoration for your home with our Paper Bag Bunny Footprint Garland project. This fun and interactive activity is perfect for kids to develop their fine motor skills while working together as a team.
To get started, gather some paper bags, scissors, glue, string or twine, and markers. Cut out bunny footprints from the paper bags and have your child decorate them with markers, adding names or messages if desired. This personalized touch will make the garland extra special for years to come.
Next, help your child arrange the decorated footprints in a pattern along the string or twine, leaving space between each one for a playful effect. Use glue to secure the footprints in place, making sure they’re evenly spaced and balanced. As you work together, encourage your child to experiment with different placement and spacing of the footprints.
This project not only produces a charming Easter decoration but also promotes teamwork and fine motor skills development through cutting, gluing, and arranging. The best part? Your child can take pride in creating something unique and special for your home’s Easter celebration!
Yarn Pom-Pom Bunnies: A Colorful Decoration
Creating yarn pom-pom bunnies is an easy and fun DIY project that can add a pop of color to your Easter decorations. To start, you’ll need some basic materials: yellow and pink yarn for the bunny’s body and ears, white yarn for the paws, and a black marker for the eyes. You’ll also need a pair of scissors, a fork (yes, a fork!), and a piece of cardboard.
Begin by wrapping the yellow or pink yarn around the fork to create the pom-poms. Cut the yarn to create individual balls. Repeat this process until you have enough pom-poms for your bunny’s body and ears. To assemble the bunny, use a small amount of glue to attach the pom-poms together in a bunny shape. Add some white yarn paws and draw on some cute eyes with a black marker. You can hang these adorable bunnies from a mobile or use them as gift toppers for Easter baskets.
This project is perfect for kids aged 5-10, and it’s an excellent way to teach them about colors, shapes, and textures while having fun crafting together!
Easter Basket Craft Ideas
Get creative and make this Easter season even more special by making your own unique Easter baskets using these fun and easy craft ideas, perfect for kids to try!
Recycled Material Easter Basket: An Eco-Friendly Project
Get creative and give new life to old materials with our Recycled Material Easter Basket project. This fun and eco-friendly activity is perfect for kids to learn about sustainability while creating a one-of-a-kind Easter basket.
Gather the following recycled materials:
• Paper towel rolls
• Cardboard tubes (from toilet paper or paper towel rolls)
• Fabric scraps (old t-shirts, fabric remnants, or ribbons)
• Old magazines or cardboard sheets
• Scissors
• Glue
• Markers or paint
Cut the cardboard tubes into smaller sections and decorate them with markers or paint to create unique handles. Use glue to attach the tubes to a paper towel roll, creating the basket’s base. Meanwhile, cut out shapes from fabric scraps and old magazines to use as basket embellishments.
Let your child’s creativity shine by arranging the embellishments on the basket and adding any personal touches they like. This project teaches kids about reducing waste while encouraging their imagination and fine motor skills. With a little bit of glue and some recycled materials, you’ll have a stunning Eco-Friendly Easter Basket that’s both functional and environmentally friendly!
Felt and Button Easter Basket: A Cute and Colorful Option
Creating an Easter basket for your little ones is a fun and creative activity that they’ll cherish long after the holiday. Why not take it up a notch by making one using felt and buttons? This adorable accessory is a perfect blend of functionality and cuteness, and with just a few simple steps, you can create one to treasure.
To get started, gather the following materials: green or colored felt for the basket, various colors of felt for the handles and embellishments, a needle, thread, scissors, glue, and an assortment of buttons. You’ll also need some basic sewing skills and patience to bring your design to life.
When customizing your Easter basket, think about adding personalized touches that reflect your child’s interests or favorite colors. For example, you could use brightly colored felt for the handles or add a few decorative stitches around the edges. To make it even more special, consider adding a small gift or treat to the basket once it’s complete. With these simple steps and creative ideas, you can create an Easter basket that your child will love displaying in their room year-round.
Conclusion and Final Tips
Now that you’ve made some adorable Easter handicrafts, let’s wrap up our creative journey together with some final tips to make your projects shine.
Recap of Easter Handicraft Ideas for Kids
In conclusion to our Easter handicraft ideas for kids section, let’s recap some of the creative projects we’ve explored together. From decorating eggs using natural dyes to making adorable bunny masks, these activities are not only fun but also offer numerous benefits for young minds.
For instance, our DIY paper plate chicks project encouraged creativity and problem-solving skills while promoting fine motor development through cutting and pasting tasks. Similarly, the Easter bonnet-making activity fostered self-expression and confidence as children got to design their own hats using various materials.
These Easter handicraft ideas not only bring joy but also contribute significantly to kids’ cognitive, emotional, and social growth. They help develop essential life skills like patience, perseverance, and critical thinking while providing a platform for self-expression and creativity.
Remember, the key to making these projects successful is to keep them engaging, interactive, and relevant to your child’s interests. So, don’t be afraid to experiment and come up with unique ideas that cater to their needs and abilities. By doing so, you’ll not only create lasting memories but also set your kids on a path of creative exploration and learning.
Additional Resources for Parents and Educators
For parents and educators looking to create even more unique and engaging Easter handicrafts with kids, there are numerous resources available. Some excellent books that offer a wealth of creative ideas and techniques include “The Crafter’s Bible” by Leonie Burgess, which provides an extensive collection of projects for all skill levels, and “Get Crafty!” by Lisa Shepherd, which focuses on easy-to-follow instructions for various crafts.
In addition to books, there are numerous online resources that can serve as a valuable source of inspiration. The website “Craftsy” offers a wide range of video classes and tutorials specifically focused on Easter-themed crafts, while the Pinterest page “Easter Crafts for Kids” features an impressive collection of projects with step-by-step instructions.
To connect with like-minded individuals and gain even more insights into creating engaging Easter handicrafts, consider joining online social media groups such as Facebook’s “Easter Craft Ideas” group or Reddit’s r/EasterCrafts community.
Frequently Asked Questions
Can I adapt these Easter handicraft ideas for kids with special needs or abilities?
Yes, many of the crafts mentioned can be adapted to suit children’s individual needs. For example, using larger eggs or paper plates for easier handling, or providing pre-cut shapes for fine motor skills development. Be creative and involve your child in modifying projects to make them more accessible.
How do I ensure my kids’ Easter handicrafts are durable and long-lasting?
To extend the life of their creations, encourage children to use washable materials, like fabric paint or tempera paint, and to avoid using glue that may be prone to flaking off. You can also display their crafts in a protective case or frame.
Can I make Easter handicrafts with my toddler without worrying about mess?
Absolutely! Toddlers love creating art, and it’s an excellent way for them to develop their fine motor skills and hand-eye coordination. Set up a space where they can create freely, using washable materials and old sheets or smocks to protect clothing.
How do I store and display my kids’ Easter handicrafts after the holiday season?
To preserve their creations, consider displaying them in a special area of your home dedicated to children’s artwork. You can also use photo albums or scrapbooks to create a keepsake of your child’s artistic endeavors.
Can I incorporate other materials like recycled paper or natural dyes into my Easter handicrafts?
Yes, incorporating eco-friendly materials and techniques is a great way to promote sustainability and creative thinking in children. Consider using recycled paper for crafts or natural dyes like turmeric or coffee grounds for an environmentally conscious twist on traditional decorating methods.