
Easter is just around the corner, and with it comes the excitement of decorating our homes, creating special treats, and spending quality time with loved ones. But let’s be honest – planning an Easter celebration can sometimes feel overwhelming, especially when it comes to crafting and decorating. That’s why we’ve put together a collection of easy Easter crafts that will make your holiday season truly special and fun! From DIY decorations to gourmet treats, this article covers all the essentials you need to create a memorable Easter celebration without breaking a sweat. We’ll take you through simple yet creative ideas for egg decorating, paper flower making, and even some delicious Easter-themed recipes to impress your family and friends. Get ready to unleash your creativity and make this Easter one to remember!
Decorate Your Home with Spring-Inspired Themes
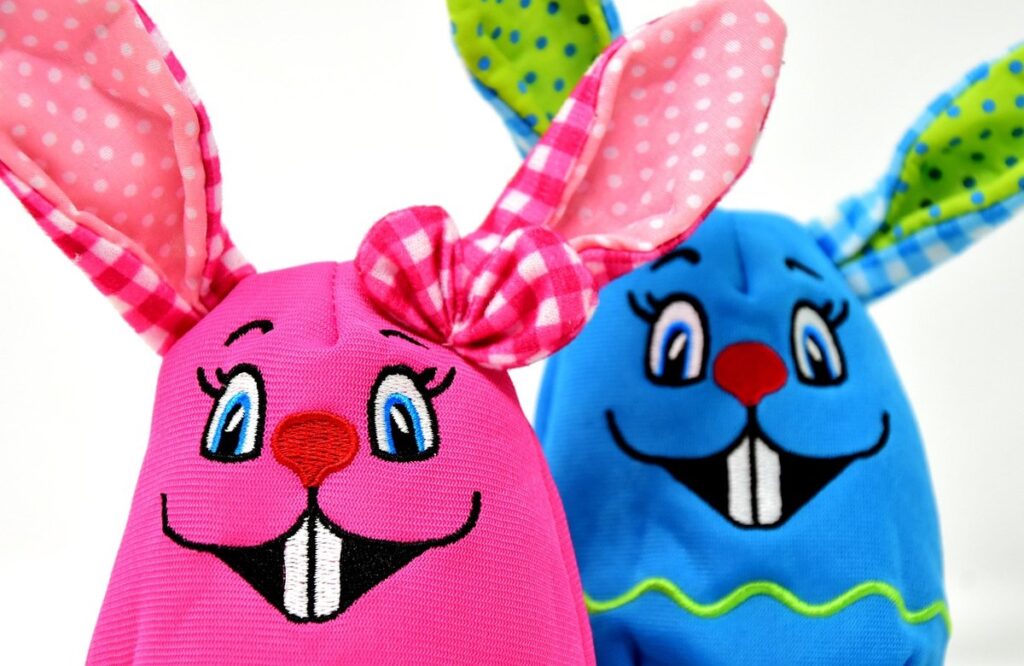
Bring the beauty of spring into your home with our easy Easter craft ideas, perfect for decorating your space and celebrating the new season in style. From fresh flowers to fluffy bunnies, get creative!
Create a Vibrant Easter Wreath
Creating an Easter wreath is a fun and easy DIY project that can add a pop of color to your front door or wall. To get started, gather materials like paper flowers in pastel shades, ribbons in matching hues, and some greenery for added texture. You’ll also need a wire or foam wreath base as the foundation.
Begin by attaching the paper flowers to the wreath base using hot glue. Start with the largest blooms and work your way down to the smallest. This will create a layered look that’s visually appealing. Next, wrap ribbons around the wreath in a random pattern to add depth and texture. You can also use floral tape to secure any loose ends.
To give your wreath some extra oomph, add a few sprigs of greenery like eucalyptus or ferns. Finish off the look by attaching a bow made from a matching ribbon at the top of the wreath. This will create a beautiful and festive Easter display that’s perfect for the spring season.
DIY Easter Centerpieces for the Table
Creating beautiful DIY Easter centerpieces for your dining table is a great way to add a touch of springtime charm to your home. With just a few simple materials and some creativity, you can create stunning centerpieces that will impress your guests.
To start, gather some basic supplies such as vases, candle holders, or wooden boxes in pastel colors or natural tones. Fill them with fresh flowers like tulips, daffodils, or hyacinths, which are classic springtime blooms. You can also add some greenery like eucalyptus or ferns to add texture and depth.
For a more rustic look, use mason jars filled with baby’s breath, pastel-colored eggs, or small potted plants like succulents or begonias. Don’t forget to add some decorative elements like ribbons, lace, or twine to give your centerpiece a whimsical touch.
Some popular DIY Easter centerpiece ideas include:
* Using a vintage wooden box as a base and filling it with spring flowers
* Creating a “nest” using twigs and filling it with small eggs or flower petals
* Making a paper flower garland in pastel colors to drape over the table
Remember, the key to creating beautiful DIY Easter centerpieces is to keep it simple and have fun!
Upcycled Easter Vase Decorations
Easter is just around the corner, and it’s time to get creative with your home decor. Why not give old vases a new life by transforming them into stunning Easter decorations? Upcycling old vases is an excellent way to add a personal touch to your spring-inspired theme without breaking the bank.
Start by gathering old vases in various shapes, sizes, and colors from around the house or thrift stores. Next, decide on the theme of your upcycle project – do you want to create a vintage Easter look or something more modern? Think about the colors and materials that will complement your chosen theme.
To get started, clean and dry the vases thoroughly. Then, apply a coat of paint or decoupage to give them a fresh new look. You can use pastel shades for a soft, spring-inspired color palette or bold Easter-themed prints like eggs, bunnies, or flowers. Add some decorative twine or ribbon around the neck of the vase for a charming finishing touch.
To take your upcycled vases to the next level, fill them with artificial flowers, greenery, or even fresh branches from your backyard. You can also add small Easter-themed decorations like bunny figurines, eggs, or other embellishments. With a little creativity and some basic crafting skills, you’ll have beautiful one-of-a-kind Easter vase decorations that will make your home stand out this spring season!
Easy-to-Make Easter Crafts for Kids
Get creative with your little ones and make some adorable Easter crafts that are easy to create, requiring minimal supervision and materials you likely have at home. From decorations to gift ideas, we’ve got you covered!
Paper Plate Bunny Masks
Get ready to hop into Easter fun with our adorable paper plate bunny masks craft! This easy-to-make activity is perfect for little ones to showcase their creativity while celebrating the season. To create these cute masks, you’ll need just a few simple materials: a paper plate, construction paper, scissors, glue, and some markers or crayons.
Start by cutting out ear shapes from the construction paper. You can use one large piece for both ears or cut two separate ones for a more realistic look. Cut out two small triangles from the remaining paper to create the nose. Glue these pieces onto the plate, positioning them about an inch apart.
Next, let your child’s creativity shine by decorating the mask with markers, crayons, or paint. They can add whiskers, eyebrows, and even a cute bunny mouth! Once dry, help them punch two small holes on either side of the plate for elastic or ribbon to tie around their head. With this mask on, they’ll be ready to hop into Easter festivities!
Finger Painting Easter Eggs
Making colorful Easter eggs with finger paints is an excellent way to encourage little artists to express themselves creatively. To get started, gather some basic materials: hard-boiled eggs, washable finger paints, paper towels, and a surface for painting.
Begin by blowing out the egg and gently washing it clean with soap and water. This will ensure that the paint adheres evenly and doesn’t peel off easily. Next, apply a thin layer of paint to each egg using your fingers – it’s okay if they get a bit messy!
To create unique designs, try layering different colors or mixing them together to achieve new shades. For example, blend blue and yellow for a calming green hue or mix red and white for a soft pink color. Let the kids experiment with different textures by adding salt, glitter, or even shredded paper for added dimension.
Remember to let each egg dry completely before handling them – this will prevent smudging or smearing. With a little creativity, your child can create beautifully decorated Easter eggs that are truly one-of-a-kind!
Popsicle Stick Easter Projects
Creating fun and easy Easter projects with popsicle sticks is a great way to keep kids engaged and entertained during the holiday season. These simple yet creative crafts are perfect for little ones to make their own decorations, gifts, or party favors.
To get started, gather some basic materials like popsicle sticks, glue, scissors, and paint. You can also add some decorative items like glitter, stickers, or ribbons to give your project a personalized touch. For example, you can make a simple Easter egg mobile by gluing the popsicle sticks together in a hexagonal shape, decorating each one with colorful paint or markers.
Another idea is to create a cute Easter bunny or chick using popsicle sticks and construction paper. Simply cut out the shapes, glue them onto a larger piece of cardboard, and add some wiggly eyes and a cotton ball nose for a playful touch. With a few simple steps, your little ones can create their own Easter-themed crafts that are both adorable and meaningful.
These projects are not only fun but also help develop fine motor skills and creativity in children. So go ahead and let your kids get creative with popsicle sticks this Easter!
Gourmet Easter Treats to Impress Your Guests
Elevate your Easter celebration with these deliciously easy gourmet treats that will wow your guests and leave them begging for more. From decadent chocolates to elegant pastries, we’ve got you covered!
Homemade Easter Egg Truffles Recipe
Indulge your guests with these decadent Easter egg truffles that are surprisingly easy to make. To create this heavenly treat, you’ll need 1 cup of dark chocolate chips (at least 60% cocoa), 8 ounces of cream cheese softened, and 1 teaspoon of vanilla extract.
Begin by melting the chocolate in a double boiler or in the microwave in 30-second increments, stirring between each interval until smooth. In a separate bowl, beat the cream cheese with an electric mixer until light and fluffy. Add the vanilla extract and mix well.
Once the chocolate has cooled slightly, fold it into the cream cheese mixture until fully incorporated. Cover the bowl with plastic wrap and refrigerate for at least 2 hours or overnight.
To shape the truffles, use a melon baller or spoon to portion out small balls of the mixture onto a baking sheet lined with parchment paper. Chill in the refrigerator for an additional 30 minutes before rolling between your hands to form smooth spheres.
Dust with confectioners’ sugar and enjoy as is, or coat in colored candy melts or sprinkles for added festivity. These bite-sized morsels are perfect for Easter gatherings or as a sweet surprise in Easter baskets.
Spring-Themed Cupcake Decorating Ideas
Transform your Easter celebration with these adorable spring-themed cupcake decorating ideas. As we welcome warmer weather and vibrant colors, why not infuse your holiday gathering with edible blooms? Pastel-colored sprinkles are a fantastic starting point for creating a whimsical look.
Try pairing soft pink or baby blue sprinkles with delicate white flowers like violas or pansies to add an air of elegance to your cupcakes. For a more playful approach, layer vibrant hues of yellow and green on top of a lightly frosted cupcake, mimicking the appearance of spring foliage.
To give your cupcakes an extra touch of whimsy, experiment with edible flowers like lavender buds or tiny rose petals. When using real flowers, be sure to use food-grade options specifically designed for consumption. Simply place them atop your frosted cupcake and enjoy the subtle pop of color they bring.
For a more structured approach, consider creating patterns with pastel sprinkles by pipelining or piping borders around the edges of each cupcake.
DIY Gourmet Hot Cross Buns Recipe
Making homemade hot cross buns is a simple yet impressive way to add a personal touch to your Easter celebrations. With just a few ingredients and some basic kitchen equipment, you can create these sweet, spicy, and savory treats that are sure to impress your guests.
To start, you’ll need 1 cup of warm milk, 2 teaspoons of active dry yeast, and 3 tablespoons of sugar. In a large mixing bowl, combine the milk, yeast, and sugar, stirring gently until the yeast is dissolved. Let this mixture sit for 5-10 minutes, or until it becomes frothy and bubbly.
Next, add 4 cups of all-purpose flour, 1 teaspoon of salt, 2 teaspoons of ground cinnamon, and 1/2 teaspoon of ground nutmeg to the bowl. Mix until a sticky dough forms, then knead for 10-15 minutes until the dough becomes smooth and elastic.
Finally, add in your dried fruits – such as raisins or cranberries – and mix until they’re evenly distributed throughout the dough. Divide the dough into 12 equal pieces, shape each piece into a ball, and place them on a baking sheet lined with parchment paper. Let these buns rise for 1 hour before baking at 375°F (190°C) for 18-20 minutes, or until golden brown.
Easter Crafts Using Nature’s Bounty
Get creative with what nature has already provided by using real eggs, leaves, and flowers to create beautiful Easter crafts that are both eco-friendly and adorable. We’ll show you how!
Pressed Flower Art for Easter Cards
Create beautiful and delicate pressed flower art for Easter cards using real flowers and cardstock. This unique technique is an excellent way to add a personal touch to your Easter greetings.
To get started, you’ll need some real flowers that are suitable for pressing, such as baby’s breath, daisies, or violas. You can use fresh or dried flowers, but make sure they’re completely dry before proceeding. Next, place the flowers between two sheets of paper towels and weigh them down with a heavy book. Let them sit for 2-3 weeks, allowing them to dry completely.
Once your flowers are dry, you can start creating your pressed flower art. Cut out intricate shapes from cardstock using scissors or a craft knife. You can use these shapes as a backing for your dried flowers, creating a beautiful and delicate design. To attach the flowers, simply apply a small amount of decoupage medium to the back of each petal and stick them onto the card.
Tips: Use a variety of flower colors and shapes to create a visually appealing design. Experiment with different cardstock patterns and textures to add depth to your art. Consider adding some additional embellishments, such as ribbons or lace, to give your card an extra special touch.
Pinecone Wreath Making Tutorial
Making a pinecone wreath is an easy and fun way to celebrate Easter with nature’s bounty. To start, gather some pinecones, twine, ribbons, and floral wire. You can collect pinecones from your backyard or nearby park – just be sure they’re dry and free of debris.
Begin by wrapping the twine around a Styrofoam ring or a wire wreath frame to create the base of your wreath. This will help secure the pinecones in place. Next, start attaching the pinecones using floral wire. Begin at the bottom of the wreath and work your way up, overlapping the pinecones as you go. This will create a full and lush look.
Add some ribbons or bows to give your wreath a pop of color and Easter spirit. You can use any combination of colors that match your home’s decor or Easter theme. Some ideas include pastel shades, bright spring colors, or even metallic accents. Once you’ve added the final touches, hang your pinecone wreath on your front door, wall, or mantel for a beautiful Easter display.
Seashell Easter Decorations
Adding a touch of ocean breeze to your Easter decor is easier than you think. Seashells are not only beautiful but also readily available, making them an excellent choice for creative and eco-friendly decorations. To incorporate seashells into your Easter theme, start by collecting various types of shells in different shapes, sizes, and colors.
Use these shells to create a stunning centerpiece or table runner by arranging them in a pattern or design on a piece of decorative fabric or ribbon. You can also fill glass vases or jars with shells for a beautiful and elegant display. For a more whimsical look, attach seashells to Easter eggs using glue or string, creating a unique and eye-catching decoration.
To add an extra touch, consider incorporating other natural elements like driftwood, starfish, or sand dollars into your design. This will not only create a coastal vibe but also tell the story of a beachy Easter celebration. With just a few shells and some creativity, you can transform your space into a seaside haven for the holiday season.
DIY Easter Gifts for Family and Friends
Looking for a thoughtful way to show your loved ones you care? We’ve got you covered with some adorable and easy DIY Easter gift ideas that are perfect for family and friends.
Photo Album Easter Gift Ideas
Creating a photo album gift is a thoughtful way to show loved ones you care. For Easter, you can give this idea an extra touch by incorporating spring-themed backgrounds and decorative embellishments. Start by choosing a beautiful background that reflects the season, such as a pastel pink or blue paper with floral patterns.
Next, gather your favorite photos of the family or friend from over the years. Arrange them in a way that tells a story or creates a sense of nostalgia. You can use photo corners or adhesive putty to secure the photos without damaging them.
Add some decorative embellishments like flowers made of tissue paper, spring-colored ribbons, or tiny Easter eggs. These will not only add visual appeal but also tie in with the Easter theme. Consider adding a handwritten message or caption to each photo for an extra personal touch.
To make it even more special, include a few blank pages where the recipient can fill in their own memories and photos from this past year’s celebrations. This way, your gift becomes a keepsake they’ll cherish for years to come.
Handmade Easter Candles Recipe
To create your own handmade Easter candles, you’ll need natural wax, essential oils, and colorful dyes. Start by melting 1 pound of soy wax flakes in a double boiler until it reaches 180-190°F. Meanwhile, mix 10 drops of your preferred essential oil with 2 tablespoons of carrier oil (such as jojoba or sweet almond oil). Add a few grains of mica powder to tint the melted wax.
Once the wax has cooled slightly, add the dye mixture and stir until well combined. Pour the colored wax into candle molds or apothecary jars. Allow the mixture to cool completely before removing it from the mold or jar. For an extra decorative touch, sprinkle a pinch of glitter on top of each candle before the wax hardens.
This Easter gift is not only eco-friendly but also allows for customization with your favorite fragrances and colors. Give these candles as gifts or use them to set a festive mood in your home. With this simple recipe, you can create beautiful handmade Easter candles that make thoughtful presents for family and friends.
Upcycled Easter Gift Boxes Tutorial
Get creative and give old gift boxes a new life by turning them into one-of-a-kind Easter gifts for your loved ones. This upcycling project is perfect for those who want to reduce waste and add a personal touch to their presents.
Start by collecting old gift boxes in various shapes, sizes, and colors. You can find these at thrift stores, garage sales, or even reuse last year’s Easter box. Once you’ve gathered your materials, it’s time to get creative. Clean and dry the boxes thoroughly before decorating them with paint, markers, or stickers.
Add a personal touch by filling the boxes with treats like chocolate bunnies, marshmallow Peeps, or small toys. You can also include handmade candies, decorated eggs, or other Easter-themed goodies. To make it more unique, fill each box with a customized note or card expressing your love and appreciation.
To give it an extra-special touch, you can add some decorative elements like ribbons, lace, or flowers around the lid or handle of the box. This DIY project is perfect for kids to participate in and learn about recycling and creativity. With a little imagination, old gift boxes can be transformed into thoughtful Easter gifts that will surely delight your family and friends.
Easter Traditions and History
Easter is a time-honored holiday steeped in tradition, and understanding its history can help you create crafts that truly capture the spirit of the season. Let’s dive into some fascinating Easter traditions and their origins.
The Origins of Easter Egg Decorating
The tradition of decorating Easter eggs dates back to ancient times. In many cultures, eggshell symbolized new life and renewal. The early Christians adopted this tradition and began decorating eggs as a way to celebrate the resurrection of Jesus Christ. Eggs were also seen as a symbol of fertility and prosperity.
In Ukraine, for example, Pysanky (traditional Easter eggs) are intricately decorated with wax and dye. Each design has specific meanings, such as the sun representing light and life. In other Eastern European countries, eggs were dyed red to represent the blood of Christ.
Today, Easter egg decorating has evolved into a fun family activity. To make your eggs truly special, try using natural dyes like beets, turmeric, or coffee. You can also experiment with different patterns and techniques, such as marbling or wax resist. Use a toothpick to create intricate designs or add some sparkly decorations for extra flair.
Consider making the process more meaningful by involving children in the decorating process. Share stories about the origins of Easter egg decorating and let them choose their own colors and designs. This way, your eggs will be not only beautiful but also hold personal significance.
Easter Symbolism and Meaning
Easter is a holiday rich in symbolism and meaning, with many of its traditions dating back centuries. At the heart of Easter celebrations are several beloved symbols that hold significant importance. The Easter bunny, for example, has its roots in Germanic tradition, where it was believed to be a symbol of fertility and rebirth. According to legend, the Easter bunny would lay eggs for children as a sign of spring’s arrival.
Easter eggs themselves also carry symbolic meaning, representing new life and renewal. In many Eastern European cultures, it’s customary to dye eggs red, which signifies the blood of Christ. The act of decorating eggs is not only a fun activity but also holds deep spiritual significance. By cracking open an egg, you’re symbolically breaking free from the old and embracing the new.
In modern times, Easter symbols have evolved, but their meaning remains unchanged. When decorating your home or participating in Easter activities with family and friends, consider the rich history behind these beloved traditions. By understanding the symbolism, you’ll be able to appreciate the significance of each activity on a deeper level.
Spring Equinox Celebrations Around the World
As you explore Easter traditions and history, it’s fascinating to note that many cultures around the world celebrate the arrival of spring with unique festivities. The spring equinox marks a significant moment when day and night are balanced, symbolizing renewal and growth.
In ancient Greece, for example, the spring equinox was celebrated as Hilaria, where people honored Cybele, the goddess of fertility. They would light fires, sing hymns, and even reenact the myth of Dionysus’ resurrection. Similarly, in Japan, the spring equinox is known as Shubun, a day to honor the sun god and appreciate nature’s beauty.
In many cultures, the spring equinox is also associated with themes of renewal and fertility. In some African countries, people wear traditional clothing made from natural fibers to celebrate the season’s arrival. The Irish, on the other hand, hold festivals like Bealtaine, where they light bonfires to mark the beginning of summer.
These celebrations remind us that Easter, a holiday often tied to springtime, has its roots in ancient cultures’ reverence for nature and the changing seasons. By embracing these traditions, we can connect with our global community and appreciate the beauty of new life bursting forth around the world.
Frequently Asked Questions
Can I use recycled materials for my Easter crafts?
Yes, using recycled materials is a great way to make your Easter crafts even more eco-friendly and unique! Consider using old cardboard tubes, fabric scraps, or newspaper for creative projects like making paper flowers or decorating eggs. Get creative and think outside the box!
How long do Easter wreaths typically last indoors?
Easter wreaths can last for several weeks when properly maintained. To extend their lifespan, avoid exposing them to direct sunlight, moisture, or extreme temperatures. Gently dust the wreath with a soft brush every few days to maintain its appearance.
Can I customize the Easter craft ideas according to my child’s age and skill level?
Absolutely! Our easy Easter crafts are designed to be adaptable for children of various ages and abilities. For younger kids, consider simpler projects like finger painting eggs or making paper plate bunny masks. Older kids can try more complex tasks like making upcycled vases or decorating cupcakes.
What if I’m not crafty or artistic? Can I still create beautiful Easter decorations?
Don’t worry – you don’t need to be a skilled crafter to make stunning Easter decorations! Focus on simple, yet elegant ideas like arranging fresh flowers in a vase or using store-bought decorations. Even the most basic designs can add a touch of spring charm to your home.
How do I ensure my DIY Easter crafts are durable and long-lasting?
To extend the life of your DIY Easter crafts, use high-quality materials and follow our step-by-step tutorials carefully. For example, when making paper flowers, use acid-free paper and adhere them securely with hot glue. Avoid exposing fragile items to moisture or extreme temperatures to prevent damage.