
Pumpkin season is finally here, and what better way to get into the autumn spirit than by creating some fun and creative masterpieces with your little ones? If you’re anything like me, you’re probably searching for easy pumpkin painting ideas that will keep your kids engaged and excited all season long. But let’s be real – who has time to worry about messy paint sessions or complicated designs when we could be enjoying quality time together as a family?
In this article, I’ll share my top picks for simple and creative pumpkin painting ideas perfect for kids. From step-by-step tutorials to expert tips on how to make this autumn activity a fun and memorable experience, you’ll find everything you need to get started right here.
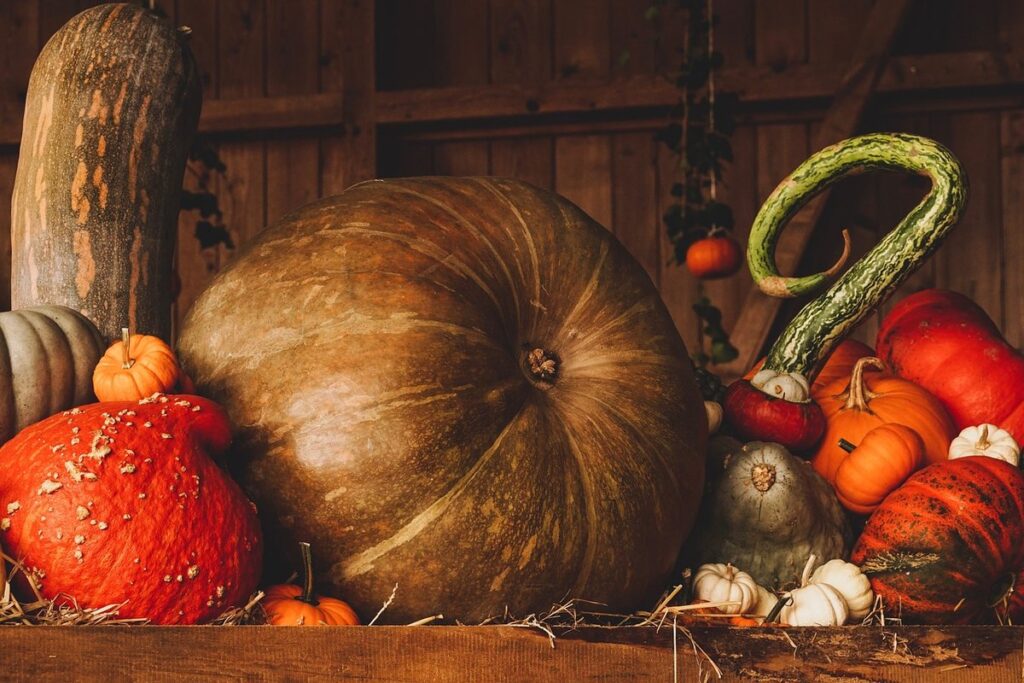
Introduction to Pumpkin Painting
Welcome to our guide on easy pumpkin painting ideas for kids, where we’ll explore the simple steps and fun designs to get your little ones creative juices flowing. We’re excited to share our favorite techniques with you!
Brief History of Pumpkin Decorating
Pumpkins have been a staple of autumn celebrations for centuries, and their use as decorative items dates back to ancient cultures. In North America, indigenous peoples used pumpkins as a food source during the harvest season, but they also found creative ways to decorate them with intricate carvings and paintings.
In Europe, pumpkins were introduced by early settlers and became a popular decoration for autumn celebrations. The tradition of carving jack-o’-lanterns is believed to have originated in Ireland, where people would carve turnips and other root vegetables to make lanterns for the festival of Samhain. When European settlers arrived in North America, they found that pumpkins were easier to carve than turnips, and the jack-o’-lantern was born.
Today, pumpkin decorating is a beloved activity around the world, with many cultures incorporating their own unique twists and traditions. From simple paint designs to elaborate carvings, there’s no shortage of creative ways to decorate a pumpkin. And with the rise of DIY crafting, it’s easier than ever for families to get in on the fun and create their own special autumn decorations.
The history of pumpkin decorating is a rich one, full of cultural influences and traditions that have evolved over time.
Importance of Arts and Crafts for Kids
Engaging kids in arts and crafts activities is essential for their cognitive and emotional development. Research has shown that regular participation in creative pursuits can have a significant impact on young minds. One of the most notable benefits is the improvement of fine motor skills, which are developed through the precise movements involved in painting and crafting.
As your child works with different colors, textures, and techniques, they will also experience an increase in creativity. Arts and crafts projects encourage experimentation and imagination, allowing kids to express themselves freely without fear of failure. This, in turn, helps build their self-esteem and confidence as they see the fruits of their labor take shape.
In addition to these benefits, arts and crafts activities provide a much-needed break from screen time, giving your child a chance to relax and unwind while engaging their creative side. To incorporate pumpkin painting into your arts and crafts routine, start by setting up a designated space with washable paints and paper. Encourage your child to explore different colors and techniques, and most importantly, have fun!
Materials Needed for Pumpkin Painting
To get started with decorating, you’ll need a few simple materials that can be found at most craft stores or even in your own kitchen. These essentials will help bring your design to life!
Types of Paints Suitable for Pumpkins
When it comes to painting pumpkins with kids, choosing the right paint is crucial for creating vibrant and long-lasting designs. There are several types of paints that are suitable for pumpkin painting, each with its own unique characteristics.
Watercolor paints are a popular choice for pumpkin painting because they are easy to blend and can create beautiful, soft washes. However, keep in mind that watercolor paints may not provide the same level of durability as other options, so be prepared for them to fade slightly over time. To achieve the best results with watercolor paints, make sure to use a waterproof varnish to seal your design.
Acrylic paint is another excellent option for pumpkin painting. It dries quickly and comes in a wide range of vibrant colors. Since acrylic paint is relatively thick and easy to control, it’s perfect for kids who are just starting out with pumpkin painting. Just be sure to clean up any spills immediately, as acrylic paint can stain.
Tempera paint is also a great choice for pumpkin painting. It’s inexpensive and comes in many bright colors that are perfect for kids’ designs. However, tempera paint tends to dry slowly compared to other options, so plan accordingly when working with it.
Tools Required for a Smooth Process
To ensure that your pumpkin painting project with kids goes smoothly, it’s essential to have the right tools on hand. Here are some of the must-haves for a fun and creative experience:
Start by gathering various paintbrushes in different sizes and shapes. Natural-bristle brushes work best for oil-based paints, while synthetic brushes are ideal for watercolor or acrylics. Make sure to include detail brushes for intricate designs and large flat brushes for broad strokes.
In addition to brushes, you’ll also need sponges in different textures and sizes. These can be used to create unique patterns and effects on your pumpkin’s surface. You can also use foam brushes or even household items like credit cards or plastic spreads to achieve similar results.
Stencils are another great tool for kids to use when painting pumpkins. They come in various shapes, sizes, and designs, making it easy to create intricate patterns without having to freehand the design. You can find stencils specifically designed for pumpkin painting at most craft stores or online.
Easy Pumpkin Painting Ideas for Beginners
Get ready to unleash your little artist’s creativity as we dive into some fun and easy pumpkin painting ideas that are perfect for kids of all ages! From simple designs to more intricate patterns.
Simple Design Ideas for Kids
Painting pumpkins is an excellent way to introduce kids to the world of art and creativity. It’s also a fun activity that can be enjoyed by the whole family. For little ones, simple design ideas are perfect for their first foray into pumpkin painting. Here are some easy-to-follow designs that your child will love:
Stripes: Who doesn’t love stripes? They’re classic, easy to paint, and always look great on a pumpkin. Simply use a brush or sponge to create horizontal or vertical stripes. You can use one color or mix and match different hues for a fun, multi-colored effect.
Polka Dots: Polka dots are another cute design that kids adore. Use a small round brush or toothpick to paint evenly spaced dots all over the pumpkin. Your child can choose from various colors or stick with just one – it’s up to them!
Leaves: Leaf designs are perfect for fall and add a touch of whimsy to your painted pumpkin. Use a leaf-shaped cookie cutter to cut out leaves from construction paper, then help your child glue them onto the pumpkin. You can also paint on individual leaves using green or brown paint.
Remember, don’t worry too much about perfection – it’s all about having fun and expressing yourself creatively!
Tips for Creating a Balanced Design
When creating a balanced design on your pumpkin, remember that balance is all about harmony. You want to achieve a sense of visual equilibrium by considering three key elements: color, texture, and composition.
Start by choosing colors that complement each other. For instance, pairing warm colors like orange and yellow with cool colors like blue and green creates a nice contrast. Consider the 60-30-10 rule: use a dominant color for 60% of the design, a secondary color for 30%, and an accent color for 10%. This will help you create visual interest without overwhelming the viewer.
To add texture to your design, think about incorporating different materials like glitter, stickers, or even decoupage. You can also use sponges or brushes to create unique textures with paint. As for composition, remember that balance is not just about symmetry – it’s about creating a visually appealing arrangement of elements. Experiment with asymmetrical designs and consider using visual weight to draw the viewer’s eye towards a specific area.
By considering these factors, you can create a balanced design on your pumpkin that’s both beautiful and meaningful!
Encouraging Kids to Get Creative
When it comes to encouraging kids to get creative with pumpkin painting, it’s essential to create an environment that fosters experimentation and exploration. Start by letting them pick their favorite colors and paintbrushes – the more vibrant and varied, the better! This freedom of choice will not only spark their imagination but also give you a glimpse into their personality.
To take creativity to the next level, try incorporating different techniques such as dripping, splattering, or even using household items like sponges or coffee filters to create unique textures. For example, dipping a sponge in paint and applying it to the pumpkin can produce an interesting, multi-dimensional effect. Don’t be afraid to get messy – after all, that’s what makes art so exciting!
Another idea is to set up a “painting station” with various materials like glitter, stickers, or stencils for kids to incorporate into their design. This will not only add visual interest but also encourage them to think outside the box and try new things. Remember, it’s all about having fun and making memories – so let your little ones take the reins and see what masterpiece they create!
Intermediate Pumpkin Painting Ideas
Now that you’ve mastered basic pumpkin designs, it’s time to get creative and try more intricate patterns, shapes, and styles for a truly unique look. Let’s dive into some intermediate-level ideas to wow your friends and family!
Using Stencils and Masks
Using stencils and masks is an excellent way to add intricate designs to your pumpkin without too much fuss. For example, you can use a flower stencil to create a beautiful bouquet on your pumpkin’s surface. Simply place the stencil where you want the design to be, and use a paintbrush to fill in the gaps with your chosen color.
If you’re looking for something more unique, try using a mask to block off areas of the pumpkin while you paint. For instance, you can create a cute animal face by painting the body first, then using a mask to protect it as you add details like whiskers and eyes. Geometric shapes are also easy to achieve with stencils or masks – just place them on your pumpkin and fill in the design.
To take your stencil game to the next level, try layering different designs or experimenting with different colors and patterns. This will give your pumpkin a truly one-of-a-kind look that’s sure to impress.
Layering Colors for Depth and Dimension
Layering colors is an excellent technique to add depth and dimension to pumpkin designs. By applying colors in layers, you can create a sense of volume and texture that makes your design pop. Start by painting the background color first, allowing it to dry completely before adding subsequent layers.
Use a darker shade for the shadows and mid-tones to give your design some depth. For example, if you’re painting a landscape on your pumpkin, use a darker green for the foliage in the back and lighter shades towards the front. This will create a sense of distance between the different elements.
You can also experiment with layering warm and cool colors together to create interesting contrasts. Warm colors like orange and yellow will always be drawn to the viewer’s eye, while cool colors like blue and green provide a calming background. Don’t forget to let each layer dry before adding more paint – this ensures that your design doesn’t get muddy or blendy.
Remember, practice makes perfect! The key is to experiment with different color combinations and see what works best for you.
Experimenting with Textures
Experimenting with different textures is an excellent way to add some excitement and uniqueness to your pumpkin painting design. You can try using various materials like glitter, sequins, or fabric paint to create a fun and tactile experience for the kids.
For example, you can use glue to attach small pieces of tissue paper or confetti to create a textured background or accent on your pumpkin. This is a great way to teach the kids about pattern-making and texture experimentation. Another idea is to use fabric paint or markers to add a rough, stitched look to your design. This can be achieved by painting in quick strokes or using a stencil.
Glitter and sequins are also fantastic additions to any pumpkin painting project. You can apply them directly onto the wet paint or use glue to attach them for added depth and visual interest. To take it up a notch, try mixing different textures together, like pairing glitter with fabric paint or sequins with tissue paper. This will create a one-of-a-kind design that’s sure to impress!
Advanced Pumpkin Painting Ideas
Take your pumpkin painting skills to the next level with these inspiring and creative ideas that are perfect for kids who want to try more complex designs. Get ready to unleash their artistic talents!
Using Natural Materials
When it comes to creating unique and eco-friendly pumpkin designs, incorporating natural materials is an excellent approach. Leaves, twigs, flowers, and even pinecones can be used to create stunning patterns and textures on your pumpkins.
Gather a variety of natural elements from your backyard or nearby park, and let the kids get creative! For example, use large leaves as stamps to create intricate designs on the pumpkin’s surface. Simply dip the leaf in paint, stamp it onto the pumpkin, and watch as the design develops.
You can also use twigs and branches to create 3D elements, such as a spider web or a miniature tree. Simply glue the twig onto the pumpkin and let the kids add details with paint or markers. Consider using real flowers like daisies or sunflowers to create a beautiful, delicate pattern on your pumpkin.
Remember, the key is to experiment and have fun! Encourage the kids to mix and match different materials to create one-of-a-kind designs that showcase their personalities and creativity. With a little imagination, natural materials can become an integral part of your pumpkin painting project.
Creating 3D Effects
When it comes to creating 3D effects on pumpkins, kids love the magic of bringing their designs to life. To achieve this illusion, you can try layering different textures and colors using various techniques. Start by painting a base color for your design, allowing it to dry completely before adding more details.
For added dimension, use a textured paint or a mixture of glue and water to create raised patterns. You can also experiment with different materials like glitter, sequins, or even real leaves to add an extra layer of depth. To make your design truly pop, apply a clear coat of varnish or Mod Podge to protect the surface and give it a glossy finish.
Remember, the key to creating 3D effects is experimentation and patience. Don’t be afraid to try new techniques or combine different methods to achieve the desired look. For example, you can paint a scene with layers of foliage and then add some raised textures using modeling paste. The results are sure to impress!
Collaborative Projects with Kids
One of the most rewarding aspects of pumpkin painting is doing it with kids. Not only does it foster creativity and self-expression, but it also promotes teamwork and collaboration. To make the most out of this experience, consider trying out some collaborative projects that can be enjoyed by both adults and children.
Here are a few ideas to get you started:
• Paint a large pumpkin together as a family, assigning each person a section or design element.
• Create a “paint-a-pumpkin” station with various materials like stickers, stamps, and stencils that kids can use to add their own unique touches.
• Work on a group mural using small pumpkins or even paper plates as canvases.
• Set up a “Pumpkin Decorating Challenge” where kids can compete in painting the most creative design within a set time frame.
To make it even more engaging, be sure to provide an array of paint colors and encourage kids to mix and match colors to create their own hues. As they work on their masterpieces, ask open-ended questions about their designs, such as “What inspired your choice of colors?” or “How did you come up with that idea?” This not only sparks creativity but also encourages kids to think critically about their art.
Tips and Tricks for a Stress-Free Pumpkin Painting Experience
To make your pumpkin painting experience a breeze, we’ve gathered some expert tips on how to prepare, paint, and even clean up afterwards in record time.
Preparing the Pumpkins
Before you start painting, it’s essential to prepare your pumpkins properly. Cleaning and drying them will ensure that your designs stick well and last throughout the fall season.
Start by gently scrubbing the pumpkin with a soft-bristled brush or a vegetable brush under running water to remove any dirt, wax, or debris from the surface. This will help create a clean slate for painting. Be sure to use a mild soap or detergent specifically designed for cleaning produce to avoid any harsh chemicals that might damage your design.
Once you’ve cleaned the pumpkin, dry it thoroughly with a soft cloth or paper towel. This is crucial, as any moisture can cause paint to peel off quickly. If you’re painting a particularly delicate design, consider using a hair dryer on a low setting to speed up the drying process.
Take your time with this step – it’s much easier to clean and dry your pumpkins now than to deal with a sticky or damp surface when trying to paint. With a clean and dry pumpkin, you’re ready to get creative!
Managing Mess and Clean-up
When working with little ones and paint, it’s only natural to expect a bit of chaos. To minimize mess and clean-up, we recommend having some essential supplies on hand. Cover the work surface with newspaper, plastic tablecloths or even an old sheet – anything that can protect against stains.
Prepare your pumpkins by wiping them down with a damp cloth before painting. This will help prevent paint from seeping into any grooves or ridges. Also, consider using washable paints specifically designed for kids to make clean-up easier.
To speed up the process, have a designated “paint station” where supplies are organized and within reach. Set out cups of water for washing brushes, as well as paper towels for drying. Have some soap on hand in case any paint gets on skin or clothing – it’s better to be safe than sorry!
As you work with your little artists, encourage them to wash their hands frequently and keep their workspace tidy. This not only promotes responsibility but also helps prevent a huge mess at the end. Remember, it’s okay if things get a bit messy – that’s half the fun! With these simple tips, you’ll be well-prepared for a stress-free pumpkin painting experience.
Making it Fun and Engaging
To ensure that pumpkin painting becomes an enjoyable experience for kids, it’s essential to infuse some fun and creativity into the activity. One way to do this is by setting up a “painting station” where kids can get hands-on and creative with their designs. This could include providing a variety of paints, brushes, and stencils that cater to different age groups and skill levels.
Another idea is to let your little artists express themselves through storytelling. Ask them to paint a scene or character from their favorite book or movie. Not only will this spark their imagination, but it also encourages creativity while connecting the activity to something they love.
For an added level of engagement, consider making pumpkin painting a collaborative effort between kids and adults. This can help build bonds within families while creating memories that last a lifetime. Don’t forget to play some upbeat music in the background to keep the atmosphere light-hearted and fun!
Conclusion and Final Thoughts
Now that you’ve created some amazing pumpkin masterpieces, let’s take a moment to reflect on what made these ideas so much fun for you and your little ones. What are some key takeaways from this creative adventure?
Recap of Key Takeaways
As we wrap up our exploration of easy pumpkin painting ideas for kids, let’s recap the key takeaways that will make your fall festivities a creative and memorable success. One of the most important things to remember is to keep it simple, especially when working with young children. This means choosing a design or theme that requires minimal details and can be accomplished with just a few strokes.
We also discussed the importance of using washable paints and materials, such as foam brushes or sponges, to make clean-up a breeze. Additionally, don’t forget to encourage your child’s creativity by allowing them to take ownership of their design choices – this will not only add to the fun but also help develop their fine motor skills.
By following these easy pumpkin painting ideas and tips, you’ll be well on your way to creating beautiful, one-of-a-kind pumpkins that showcase your child’s artistic talents. Remember, the most important thing is to have fun and enjoy the process of creating together – Happy Painting!
Encouragement to Get Creative
Now that you’ve had fun exploring these easy pumpkin painting ideas for kids, it’s time to get creative and take your project to the next level! Don’t be afraid to experiment with new techniques and try out different designs. Remember, the most beautiful pumpkins are often those that have a personal touch.
Try combining two or more of the ideas you’ve learned about in this post to create something truly unique. For example, why not paint a jack-o-lantern design on one pumpkin and then add some fun stickers or stencils to another? You could also use different colors, patterns, and textures to give your pumpkins a distinct personality.
Don’t worry if things get messy – that’s half the fun! Let your kids’ imagination run wild and see what amazing creations they come up with. With a little patience and practice, you’ll be amazed at what they can achieve. So go ahead, take a deep breath, and let your creativity shine through. Your pumpkins will thank you for it!
Frequently Asked Questions
Can I use any type of paint for pumpkin painting, or are there specific recommendations?
It’s essential to choose the right type of paint for your pumpkin decoration project. Acrylic paint is a popular choice due to its vibrant colors and fast-drying properties. Make sure to select paint specifically designed for pumpkins, as regular wall paint may not adhere well to the surface. You can also use spray paint or stencils for added creativity.
How do I prevent my pumpkin from getting too soggy or mushy during the painting process?
To ensure your pumpkin remains sturdy and intact, make sure it’s completely dry before starting the painting process. If you’re using a particularly soft pumpkin, consider applying a coat of clear varnish to protect it from moisture. This will also help extend the lifespan of your decoration.
Can I reuse my stencils or masks for future projects, or do they need to be replaced?
Stencils and masks can be reused multiple times with proper care. To clean them, gently scrub with soap and water, then let them air dry. If you notice any wear and tear, consider replacing them to ensure crisp designs.
What’s the best way to store my pumpkin decorations after the painting process is complete?
To preserve your artwork, store your pumpkin decorations in a cool, dry place away from direct sunlight. Avoid storing them in humid areas or near heating vents, as this can cause fading and damage. You can also consider applying a clear coat of varnish for added protection.
Can I use natural materials like leaves or twigs to create 3D effects on my pumpkin?
Yes! Using natural materials is an excellent way to add depth and dimension to your pumpkin design. Simply attach the leaves or twigs using a hot glue gun, or use a strong adhesive specifically designed for craft projects. Experiment with different textures and combinations for unique results.