
Are you looking for creative ways to encourage your little one’s artistic side? Crafting is an excellent way to foster fine motor skills, self-expression, and creativity in 3-year-olds. At this age, children are naturally curious and love exploring different textures, colors, and materials – making it the perfect time to introduce them to various art forms.
In this article, we’ll take you through a collection of fun and easy crafts designed specifically for 3-year-olds. From finger painting to collage-making, these activities will not only provide hours of entertainment but also help lay the foundation for a lifelong love of art. We’ll cover the benefits of crafting for young children, including improved hand-eye coordination and enhanced creativity, and share some practical tips on how to get started with minimal mess and maximum enjoyment!
Introduction to Crafting with Preschoolers
Starting a crafting routine with your three-year-old is all about exploration and creativity, not perfection. In this section, we’ll share tips for setting up a fun and engaging craft environment.
Benefits of Crafting for 3-Year-Olds
Crafting with 3-year-olds is not just a fun activity; it also offers numerous benefits that can shape their cognitive, emotional, and social development. One of the primary advantages is the improvement of fine motor skills. As children engage in various craft activities like painting, drawing, or cutting, they strengthen their hand muscles, enhancing their ability to hold utensils, write, and perform other tasks.
Crafting also provides an excellent opportunity for self-expression and creativity. Preschoolers can freely experiment with different materials, colors, and textures, allowing them to express their thoughts, feelings, and ideas in a unique way. For instance, you can give your child a set of crayons or paints and ask them to create whatever they imagine – be it an animal, a person, or even a fantasy creature. This freedom of expression helps build confidence and fosters creativity.
In addition, crafting with 3-year-olds promotes social skills as children engage in conversations with others while working on a project together. They learn essential life skills like sharing materials, taking turns, and cooperating with peers – all of which are crucial for developing strong relationships and a sense of belonging.
Preparing Your Child for Crafting Activities
When introducing your 3-year-old to crafting activities, it’s essential to create an environment that fosters creativity and experimentation. Start by setting aside a dedicated space for art projects, free from distractions and messes. This could be as simple as clearing off a corner of the living room or dedicating a small table in the playroom.
Next, talk to your child about what they can expect during crafting activities. Use simple language to explain that making messes is okay and that it’s all part of the creative process. You can also read books together that feature children engaging in art projects, helping them become familiar with different materials and techniques.
As you begin crafting sessions, encourage your child to explore and try new things. Avoid criticism or correction, which can stifle their creativity. Instead, ask open-ended questions like “What do you think will happen if we add more glue?” or “How do you think we can make this shape look different?”
Make sure to have a variety of materials available for your child to choose from, including washable paints, crayons, and markers. This will allow them to experiment with different textures and colors.
Finger Painting and Drawing
Little ones love getting messy, and finger painting is a great way to encourage creativity while making a mess together. In this section, we’ll explore fun ideas for finger painting and drawing projects.
Introduction to Finger Painting
Finger painting is an excellent way to encourage creativity and self-expression in 3-year-olds. To get started, you’ll need some basic materials. You can use washable paints specifically designed for kids, as they are easy to clean up and won’t stain clothing or surfaces. Paper or canvas is also essential, and consider using a large sheet to allow your little artist to create freely.
When it comes to techniques, keep in mind that the process of finger painting is just as important as the final product. Encourage your child to experiment with different motions, such as swirling, dabbing, and smearing the paint onto the paper. Suggest using their fingertips or palms to achieve varying effects. To make the experience even more enjoyable, play some fun music in the background or have a storytelling session while they work.
For beginners, try starting with simple exercises like painting straight lines or curvy shapes. This will help your child develop fine motor skills and build confidence in their artistic abilities. Most importantly, remember to let go of any expectations – finger painting is all about exploration and having fun!
Simple Drawing Exercises for 3-Year-Olds
At three years old, children are beginning to develop their fine motor skills through various activities, including drawing. Simple drawing exercises can be an excellent way to encourage this development while fostering creativity and self-expression. Start by introducing basic shapes, such as circles, squares, and triangles. Use large pieces of paper and a variety of colored markers or crayons to make the experience more engaging.
Encourage your child to draw lines of varying lengths and thicknesses, moving their arm in different directions. This will help them develop control and precision. Next, move on to basic forms like houses, trees, and flowers. Use stencils or tracing sheets with these shapes for added support. As they become more confident, gradually introduce simple objects, such as animals and people.
To take it up a notch, try creating a ‘fishing’ game where your child has to draw lines from their character’s hand to catch a fish on the other side of the paper. This interactive approach will make learning fun while practicing essential drawing skills.
Tips for Cleaning Up After Finger Painting
Cleaning up after finger painting can be just as much fun for 3-year-olds as creating their masterpiece! It’s essential to teach them that art is a process, and messes are an opportunity for learning. Here are some practical tips to help you clean up with ease:
To start, have smocks or old shirts on hand to protect your child’s clothes. You can also use a drop cloth or tablecloth to make cleanup even faster. Next, gather all the necessary cleaning supplies: soap, water, and paper towels.
Before getting started, give your child a quick rundown of what needs to be done. Explain that they’ll help clean up their painting area, wash their hands, and then put away materials. Encourage them to take ownership by letting them decide which parts need more attention.
When it’s time to clean the table or floor, use a soft-bristled brush to gently sweep off large pieces of paint. Follow this with soap and water for tougher stains. For little ones, make it a game by using a “paint-sweeping” motion with their hands!
Remember to praise your child’s efforts and progress as you clean together. This activity will not only teach them about responsibility but also the value of teamwork!
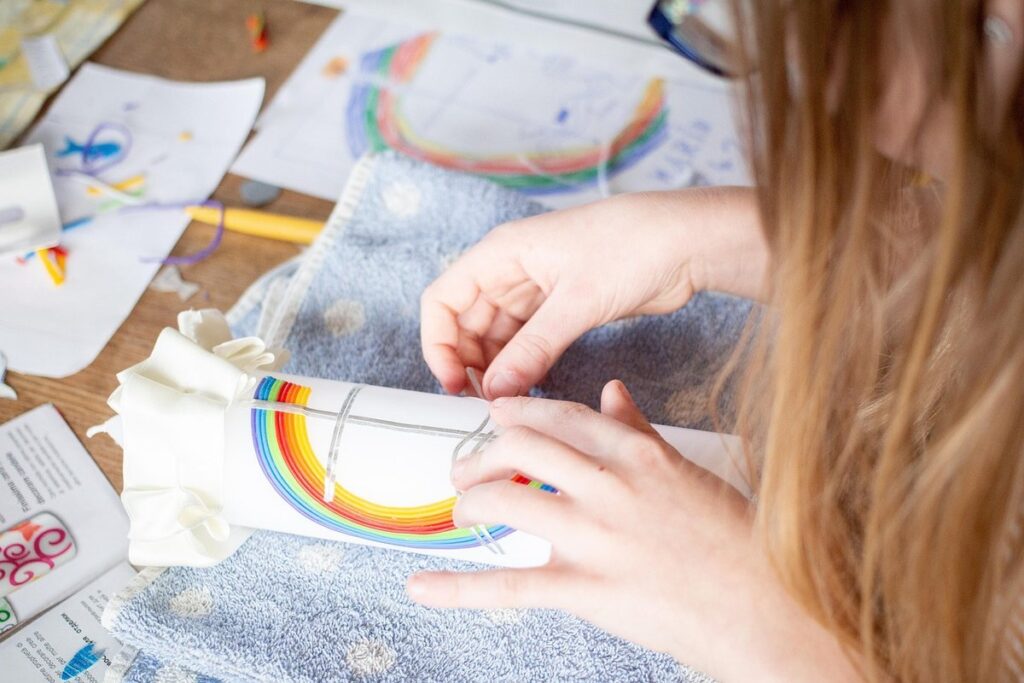
Collage Making with Preschoolers
Get ready to unleash your child’s creativity as we explore the simple yet effective process of creating collages using everyday materials that are perfect for preschoolers. We’ll share some fun ideas to get you started!
Introduction to Collage Making
Collage making is an exciting and engaging activity that can be adapted for 3-year-olds with a little creativity. At this age, children are naturally curious and love to explore different textures, colors, and materials. Collage making allows them to express their imagination and creativity while developing fine motor skills and hand-eye coordination.
To introduce collage making to your preschooler, start by collecting various materials such as paper scraps, glue sticks, scissors, and fabric remnants. You can also incorporate natural materials like leaves, flowers, or feathers to add texture and depth to their collages. Begin with simple projects like gluing different colored papers together or creating a collage using only primary colors.
As your child becomes more confident, you can introduce more complex materials like foam shapes, stickers, or even found objects from nature. Encourage them to experiment with different techniques such as tearing, cutting, and arranging their materials in unique ways. Remember, the most important aspect of collage making is allowing your child’s creativity to shine through!
Simple Collage Ideas for Young Children
When it comes to collage making with young children, you can’t go wrong with simple yet engaging ideas that promote creativity and fine motor skills. One of the best ways to get started is by creating a self-portrait. This activity allows children to explore their identity, experiment with colors and textures, and develop their hand-eye coordination.
To create a self-portrait collage, start by gathering various materials like construction paper, scissors, glue, markers, and any other embellishments you have on hand. Encourage your child to draw or cut out simple shapes for eyes, nose, mouth, and hair. They can then arrange these pieces onto a larger sheet of paper and glue them into place.
Another fun project is making a family tree. This activity helps children learn about their heritage while developing their fine motor skills through cutting and gluing. Use construction paper to create trunk and branches, and have your child draw or cut out pictures of family members to hang from the branches. You can also add names and dates to make it even more special.
Remember, the goal is to keep things simple and fun!
Encouraging Creativity in Collage Making
When working with preschoolers on collage making projects, it’s essential to encourage their creativity and imagination. One way to do this is by providing a variety of materials and textures for them to experiment with.
You can set up different stations with distinct art supplies, such as construction paper, felt, fabric scraps, and even found objects like leaves or seashells. This will allow your child to explore and combine different textures and colors in their collage. For example, you could create a “fuzzy” station with felt, a “patterned” station with printed paper, and an “organic” station with natural materials.
To further stimulate creativity, try using everyday objects as materials for collages. Cardboard tubes, egg cartons, and newspaper can all become exciting elements in your child’s artwork. Encourage them to think outside the box (or collage frame) and explore new ways to represent their imagination.
As you work alongside your child, ask open-ended questions like “What if we add some glitter?” or “How do you think this piece of fabric would look here?” This will not only foster creativity but also develop critical thinking skills.
Playdough and Modeling Clay Activities
Get ready for a fun and creative way to engage your little one’s imagination, as we explore playdough and modeling clay activities perfect for 3-year-olds. We’ll share some easy ideas to make these messy masterpieces!
Introduction to Homemade Playdough
Homemade playdough is a staple in many households with young children. Making your own playdough from scratch can be a fun and rewarding experience for 3-year-olds, as it allows them to explore the process of mixing and creating something new.
To make homemade playdough suitable for 3-year-olds, we’ll focus on using simple ingredients that are easy to find in most kitchens. A basic recipe typically includes flour, water, and food coloring. You can also add other ingredients like salt, oil, or cream of tartar to enhance the texture and consistency.
When adapting this recipe for 3-year-olds, keep in mind that they may have difficulty with complex instructions or precise measurements. To make it more accessible, try breaking down the process into simple steps, such as “add flour,” “add water,” or “add color.” You can also use visual aids like measuring cups and spoons to help them understand the concept of measurement.
Remember, homemade playdough is all about experimentation and creativity! Encourage your child to explore different textures and colors by adding various ingredients or using food coloring in unique ways.
Simple Modeling Clay Ideas for Preschoolers
When it comes to simple modeling clay ideas for preschoolers, you can’t go wrong with classic shapes and objects. One of the best ways to develop fine motor skills is by making different shapes using various tools such as rolling pins, cookie cutters, or even fingers. Encourage your little one to create a variety of shapes like balls, sticks, and squares.
You can also help them learn about dimensions by creating simple 3D objects like boxes, cones, or pyramids. This will not only enhance their fine motor skills but also introduce basic math concepts in a fun way. For instance, you can ask your child to create a box with a specific number of layers or shapes.
To take it a step further, try making small objects that come alive in the world of playdough and modeling clay. Create miniature fruits like apples, oranges, and bananas by rolling out the dough into cylindrical shapes and adding some details with toothpicks or skewers. Your child can also make simple animals like dogs, cats, or birds using modeling clay tools to add features.
Remember, always supervise your child while working with modeling clay and provide guidance as needed. The goal is to have fun and encourage creativity, not perfection!
Tips for Storing and Maintaining Playdough
Storing playdough is just as important as making it. If you don’t store it properly, it can dry out and become brittle. This makes it difficult for your child to mold and shape into the desired form.
To prevent this from happening, try storing your homemade playdough in an airtight container or plastic bag. You can also use a dedicated playdough storage container with separate compartments to keep different colors organized.
When storing playdough, make sure it’s wrapped tightly in plastic wrap or aluminum foil to prevent air from getting in. If you notice that your playdough is starting to dry out, simply knead it until it becomes smooth and pliable again.
It’s also a good idea to label the container with the date it was made so you can keep track of how long it’s been stored. As for maintaining playdough, make sure to clean up any mess immediately after use. This will prevent crumbs and dust from getting stuck in the dough and making it difficult to work with.
By following these simple tips, you’ll be able to enjoy your homemade playdough for a longer period of time and keep it looking fresh and new.
Sensory Bin Activities for 3-Year-Olds
Get ready to bring a new level of excitement to playtime with these engaging and easy-to-execute sensory bin activities tailored specifically for your curious three-year-old. They’ll love digging in!
Introduction to Sensory Bins
Sensory bins are a fantastic way to engage 3-year-olds in exploration and discovery. Essentially, sensory bins are containers filled with various materials that stimulate the senses through touch, sight, sound, smell, and even taste (although we’ll stick to safe options for little ones!). These bins can be adapted for different age groups and abilities by changing up the contents or adding new textures.
For 3-year-olds, it’s essential to use materials that are safe and easy to manipulate. Rice, beans, sand, and pasta are popular choices for sensory bin fillers. You can also add small toys or other objects for them to discover. For example, hiding a small toy or figurine in the rice or beans will encourage your child to search and explore using their hands.
When setting up sensory bins, remember to start with simple concepts and gradually introduce more complex ones. This age group is still learning about boundaries and control, so it’s essential to provide a safe and inviting environment for them to experiment. Be sure to supervise closely during these activities and encourage your child to use their imagination and creativity!
Simple Sensory Bin Ideas for Young Children
Sensory play is an excellent way to encourage creativity and develop fine motor skills in young children. When it comes to creating sensory bins for 3-year-olds, you don’t need to break the bank or have a large space to set up. In fact, some of the most engaging and interactive bins can be created with simple materials found around the house.
For example, try setting up a beach-themed bin by filling a container with sand, seashells, and small toy sea creatures. This bin encourages children to dig and scoop, developing their pincer grasp and hand-eye coordination. Alternatively, create a farm-themed bin filled with beans, small toy tractors, and plastic animals. This bin allows children to explore and engage in imaginative play while practicing their sorting and categorization skills.
Other simple sensory bin ideas include:
* A “muddy” bin filled with water and soap for kids to splash and play
* A “snow” bin made from shredded white paper or Styrofoam beads for a winter wonderland experience
* A “forest floor” bin filled with small rocks, leaves, and twigs for kids to explore and discover
Remember to supervise your child during sensory play and provide guidance on how to handle the materials safely. With a little creativity, you can create a world of discovery and exploration right in your own home!
Tips for Supervising Sensory Bin Activities
When supervising sensory bin activities for 3-year-olds, it’s essential to create a safe and engaging environment. One of the most critical aspects is setting clear boundaries and guidelines. For instance, you might say something like, “We need to use our hands only to dig and play with the rice, not our mouths.” This helps children understand what’s expected of them.
Another crucial aspect is being mindful of the materials used. Make sure they’re non-toxic and safe for the age group. Also, be prepared for a mess! Sensory bins can get messy quickly, so have some wipes and a trash can nearby to clean up spills as needed.
As children engage with the sensory bin, observe their behavior and intervene if necessary. For example, if one child is getting overwhelmed or frustrated, gently guide them towards a calmer activity. It’s also essential to supervise the number of children participating in each sensory bin to ensure everyone has enough space and can enjoy the experience safely.
Lastly, be creative and have fun! Encourage children to explore and experiment with different textures, colors, and smells. This is an excellent opportunity for them to develop their fine motor skills, hand-eye coordination, and imagination.
Music and Movement Crafts
Get ready for a fun twist on traditional crafts as we explore creative ways to incorporate music and movement into your child’s art-making adventures at home. We’ll share some engaging ideas!
Introduction to Music-Based Crafts
Music has always been an essential part of childhood development, and incorporating it into crafts can be incredibly beneficial for 3-year-olds. Music-based crafts are activities that combine creative expression with musical exploration, allowing little ones to develop their fine motor skills, hand-eye coordination, and cognitive abilities while having fun.
You can start by introducing simple instruments like maracas or tambourines, which can be used in various craft projects. For example, fill a container with beads, rice, or sand and attach a metal colander to create a homemade shaker instrument. Add some paint or markers, and let your child decorate the instrument while exploring different sounds.
Another idea is to use everyday objects like pots, pans, and wooden spoons to create a makeshift drum set. You can also incorporate music into arts and crafts projects by listening to nursery rhymes or kids’ songs while creating, or even using musical themes for painting and coloring.
Remember, the goal of music-based crafts is not only to produce beautiful creations but also to encourage creativity, self-expression, and exploration through music. By adapting these activities to your child’s interests and abilities, you can help foster a lifelong love for both art and music.
Simple Movement Exercises for Preschoolers
Getting Your Preschooler Moving with Simple Exercises!
Music and movement are an essential part of a preschooler’s development, helping them build strong gross motor skills. These exercises can be as simple as dancing or marching in place to get those little legs moving. But don’t just take our word for it – let’s explore some fun and easy ways to get your 3-year-old grooving!
Try “Animal Moves” with your child: have them stomp like a bear, hop on one foot like a frog, or spin around like a chicken! These playful movements not only promote balance and coordination but also encourage creativity. For example, you can put on some upbeat music and challenge your child to “find the animal” in the song.
Another great exercise is “Freeze Dance”: simply put on some fun music and have your child dance freely – then, without warning, stop the music and say “freeze!” This game helps develop self-control and body awareness. To take it up a notch, you can add “Animal Freeze,” where your child must freeze in place like their chosen animal.
Remember to always supervise and encourage your child during these activities. With a little creativity and some fun music, you’ll be helping your preschooler build strong gross motor skills in no time!
Tips for Incorporating Music into Crafting Activities
Incorporating music into crafting activities can be a great way to engage 3-year-olds and encourage their creativity. Music can help stimulate imagination and inspire self-expression through art.
When selecting music for your craft sessions, choose upbeat tunes that kids love. You can also create playlists with songs that match the theme of your project, such as ocean-themed music for a beach-inspired craft. This will not only make the activity more enjoyable but also add an extra layer of depth and meaning to the craft.
Some practical tips to consider include:
• Start by introducing simple rhythms and beats, gradually increasing complexity as the child becomes more comfortable with the sounds.
• Use instruments that are easy for little hands to grasp, such as tambourines or maracas.
• Play music in the background while kids work on their crafts, allowing them to move freely and tap out a beat if they choose.
Remember, the most important thing is to have fun! Let your child’s creativity shine through by embracing the process, not just the end result. By incorporating music into your crafting activities, you’ll be providing an engaging experience that fosters imagination and self-expression in a unique way.
Conclusion and Encouragement
As you’ve made it through this journey of discovering fun crafts for 3-year-olds, remember that the most important thing is to have fun! These little ones are learning and growing at an incredible pace, and your enthusiasm and encouragement play a significant role in their development. Don’t be too hard on yourself if things get messy – it’s all part of the process!
Encourage your child to explore and express themselves through various materials like paint, glue, and crayons. Let them create without worrying about perfection, as this is an essential stage for developing fine motor skills, creativity, and problem-solving abilities. Remember, these early years are a chance for your little one to experiment and try new things, so be supportive and let their imagination shine!
Frequently Asked Questions
Can I use store-bought playdough instead of making my own?
Yes, you can definitely use store-bought playdough, but keep in mind that homemade playdough is often healthier and more cost-effective in the long run. If you choose to buy playdough, make sure it’s made from non-toxic materials and doesn’t contain any harsh chemicals.
How do I handle a child who becomes overwhelmed or frustrated with a craft activity?
It’s completely normal for young children to feel overwhelmed during crafts. Encourage them to take breaks when needed, offer gentle guidance, and celebrate their efforts rather than focusing on the end result. You can also try offering simpler alternatives or adjusting the materials used.
Can I do these crafting activities with my child at home without any prior experience?
Absolutely! Crafting with your child is about having fun together, not about creating perfect pieces of art. Start by setting up a dedicated craft space and getting the necessary materials. Begin with simple activities like finger painting or collage-making, and gradually introduce more complex projects as you both become more confident.
How often should I schedule crafting activities for my 3-year-old?
The frequency of crafting activities depends on your child’s attention span and interest level. Try to set aside dedicated time each week (e.g., an hour on the weekends) for crafting, but also be flexible and adapt to their changing needs. You can start with short sessions and gradually increase duration as they become more engaged.
Can I involve my 3-year-old in preparing the materials or setting up the craft space?
Yes! Involving your child in the preparation process can help them feel more invested in the activity. Ask for their input when choosing materials, colors, or themes, and let them assist with setting up the craft space (e.g., arranging paper towels or fetching paint). This will encourage their sense of ownership and creativity throughout the crafting process.