
As the leaves start to change colors and the air grows crisper, our little ones are eager to get creative with the season. Fall is an amazing time to encourage kids to explore their artistic side, and we’ve got some fantastic ideas to get you started! From nature-inspired projects that bring the outdoors in, to clever crafts made from recycled materials, we’ll be sharing a variety of fall art projects for kids that are sure to foster imagination and creativity. Whether your child loves painting, drawing, or crafting with everyday objects, there’s something on our list for everyone. In this post, we’ll dive into seasonal-themed activities that capture the essence of autumn, from vibrant leaf rubbings to cozy harvest-inspired collages. Get ready to unleash your mini artist’s inner creative genius!
Introduction to Fall Art
Welcome to fall, a season of cozy vibes and endless creativity! In this section, we’ll explore some fun and easy art projects that kids will love making during the autumn months.
Importance of Art in Child Development
As you explore fall art projects with your child, it’s essential to understand the significance of art in their overall development. Art plays a vital role in shaping a child’s cognitive, emotional, and social growth. Through creative expression, children develop problem-solving skills, hand-eye coordination, and fine motor control. Moreover, art helps build confidence, self-esteem, and self-expression – all critical components of a child’s emotional well-being.
Fall-themed art projects can be particularly beneficial in fostering creativity and imagination. For instance, creating leaf rubbings using various textures and colors encourages children to experiment with different techniques and materials. This process not only develops their fine motor skills but also sparks their curiosity about the natural world around them. When engaging in fall-inspired art activities, encourage your child to explore different themes, such as harvest, Thanksgiving, or Halloween, and see how they incorporate these ideas into their creations.
As you work on these projects together, remember that the process is just as important as the final product. Allow your child to take ownership of their artistic expression, making mistakes and learning from them a natural part of the creative journey. By doing so, you’ll be nurturing not only their artistic abilities but also their confidence and self-expression.
Preparing for Fall Art Sessions
As you start planning for fall art sessions with kids, it’s essential to gather all the necessary materials to bring their creative ideas to life. Begin by collecting an assortment of papers, paints, and markers that reflect the season’s vibrant colors. Include a variety of textured papers like cardstock, construction paper, and watercolor paper to add depth to their artwork.
Don’t forget to stock up on glue – white, hot, and spray glue will come in handy for various projects. Natural materials like leaves, twigs, and pinecones can be used as stampers, textures, or even added directly into the art piece. Consider collecting these items during a nature walk with your kids, making it an educational experience.
To create a conducive art environment, designate a specific area for fall art sessions. Cover tables or workspaces with newspaper or old sheets to prevent messes and make cleanup easier. Encourage kids to experiment and explore different materials by providing plenty of space to spread out their projects. Ensure good lighting, as it will make it easier for them to see the colors and textures they’re working with. By preparing these essentials and setting up a comfortable workspace, you’ll be ready to dive into the world of fall art with your kids.
Nature-Inspired Fall Art Projects
Get creative and connect with nature through these fun fall art projects that bring the outdoors inside, featuring leaves, acorns, and other autumnal treasures. From collages to sculptures, your little ones will love them!
Leaf Rubbings and Pressing
Get Ready to Fall in Love with Leaf Rubbings and Pressing!
As the leaves begin to change colors and fall from the trees, it’s the perfect time to get creative with nature. One of our favorite fall art projects is making leaf rubbings using everyday items like paper, crayons, and tape. This activity is not only fun but also teaches kids about the different shapes and textures of leaves.
To make a leaf rubbing, start by placing a leaf under a piece of paper. Then, take a crayon and rub it gently over the leaf, moving the paper back and forth to capture the impression. You can use various colors and techniques to create unique designs. For example, try using different shades of green or adding some texture with a textured crayon.
But why stop at just making rubbings? We also love pressing leaves to preserve them for future use in art projects. Simply place the leaf between two sheets of paper towel or blotting paper and weigh it down with a heavy book. Leave it overnight, and voila! You’ll have perfectly preserved leaves ready to be used in collages, paintings, or other craft projects.
Twig Sculptures and Mobiles
Creating twig sculptures and mobiles is an excellent way to encourage kids to explore their creativity while connecting with nature. To get started, take a walk around your backyard or a nearby park and collect various types of twigs, branches, and leaves. Encourage your child to experiment with different shapes, textures, and colors to create unique pieces.
To make a twig mobile, start by gathering sturdy branches that can hold the weight of smaller twigs and leaves. Use wire or string to attach the twigs to a central point, allowing them to hang freely. You can add decorative elements like pinecones, acorns, or small flowers for added interest. For a sculpture, encourage your child to arrange the twigs in three-dimensional shapes, using glue or twine to hold them in place.
Remember, this project is all about experimentation and imagination! Don’t worry too much about perfection – it’s okay if things get a bit messy or uneven. Emphasize the process over the end result, and watch your child’s creativity flourish as they explore new ways to work with natural materials.
Recycled Materials Fall Art
Get creative with nature by making art from recycled materials, such as fallen leaves and twigs, to create unique fall-inspired masterpieces. This is a great way to get kids outside and exploring their surroundings.
Paper Bag Puppets and Lanterns
Creating colorful paper bag puppets and lanterns is a fun and creative way to reuse recycled materials. For this project, you’ll need some basic supplies like newspaper, cardboard tubes, scissors, glue, and markers.
To start making the puppets, cut out mouths and other facial features from construction paper or magazine cutouts. Then, decorate the outside of the paper bags with paint, markers, or crayons to give them a personalized look. Use scissors to cut out arms and legs from newspaper strips, and assemble the puppets by gluing these parts onto the bag.
For the lanterns, you’ll need some clean plastic bottles, scissors, glue, and string. Cut the bottom off each bottle and decorate the outside with paint or markers. Then, punch a hole at the top of each bottle and attach a piece of string to hang them up. You can add additional embellishments like glitter, sequins, or stickers for extra sparkle.
This project is an excellent way to encourage creativity and sustainability in kids while teaching them about recycling and repurposing materials. With these simple steps and supplies, you’ll have colorful puppets and lanterns that will light up any room!
Yarn and Pipe Cleaner Creations
Get creative with yarn and pipe cleaners to craft unique autumn-themed art projects that are both fun and educational for kids. To start, gather a variety of yarns in warm fall colors such as orange, yellow, red, and brown. Cut the yarn into long strips and help your child thread them through a needle or a fork to create a garland.
Pipe cleaners can be used to add texture and dimension to these projects. For example, you can use pipe cleaners to make leaves or acorns that can be attached to the garland or a mobile. To make a crown, simply wrap yarn around a headband or a wire shape, securing it with glue or by tying knots.
Encourage your child to think about the texture and weight of each material as they create their project. For instance, thicker yarns might be better suited for a garland while thinner yarns would work well for a mobile. With these simple materials and some imagination, kids can create beautiful fall-themed art pieces that are sure to brighten up any room.
Fall Season-Themed Art Ideas
Let your little ones get creative with our fall-themed art ideas, from colorful leaf collages to warm and cozy painting projects that celebrate the season’s beauty. We’ve got inspiration for kids of all ages!
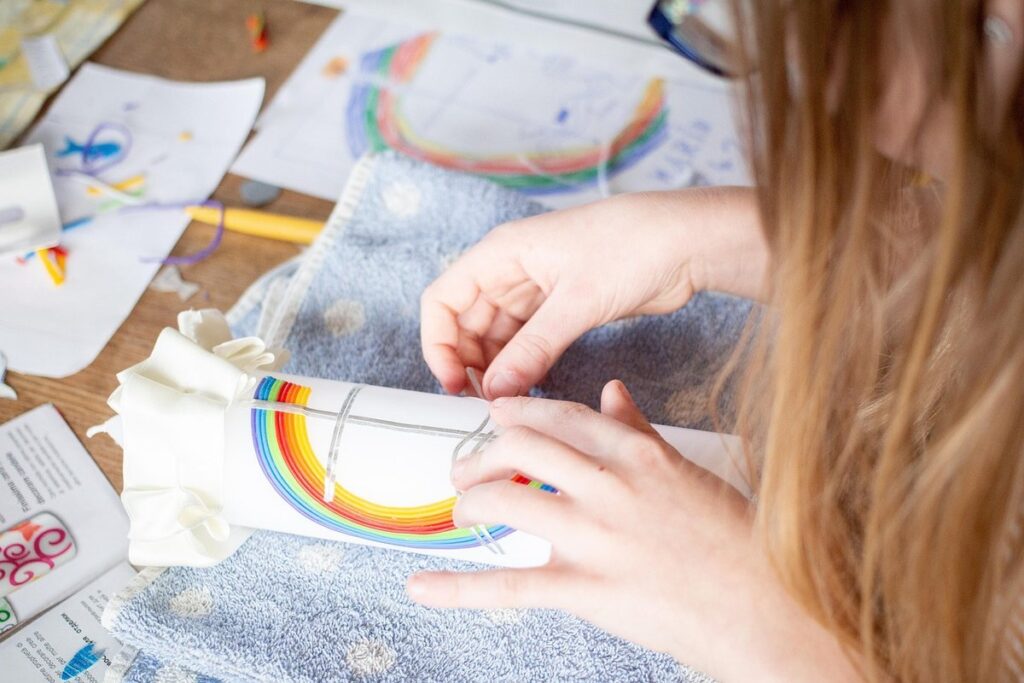
Apple Printing and Painting
Creating apple prints using paint and paper is a fun and creative way to capture the essence of fall. To get started, you’ll need some apples, white paper, and a variety of paints. Cut the paper into desired shapes or sizes, and have kids dip the paper into a plate of paint, allowing the paint to pool at the bottom. Press the paper onto a smooth surface, creating a fun and unique print.
For an extra layer of excitement, try using a combination of stamping techniques with stencils and painting with fingers or sponges. This will allow kids to experiment with different textures and patterns. Encourage them to use their prints as backgrounds for fall-themed paintings by adding leaves, branches, or other seasonal elements.
To paint like a pro, try the “dotting” technique where kids dab small dots of paint onto their paper to create an apple effect. You can also use watercolors to create soft, blended colors reminiscent of autumn foliage. Whatever technique you choose, remember to have fun and be creative!
Pinecone Crafts and Decorations
Create a beautiful and fragrant fall display with pinecone crafts that capture the essence of the season. One of the simplest and most charming pinecone crafts is a pinecone wreath. To make one, start by gathering an assortment of pinecones in various sizes, some twine or wire for hanging, and a few decorative items like ribbons, flowers, or berries.
Begin by gluing the largest pinecones to a wire or foam wreath form, spacing them evenly apart. Fill in the gaps with smaller pinecones, working your way around the circle. Add some texture and depth to the wreath by incorporating twigs, eucalyptus leaves, or other natural elements.
For a more rustic look, try a pinecone garland by threading large pinecones onto a length of twine or wire. You can also add some smaller pinecones or other decorations like acorns, seeds, or dried flowers to create a visually appealing display. To make pinecone ornaments, simply dip the pinecones in a mixture of glue and water, then roll them in glitter or decorative paint for a festive touch.
Remember, the beauty of pinecone crafts lies in their natural simplicity, so don’t be afraid to experiment and add your own unique twist to these projects!
Safety Precautions and Tips
To ensure a fun and safe experience for your little artists, we’ll cover essential safety precautions and valuable tips to keep them happy and accident-free while working on their fall projects.
Material Safety and Handling
When working on fall-themed art projects with kids, it’s essential to prioritize material safety and handling. Young children are naturally curious and tend to explore their surroundings through touch, which can lead to accidents if they come into contact with hazardous materials.
To ensure a safe and enjoyable experience for both you and your little artists, store art supplies out of reach when not in use. Use containers or bins with secure lids to keep paints, markers, and other mediums organized and within sight. Label each container clearly so that kids understand which materials are off-limits.
When engaging in messy activities like painting or stamping, make sure children wear old clothes or smocks to protect their clothing from stains. Have a designated space for art projects where spills can be easily cleaned up without causing damage to floors or surfaces.
Supervise your child at all times during art sessions and demonstrate proper handling techniques for each material. Encourage kids to wash their hands thoroughly after working with art supplies, especially before eating or drinking. By taking these simple precautions, you’ll create a safe environment where children can freely express themselves through art without worrying about safety concerns.
Encouraging Creativity and Imagination
When it comes to fall art projects for kids, encouraging creativity and imagination is just as important as following safety precautions. To foster a sense of wonder and experimentation, consider providing an open-ended prompt or activity that allows children to explore their own ideas.
For example, you could set up a still-life arrangement with autumnal elements like leaves, acorns, and pinecones, and ask the kids to create a composition using paint, markers, or collage. Alternatively, you could provide a variety of natural materials like fallen branches, rocks, and dried flowers for them to incorporate into their artwork.
To encourage experimentation and exploration, don’t be afraid to let go of expectations and allow children to make mistakes. This can often lead to unexpected and innovative results! Encourage kids to try new techniques, like layering paint or using unconventional materials, and praise their efforts even if the outcome isn’t what you envisioned.
By giving children the freedom to explore and create without fear of failure, you’ll not only be promoting creativity but also building confidence and self-expression.
Conclusion and Final Thoughts
As we wrap up our fall art projects for kids, let’s recap what you’ve created and gained inspiration from these fun and creative activities together. We’re excited to share your finished masterpieces!
Recap of Fall Art Projects
As we wrap up our fall art project series, let’s take a moment to recap the various activities we’ve explored and highlight their benefits for child development and creative expression.
From leaf rubbings to pinecone bird feeders, we’ve seen how simple materials can be transformed into unique and engaging art projects. These activities not only foster creativity but also encourage children to explore their surroundings and appreciate the beauty of nature. For example, creating a fall-themed collage using natural materials like leaves, twigs, and acorns allows children to develop their fine motor skills while learning about texture and color.
Other projects, such as making handprint turkeys or paper plate pumpkins, promote cognitive development by introducing new shapes, colors, and patterns. These art projects also provide an excellent opportunity for children to express themselves and explore their imagination. As a parent or caregiver, you can continue to encourage creativity and exploration by providing a variety of materials and inspiring your child to think outside the box.
Inspiring Future Art Adventures
As we conclude our journey through fall art projects for kids, I want to leave you with the excitement of what’s possible when creativity and imagination are nurtured. By incorporating these activities into your child’s daily routine, you can spark a lifelong love for art that will continue to evolve and flourish as they grow.
Remember, art is not just about creating something beautiful; it’s also about experimenting, taking risks, and learning from mistakes. So, don’t be afraid to get messy, try new techniques, and explore different mediums together.
To make fall art projects a regular part of your child’s life, start by setting aside a dedicated space for creativity – even if it’s just a corner in the living room or a small craft table. Schedule regular “art days” or incorporate artistic activities into your daily routine, such as during snack time or after dinner.
Make it fun and engaging by choosing projects that align with their interests and skills level, and always be there to support and encourage them as they explore their creativity. With consistency and patience, you’ll see the magic of art unfold in your child’s life, filling it with wonder, joy, and a sense of limitless possibility.
Frequently Asked Questions
What materials do I need for fall-themed art projects?
You’ll likely already have many of the necessary materials at home, such as paper, glue, scissors, and paint. For nature-inspired projects, gather items like leaves, twigs, pinecones, and yarn to incorporate into your crafts.
Can my child make art projects without adult supervision?
While it’s wonderful for children to explore their creativity independently, some fall art projects may require adult guidance or assistance due to material safety concerns (e.g., using scissors, paint, or hot glue). Ensure you’re nearby to provide support and ensure your child’s safety.
How can I reuse materials from previous crafts in new projects?
Repurposing materials is an excellent way to reduce waste and encourage creativity. Think about how items like leaf rubbings, twig sculptures, or paper bag puppets could be repurposed into different fall-themed art pieces. This will not only save resources but also inspire your child’s imagination.
What are some ways to display my child’s artwork?
Encourage your child to showcase their creations by displaying them in a special gallery area at home or showcasing their masterpieces on the fridge with magnets. You can also consider framing or laminating their work for a more permanent display.
How often should I schedule fall art sessions with my child?
It’s best to plan regular fall art sessions, ideally once a week, to maintain momentum and keep your child engaged in creative activities. This will allow you to explore various projects without feeling overwhelmed by a single long session.