
Getting outside to play in the snow can be a magical experience for preschoolers, but have you ever thought about bringing that magic inside? Creating snow crafts is not only fun and engaging, but it also offers a wealth of learning benefits. By making snow-themed art projects, your little ones will develop their cognitive skills, hand-eye coordination, and fine motor abilities while exercising their creativity and imagination.
In this article, we’ll explore the wonderful world of snow crafts perfect for preschoolers, from simple yet creative ideas to more complex projects that encourage experimentation and self-expression. We’ll cover a variety of fun and easy-to-make crafts using materials you likely have at home or in nature, such as snowflakes, pinecones, and twigs. Whether you’re looking for a fun activity to do together on a snowy day or a creative way to celebrate winter, this article has got you covered!
Introduction to Snow Crafts
Welcome to our winter wonderland of creativity! In this section, we’ll share some exciting and easy snow crafts perfect for your preschooler’s tiny hands to get creative.
Benefits of Engaging in Winter Art Projects
Engaging in winter art projects can have numerous benefits for preschoolers. Not only do these activities provide a fun and creative outlet during the cold winter months, but they also offer opportunities for cognitive development and fine motor skills improvement.
Cognitive development is a key advantage of snow crafts for preschoolers. By participating in activities such as making snowflakes, building snowmen, or creating winter-themed artwork, children are encouraged to think creatively and explore different materials and textures. For example, when making snowflakes, children can experiment with folding, cutting, and arranging paper to create unique designs, promoting problem-solving skills and hand-eye coordination.
Fine motor skills also benefit from engaging in snow crafts. Activities such as making snow angels, building a fort, or drawing winter scenes require children to use their hands and fingers to manipulate materials, strengthening their finger muscles and improving dexterity. As you engage your preschooler in these activities, be sure to provide guidance and support while encouraging independence and self-expression.
Some practical tips for incorporating snow crafts into your daily routine include:
* Keep it simple: Start with basic projects that can be completed within a short time frame.
* Use everyday materials: Repurpose items from around the house, such as paper, glue, and scissors, to reduce waste and encourage creativity.
* Make it fun: Emphasize the process over the product, focusing on the experience of creating something together rather than the end result.
Essential Materials and Supplies
When it comes to snow crafts for preschoolers, you’ll want to make sure you have all the right materials on hand. Let’s start with the basics: paper, glue, scissors, and paint are must-haves for most snow craft projects. You can use construction paper, colored paper, or even newspaper to create unique textures and designs.
For glues, white school glue is a great choice for young children, as it dries quickly and is easy to clean up. You can also use glue sticks, which are perfect for younger preschoolers who are still learning how to handle liquids. Don’t forget to have some scissors on hand – blunt-tipped ones are best for little hands.
For paint, washable tempera paint is a great option for snow crafts. You can buy it in small containers or make your own using food coloring and water. Just remember to put down a drop cloth or old sheets to protect surfaces from messes! Some other supplies you might want to consider include glitter, stamps, and stencils – these can add an extra touch of fun and creativity to your snow crafts.
Remember, the most important thing is to have fun and be creative with your child!
Easy Snowflake Crafts
Let’s get creative and make some beautiful snowflakes! In this section, we’ll show you how to make easy and fun snowflake crafts that your preschooler will love making.
Making Simple Paper Snowflakes
Making simple paper snowflakes is a classic winter craft that’s perfect for preschoolers. To get started, you’ll need just one sheet of white paper and some patience. Begin by folding the paper in half diagonally to create a triangle. Open it back up and fold each side in towards the middle, so they meet at the midpoint.
Next, take your scissors and carefully cut along the edges of the folded paper, making sure not to cut all the way through. You can make straight cuts or try some creative patterns – the possibilities are endless! Once you’ve made your cuts, gently pull out the folded edges to reveal your snowflake design.
Encourage your preschoolers to experiment with different folding techniques and cutting patterns to create unique snowflakes. You can also try using different shapes of paper or adding some glitter for extra sparkle. With a little practice, they’ll be making beautiful snowflakes in no time! Remember, the most important thing is to have fun and enjoy the process of creating something special together.
Some great tips to keep in mind: use a ruler to help your child draw straight lines, experiment with different folding angles for unique designs, and try using different materials like foam or construction paper for added texture.
Alternative Methods for Making Snowflakes
Who says snowflakes have to be made from paper? There are plenty of alternative methods that can add some excitement to your snowflake crafts! For instance, you can use foam sheets or felt to create unique and textured snowflakes. Simply cut out intricate designs or shapes from the foam or felt, and then decorate them with glue, glitter, or other embellishments.
One fun way to make snowflakes using foam is to use a craft mat or cutting tool to cut out delicate patterns. This can add an extra layer of dimension to your design. Alternatively, you can use colored felt to create layered snowflakes by stacking different colors on top of each other. To hang them up, simply glue a string or stick through the center.
You can also experiment with different materials like stickers, stamps, or even yarn to create one-of-a-kind snowflakes. The possibilities are endless! Encourage your little ones to get creative and see what unique designs they come up with. By exploring alternative methods, you’ll not only add some variety to their crafts but also help develop their problem-solving skills and imagination.
Tips for Displaying Snowflakes
When it comes to displaying your finished snowflakes, you’ll want to make sure they’re showcased in a way that’s just as fun and creative as making them! Here are some ideas to get you started:
First, consider hanging your snowflakes in a window where the light can catch them. This will not only add a touch of winter wonderland magic to your room but also create a beautiful display for all to see. You can use string or thread to hang them from the curtain rod or the window frame.
Another great idea is to create a “snowflake gallery” on a wall in your home. Simply punch holes at the top of each snowflake and thread some yarn through to hang them up. This way, you can enjoy looking at all your beautiful creations together in one spot.
You could also use your snowflakes as decorations for a special winter event or party. Hang them from the ceiling or place them on tables and walls to create a festive atmosphere. Remember, the most important thing is to have fun and be creative with how you display your snowflakes!
Winter Wonderland Collage
Create a beautiful winter wonderland collage using various textures and materials, like glittery snowflakes, cotton balls, and construction paper, that your preschooler will love! This fun project is perfect for little hands to get creative.
Introduction to Collage-Making Techniques
When introducing preschoolers to collage-making, it’s essential to emphasize experimentation and creativity. This technique allows young minds to explore various textures, colors, and shapes, fostering their artistic expression.
To begin, gather a variety of materials such as construction paper, scissors, glue sticks, and a range of fabrics like felt, lace, or even tissue paper. You can also include natural elements like leaves, flowers, or snowflakes for an added touch.
Start by demonstrating the process yourself, perhaps creating a simple winter-themed collage using these materials. Then, encourage your preschoolers to replicate the technique, allowing them to explore and experiment with different combinations of textures and colors. Encourage them to make mistakes – they’re an essential part of the creative process!
As they work, ask open-ended questions like “What do you think will happen if we glue this fabric onto our collage?” or “How can we use these scissors to cut out interesting shapes?” This will not only encourage their creativity but also develop their critical thinking skills.
By embracing experimentation and creativity, your preschoolers will develop a deeper understanding of the collage-making process and be more likely to explore other art forms in the future.
Materials Needed for Collage
When it comes to creating a winter wonderland collage with preschoolers, you’ll want to gather some essential materials to make the process fun and engaging. Start by collecting a variety of papers that evoke a sense of winter, such as white or light blue construction paper, gray tissue paper, or even recycled pages from old books or magazines.
Glue is another crucial component for a collage project. Choose a washable glue stick specifically designed for young children to prevent messes and ensure safe use. You’ll also need scissors that are easy for preschoolers to handle and won’t pose a choking hazard. Crayons, markers, or paint can be used for added color and creativity.
Before you begin, prepare your workspace by covering it with newspaper or a plastic tablecloth to protect against spills and stains. As the children work on their collages, encourage them to explore different textures and patterns using the various materials. This will help develop their fine motor skills and creativity while having fun creating a winter wonderland scene.
Example Projects: Winter Landscapes and Animals
Let’s dive into some amazing example projects that showcase winter landscapes and animals. As you continue to explore the world of snow crafts for preschoolers, it’s essential to see what others have created.
For this activity, we’ll focus on incorporating various textures and colors to bring our collages to life. Take a look at Emma’s winter wonderland landscape. She used a combination of blue and white construction paper to create a serene sky, while the snow-covered trees were made from a mixture of glue and glitter. The finishing touch? A few strategically placed cotton balls for added texture.
In another example, we see Olivia’s adorable polar bear collage. Using various shades of gray and white paper, she created a beautiful furry effect on her animal. By adding some wiggly eyes and a pink nose, the bear came to life!
Remember, it’s all about experimentation and creativity with your little ones. Encourage them to try different materials and textures, like glitter, stickers, or even real snowflakes, to add an extra layer of depth to their collages. Who knows what amazing creations they’ll come up with?
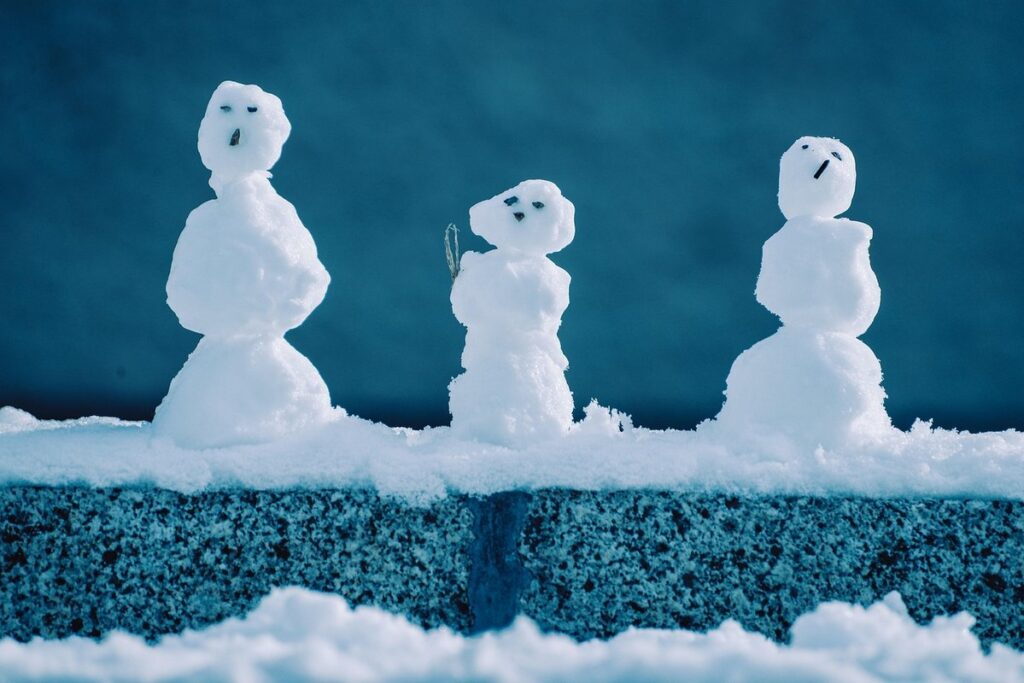
Snowman Crafts
Get creative and make some frosty friends with these fun snowman crafts, perfect for a winter wonderland playdate or preschool activity! We’ll show you how to bring snowy joy to your little ones.
Building Paper Snowmen
Let’s get creative with paper snowmen! Building 3D paper snowmen is an exciting and easy craft perfect for preschoolers. You’ll need some basic shapes and materials to get started. Begin by gathering a square piece of white paper, scissors, glue, and a pencil.
Start by drawing a large square on the paper for the base of your snowman. Cut out the square carefully, making sure it’s even all around. Next, draw three small circles for the head, middle, and bottom body sections of your snowman. Cut these out as well. You can also add some details like eyes, a mouth, and buttons to bring your snowman to life!
Use glue to assemble your snowman by attaching each body section together in order. Start with the base, then the middle, and finish with the head. Make sure everything is aligned properly before gluing. To give your snowman some extra dimension, add two small triangles for the arms and a carrot nose (you can draw or paint one on). Be proud of your creation – it’s a winter wonderland masterpiece!
Alternative Snowman Options
If you’re looking for alternative ways to create snowmen with your preschoolers, there are plenty of creative options beyond traditional snow. One fun idea is to use felt sheets to create a 3D snowman. Simply cut out the body, middle, and head from white or cream-colored felt, then decorate them with buttons, cotton balls, and other embellishments. You can also add some personality to your felt snowman by using different colored felt for the hat, scarf, or nose.
Another option is to use air-dry clay to create a more textured and durable snowman. This is perfect for little hands that love to get messy! Just mix the clay according to the package instructions, shape into a snowman body, middle, and head, and let it dry completely. You can add details with paint or markers once it’s dry.
Both of these alternatives offer a unique twist on traditional snowmen and are great ways to keep little ones engaged in winter crafts while exploring different materials and textures.
Decorating the Snowman’s Accessories
When it comes to decorating your snowman’s accessories, the possibilities are endless. Let’s start with the hat – a classic part of every snowman’s attire. You can turn this simple hat into a work of art by adding some creativity. Try using different colored buttons or pom-poms to create a fun and playful design. For example, you could use blue buttons for a winter wonderland look or red pom-poms for a festive feel.
Next up is the scarf – an essential item that keeps your snowman warm and cozy on chilly days. You can make this scarf stand out by using different textures like glittery paper, felt, or even yarn. To add some extra flair, you could attach small bells to the ends of the scarf or use a contrasting color to create a striking effect.
Don’t forget about the other accessories that can transform your snowman into a true winter wonder! Consider adding a pair of gloves made from brown construction paper and glued onto the snowman’s hands. You can also make a carrot nose using an orange crayon or paint, which will add a pop of color to your snowman’s face.
Some other ideas include making a broom out of a popsicle stick and some twigs, or even creating a top hat from a black paper plate. With a little imagination, the possibilities are endless!
Nature-Inspired Snow Crafts
Let’s dive into some nature-inspired snow crafts that are perfect for little hands to get creative and connected to the winter wonderland outside their windows. We’ll explore three fun projects together!
Collecting Natural Materials
Collecting natural materials is an essential part of creating unique and meaningful snow crafts for preschoolers. These materials not only add a touch of authenticity to the craft but also help children connect with nature. When collecting natural materials, encourage your little ones to explore their surroundings and gather items like pinecones, acorns, and sticks.
To make this process more engaging, try going on a scavenger hunt together. Create a list of items for them to find, such as specific types of leaves or colorful rocks. This will not only get them excited about collecting materials but also teach them about the different types of plants and features that exist in nature.
When collecting, remind children to be gentle with their surroundings and only take what they need. Teach them how to identify items that might be fragile or better left behind. For example, if you find a bird’s nest, it’s best to leave it intact so as not to disturb the birds’ home.
As you collect your materials, encourage your child to observe the different textures, shapes, and colors of each item. This will help them develop their observation skills and appreciate the diversity of nature.
Creating a Winter Wonderland Scene
Creating a winter wonderland scene is an exciting activity for preschoolers. It’s an opportunity to explore nature and get creative with collected materials. To start, gather items like twigs, pinecones, snowflakes (if possible), and evergreen branches. These will form the base of your scene.
Next, think about the theme you want to create. Do you want a snowy forest, a frozen pond, or a winter village? Plan out what elements you’ll need for each part. For example, if you’re creating a forest, you might arrange twigs to resemble trees and add pinecones as ornaments.
Now it’s time to get creative! Arrange your materials on a large piece of paper or a tray to create the scene. Encourage preschoolers to experiment with textures and colors by adding items like glitter, sequins, or small rocks. To make it more engaging, you can also tell a story around the scene, such as a family of animals taking shelter from the snowstorm.
Remember, the most important thing is to have fun! Don’t worry too much about perfection – it’s okay if things get a bit messy.
Encouraging Observation and Creativity
Encouraging preschoolers to observe and get creative with nature-inspired snow crafts is an essential part of the learning process. When we give them the freedom to explore and express themselves, they develop a deeper appreciation for the natural world.
To encourage observation, take your child on a winter wonderland walk before starting any craft project. Collect interesting shapes and textures from the snow, like pinecones, twigs, or even animal tracks. Ask open-ended questions like “What do you see?” or “How does this feel?” This will help them develop their critical thinking skills and observe details they might have otherwise overlooked.
Once you’re back inside, encourage your child to use these natural materials in creative ways. For example, they can arrange the pinecones into a pattern on a piece of paper, or use the twigs as “paintbrushes” for a snow-inspired art project. As they work, ask them to describe their process and what inspires their creations. This will not only foster creativity but also help them develop language skills and confidence in expressing themselves.
Remember, it’s essential to provide a safe space for your child to experiment and make mistakes. Encourage them to try new things, even if they don’t turn out as expected. By doing so, you’ll be helping them build resilience and a lifelong love for creativity and nature.
Tips for Parents and Educators
As you plan snowy activities for your preschoolers, we’ve gathered expert advice on how to make snow crafts a fun and engaging experience for both kids and teachers. From safety tips to creative ideas, we’ve got you covered.
Encouraging Creativity and Experimentation
Encouraging creativity and experimentation is crucial during snow craft activities for preschoolers. When working with young children, it’s essential to create a safe space that allows them to explore and express themselves freely. Here are some practical ways to encourage creativity and experimentation:
* Start by providing an assortment of materials, such as various textures, colors, and shapes, which will help stimulate their imagination.
* Offer open-ended questions like “What do you think would happen if…”, “How can we make this snowflakes more interesting?”, or “Can you show me something new?” This encourages children to think creatively and take risks.
* Emphasize the process over the end result. Instead of focusing on creating a perfect piece of art, praise their efforts and encourage them to try different approaches.
* As they work, ask open-ended questions like “What do you see?”, “How can we add more color?”, or “Can you make it more symmetrical?” This will help guide them without stifling their creativity.
By providing these opportunities for exploration and experimentation, children will develop problem-solving skills, think creatively, and build confidence in their abilities.
Safety Precautions
When engaging your preschoolers in winter art projects, safety should always be top of mind. This is especially true when working with materials like snow, ice, and other potential hazards.
First and foremost, make sure to dress your little artists warmly and comfortably. This includes wearing gloves or mittens that can withstand the cold while still allowing for creativity with paintbrushes or other art tools. It’s also essential to have them wear protective eyewear, such as goggles or glasses, to shield their eyes from any potential splatters or spills.
When working with snow, be mindful of its temperature and consistency. Avoid having children handle icy or frozen snow that may cause slips or falls. Instead, opt for softer, more pliable snow that’s easier to work with.
Additionally, consider setting up a designated art area with a clear workspace and minimal distractions. This will help prevent accidents and ensure your little ones stay focused on their creative endeavors. By taking these simple safety precautions, you’ll be able to enjoy a fun and stress-free winter art experience with your preschoolers.
Ideas for Snow Craft Themes
When it comes to snow crafts for preschoolers, exploring different themes can make the experience even more enjoyable and engaging. Why not tap into their favorite fairy tales? You could set up a “Snow White” station with materials like white paper, black paint, and glitter to create sparkly crowns or wands.
Or, if your little ones love movies, consider creating a “Frozen”-themed craft area where they can make their own snowflakes using intricately cut paper shapes and hang them from the windows. For movie night, why not set up an “Elf” station with green construction paper, red noses, and antennae headbands for all to wear?
Other themes you might consider include winter wonderland landscapes, complete with blue watercolor paint and cotton balls for fluffy clouds. Or explore the magical world of snow-covered forests with pinecones, acorns, and twigs. Whatever theme you choose, be sure to let your preschoolers’ imaginations run wild and have fun making it their own!
Frequently Asked Questions
What if I don’t have any experience with art or crafts? Can I still create snow crafts with my preschooler?
Don’t worry, you don’t need to be an artist to enjoy making snow crafts with your child! The process of creating together is just as important as the final product. Start with simple ideas and follow the steps outlined in the article. You can always ask for help or search online for tutorials if needed.
How do I encourage my preschooler to experiment and try new things when making snow crafts?
Encourage experimentation by providing a variety of materials and supplies, such as different textures, colors, and shapes. Ask open-ended questions like “What do you think would happen if we added more glitter?” or “How can we make this snowflake more interesting?” This will help foster their creativity and curiosity.
Can I use recycled materials to create winter-themed snow crafts?
Yes! Using recycled materials is a great way to teach your preschooler about reducing waste and sustainability. Collect items like old CDs, cardboard tubes, or newspaper pages to create unique snow craft projects. Get creative and think outside the box – you’ll be amazed at what you can make!
How do I display our finished snow crafts?
Displaying your child’s artwork is a wonderful way to encourage pride and ownership. Use picture frames, string, or a bulletin board to showcase their creations in a prominent place. You can also create a “Winter Wonderland” display by grouping similar projects together.
What if my preschooler gets frustrated with making snow crafts? How can I help them overcome this feeling?
It’s normal for young children to feel frustration when creating something new. To help your child overcome this feeling, try the following: break down complex tasks into smaller steps, provide positive reinforcement and praise their efforts, and remind them that it’s okay to make mistakes – they’re all part of the learning process.