
Hand painting is an excellent way to encourage creativity in children, allowing them to express themselves freely without worrying about making mistakes. As parents and educators, we often look for activities that not only keep our little ones engaged but also help develop their fine motor skills, hand-eye coordination, and imagination. In this article, we’ll explore a variety of fun and inspiring ideas for hand painting projects that cater to different age groups and skill levels. From simple warm-up exercises to advanced techniques like glazing and layering, you’ll discover plenty of animal-themed, nature-inspired, and abstract projects that will spark your child’s creativity and make them eager to get messy with paint! Whether you’re a seasoned artist or just starting out, these ideas are sure to inspire your next art session.
Getting Started with Hand Painting
Get ready to unleash your child’s creativity as we dive into the world of hand painting, where imagination knows no bounds and mess is just a part of the fun. Let’s start at the very beginning!
Understanding Safety Precautions
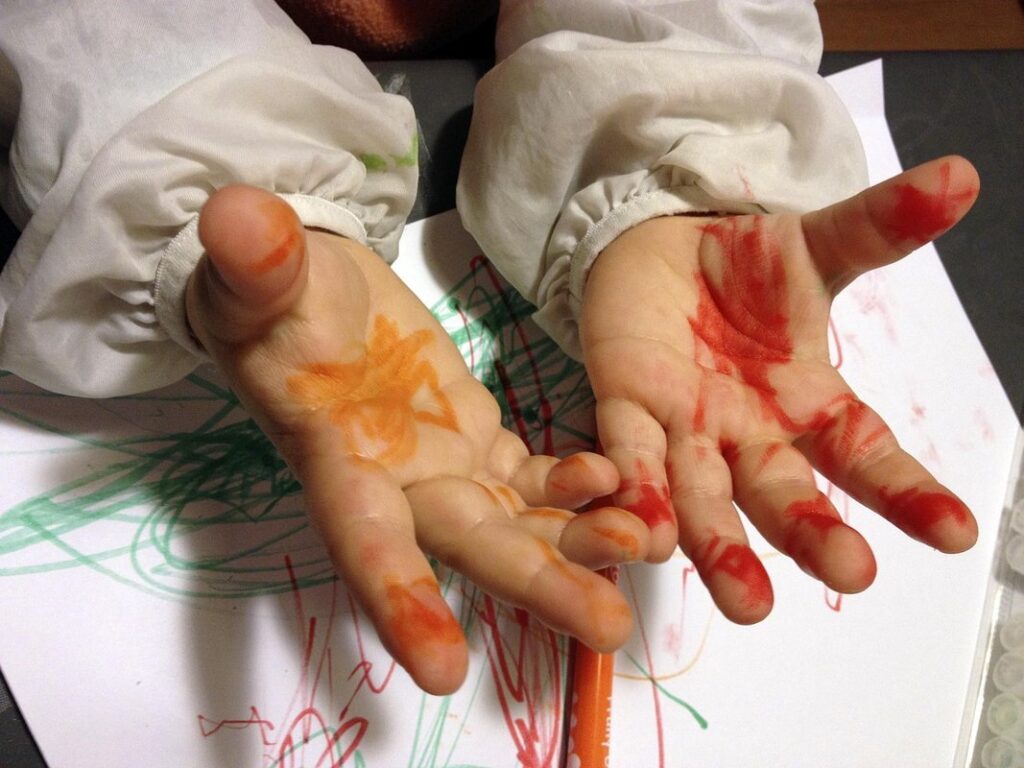
When introducing hand painting to children, it’s essential to prioritize their safety. Before you start, make sure the workspace is set up with some basic safety precautions in mind. Cover your work surface with newspaper, a tablecloth, or a plastic sheet to prevent paint spills and stains.
Choose washable paints specifically designed for children’s use. These usually come in vibrant colors and are easy on their skin. Acrylic paints are an excellent option as they’re non-toxic and dry quickly. Always read the label and follow the manufacturer’s instructions for proper usage.
Supervise your child at all times during hand painting activities, especially when it comes to using scissors or paintbrushes. Encourage them to wash their hands thoroughly with soap and water before and after painting.
It’s also crucial to dress your child in old clothing or an apron to prevent stains on their favorite shirts or dresses. Have a dedicated space for cleaning up spills and messes, like a designated “messy area” near the sink. By taking these simple precautions, you’ll ensure a fun and safe experience for your little ones.
Choosing the Right Materials
When it comes to hand painting with kids, having the right materials is crucial for achieving the best results. Start by gathering a variety of paints specifically designed for children’s use. These water-based acrylics are easy to clean up and offer vibrant colors that will captivate your little artist’s imagination.
Choose brushes in different shapes and sizes to cater to various techniques and textures. A mix of thick, flat brushes and finer detail brushes will allow your child to experiment with broad strokes and intricate details. Don’t forget to get some sponges and foam brushes for added texture and fun!
For the surface itself, pick something sturdy yet forgiving – a large sheet of paper or cardstock works well. You can also try using canvas panels or even wood as an alternative. If you’re painting on a table or countertop, consider covering it with newspaper or a plastic tablecloth to prevent any messes.
Remember, the most essential thing is to let your child’s creativity shine! Encourage them to explore and experiment with different materials – you might be surprised at what amazing creations they come up with.
Simple Warm-Up Exercises
When it comes to hand painting with kids, getting them comfortable holding a brush is essential for their artistic journey. To ease them into this new skill, start with some simple warm-up exercises that’ll help loosen up those little hands and get them ready for creativity.
Begin by giving your child a soft-bristled brush and a large sheet of paper to play on. Encourage them to simply hold the brush and move it around without applying too much pressure. This exercise helps develop hand-eye coordination and gets their small muscles used to holding onto something. You can also try this with a crayon or pencil, which is often more manageable for tiny hands.
To take it up a notch, try some gentle arm movements like drawing circles or zigzags on the paper. These actions help loosen up the shoulder and wrist joints, making it easier for your child to hold a brush steady. Remember, the goal here is not perfection but rather to get your child comfortable with holding a brush and having fun while doing so!
Animal-Themed Hand Painting Ideas
Get creative and bring animals to life on your little ones’ hands with these fun and easy animal-themed hand painting ideas that are sure to delight. From pandas to lions, we’ve got them all!
Painting Cute Animals
When it comes to painting cute animals, kids love bringing these adorable creatures to life on paper. To get started, gather a variety of paints and brushes in different colors and sizes. You can use watercolors, tempera, or even fabric paint for a more textured look.
To create your animal design, begin with the basics: body shape, face, ears, and tail. Use simple shapes to draw out these features before adding details. For example, you can draw a circle for the head, an oval for the body, and two small triangles for the ears.
Now it’s time to get creative! Add whiskers, eyes, and a nose using fine-tip brushes. Experiment with different paint techniques like layering, blending, or stamping to add depth and texture to your animal design. For instance, use a sponge to create soft, fuzzy textures on your cat’s fur or try stenciling stripes for a cute tiger look.
Some popular animal designs to try include cartoon-style cats, pandas, or even dragons. Encourage kids to express their imagination by adding fun accessories like flowers, hats, or balloons. With practice and patience, they’ll be painting adorable animals in no time!
Fun Zoo Creatures
Get ready to unleash your little artist’s creativity with these fun zoo creature hand painting ideas! Who doesn’t love visiting the zoo and seeing the majestic animals up close? Now, bring that excitement home by creating your own hand-painted zoo friends. Let’s dive into some popular choices: monkeys, lions, and elephants.
Monkeys are always a crowd-pleaser, with their agile movements and playful antics. To paint a monkey, start with a yellow or brown base color for the fur. Use black to draw on the eyes, nose, and mouth. Don’t forget those adorable fingers and toes! For an extra touch, add some green for the leaves and branches they love to swing from.
Lions are another roaring favorite among kids (and adults alike!). Paint a golden mane around the neck and head, with a light orange or yellow base color for the body. Use black to create sharp eyes and a nose. Don’t forget those fluffy whiskers! For an added detail, add some brown stripes on the legs.
Elephants are majestic creatures that inspire awe in many children (and adults!). Paint a gray or blue-gray base coat for the body, with darker patches around the ears and trunk. Use black to draw on the eyes and tusks. Add some texture by painting the wrinkled skin on the ears and trunk.
Remember, the most important thing is to have fun and be creative! Encourage your little ones to experiment with colors and patterns, making each hand-painted zoo creature unique.
Colorful Bird Designs
Get Ready to Take Flight with Colorful Bird Designs!
Birds are some of the most beloved creatures in our world, and what better way to capture their essence than through hand-painting? When it comes to creating colorful bird designs, the possibilities are endless. Let’s explore some fascinating examples of bird species that will inspire you to get creative.
The vibrant plumage of peacocks and macaws can be a great starting point for your art. Use shades of blue, green, and yellow to bring these stunning birds to life on paper. For a more subtle approach, why not try capturing the soft hues of a dove or pigeon? Their feathers offer endless opportunities for texture and pattern play.
To take your designs to the next level, consider experimenting with different brushstrokes and layering techniques. Try using textured paint or even stampers to add depth and dimensionality to your artwork. Remember, practice makes perfect, so don’t be afraid to let your imagination soar (pun intended!) and see where the creative journey takes you.
If you’re working with kids, encourage them to explore different color combinations and textures by starting with simple shapes and patterns. This will help build their confidence and creativity as they experiment with various materials and techniques.
Nature-Inspired Hand Painting
Bring the outdoors in by exploring nature-inspired hand painting ideas, from blooming flowers to majestic trees, and let your little ones’ creativity flourish.
Leafy Green Art
Get creative with leafy greens and bring the outdoors inside! Painting leaves, branches, and flowers is an excellent way to engage kids with nature-inspired art. To get started, gather a range of green and earthy tones on your palette, including shades like lime, mint, sage, and olive.
Begin by painting large leaves using broad strokes, varying the shape and size to create a natural look. Use a wet-on-wet technique by adding layers of transparent paint to achieve a soft, blended effect. Add some subtle texture with a sponge or a textured brush for an extra touch of realism.
Move on to painting branches using gentle sweeps and twirls of your brush. Mix earthy tones like sienna and umber with greens to create warm, sun-kissed hues. Don’t forget to add some delicate flowers in shades of yellow, pink, or purple to complete the piece.
To make it even more engaging, encourage kids to experiment with different leaf shapes, textures, and patterns inspired by nature. For instance, they can paint veins on a leaf like tiny roads or create a whimsical floral arrangement with oversized blooms. With these simple steps and earthy colors, you’ll be growing your own masterpiece in no time!
Ocean Creatures
Get ready to dive into the underwater world of hand-painting! Kids love creating ocean creatures, and with just a few simple steps, you can help them bring these amazing animals to life. Start by introducing your little ones to some of the most iconic ocean dwellers like fish, coral, and seaweed.
To paint a colorful fish, use gentle strokes to create curved lines for its body, adding fins and tail for extra detail. For coral, try using puffy brushstrokes in shades of pink and orange to capture its textured beauty. Don’t forget about seaweed – use long, wavy strokes with your brush to create the flowing tendrils.
To make it even more engaging, challenge your kids to come up with their own ocean creature! Encourage them to think about what features would help it survive in the ocean, like a shell for protection or a special power for hunting. With a little creativity and some paint, they’ll be swimming in a sea of imagination in no time. So grab those brushes and get ready to make some waves with hand-painted ocean animals!
Sunset Skies
When it comes to capturing vibrant colors and textures for sunset-inspired hand painting, there are several techniques you can try with your kids. To start, encourage them to experiment with blending warm colors such as orange, pink, and yellow on their palette.
To create the soft texture of a cloud, suggest they mix small amounts of white paint with a touch of gray or blue to achieve a subtle contrast with the vibrant sunset hues. For a more dramatic effect, try adding a dash of red or purple to deepen the colors and give them an extra layer of dimensionality.
One fun activity is to have your child create different layers for their sunset by painting the base sky first, then gradually building up to the horizon line where the sun meets the land. This can be achieved using thicker brushstrokes with a mix of yellow and orange paint. Encourage experimentation with various brush textures and colors to bring out the dynamic energy of a sunset scene.
Abstract Hand Painting Ideas
Get creative and explore the world of abstract hand painting with your kids, where imagination knows no bounds and mistakes become masterpieces! Let’s dive into some inspiring ideas.
Exploring Color Mixing
When exploring color mixing for hand painting, it’s essential to understand the basic principles of color theory. This will help you create unique and fascinating effects that add depth and interest to your artwork. Let’s start with the basics: primary colors are red, blue, and yellow. When you mix two primary colors together, you get secondary colors – green (blue + yellow), purple (blue + red), and orange (red + yellow).
But what happens when you mix a primary color with a secondary color? This is where things get really interesting! For example, mixing red with green creates a rich, dark brown. Adding a bit of blue to yellow creates a lovely shade of turquoise. Experimenting with different combinations can lead to some amazing discoveries.
Remember, the key to mastering color mixing is experimentation and practice. Encourage kids to play around with different colors and see what happens when they mix them together. This process will not only teach them about color theory but also develop their creative skills and imagination.
Texture Play
When it comes to creating texture in hand-painted artwork, kids can experiment with various techniques that add an extra layer of fun and depth to their art. One way to achieve this is by incorporating drips of paint into their work.
To create dripped textures, simply tilt the painting surface slightly and let the paint flow from a bottle or a cup held above it. Kids can control the amount of paint that drips down by adjusting the distance between the bottle and the paper. This technique works best with thick, heavy paints like acrylics or tempera.
Another way to create texture is by using household items as stampers, such as bubble wrap, sponges, or even a credit card. Kids can apply paint directly to these items and then press them onto their artwork, creating interesting patterns and textures in the process. You can also try using kitchen utensils like spatulas or spoons to create unique marks on the painting surface.
These techniques not only add visual interest but also allow kids to explore different materials and methods of mark-making, which can help develop their fine motor skills and hand-eye coordination. So go ahead, get messy, and let your little ones experiment with texture play in their hand-painted artwork!
Unconventional Brushes
Get ready to unleash your child’s creativity with unconventional brushes that add an extra layer of fun and excitement to their painting experience. Who says traditional paintbrushes are the only way to create art? Experimenting with alternative tools like sponges, stencils, and even household items can lead to some amazing results.
Try using a sponge as a brush by dipping it in paint and dabbing it onto the canvas or paper. This creates a unique texture that resembles the softness of real fabric. You can also use a kitchen sponge to create fun patterns like polka dots or stripes. For added texture, try using a stencil with a sponge underneath for a double-layer effect.
You can also repurpose household items as brushes. Old credit cards, sponges, and even household sponges work great for creating smooth lines and shapes. Even objects like straws, sticks, and toothbrushes can be used to create different effects. Remember, the most important thing is to let your child’s imagination run wild and experiment with new tools and techniques!
Advanced Techniques
As you get more comfortable with hand painting, it’s time to take your creations to the next level! In this section, we’ll explore advanced techniques that will add even more flair and fun to your artwork.
Glazing and Layering
As you explore advanced techniques for hand painting with kids, glazing and layering are essential methods to achieve depth and luminosity. Glazing involves applying multiple thin layers of transparent paint over a base coat, allowing each layer to dry before adding the next. This technique is perfect for creating realistic glass or water effects. Start by mixing a small amount of opaque paint with a larger amount of transparent paint to create a glaze.
To add depth and dimension to your artwork, try layering different colors on top of each other. For example, use a base coat of yellow ochre to depict a sunny landscape, then add layers of blue and green for the sky and foliage. Encourage kids to experiment with different color combinations to achieve unique effects. When layering, remind them to work from light to dark, allowing each layer to dry completely before adding the next.
Remember, practice makes perfect, so don’t be afraid to let kids make mistakes – they can often lead to exciting new discoveries and techniques!
Stenciling and Masking
Using stencils can add an extra layer of fun and precision to your kids’ hand-painting projects. One of the most exciting things about stenciling is that it allows you to create intricate details and complex designs with ease.
When choosing a stencil, consider the size and complexity of the design you want to achieve. Larger stencils are perfect for broad areas like walls or furniture, while smaller ones are great for more detailed work on smaller objects like ceramics or wooden toys.
To use a stencil effectively, place it over your painting surface and secure it with painter’s tape or a heavy object. Use a sponge or paintbrush to apply the paint through the stencil, making sure to cover the entire area evenly. To create patterns and designs within the stenciled shape, simply lift up the stencil and reapply it in different positions.
For added creativity, try layering multiple stencils on top of each other to achieve a multi-colored design. You can also use masking tape to mask off areas around the stencil, allowing you to paint intricate details or add backgrounds.
Blending Colors
Blending colors is an essential technique for hand painting that can add depth and dimension to your child’s artwork. It’s a simple yet effective way to achieve smooth transitions between hues, making their paintings look more realistic and visually appealing.
To blend colors, start by using a gentle touch and soft brushstrokes. Dip the tip of the brush in the first color and apply it to the painting surface. Then, pick up a small amount of the second color on the brush and gently merge it with the first color. Continue this process, gradually adding more of each color until you achieve the desired shade.
A great way to demonstrate blending colors is by using an example like painting a sunset sky. Start with a light blue base coat, then blend in shades of pink and orange to create a warm, gradient effect. You can also use household items like food coloring or watercolor paints to add extra vibrancy to your child’s artwork.
Remember, the key to successful blending is to be patient and gentle when layering colors. Encourage your child to experiment with different techniques and combinations of colors to achieve unique effects and styles.
Frequently Asked Questions
How can I involve my child with hand painting projects when they’re just starting out?
It’s wonderful that you want to encourage your little one’s creativity from the beginning! When introducing them to hand painting, start with simple warm-up exercises like finger painting or making handprint art. This will help them get comfortable with using their fingers and hands to create different textures and patterns. As they become more confident, you can gradually introduce new techniques and projects that cater to their skill level.
What’s the best way to clean up after a messy hand painting session?
Don’t worry about the mess – it’s all part of the fun! To clean up easily, make sure your child is wearing old clothes or an apron, and have washable paints on hand. If you’re worried about paint stains, consider using a plastic tablecloth or newspaper to cover your work surface. After the session, gently wipe down surfaces with soap and water, and wash any paint-stained hands thoroughly.
Can I use regular household items as unconventional brushes for my child’s art projects?
Absolutely! Using everyday objects like sponges, foam brushes, or even household utensils can add a new dimension to your child’s artwork. Experiment with different textures and materials to create unique effects. Just be sure to clean the items thoroughly before reusing them in future projects.
How do I encourage my child to explore advanced techniques like glazing and layering?
To introduce more complex techniques, start by explaining the concept behind glazing and layering. Then, demonstrate each step with a simple project, allowing your child to observe and imitate. As they become more comfortable, gradually give them more freedom to experiment and create their own designs using these techniques.
What’s the best way to store my child’s artwork when it gets too messy or overwhelming?
Don’t worry about storing every piece of art – instead, focus on showcasing their favorites! Consider displaying a selection of their most proud creations in a designated space at home. For other pieces, try scanning or photographing them for digital storage, and recycle any paper or materials that can be reused. This will help declutter your workspace while keeping the memories alive.