
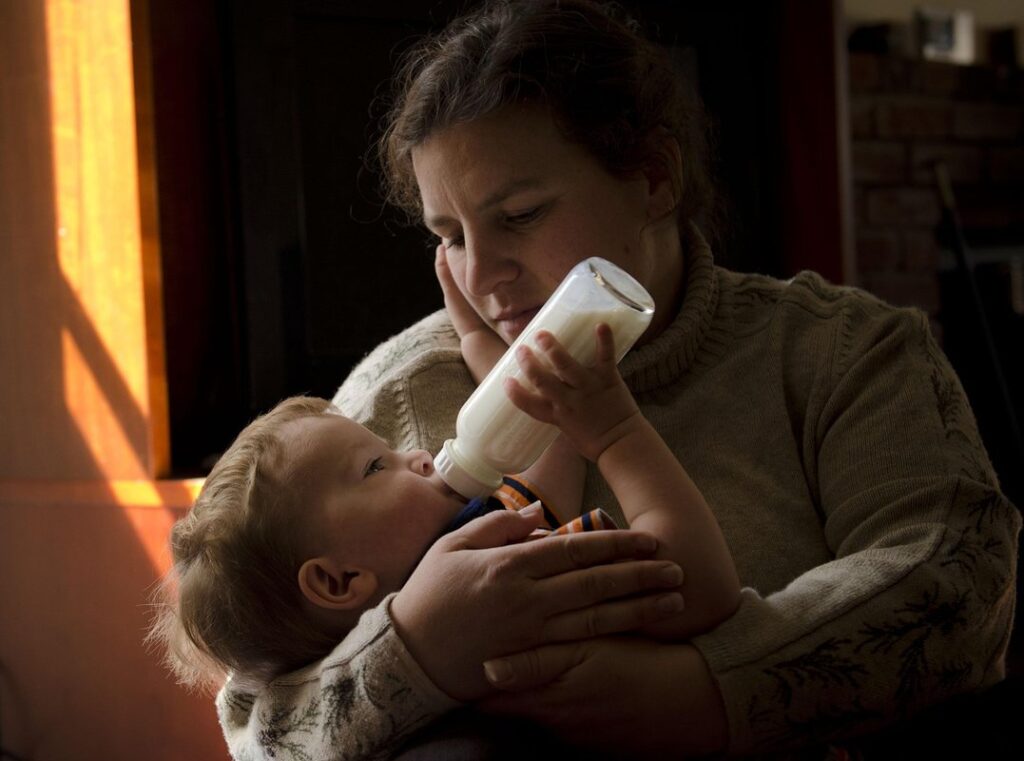
When it comes to caring for your baby, one of the most essential tasks is feeding them. But with so many options available, it can be overwhelming to know where to start when it comes to bottle feeding. From choosing the right bottle and nipple size to establishing a consistent feeding routine, there are many factors to consider. However, getting these basics right is crucial for your baby’s growth and development.
In this article, we’ll guide you through the essential bottle feeding guidelines that every parent should know. We’ll cover topics such as selecting the perfect bottle and nipple combination for your little one, establishing a routine that works for both you and your baby, and troubleshooting common issues that may arise. Whether you’re a first-time mom or looking to supplement breastfeeding with bottle feeds, our expert advice will help you navigate the world of bottle feeding with confidence.
Choosing the Right Bottle
When it comes to bottle feeding, selecting the right bottle for your baby is crucial. This section will help you make an informed decision based on your little one’s needs and preferences.
Factors to Consider When Selecting a Bottle Type
When selecting a bottle for your baby, it’s essential to consider several factors beyond just functionality. The type of bottle you choose will significantly impact your feeding routine and your baby’s overall health.
You’ll find three primary types of bottles on the market: glass, BPA-free plastic, and stainless steel. Glass bottles are durable and easy to clean, but they can be heavy and prone to shattering. On the other hand, BPA-free plastic bottles are lightweight and convenient, but some parents worry about their chemical leaching properties.
Stainless steel bottles are a popular choice due to their eco-friendliness and ability to keep liquids at the right temperature. However, they can be expensive and require special care to prevent corrosion.
Consider factors like durability, ease of cleaning, and eco-friendliness when selecting a bottle for your baby. If you plan to use the bottle frequently, choose one made from high-quality materials that will withstand regular use. For example, BPA-free plastic bottles are a great option if you’re always on-the-go.
How to Read Bottle Label Claims
When it comes to choosing a bottle for your baby, deciphering marketing claims on labels can be overwhelming. Terms like “BPA-free” and “dual-layer” might sound impressive, but what do they really mean? Let’s break down some common label claims to help you make informed decisions.
First off, “BPA-free” is a claim that has gained significant attention in recent years. BPA (Bisphenol A) is a chemical used in the production of polycarbonate plastics and resins. While it was once commonly used in baby bottles, research has shown potential health risks associated with its use. If you see “BPA-free” on a label, it means that the manufacturer has avoided using this chemical in their products.
However, another term to look out for is “phthalate-free.” Phthalates are chemicals similar to BPA and have also raised concerns about health effects. Some bottles might be labeled as “BPA-free” but still contain phthalates, so it’s essential to check for both claims if you’re concerned.
Not all labels are created equal, though. Dual-layer or triple-layer construction can refer to the bottle’s design, which includes a protective layer between the liquid and the inner walls of the bottle. This feature is meant to prevent leakage and improve durability but might not necessarily be related to safety concerns.
If a label claims to be “non-toxic” or “eco-friendly,” it may imply that the materials used are safe for your baby, but this doesn’t always mean they’re BPA-free or phthalate-free. Always check for these specific claims when making your decision.
In reality, even if a bottle is labeled as “BPA-free,” it’s essential to remember that there’s no strict regulation on what manufacturers can and cannot use in their products. The safest bet is often to opt for bottles made from glass or high-quality silicone materials that are free from BPA and phthalates.
When shopping for bottles, don’t rely solely on marketing claims. Research the brand, read reviews, and look into any certifications like FDA approval or compliance with international safety standards. By being an informed consumer, you can make a decision that’s best for your baby’s health and well-being.
Preparing for Bottle Feeding
Before you start feeding, it’s essential to prepare everything you’ll need to ensure a smooth and safe experience for both you and your baby. This includes setting up a clean and comfortable feeding space.
Understanding the Different Types of Nipples
When it comes to choosing the right nipple for your baby, there are several options available. Each type of nipple is designed with a specific purpose in mind, whether it’s to promote easy latching, reduce colic symptoms, or accommodate orthodontic needs.
Standard nipples are the most common type and are suitable for most babies. They’re typically made from latex or silicone and come in various sizes. However, they may not be the best choice for babies who experience gas or reflux issues.
Orthodontic nipples have a unique design that mimics the shape of a breast nipple. They’re designed to promote good oral development and can help prevent misalignment of the teeth and jaw. These nipples are especially beneficial for babies with tongue-tie or other oral restrictions.
Anti-colic nipples, on the other hand, are designed to reduce colic symptoms in babies. They often feature a unique valve that allows air to escape while minimizing gas intake. If your baby experiences frequent crying spells after feeding, an anti-colic nipple might be worth trying.
Ultimately, the right nipple for your baby will depend on their individual needs and preferences. Consider factors like age, feeding style, and any medical conditions or restrictions before making a decision.
Sterilizing Bottles and Nipples: A Step-by-Step Guide
Properly sterilizing bottles and nipples is crucial to prevent bacterial contamination and ensure the health and safety of your baby. When handling baby equipment, it’s essential to maintain high hygiene standards.
To sterilize bottles and nipples using the boiling method, first, wash them with soap and warm water. Then, submerge the items in a pot of boiling water for 5-10 minutes. Afterward, let them air dry on a clean towel. This method is effective but time-consuming.
For a quicker option, you can use a dishwasher with a sanitizing cycle. Check your user manual to ensure this feature is available. Load the bottles and nipples securely to prevent chipping or breaking during the cycle.
Another method involves using a microwave-safe bowl of water. Submerge the items in the bowl, heat for 1-2 minutes on high, then let them stand for an additional minute before rinsing with cold water. This method is efficient but be cautious not to overheat the water.
Regardless of the chosen method, always rinse and dry your baby’s bottles and nipples thoroughly after sterilization to prevent bacterial growth.
Establishing a Feeding Routine
Establishing a feeding routine from day one is crucial for your baby’s growth and development, so let’s dive into the details of creating a schedule that works. This section will cover tips on creating a customized feeding plan.
Creating a Schedule for Bottle Feedings
Establishing a regular feeding routine is crucial for bottle-fed babies. It helps them develop healthy eating habits and ensures they receive the necessary nutrients for growth. To create an effective schedule, consider your baby’s individual needs and age.
For newborns (0-3 months), you’ll likely need to feed every 2-3 hours around the clock. As your baby grows and matures, their feeding frequency will decrease. By 6-8 weeks, they may be ready for a more flexible schedule with longer intervals between feedings. For example, you might feed every 3-4 hours during the day and every 4-5 hours at night.
When determining how much to feed, follow these guidelines: Offer 2-3 ounces (60-90 mL) per feeding for newborns and gradually increase the amount as your baby grows. Monitor their weight gain and adjust accordingly. Remember that each baby is unique, so be prepared to make adjustments to your schedule as needed.
Be flexible and adapt to changes in your baby’s appetite or growth rate.
Recognizing Hunger Cues and Fullness Signs
As you establish a feeding routine for your baby, it’s essential to learn their unique hunger and fullness cues. These signs will help you determine when your baby is ready for a feeding session and when they’re satisfied. By recognizing these cues, you can avoid overfeeding or underfeeding, which can be detrimental to your baby’s growth and development.
Look for signs of hunger, such as rooting reflex, where your baby turns their head towards the nipple or breast when stimulated on the cheek. They may also suck on their hands or fingers, indicating they’re hungry. Other signs include making sucking noises, bringing their hands to their mouth, or becoming restless.
On the other hand, fullness cues can be more subtle. Pay attention if your baby pushes the bottle away, turns their head from side to side, or starts to spit out the milk. They might also slow down their feeding pace, swallow less frequently, or exhibit a relaxed facial expression. Trust these signs and don’t force them to finish the entire bottle. Instead, let them self-regulate their intake, which will help you establish a healthier feeding routine.
Troubleshooting Common Issues
Don’t worry if you encounter bumps along the way, we’ve got you covered. This next part addresses some common issues that may arise while bottle feeding your baby.
Dealing with Gas and Colic
Dealing with gas and colic is one of the most common concerns for new parents. It’s estimated that over 70% of babies experience some level of gas discomfort during their first few months. Gas and colic can be caused by a variety of factors, including overfeeding, swallowing air, or sensitivity to certain ingredients in formula.
To alleviate gas and colic discomfort, try these simple remedies:
* Burp your baby frequently: This helps release trapped air bubbles that can cause discomfort
* Use a pacifier: Sucking on a pacifier can help release swallowed air and calm the digestive system
* Try a gas drop or gripe water: These supplements contain natural ingredients like dill oil and ginger that can help soothe an upset stomach
Some parents also swear by these tips:
* Feed in smaller, more frequent sessions to prevent overfeeding
* Switch to a hypoallergenic formula if you suspect your baby is sensitive to certain ingredients
* Use a bottle brush with a narrow neck to help minimize air bubbles when mixing formula
What to Do When Your Baby Refuses a Bottle
If you’re finding that your baby refuses a bottle, it’s essential to remember that this is a common issue many parents face. A dislike for the nipple shape or size can be the culprit, while others might simply be learning to self-soothe and prefer the breast.
To address this refusal, start by examining the nipple type you’re using. Check if it’s too small or large for your baby’s mouth. Sometimes, switching to a different brand or model with a similar flow rate can resolve the issue. You can also try warming the bottle by placing it in a bowl of warm water or under running tap water – this can help make the feeding experience more comfortable.
Another approach is to introduce the bottle gradually and at a pace that works for your baby. You might begin by allowing them to latch on while still receiving breast milk, then gradually transition to formula or expressed breast milk in a bottle over several days. This allows their taste buds and digestive system to adjust without feeling overwhelmed or frustrated. Be patient, and don’t be afraid to consult with a healthcare professional if the issue persists.
Breastfeeding and Bottles: Coordinating the Two
Many mothers choose to breastfeed while also supplementing with bottles, but coordinating the two can be a challenge. This section will walk you through the best practices for combining breastfeeding and bottle-feeding.
Tips for Combining Breast and Bottle Feeding
Combining breast and bottle feeding can be a great option for many mothers. The key to a smooth transition is coordination, ensuring that you’re not overwhelming yourself with too much information at once. Start by setting clear goals: how often do you want to feed your baby by bottle, and when? Establishing a routine will make things easier in the long run.
When it comes to introducing bottles, consider your baby’s age and individual needs. For newborns, it’s essential to establish breast dominance before supplementing with bottles. Typically, this means exclusive breastfeeding for the first few weeks before introducing one or two bottle feedings per day. You can start by replacing one of your breastfeeding sessions with a bottle feeding, gradually increasing the frequency as needed.
For older babies (around 4-6 months), combining breast and bottle feeding becomes more flexible. Here are some tips to keep in mind:
• When using a bottle, make sure it’s at room temperature and not too cold or hot.
• Burp your baby after each feeding to avoid discomfort and gas.
• If you’re supplementing with formula, choose one that closely mimics breast milk for easier digestion.
By following these guidelines and being mindful of your baby’s cues, you can successfully combine breastfeeding with bottle feeding. Remember to always consult your pediatrician or healthcare provider for personalized advice on introducing bottles.
When to Switch from Breast to Bottle (or Vice Versa)
When it comes to switching between breast and bottle feeding, timing is everything. As a new mom, you’re likely wondering when and how to make the transition from one to the other. It’s essential to consider factors like supply and demand, baby’s development, and individual needs.
Typically, babies are ready to start taking bottles by around 3-4 weeks old, but it’s crucial to wait until your milk supply has regulated and you’re producing enough breastmilk for both feedings. A good rule of thumb is to introduce the bottle when your baby is about 2/3 full on a feeding session. This allows them to get used to the new sensation without feeling too full or uncomfortable.
Keep in mind that some babies may need more time to adjust, and it’s not uncommon for them to refuse bottles initially. Be patient and try different types of nipples and flow rates to find what works best for your baby. Remember, every baby is unique, so don’t be afraid to experiment and adjust your approach as needed. With a little trial and error, you’ll find the perfect balance between breastfeeding and bottle feeding.
Conclusion
In conclusion, following these comprehensive bottle feeding guidelines is crucial for ensuring your baby’s nutritional needs are met while establishing a healthy feeding routine. By being mindful of factors such as temperature control and proper storage, you can minimize the risk of contamination and ensure your baby’s safety. Don’t be afraid to reach out to your pediatrician if you have any concerns or questions along the way – they’re there to support you and your little one. Remember, consistency is key when it comes to bottle feeding, so try to establish a routine that works for you and stick to it. With time and practice, you’ll become more confident in your ability to provide for your baby’s nutritional needs, and both of you will benefit from the positive experiences that come with this special bonding time.
Frequently Asked Questions
What if I’m unsure whether my baby prefers a certain bottle or nipple type?
If you’re unsure which bottle or nipple is best for your baby, try offering a few different options to see what they prefer. You can also consider consulting with your pediatrician for personalized advice on choosing the right equipment.
How often should I sterilize bottles and nipples when my baby is sick?
When your baby is sick, it’s essential to prioritize hygiene. Sterilize bottles and nipples frequently, ideally after every use, to minimize the risk of bacterial contamination.
Can I reuse nipple rings or valves from a previous bottle set?
Reusing nipple rings or valves can compromise cleanliness and safety. It’s recommended to replace these parts with new ones when switching between different bottles or nipples to maintain optimal hygiene standards.
What are some common signs that my baby is getting too full during bottle feeds?
Pay attention to your baby’s feeding cues, such as pushing the bottle away, turning their head, or showing discomfort. If you notice these signs, it may be time to slow down the feed pace or offer smaller amounts.
How long do I need to store expressed breast milk in the fridge before using it for a bottle feed?
Expressed breast milk can typically be stored safely in the refrigerator for 3-5 days and in the freezer for up to 6 months. Be sure to label and date the storage containers accurately to ensure you use the oldest milk first.