
You’re probably familiar with the concept of “like a rock” and “like a feather,” but have you ever stopped to think about what makes something sink or float in water? The oil water experiment is a fascinating demonstration of density and buoyancy, two fundamental principles that govern our world. With just a few simple materials, you can conduct this fun and educational experiment at home or in the classroom. But what exactly happens when you combine oil and water, and why does it matter? In this comprehensive guide, we’ll take you through the setup, results, and real-world applications of the oil water experiment, revealing the science behind this intriguing phenomenon and exploring its relevance to our everyday lives.
Introduction to the Oil Water Experiment
This is where we’ll introduce you to one of the coolest and most educational experiments ever: mixing oil and water. Let’s dive in and explore what happens when these two liquids combine!
What is the Oil Water Experiment?
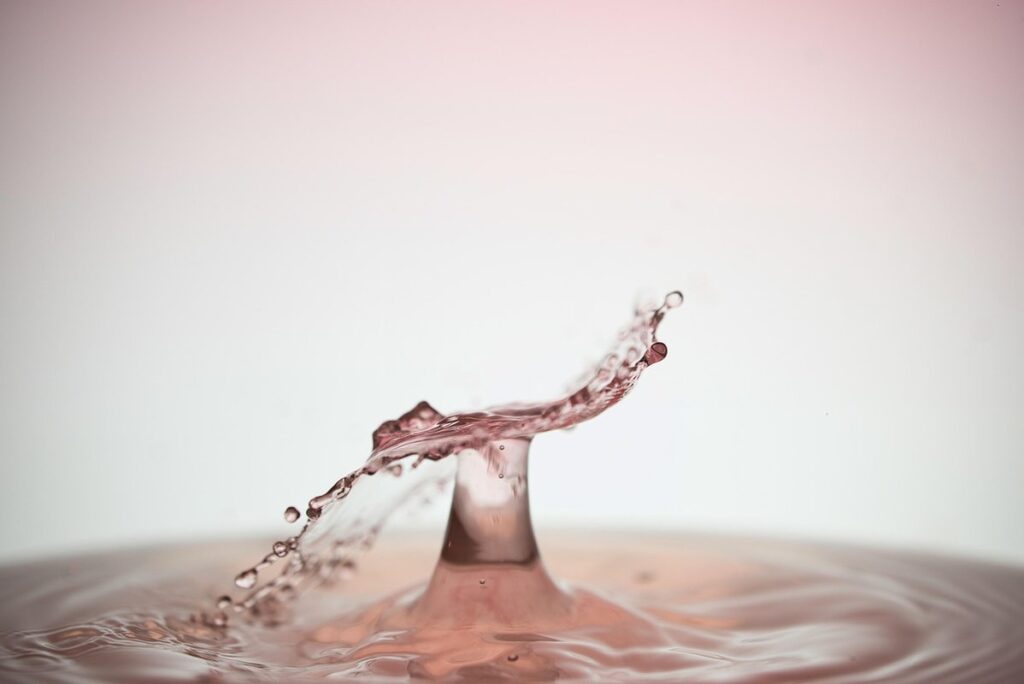
The Oil Water Experiment is a timeless and fascinating demonstration of two fundamental concepts in physics: density and buoyancy. At its core, the experiment involves mixing oil and water to observe their behavior when combined. What’s surprising is how these two liquids, with distinct properties, interact and separate when placed together.
When you pour oil into a container filled with water, it doesn’t immediately mix with the water. Instead, the oil forms a distinct layer on top of the water due to its lower density compared to water. This separation occurs because the molecules in both liquids are arranged differently, causing them to interact and separate based on their densities.
The significance of this experiment lies not only in showcasing density and buoyancy but also in highlighting the importance of understanding these concepts in real-world applications, such as engineering and navigation. By grasping how different substances behave when combined, we can better design systems that operate efficiently and safely.
Background Information on Density and Buoyancy
When working with oil and water, it’s essential to understand two fundamental concepts: density and buoyancy. Density refers to an object’s mass per unit volume, while buoyancy is the upward force exerted on an object by a fluid, such as water or air.
Let’s take a closer look at these definitions. Imagine holding a rock underwater – if it sinks, its density is greater than that of water. On the other hand, if it floats, its density is less than that of water. Understanding these concepts helps us predict whether an object will float or sink in a given fluid.
In various fields, such as engineering and architecture, knowledge of density and buoyancy is crucial for designing structures like ships, buildings, and bridges. For instance, knowing the density of a material can help architects choose suitable building materials that provide sufficient structural support without being too heavy.
In everyday life, understanding these concepts helps us make informed decisions when handling objects near water, whether it’s storing oil in tanks or cleaning up spills.
Materials Needed for the Experiment
To conduct the oil and water experiment, you’ll need a few simple materials that can be found around the house. Take a look at our list below to ensure everything is ready to go!
Essential Components
To conduct an oil water experiment successfully, you’ll need to gather some essential components. Let’s start with the types of oil and water you’ll require. For this experiment, it’s best to use vegetable oil like canola or olive oil. These oils have a high viscosity, making them ideal for demonstrating the concept of density differences.
You’ll also need distilled water, as tap water may contain impurities that could affect the experiment’s results. Ensure that your water is at room temperature, as cold or hot water can alter the oil droplets’ behavior.
Moving on to containers and equipment, you’ll need a clear glass or plastic container with a flat bottom, allowing for easy observation of the oil-water interaction. A measuring cup or pipette will come in handy for accurately transferring small amounts of oil and water. Additionally, have a thermometer nearby to monitor the temperature, if needed.
For a more precise measurement, consider investing in a digital scale or a balance to weigh out exact amounts of oil and water.
Optional Materials for Enhanced Results
If you want to take your oil and water experiment to the next level, consider adding some optional materials to enhance the results. Food coloring is a great way to visualize the separation process. Simply add a few drops of food coloring to the water before mixing it with oil. This will allow you to see the distinct layers forming as the mixture settles.
Another option is to use soap or dish detergent in place of regular oil. This will create a more dramatic separation, making it easier for students to observe and understand the process. You can also experiment with different types of soap or detergents to see how they affect the outcome.
If you’re looking for an even more engaging experience, try adding some coffee grounds or sand to the water mixture. These particles will settle at the bottom of the container, allowing students to explore the concept of density and layer formation in a more hands-on way. Remember to adjust your measurements accordingly when using these optional materials to ensure accurate results.
Conducting the Oil Water Experiment
Now that you’ve mixed oil and water, it’s time to observe how they separate. In this next step, we’ll guide you through safely conducting the experiment with minimal mess and maximum observation.
Setting Up the Experiment
To set up the oil water experiment successfully, you’ll need to prepare the necessary materials and create a controlled environment. First, gather the required materials: a clear glass container, vegetable oil, water, food coloring (optional), Alka-Seltzer tablets or soap, a measuring cup, and a thermometer.
Next, fill the container with 2-3 cm of vegetable oil. This will serve as the denser layer. If you’d like to add color, now’s the time to do so by adding a few drops of food coloring.
Measure out 4-5 cm of water and carefully pour it over the oil layer in the container. Use a measuring cup or spoon to prevent spills. Be patient; as the two liquids combine, they may take a while to separate completely.
If desired, add an Alka-Seltzer tablet or soap directly to the water layer. This will help speed up the separation process by introducing surface tension. Monitor your experiment and record observations, including any notable changes in temperature. Note how long it takes for the liquids to settle into distinct layers.
Observations and Recordings
As you set up the oil water experiment, it’s essential to make observations and record data accurately. Start by noting the initial separation of the oil and water mixture. Observe the time it takes for the liquids to separate completely, which can range from a few minutes to several hours.
Take precise measurements of the separated layers, including their thickness and density. Use a ruler or caliper to measure the height of each layer, and record these values in your notebook. You can also use a stopwatch to measure the time it takes for the liquids to separate.
When collecting data, consider factors like temperature, surface tension, and the type of oil used. These variables can significantly impact the separation process. Take note of any changes in the mixture’s appearance or behavior during the experiment.
It’s also crucial to record your observations at regular intervals, such as every 10-15 minutes, to track the progress of the liquids’ separation. This will help you identify patterns and make informed conclusions about the oil water experiment.
Interpreting Results of the Oil Water Experiment
Now that you’ve conducted your oil water experiment, it’s time to make sense of what happened. In this next part, we’ll walk through how to accurately interpret your results and draw meaningful conclusions.
Understanding the Role of Density
When you’re observing the behavior of oil and water in an experiment, density plays a significant role. Density is defined as mass per unit volume of a substance, and it affects how objects interact with their surroundings. In the context of the oil water experiment, density determines which layer forms at the top or bottom.
Let’s consider an example: when you mix oil and water, they separate into distinct layers due to differences in density. Oil has a lower density than water, so it floats on top. This is why you see oil droplets floating on the surface of water. The same principle applies in real-life situations – think of how boats work. A boat displaces a certain amount of water, creating an upward buoyant force equal to the weight of the water displaced. This is only possible because the density of the boat is lower than that of water.
To further illustrate this concept, consider a scenario where you’re trying to separate oil from water in a contaminated environment. You could use a method called “density separation,” which involves using a substance with a higher or lower density than both oil and water to facilitate separation. This technique can be useful for cleaning up spills or extracting oil from wastewater. By understanding the role of density, you’ll gain a deeper appreciation for how substances interact and behave in different environments.
Analyzing Buoyancy Forces
When analyzing the results of the oil and water experiment, it’s essential to consider the role of buoyancy forces in shaping the mixture’s behavior. Buoyancy is the upward force exerted by a fluid (liquid or gas) on an object partially or fully submerged within it. In the context of our experiment, buoyancy affects the oil droplets’ ability to disperse and mix with water.
To calculate the buoyant force, we use Archimedes’ Principle: Fb = ρv g, where Fb is the buoyant force, ρ is the fluid’s density, v is the volume of the object immersed, and g is the acceleration due to gravity. For our experiment, the density of water (ρw ≈ 1000 kg/m³) and oil (ρo ≈ 800-900 kg/m³) are key parameters.
The magnitude of the buoyant force can be substantial, particularly for denser substances like oil. This means that as we observe the mixture’s behavior, it’s crucial to consider how buoyancy is influencing the oil droplets’ movement and distribution within the water.
Real-World Applications of the Oil Water Experiment
Now that you’ve seen how oil and water interact, let’s take a closer look at where this concept plays out in real-world situations. We’ll explore some fascinating examples.
Uses in Engineering and Architecture
When it comes to building design and ship construction, understanding density and buoyancy is crucial for ensuring stability and efficiency. In engineering and architecture, this knowledge can be applied to create structures that float effortlessly on water, such as catamarans or trimarans.
For instance, architects designing yachts need to consider the distribution of weight in order to optimize their design and prevent capsizing. By understanding how density affects buoyancy, they can strategically place heavy components, like engines or ballast tanks, to maintain a stable center of gravity.
Similarly, ship builders use this knowledge to construct vessels that can navigate shallow waters with ease. By carefully designing the hull’s shape and weight distribution, ships can reduce their draft while maintaining stability in choppy seas. For example, the Singaporean company, ST Engineering, has successfully designed and built a range of naval vessels that incorporate buoyancy principles for enhanced maneuverability.
In practical terms, engineers and architects can use online tools or software to simulate different scenarios and test their designs before actual construction begins. This approach enables them to refine their ideas and create more efficient, safe structures.
Environmental Implications
Oil spills and waste management have significant environmental implications. When oil and water mix, they form an emulsion that can persist in ecosystems for years. This persistence can lead to long-term damage, including contamination of soil, air, and water. For instance, the Deepwater Horizon spill released approximately 4.9 million barrels of oil into the Gulf of Mexico, causing widespread harm to marine life.
In terms of waste management, improperly disposed-of oil can leak into waterways, contributing to pollution. Conservation efforts can mitigate this damage by promoting responsible oil handling practices. To do so, individuals and organizations should prioritize proper disposal methods for used oil. This includes taking it to designated collection facilities or recycling centers.
Additionally, communities can implement strategies to prevent oil spills from occurring in the first place. These include regular equipment inspections, using containment booms during transport, and developing emergency response plans. By adopting these best practices, we can reduce the likelihood of environmental disasters caused by oil spills and promote a more sustainable future for our planet.
Safety Precautions and Conclusion
Now that you’ve completed the oil water experiment, it’s time to wrap things up safely. This final section will cover essential safety precautions to keep in mind.
Handling Hazardous Materials
When handling hazardous materials during the oil and water experiment, it’s essential to prioritize caution. Chemicals such as soap, detergent, and bleach can cause skin irritation, while equipment like beakers and pipettes may break if dropped.
Before starting the experiment, ensure you have protective gear, including gloves, goggles, and a lab coat. These will provide a barrier between your skin and any potential chemicals. When handling materials, follow the instructions carefully and avoid mixing substances unless it’s specifically required by the experiment.
Dispose of hazardous materials responsibly after use. If you’re working with liquids, pour them down the drain, but be sure to rinse the container thoroughly first. For solid waste like empty packaging or broken equipment, dispose of it in a designated trash can. Labeling containers properly is also crucial; clearly mark them with their contents and the date they were used.
Remember that accidents can happen despite precautions. If you spill something, clean up promptly using soap and water.
Recap and Future Directions
As we conclude our oil and water experiment, let’s recap the key takeaways. We’ve learned that the density of a substance plays a crucial role in determining its behavior when mixed with another substance. When two liquids have different densities, they separate, forming distinct layers. This is exactly what we observed when we mixed vegetable oil and water.
In this experiment, we also saw how surface tension affects the interaction between the two liquids. The oil’s non-polar molecules repelled the polar water molecules, causing them to separate and form distinct layers. This phenomenon has significant implications in various industries, including chemical engineering and environmental science.
For future experiments or investigations, consider exploring the effects of different temperatures on the separation process. How does changing the temperature affect the density of the liquids? Can you think of ways to use this knowledge to create innovative solutions for real-world problems?
Remember, experimentation is an iterative process, and our findings can serve as a foundation for further exploration. Take what you’ve learned from this experiment and apply it to your own scientific inquiries – who knows what discoveries await us!
Frequently Asked Questions
What happens if I add a surfactant to the oil water mixture?
Adding a surfactant, or surface-active agent, can alter the behavior of the oil-water mixture by reducing its surface tension and allowing it to mix more easily. However, this may also change the experiment’s results, making it essential to note any differences in observations and recordings. When using a surfactant, ensure you handle it carefully according to safety precautions.
Can I use vegetable oil or another type of oil for the experiment?
While vegetable oil can be used as a substitute for mineral oil, keep in mind that its viscosity may differ slightly, affecting the separation process. Other types of oil, such as coconut oil or olive oil, might not work well due to their lower densities and higher viscosities.
How do I dispose of the used materials safely after completing the experiment?
When disposing of the used materials, make sure to follow proper safety protocols. Oil can be collected from a container and disposed of as hazardous waste. Water can usually be poured down the drain, but check with local regulations first. Clean any equipment thoroughly before storage or disposal.
Can I repeat the experiment multiple times, and what are some tips for consistent results?
Yes, you can repeat the oil water experiment multiple times to observe consistent results. To ensure consistency, use identical materials and follow the same setup procedure each time. Regularly calibrate your measuring devices and maintain a constant temperature in the room where the experiment is conducted.
Are there any adaptations I can make for the experiment with different liquids or containers?
Yes, you can adapt the oil water experiment using various liquids, such as glycerin or corn syrup, to demonstrate density differences. Additionally, consider using different container shapes and sizes to explore how these affect the separation process. Be aware that changes in materials may impact results and require adjustments to your setup and data collection.