
Painting with kids is an incredible way to foster creativity, fine motor skills, and self-expression. As parents and caregivers, we often look for fun and engaging activities that encourage our little ones to explore their artistic side. One slithery subject that’s perfect for young artists is the snake! Not only are snakes a great topic for learning about colors and patterns, but they’re also an excellent way to introduce kids to the world of nature-inspired art. In this article, we’ll delve into the world of painting snakes with kids, covering essential techniques, color palettes, and display ideas to showcase their masterpieces. We’ll also explore how to encourage creativity and imagination in your young artists. Get ready to unleash your child’s inner artist and discover the fun of painting a snake together!
Getting Started with Painted Snakes
Before we dive into painting, let’s make sure you have everything you need to create a beautiful painted snake! Gather your materials and follow these simple steps.
Choosing the Right Colors
When it comes to painting a snake, one of the most exciting parts is choosing the colors! This decision can completely transform the look and feel of your finished masterpiece. As you start thinking about what colors to use, remember that they play a huge role in setting the mood or theme of your painted snake.
Let’s think about some fun color combinations kids might enjoy: bright blues and yellows for a happy summer snake, muted greens and browns for a more natural camouflage snake, or bold reds and blacks for a fiery desert dweller. Consider what kind of environment you want to create with your paint job – do you want it to be calm and soothing, or vibrant and playful?
To pick the perfect colors, think about the mood you want to convey with your painted snake. Do you want it to look friendly and approachable, or sleek and mysterious? Think about what kind of animals live in different parts of the world and how their habitats might influence their coloration. For example, a snake that lives in the desert might have a sandy beige coat with darker stripes for shade.
Some fun tips for choosing colors include:
* Let your child’s personality shine through – use bright, bold colors if they’re an outgoing kid, or softer pastels if they prefer more mellow vibes.
* Think about what colors you see in nature and how you can incorporate those into your painted snake.
* Experiment with layering different colors to create depth and dimension – like using a lighter color for the snake’s belly and a darker one for its back.
Preparing Your Canvas
When it comes to painting a snake for kids, preparing the canvas is an essential step. You’ll want to start by choosing a surface that’s specifically designed for kids’ art projects. Look for paper or canvas with a smooth texture and a durable finish that can withstand multiple layers of paint.
Some popular options include watercolor paper, construction paper, or even fabric scraps. If you’re using a large piece of paper, consider taping it down to a wall or board to prevent it from buckling under the weight of paint.
To make the process fun and engaging for kids, try incorporating some interactive elements into your setup. For example, you can lay out various paint colors and materials, such as glitter or stickers, and let the kids choose how they want to add texture and interest to their snake design. Alternatively, you can create a “snake habitat” by taping down rocks, leaves, or other natural materials around the canvas.
Remember to cover your work surface with newspaper or a plastic tablecloth to make cleanup a breeze. With these simple tips, you’ll be well on your way to creating a fun and creative painting experience for kids!
Understanding Snake Anatomy
To get started, let’s explore how snakes are built. From their slithery scales to their strong bodies, learning about snake anatomy will help you bring your painting to life!
Observing Real-Life Snakes
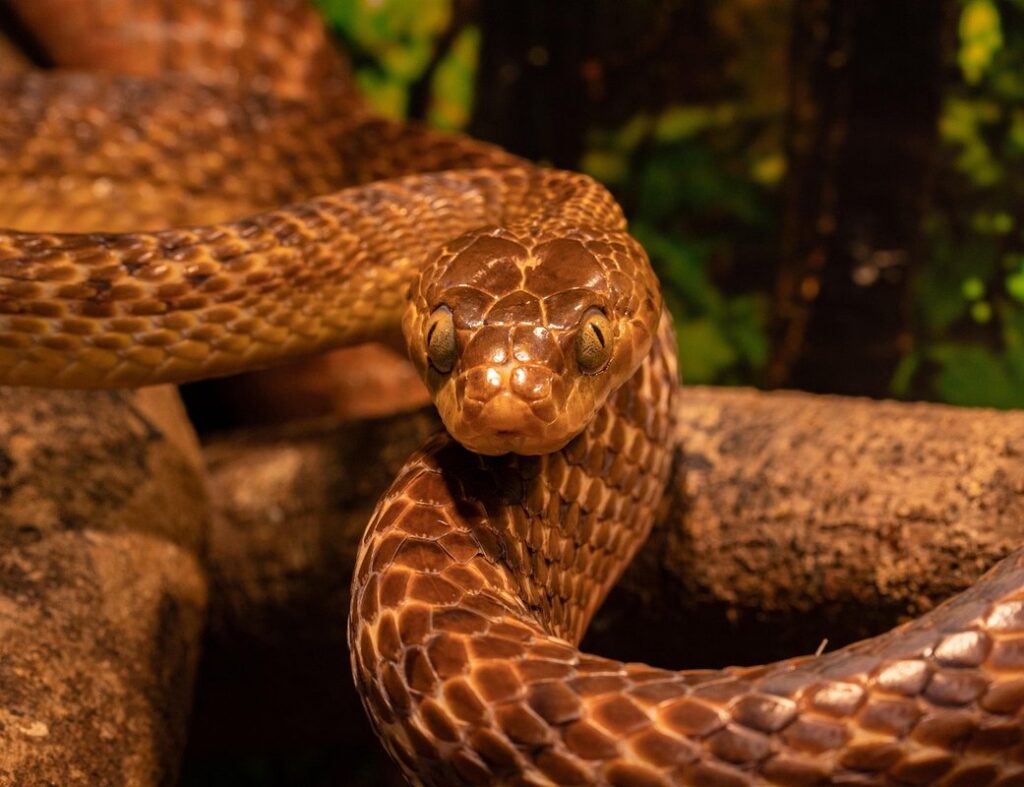
When learning to paint a snake, it’s essential to observe real-life snakes to gain inspiration and understanding of their unique shape and patterns. By studying the characteristics of actual snakes, you can develop your artistic skills and create more realistic and accurate paintings.
One great way to observe snakes is by visiting a zoo or wildlife sanctuary. Many zoos have dedicated reptile houses where you can see various species of snakes up close. When observing snakes in these settings, be sure to follow the rules and guidelines provided by the zoo staff. Keep a safe distance from the enclosures, and never attempt to touch or handle the snakes.
Observe how different species of snakes have distinct patterns and shapes that help them blend into their environments. For example, the desert-dwelling sidewinder has a unique pattern of dark blotches on its back that allow it to camouflage itself in the sand. By observing these characteristics, you can develop your artistic skills and create more realistic paintings of snakes.
Remember to take notes or sketch the details of the snake’s shape and patterns during your observation. This will help you recall specific features when painting and ensure your artwork is accurate and detailed.
Basic Shape and Proportions
Let’s start by looking at the basic shapes that make up a snake’s body. A snake is essentially a long, curved tube with a rounded head and a tapering tail. To draw this accurately, you’ll want to focus on getting the proportions right first.
The average length of a snake is about 2-3 times its width. For example, if your snake is 10 inches long, it should be about 4-5 inches wide at its thickest part (just behind the head). To practice drawing this proportion, try sketching a rectangle with a curved top and bottom, making sure the length is roughly twice the width.
Now let’s talk about scales. Snakes have tiny little plates on their skin that help them slither smoothly through the grass. These scales are usually diamond-shaped or hexagonal in shape. To draw them accurately, try sketching a series of connected diamonds along the snake’s body, making sure they get smaller towards the tail.
Painting Techniques and Tips
Now that you’ve got your snake body painted, let’s dive into some fun techniques to add some extra flair to your reptile’s design! We’ll explore ways to create patterns and textures.
Brushstrokes and Texture
When painting a snake, getting the scales and patterns just right can be a bit tricky. But don’t worry, with some simple techniques, you’ll be able to create a realistic-looking snake in no time! Let’s talk about brushstrokes and texture – two essential tools for creating those all-important scales.
To start off, grab your painting brushes in various sizes. A smaller brush is perfect for detailing the individual scales, while a larger one can help cover bigger areas of the snake’s body. Try using different brushstrokes to create texture. For example, use long, smooth strokes with the flat side of the brush to paint the main body of the snake, and then switch to short, dabbing strokes with the round tip for the scales.
You can also experiment with texture by adding patterns or ridges to your scales using a textured brush or even a household item like a toothpick. Don’t be afraid to get creative! Remember, practice makes perfect, so have fun trying out different techniques until you find what works best for you.
Adding Shading and Depth
When painting a snake for kids, adding shading and depth can make all the difference. Think about it like this: when you see a real snake slithering through the grass, its body looks three-dimensional, right? It’s not just flat on one side – it has curves, contours, and shadows that give it life.
To create a similar effect with your painted snake, start by thinking about where the light would hit its body. Would it be in direct sunlight or dappled shade? Use a mix of colors to create shadows and highlights. For example, if you’re painting with tempera paint, try mixing a little blue with the main color for darker areas. This will give your snake some depth without looking too dark.
Remember, shading is all about contrast. Try using different shades of the same color to add dimension to your snake’s body. Don’t be afraid to get creative and experiment with different techniques! You can even use a small brush to paint in some fine details, like scales or texture on the snake’s skin. With practice, you’ll be creating realistic, three-dimensional snakes in no time!
Inspiration from Nature and Art
Let’s find inspiration for our snake painting project by exploring how nature and art can come together to create unique and exciting designs. Think about how a real-life snake might look in the forest, and how we can bring that magic onto our canvas!
Real-Life Patterns and Textures
When it comes to painting a realistic snake, observing patterns and textures found in nature can be incredibly inspiring. Let’s take a closer look at some amazing examples! Reptilian scales, for instance, can add an extra layer of realism to your artwork. Imagine mimicking the overlapping scales on a snake’s body by using small brushstrokes and alternating colors.
Tree bark is another fascinating pattern that can be incorporated into your painting. You can use rough, impasto techniques to create a textured effect that resembles real tree bark. By applying layers of paint with different consistencies, you’ll achieve a three-dimensional look that will make your snake’s habitat feel more immersive.
But don’t forget about the scales themselves! Observe how they shimmer in the light and try replicating this effect on paper. You can use metallic paints or even layering techniques to achieve an iridescent sheen. By combining these patterns and textures, you’ll create a vibrant and lifelike painting that will capture your audience’s imagination.
For example, consider painting the snake’s underside with smooth, blending strokes to mimic the shiny scales on its belly. On the other hand, use rougher brushstrokes for the back of the snake, where the scales are more prominent. This contrast between textures and patterns will add depth and visual interest to your artwork.
Famous Artists and Their Snakes
When we think of snakes, we might imagine slithery creatures that live in the wild. But did you know that some famous artists have been inspired by these reptiles and featured them in their artwork? Let’s take a look at a few examples!
Frida Kahlo was a Mexican artist known for her vibrant and emotive paintings. In her piece “The Wounded Table”, she includes a snake wrapped around the legs of the table. This might seem strange, but it’s actually a symbol of renewal and transformation – just like how snakes shed their skin to grow new ones!
Another artist who featured snakes in his work is Henri Rousseau. His painting “Surprised” shows a woman sitting on a bench with a snake slithering up her leg. This artwork is often seen as a commentary on the relationship between humans and nature.
So, how can we use these art pieces to inspire our own drawings? First, take a closer look at the colors used in each painting. Frida Kahlo’s work is full of bold blues and greens, while Henri Rousseau’s piece features softer pastel shades. Experiment with different color combinations to see what works best for you!
When drawing your snake, think about its body shape – snakes are long and slender, but also have a distinctive pattern on their skin. You can use lines or shapes to create this texture effect.
Most importantly, remember that art is all about experimentation and having fun! Don’t be afraid to try new things and see what you come up with. Who knows – maybe your artwork will feature a snake just like Frida’s or Henri’s!
Displaying Your Masterpiece
Now that you’ve finished painting, let’s talk about how to show off your amazing snake artwork to family and friends! Let’s get creative with some fun display ideas.
Framing and Mounting
Now that you’ve created a stunning snake painting with your child, it’s time to display your masterpiece proudly! You’ll want to make sure it looks its best, so let’s dive into the world of framing and mounting.
When it comes to choosing a frame for your snake painting, consider the color palette of the artwork. If you’re using bright colors, opt for a simple white or black frame that won’t compete with the colors. For more muted tones, try a frame with a matching hue to create a cohesive look. You can also choose frames in fun shapes and sizes to add an extra touch of whimsy.
For a more creative display, consider mounting your snake painting on a canvas or wood panel. This will give it a textured, three-dimensional look that’s perfect for a nursery or playroom. Use wall hooks or screws to hang the artwork securely, making sure not to damage the surrounding area.
Some other ideas for displaying your snake painting include turning it into a gallery wall with other artwork from your child’s collection, or creating a colorful border around the edges of the painting using stickers, stamps, or even fabric!
Encouraging Creativity and Pride
Displaying and showcasing your child’s artwork can have a profound impact on their creativity and confidence. When we hang their painting proudly on the wall or create a special display case for it, we’re sending a clear message: “Your art matters!” This simple act of appreciation can encourage young artists to explore new colors, textures, and techniques.
Make time to talk with your child about their artwork. Ask open-ended questions like “What inspired you to paint a snake?” or “How did you choose those specific colors?” Listen attentively to their responses and show genuine interest in their creative process. This helps build their confidence and reinforces the idea that their art is valuable.
Celebrate small victories, even if it’s just a tiny detail they mastered. For instance, if your child added scales to their snake, praise them for their attention to detail. By acknowledging and celebrating their efforts, you’ll create an environment where creativity and pride thrive. As kids feel more confident in their abilities, they’ll be more likely to experiment with new ideas and techniques.
Safety Precautions and Fun Activities
Now that you’ve got your snake’s body painted, it’s time to think about safety and fun! We’ll cover essential precautions to keep little artists safe while enjoying exciting activities.
Painting with Kids: Essential Tips
When painting with kids, safety should always be the top priority. To ensure a fun and mess-free experience for both you and your little ones, it’s essential to use washable paints specifically designed for children. These paints are formulated to be easy to clean off surfaces and skin, reducing the risk of stains and irritation.
Before starting the painting session, make sure to cover your work surface with old sheets or tablecloths to prevent any accidental spills from damaging the furniture. Wear protective gear such as smocks, aprons, or even old shirts to keep your clothes clean. This will not only save you time on laundry but also prevent paint from getting stuck in fabric.
To minimize messes and make clean-up easier, use a large sheet of paper or a canvas specifically designed for kids’ art projects. This will allow them to express their creativity without worrying about making a mess. If accidents do happen, have some soap and water ready to quickly clean up any spills.
Additional Activities for Kids
Painting a snake is just the beginning of a fun and educational experience for kids. To make it even more engaging and informative, consider incorporating additional activities that complement this creative endeavor. Reading books about snakes together can be an excellent way to spark their interest and encourage further learning.
Start by browsing through children’s books at your local library or bookstore, selecting titles with vibrant illustrations and easy-to-understand text. Some popular choices include “Snakes” by Nic Bishop and “National Geographic Kids: Snakes”. As you read together, ask open-ended questions that foster curiosity and critical thinking, such as “What do you think the snake’s habitat is?” or “Why do snakes shed their skin?”
You can also explore educational videos featuring snakes on platforms like National Geographic Kids, PBS Kids, or YouTube channels like SciShow Kids. Watching these videos together can help kids visualize and understand complex concepts, from the different types of snakes to their unique characteristics and behaviors. Be sure to pause the video frequently to discuss what they’ve learned and ask follow-up questions.
Frequently Asked Questions
How can I ensure my child’s painted snake is a unique masterpiece?
Make sure to encourage your child to experiment with different color combinations, brushstrokes, and textures. You can also provide them with various materials like glitter, stickers, or stencils to add an extra layer of creativity. This will help them develop their fine motor skills while fostering imagination and self-expression.
What if my child wants to paint a snake that doesn’t follow traditional anatomy?
While it’s essential for kids to learn about basic shapes and proportions, you can also explore abstract representations or imaginative interpretations of snakes. Encourage your child to think creatively and explain their artistic choices. This will help them develop problem-solving skills and confidence in their art.
Can I use watercolor paints with children who are still learning to hold a brush?
Yes! Watercolor paints are an excellent choice for young artists because they’re easy to clean up, and the paint flows smoothly from the brush. To make it even more manageable, try using larger brushes or sponges that can help control the paint flow.
How can I display my child’s painted snake in a way that showcases their creativity?
Consider creating a fun and colorful gallery wall with all of your child’s artwork, including their painted snakes! You can also use picture frames, string, and clothespins to create a whimsical display. This will not only showcase their art but also encourage them to be proud of their creations.
Can I paint other animals alongside the snake for a fun collaborative project?
Absolutely! Painting multiple animals together can make the experience even more enjoyable and engaging for your child. Just remember to introduce one or two new subjects at a time, so they don’t feel overwhelmed. This will help them develop their observation skills while fostering a sense of accomplishment and pride in their artwork.