
If you’re a parent or caregiver looking for creative ways to engage your little ones, you’ve come to the right place. Paper plate art is an excellent activity for preschoolers, offering endless possibilities for creativity and self-expression. Not only does it allow them to tap into their imagination, but it also helps develop fine motor skills and hand-eye coordination. The best part? It’s mess-free! With just a few simple materials, you can create a variety of fun and engaging projects that will keep your preschoolers occupied for hours on end. In this article, we’ll explore some exciting paper plate art ideas perfect for young artists, from basic crafts to more complex designs. Whether you’re looking to spark creativity or make crafting easier, these activities are sure to delight both kids and parents alike!
Introduction to Paper Plate Art
Get ready to unleash your child’s creativity as we explore the world of paper plate art, a fun and accessible medium for preschoolers. We’ll introduce you to the basics of creating amazing art pieces!
Benefits of Paper Plate Art for Young Children
When exploring the world of art with young children, paper plate art is an excellent way to encourage creativity and fine motor skills development. One of the primary benefits of paper plate art for preschoolers is that it allows them to express themselves freely without worrying about making mistakes.
By using paper plates as a medium, children can create unique and imaginative pieces while developing their fine motor skills through various techniques such as cutting, tearing, and pasting. This process helps build hand-eye coordination and dexterity, essential skills for young learners. For instance, when making a plate collage, children must carefully place the paper strips onto the plate, practicing their precision and control.
Moreover, paper plate art is an excellent way to introduce preschoolers to various art techniques like layering, texture, and color mixing. It’s also an ideal medium for exploring different shapes and forms, fostering creativity and imagination in young minds.
Setting Up a Paper Plate Art Station
When setting up a paper plate art station for preschoolers, it’s essential to gather all the necessary materials and create an inviting workspace. Start by collecting a variety of paper plates, as these will be the primary medium for your art projects. You’ll also need scissors, glue, and other craft supplies such as markers, crayons, and paint.
In addition to these basic materials, consider adding some decorative items like stickers, stamps, or stencils to encourage creativity and exploration. Make sure to have a designated area for the children to work on their art projects, with ample space to spread out their paper plates and supplies.
To create an inviting workspace, set up the station in a way that promotes independence and self-expression. Consider arranging the materials in a way that makes it easy for the children to access what they need, such as having the glue and scissors within reach. A little creativity in setting up the space can go a long way in sparking imagination and inspiring young artists.
Some other tips to keep in mind include:
• Having a variety of paper plates on hand, including different shapes and sizes
• Encouraging children to experiment with different textures and materials
• Displaying their artwork prominently to foster pride and self-confidence
Fun and Easy Paper Plate Crafts
Get creative with your little ones as we share some delightful paper plate crafts that are perfect for preschoolers to make and enjoy. We’ve got fun projects waiting!
Plate Butterfly Craft
Creating a colorful butterfly art project using paper plates is an excellent way to introduce preschoolers to the world of art and creativity. To start, you’ll need two paper plates, construction paper, scissors, glue, markers, and other basic materials.
Begin by cutting out wing shapes from the construction paper. You can use the plate as a template or draw inspiration from pictures of butterflies. Cut out two identical wing shapes to create a symmetrical effect. Next, cut along the edges of the paper plates to create a foldable design. This will help your butterfly take shape.
Now it’s time to assemble your creation! Glue the wings onto the back of one plate, making sure to leave some space in between for folding. Use markers to draw on antennae, eyes, and other details that will bring your butterfly to life. Fold the plates together to create a 3D effect, and voila! Your colorful butterfly art is complete.
Tips: Encourage children to experiment with different colors and patterns on their wings. This project is an excellent way to practice fine motor skills and develop creativity.
Paper Plate Robots
Get ready to transform plain paper plates into futuristic robots that will delight your little ones! This fun and easy craft is perfect for preschoolers who love exploring their creativity. To make a paper plate robot, you’ll need just a few simple materials: paper plates, scissors, glue, and markers.
Start by cutting out arms and legs from the paper plate to create the robot’s base. Cut two small rectangles from another plate to create the robot’s head. Use glue to attach the head to the top of the body, making sure it’s secure. Now it’s time for some creative customization! Use markers to draw on eyes, a mouth, and any other features you like.
Consider adding details like buttons, screens, or even a miniature propeller to give your robot some personality. You can also experiment with different shapes and colors to create a unique robot design. Encourage your child’s imagination by asking them to describe their robot’s special powers or abilities. With these simple materials and some creative flair, you’ll be amazed at what your preschooler can create!
Thematic Paper Plate Art Activities
Get ready to transform paper plates into vibrant, theme-based masterpieces that’ll spark your preschooler’s imagination and creativity! We’ve got three exciting projects to explore.
Underwater World
As we dive into the underwater world, our little artists will be creating a stunning oceanic scene using paper plates as their canvas. To get started, gather the following materials: blue paint, green and brown paint for the seaweed, glue, scissors, construction paper, and various ocean creatures cutouts (you can use foam shapes or draw them yourself).
Begin by painting a large blue plate to serve as the ocean’s backdrop. While it dries, let your child help you cut out seaweed strips from the green and brown construction paper. Use glue to attach these swaying strands to the edges of another plate, creating a 3D effect.
Next, bring in the sea creatures! Glue them onto the blue plate, encouraging your child to place them strategically amidst the seaweed. You can also use paint to draw schools of fish or add texture to the seaweed using a sponge or a toothbrush.
To take it further, ask your child to imagine they are snorkeling through the coral reef, pointing out different creatures as they explore. This activity not only fosters creativity but also teaches about ocean diversity and the importance of marine conservation.
Outer Space Adventure
Get ready to blast off into the cosmos with our outer space adventure paper plate art activity! This fun and creative project is perfect for preschoolers who are fascinated by the stars and planets. To make a stunning space-themed craft, you’ll need some basic materials: paper plates, glitter, scissors, glue, paint, and any other embellishments you like.
Let’s start with the base of our galaxy – a large paper plate cut into a spiral shape to represent a swirling nebula. Add some fluffy white paint or tissue paper to create a textured, cloudy effect. Next, use smaller plates to craft individual planets, such as Jupiter (cut in half and painted blue) or Mars (painted red). To add some sparkle, sprinkle glitter on the plate surfaces – be sure to let it dry before handling.
For a show-stopping finale, glue the planets onto a dark blue background made from another large paper plate. Use paint or markers to draw on some bright stars, and don’t forget to include a few glittery “asteroids” for added fun! This activity encourages creativity and fine motor skills while introducing young learners to the wonders of our universe.
Paper Plate Art with Different Materials
Now that you have a stash of paper plates, let’s explore some creative ways to reuse them by combining art and everyday materials for a unique touch. Get ready for some amazing crafts!
Using Paints and Markers
When it comes to adding color and creativity to paper plate art projects, paints and markers are an excellent choice. Let’s dive into using various types of paints and markers to create unique effects.
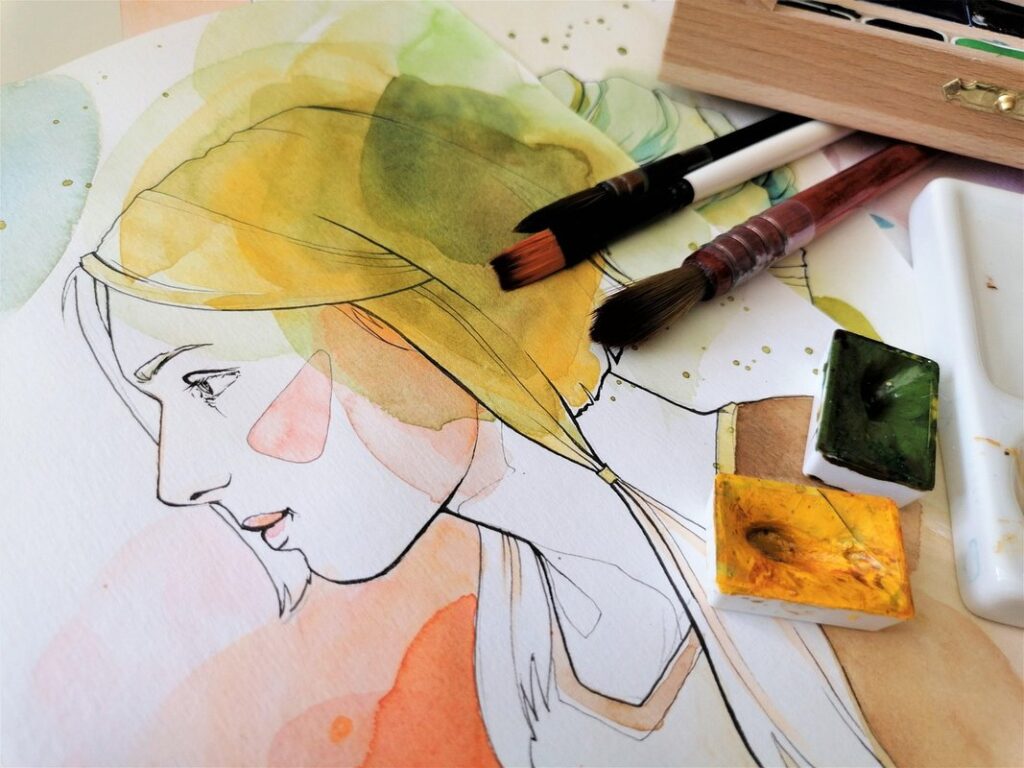
Start by introducing watercolor paints to your preschoolers. These versatile paints come in a range of colors and can be used to achieve different textures and blending techniques. Show them how to wet the paper plate with a brush before applying paint for a soft, watercolor effect. For added interest, mix two or three colors together to create a unique hue.
Tempera paints are another great option for paper plate art. They’re easy to clean up and come in vibrant, long-lasting colors. Demonstrate how to apply tempera paint with a brush or sponge for different textures. You can also encourage children to experiment with layering multiple coats of paint for a more complex design.
Markers are perfect for adding fine details and lines to paper plate art projects. Encourage your preschoolers to use washable markers in various colors to draw patterns, shapes, or even write their names on the plates. For added texture, try using metallic or glitter markers to add an extra layer of interest.
Adding Textures with Glue and Other Materials
When it comes to adding textures to your paper plate crafts, the possibilities are endless. One of the easiest ways to do this is by using glue and other materials. For instance, you can use a variety of fabric textures like felt, fleece, or even an old t-shirt to create unique effects.
To get started, simply apply a thin layer of white glue to your paper plate, and then sprinkle on some glitter, sequins, or even shredded paper for a fun, tactile experience. Alternatively, you can drizzle glue over the plate in different patterns using a dropper or toothpick to create intricate designs. To add an extra dimension, try incorporating materials like sandpaper, bubble wrap, or even small pom-poms.
Remember, the key is to experiment and have fun! Encourage your preschoolers to explore and discover new textures by layering them on top of one another. For example, you can start with a base coat of glue, followed by some glitter, then add a fabric patch, and finish off with a sprinkle of sequins. The possibilities are truly endless when it comes to creating unique and engaging paper plate art projects that kids will love!
Tips for Supervising Paper Plate Art Activities
To ensure a fun and creative experience for both you and your preschoolers, here are some essential tips for supervising paper plate art activities. Effective supervision is key to safe and successful projects.
Encouraging Creativity and Independence
When supervising paper plate art activities for preschoolers, it’s essential to strike the right balance between guiding and allowing independence. To encourage creativity while minimizing adult involvement, try setting up independent craft stations that cater to different interests and skill levels.
For instance, create a “Paint and Imprint” station where children can decorate plates with paint and then transfer the design onto paper using a brayer or sponge. This encourages exploration and experimentation while allowing kids to take ownership of their creations.
Another strategy is to provide a variety of materials and tools at each station, such as stickers, stencils, scissors, and glue. This enables children to work independently, making choices about what they want to create and how they want to assemble it.
To further promote independence, consider introducing the concept of “process art” – focusing on the journey rather than the final product. By embracing messiness and celebrating the process, you’ll empower preschoolers to think creatively and take risks in their artwork. This approach will not only save you time but also foster a love for making and creating among your little artists!
Managing Messy Materials
When it comes to paper plate art activities, messy materials are almost inevitable. However, with some planning and organization, you can minimize the mess and make clean-up a breeze.
Before the activity begins, make sure to cover the work surface with newspaper or a plastic tablecloth to protect against spills and stains. This will save you time in cleaning up later.
To keep messy materials under control, consider setting up separate stations for each art supply. For example, have one station for paint, another for glue, and so on. This way, if something gets spilled, it’s contained to a specific area.
When the activity is finished, take some time to clean up immediately. Rinse out paint cups, wash brushes, and dispose of any trash. Store materials in labeled bins or containers to prevent them from getting mixed up or lost. Be sure to wipe down surfaces with soap and water to remove any stubborn stains.
Regularly cleaning and storing art supplies will not only keep your space tidy but also ensure that the materials are ready for use next time.
Conclusion and Ideas for Expansion
As you’ve explored these fun paper plate art activities, you’re likely thinking of ways to expand on them and make your preschooler’s creative journey even more exciting! Let’s discuss some ideas for further exploration.
Recap of Paper Plate Art Benefits
In conclusion, it’s clear that paper plate art activities offer numerous benefits for preschoolers. One of the most significant advantages is their ability to foster creativity and self-expression. By providing a blank canvas with endless possibilities, you’re giving children the freedom to explore their imagination and bring their ideas to life.
Paper plate art also helps develop fine motor skills in young learners. The act of cutting, gluing, and manipulating materials requires hand-eye coordination and dexterity, laying the groundwork for future writing and drawing abilities. For example, a simple activity like creating a paper plate butterfly can help children practice their scissor skills while developing an appreciation for nature’s beauty.
In addition to these benefits, paper plate art encourages experimentation and risk-taking. Children are encouraged to explore different materials, colors, and techniques, allowing them to learn from both successes and failures. By embracing this process-oriented approach, you’re teaching your preschoolers the value of perseverance and creative problem-solving – essential skills that will serve them well in all areas of life.
Additional Project Ideas
Now that you’ve explored the world of paper plate art with your preschoolers, it’s time to think about taking their creativity to the next level. Why not try incorporating more complex crafts into your lesson plans? For example, you could have them create a 3D cityscape using multiple layers of paper plates, glue, and scissors. This project encourages spatial awareness and fine motor skills while allowing children to express their imagination.
Another idea is to collaborate with parents or caregivers on a large-scale paper plate art piece. Invite the grown-ups to contribute alongside the children, fostering a sense of community and cooperation. You could even set up an “art station” at home where families can work together on a project during family time. This approach not only makes the experience more enjoyable for everyone involved but also provides opportunities for intergenerational learning.
Consider exploring different materials and techniques to add depth and interest to your paper plate art projects. For instance, you could introduce paint, markers, or crayons to encourage color exploration and experimentation. By continuously challenging and engaging your preschoolers, you’ll help them develop their artistic skills while building confidence in their creativity.
Frequently Asked Questions
How do I store paper plates for future art projects?
You can keep used paper plates in an airtight container or a designated bin to reuse them later. This is especially helpful if you’re planning to create multiple art pieces with the same design or theme. Make sure to label and date the containers so that you know which designs are inside.
Can I use other types of plates for paper plate art?
While regular paper plates work best, you can experiment with other flat surfaces like foam plates, plastic containers, or even old cardboard sheets. However, keep in mind that different materials may require adjustments to your techniques and art supplies.
How do I manage glue spills during paper plate art activities?
To minimize messes, use washable glue sticks specifically designed for kids. You can also apply a thin layer of glue to the paper plate before adding other decorations. If an accident occurs, have wipes or cleaning products nearby to quickly clean up the area.
Can I adapt these paper plate art ideas for children with special needs?
Yes! Many of the activities can be adapted to suit different abilities and learning styles. For example, you can use tactile materials like play dough or sandpaper for added texture, or modify designs to make them more accessible for motor skill challenges.
How do I encourage my child to try new paper plate art techniques without feeling overwhelmed?
Start by introducing one new technique at a time, allowing your child to gradually build their confidence and skills. Encourage experimentation with different materials and textures, but also be willing to adjust the project or step back if needed to accommodate their pace and comfort level.