
Are you tired of seeing blank walls or messy art projects in your home? Do you want to tap into your child’s creativity and imagination, while also making the process fun and easy? Look no further than paper plate artwork! This versatile and inexpensive material is perfect for kids to express themselves and bring their ideas to life. From simple masks to intricate designs, the possibilities are endless with just a few basic supplies. In this article, we’ll explore some amazing paper plate art projects that you can make with your child today. We’ll cover everything from beginner-friendly tutorials to more complex designs, so whether you’re a seasoned artist or a total newbie, you’ll find something to spark your creativity and inspire your little ones.
Introduction to Paper Plate Art
Welcome to the world of paper plate art, where creativity knows no bounds! In this section, we’ll show you how to get started with simple and fun projects perfect for little artists.
What is Paper Plate Art?
Paper plate art has become an increasingly popular and exciting way for kids to express their creativity and imagination. This innovative form of art-making involves transforming plain paper plates into stunning works of art using various materials like paint, markers, glue, scissors, and more. By repurposing everyday household items, parents and educators are able to encourage children to think creatively and explore different artistic techniques.
The beauty of paper plate art lies in its simplicity and accessibility. It’s a great way for young artists to experiment with color, texture, and composition without worrying about making mistakes or wasting expensive materials. With just one paper plate, kids can create anything from colorful collages to 3D sculptures, and even learn basic math concepts like geometry and symmetry.
As more parents and educators discover the joys of paper plate art, its popularity continues to grow. Many schools and educational centers now incorporate paper plate projects into their curriculum, providing students with a fun and engaging way to develop their fine motor skills, hand-eye coordination, and artistic expression. With its ease of use and endless creative possibilities, it’s no wonder that paper plate art has become a favorite among kids and educators alike!
Benefits of Paper Plate Art for Children
Paper plate art is an excellent medium for unleashing children’s creativity and encouraging self-expression. By providing an open canvas for kids to explore their imagination, paper plate art helps them develop essential skills that extend beyond the arts.
One of the primary benefits of paper plate art is its ability to foster fine motor skills in children. Cutting, tearing, and pasting are all essential actions involved in creating a paper plate masterpiece. These repetitive motions help strengthen hand muscles and improve dexterity, preparing young artists for more complex activities like writing and drawing. To incorporate this benefit into your child’s creative process, try providing a variety of materials for them to experiment with, such as scissors, glue, and different textures.
Moreover, paper plate art encourages children to express themselves freely without fear of making mistakes. This environment allows kids to develop confidence in their abilities and explore various mediums, teaching them that creativity knows no bounds.
Materials and Supplies Needed
To create amazing paper plate artwork, you’ll need a few basic materials and supplies that we’ve listed below to get started. Let’s see what you need!
Basic Paper Plate Art Supplies
To get started with paper plate art projects, you’ll need to gather some basic supplies. This might seem straightforward, but having the right materials on hand can make a big difference in the creativity and quality of your artwork.
Begin by collecting an assortment of paper plates – various sizes and shapes will come in handy for different designs. You’ll also need some scissors to cut out shapes, patterns, or even entire plate sections for collage work. A glue stick is essential for assembling pieces and creating textured effects.
Markers, colored pencils, and crayons are great tools for adding color and details to your artwork. Don’t forget a few additional craft supplies like construction paper, tape, and string – these can be used to create unique textures, patterns, or even 3D elements in your design. Remember to always supervise young artists when using scissors, glue, or other materials that might pose a risk.
Having a variety of materials at hand will allow kids to experiment with different techniques and express their imagination freely. Encourage them to think outside the box (or plate!) and explore new ways to combine these basic supplies.
Optional Materials for Advanced Projects
When working on more advanced paper plate artwork projects with kids, there are several optional materials you can use to take their creations to the next level. One great way to add some extra flair is by incorporating glitter into your designs. Not only does it catch the light and add a touch of magic, but it’s also incredibly easy to work with. Simply sprinkle the glitter onto your design while the glue is still wet for a sparkly effect.
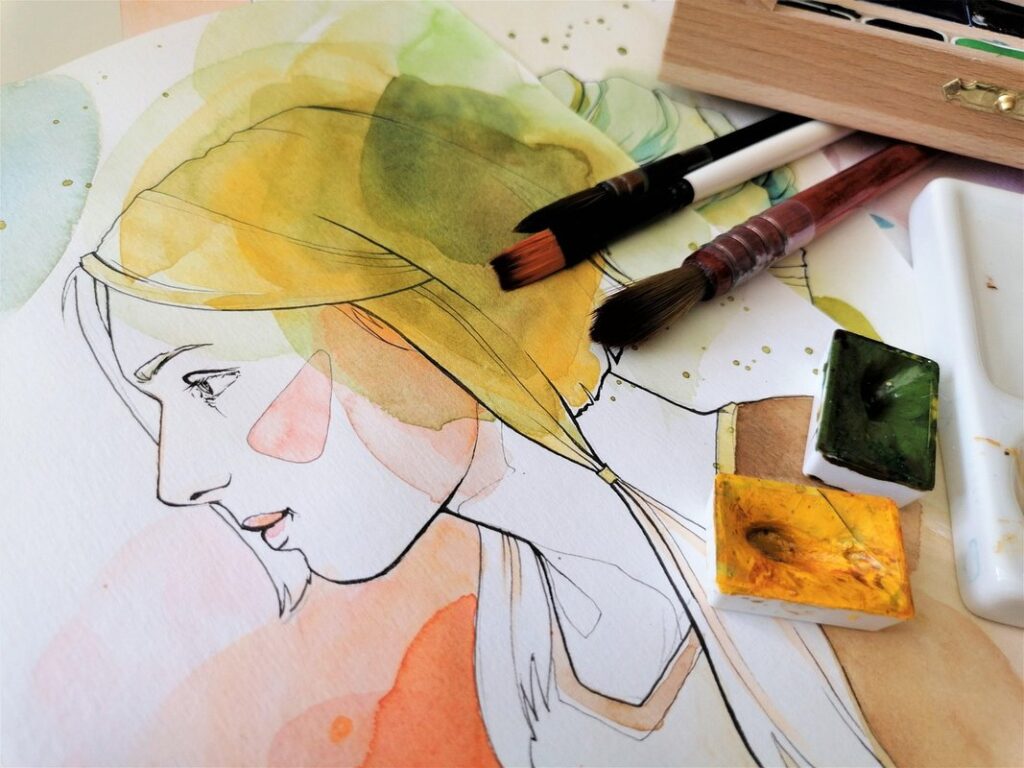
Another excellent option is using paint to add more color and depth to your artwork. You can use watercolor or tempera paint, depending on the desired texture and look you’re going for. To make it even more engaging for kids, set up a painting station with paper plates as canvases, and let them get creative with different brushstrokes and techniques.
Stencils are another great addition to your art supplies. They allow kids to create intricate designs and patterns without having to freehand it all themselves. By using pre-made stencils or even creating their own custom ones, they can add a level of precision and detail that’s both impressive and fun.
Simple Paper Plate Art Ideas for Beginners
Get creative and craft some amazing paper plate art with our simple and fun ideas that are perfect for beginners to bring out their inner artist. We’ve got you covered from basic to more complex designs!
Classic Plate Art Projects
Get ready to unleash your child’s creativity with these simple yet amazing classic plate art projects. One of our favorite ideas is making a plate mask. All you need are paper plates, scissors, glue, and some markers or paint. Cut out eye holes from the center of one plate and decorate it with colors, patterns, and even glitter. Then, cut out shapes from another plate to create ears, nose, and mouth. Glue them onto the main plate, and voila! Your child has a unique mask to wear.
Another fun project is creating a snowman using plates. Cut out three different-sized plates for the body, middle section, and head. Decorate each one with markers or paint, adding details like buttons for eyes, a carrot nose, and coal for the mouth. Glue them together, starting from the bottom plate, and add some sticks or straws for arms. Your child will love displaying their new paper plate snowman in the living room.
These classic projects are perfect for beginners, requiring minimal materials and encouraging creativity and imagination. So go ahead, grab some plates, and get crafting with your little ones!
More Complex Designs Using Multiple Plates
Take your paper plate art to the next level by creating intricate designs that require multiple plates. This technique is perfect for kids who are eager to try more complex projects and parents looking to challenge their little ones creatively.
To get started, gather a few paper plates of varying sizes and colors. Let’s say you want to create a 3D flower pot using four different plates. Begin by decorating the largest plate with paint or markers to resemble the flower pot itself. Next, cut out petal shapes from smaller plates and glue them onto the pot plate. Add some greenery made from a separate plate, cut into leaf shapes, around the edges of the pot.
For an added touch, use a smaller plate as the base and attach it to the larger pot using glue or a stapler. This will give your flower pot a sturdy foundation. You can also add a small vase made from a teacup or a bowl for a more realistic look. The possibilities are endless when working with multiple plates, so don’t be afraid to experiment and come up with unique designs that showcase your child’s creativity.
Tips and Techniques for Successful Paper Plate Art
Get creative with paper plate art by following these essential tips and techniques, including ideas for preparation, decoration, and displaying your child’s masterpieces.
Safety Precautions When Working with Children
When working on paper plate art projects with kids, adult supervision is crucial to ensure everyone’s safety. This may seem obvious, but it’s essential to remember that children can be unpredictable and might accidentally harm themselves or others while creating.
To avoid accidents, designate a safe area for crafting, clear of any breakable objects or flammable materials. Cover your work surface with newspaper or a plastic tablecloth to make cleanup easier in case of spills. Always have a first-aid kit nearby, just in case.
Another vital aspect is the choice of materials and tools. Opt for washable paints and markers that are non-toxic and safe for children’s skin. Also, ensure that any scissors, glue, or other craft supplies are out of reach to avoid accidents. If you’re using hot glue guns, consider having an adult assist with this task.
Remember, paper plate art is meant to be fun and engaging, but safety should always come first. By being mindful of these simple precautions, you can create a positive and enjoyable experience for both children and adults involved in the project.
Common Mistakes to Avoid in Paper Plate Art Projects
When embarking on paper plate art projects with kids, it’s easy to fall into common pitfalls that can ruin the fun and creativity. One of the most significant mistakes beginners make is using too much glue. It may seem counterintuitive, but excessive glue can weigh down the project, making it look messy and unbalanced. To avoid this, use a small amount of glue and spread it evenly, allowing each layer to dry before adding more.
Another common mistake is not allowing enough drying time between layers. This can lead to projects becoming soggy or developing weird textures that are difficult to work with. Make sure to let each layer dry completely before moving on to the next one. As a general rule, allow at least 30 minutes to an hour for drying time.
Additionally, be mindful of over-handling the paper plates. They can become brittle and prone to tearing if subjected to too much manipulation. Handle them gently, especially when cutting or shaping them. By being aware of these common mistakes, you’ll be well on your way to creating amazing paper plate art projects that will delight both kids and adults alike!
Advanced Paper Plate Art Techniques for Older Kids
Now that you’ve mastered the basics, it’s time to elevate your paper plate art skills! This section will show you advanced techniques perfect for older kids who are ready for more complex creations.
Stencil Methods for Creating Intricate Designs
Using stencils is an excellent way to add intricate designs to paper plates. Stenciling allows kids to create detailed and complex patterns with ease, while also teaching them about shapes, symmetry, and precision. To get started, gather a set of stencils specifically designed for paper crafting or art projects.
Begin by placing the stencil on the paper plate and securing it in place using masking tape or a sponge. Next, use a paintbrush or sponge to apply paint through the stencil, making sure to fill in all the design elements. You can experiment with different brush strokes, such as hatching or cross-hatching, to create unique textures.
For added complexity, try layering multiple stencils on top of each other to achieve multi-colored designs. This technique requires some patience and precision but results in truly stunning pieces of art. By using stencils, kids can create intricate designs that would be impossible to draw freehand, allowing them to explore their creativity and experiment with different styles.
Techniques for Adding Dimension with Layering
When working with paper plates to create 3D art pieces, layering is an essential technique for adding dimension. To get started, collect various sizes and shapes of paper plates to create a visually appealing composition. Begin by gluing a large plate as the base, followed by smaller plates stacked on top, creating a sense of depth.
To enhance texture and interest, incorporate other materials such as construction paper, cardboard, or even fabric scraps. Use glue to secure these elements in place, experimenting with different patterns and arrangements. For added dimension, try layering paper plates with different textures or colors. For instance, layer a smooth white plate on top of a textured brown one for a contrasting effect.
When working with multiple layers, it’s essential to plan ahead. Sketch out your design before gluing the plates in place to ensure balanced composition and harmonious color scheme. This will prevent overwhelming or confusing visual elements, making the final piece more visually appealing. By experimenting with different layering techniques and incorporating various materials, kids can create unique and engaging 3D art pieces that showcase their creativity and imagination.
Displaying Your Masterpiece: Tips for Presenting Paper Plate Art
Now that your little artist has finished their paper plate masterpiece, let’s talk about how to showcase it proudly and make everyone green with envy over its creativity!
How to Showcase Individual Plates
Now that you’ve created some amazing paper plate art with your kids, it’s time to showcase their individual masterpieces. Displaying each piece proudly can be just as fun and creative as the process of making them. Here are a few ideas to get you started.
Consider framing each artwork separately for a more professional look. You can use simple frames or get creative with decorative ones that match your child’s style. This way, each plate becomes a standalone art piece that can be admired from all sides. For added flair, hang the framed plates in a collage or arrange them in a gallery wall.
Alternatively, create a mobile using copper wire, string, or fishing line to suspend individual plates from a central axis. This is an excellent option if you have multiple pieces with different themes or colors. It’s also a great way to add a dynamic element to the room without cluttering the walls.
If you’re feeling crafty, repurpose old clothespins as clips to hold each plate in place. This not only adds an eco-friendly touch but also makes it easy to switch out the artwork whenever your child creates something new.
Creating a Theme-Based Display with Multiple Pieces
When it comes to showcasing multiple paper plate art pieces, creating a themed display is an excellent way to add visual interest and create a cohesive look. Imagine a “Jungle Safari” theme, where you hang various plates featuring monkeys, giraffes, and trees, all amidst a vibrant green background.
To get started, choose a central piece that sets the tone for your theme. This could be a striking animal or a colorful landscape. Then, select additional pieces that complement the central image and fit within the theme. For example, if you have a plate with a majestic lion, pair it with plates featuring trees, grasslands, or acacia branches.
As you arrange the plates, consider the color palette and textures to create visual harmony. You can use string, twine, or even 3D objects like foam shapes to add depth and dimension to your display. Don’t forget to leave some negative space between each piece to avoid overcrowding and give your artwork room to breathe.
To make it even more engaging for kids, involve them in the creative process by letting them help with the arrangement and decoration of the display. This will not only encourage their artistic expression but also develop problem-solving skills as they experiment with different layouts and designs.
Conclusion and Final Tips
As you’ve seen, creating beautiful paper plate artwork with your kids can be a fun and creative experience. Now, let’s wrap up with some final tips to make it even more enjoyable!
Encouraging Continued Creativity in Kids
As we’ve explored various paper plate art projects throughout this blog post, it’s clear that kids love getting creative with everyday materials. However, to truly foster a lifelong appreciation for art and self-expression, it’s essential to provide continued opportunities for children to explore new mediums and techniques.
One way to encourage ongoing creativity is by introducing your child to different art forms as they grow and develop. For example, a toddler who enjoys scribbling with crayons may eventually transition into finger painting or using watercolors. Similarly, a preschooler who loves making collages might begin experimenting with paper mache or sculpting.
You can also try rotating through various art supplies and projects every few weeks to keep things fresh and exciting for your child. For instance, you could dedicate one month to exploring different types of paint (acrylic, watercolor, tempera), followed by a month focused on sculpture and 3D art using materials like clay or recycled materials.
Some other ideas for nurturing ongoing creativity include:
* Encouraging your child to observe and appreciate the work of other artists
* Providing open-ended creative activities that allow them to explore and experiment without too much structure
* Setting aside dedicated time each week for free-play and exploration with art supplies
* Visiting local museums or art galleries to see different styles and techniques on display
By embracing a culture of creativity in your home, you’ll be providing your child with the skills and confidence they need to express themselves in countless ways. And who knows? You might just find yourself inspired by their unique perspective and creations!
Frequently Asked Questions
What if my child is not interested in making art at first? How can I encourage them to participate?
Start by making the process fun and engaging, like setting a timer for 10-15 minutes of plate-making time each day. This will help your child associate paper plate art with positive experiences and build their confidence. You can also involve them in the shopping process, letting them pick out new supplies or plates.
Can I use recycled materials for my paper plate art projects?
Yes! Repurposing old materials is a great way to reduce waste and encourage creativity. Think about using old cardboard tubes, construction paper, or fabric scraps to add texture and interest to your designs. This not only helps the environment but also teaches children the importance of sustainability.
How can I display my child’s finished artwork in our home without cluttering up wallspace?
Consider creating a dedicated art gallery using a wall-mounted clip board, string lights, or a floating shelf. You can also rotate their artwork every few weeks to showcase new pieces and keep things fresh. This way, your child will feel proud of their creations while keeping the space organized.
What if I’m not artistic myself? Can I still create paper plate art with my child?
Absolutely! The beauty of paper plate art lies in its simplicity and flexibility. You can follow tutorials or guides together, and your child’s creativity will shine through even if you’re not an experienced artist yourself. Focus on having fun, experimenting with different techniques, and enjoying the process with your child.
How do I store leftover materials and supplies for future projects?
Store them in a designated area, like a bin or container labeled “Art Supplies.” This keeps everything organized and makes it easy to grab what you need for the next project. You can also consider setting up a small art station or workspace with basic supplies, like paper plates, glue, scissors, and markers, so your child can create whenever they feel inspired.