
As a parent or educator, you’re always on the lookout for ways to encourage creativity and self-expression in your little ones. One of the simplest yet most effective ways to do this is through art projects that are fun, easy, and budget-friendly – like paper plate artwork! Not only does it introduce preschoolers to the world of art and design, but it also helps develop their fine motor skills, hand-eye coordination, and problem-solving abilities. In this article, we’ll explore the wonderful world of paper plate art for preschoolers, covering everything from basic tutorials and ideas to tips on display and preservation. Whether you’re a seasoned educator or just starting out, our comprehensive guide will provide you with the inspiration and resources needed to unlock your child’s full creative potential.
Introduction to Paper Plate Art
Welcome to the world of paper plate art, where creativity knows no bounds and materials are limited only by your imagination! Let’s dive into the basics of getting started.
Benefits of Paper Plate Art for Preschoolers
When introducing preschoolers to art-making, it’s essential to consider activities that promote creativity, fine motor skills, and imagination. Paper plate art is an ideal way to achieve this, as it encourages children to think outside the box (or plate!) and explore their artistic side.
Through paper plate art, preschoolers can develop their creativity by experimenting with various materials and techniques. For instance, they can decorate plates with paint, markers, or glue, creating unique designs and patterns. This creative expression helps build confidence and self-esteem, as children learn to trust their ideas and instincts.
Paper plate art also refines fine motor skills, as preschoolers practice cutting, tearing, and manipulating materials. These hands-on activities help develop hand-eye coordination, dexterity, and control – essential for future writing and drawing skills.
To maximize the benefits of paper plate art, try incorporating different textures and materials into your projects. For example, glue plates to a canvas or use paint to create a 3D effect. By encouraging exploration and creativity, you’ll unlock your preschooler’s imagination and set them on a path to artistic expression and discovery.
Materials Needed for Paper Plate Art Projects
When it comes to creating beautiful and unique paper plate art projects with your preschooler, you’ll want to have a few essential materials on hand. The good news is that most of these supplies are probably already stashed away in your craft box or can be easily found at a local art store.
To get started, gather the following basic materials: paper plates (the more colors and patterns, the merrier!), scissors, glue, markers or crayons, construction paper, tape, and any other embellishments you’d like to use. You’ll also want to have some sturdy paper or cardstock on hand for backing your artwork.
Don’t forget to include a variety of shape cutters, such as circles, squares, and hearts, to help bring your child’s creativity to life. Glue sticks are always a good idea, too – they’re easy to use and won’t make a mess (unlike some other types of glue!).
When it comes to markers or crayons, choose washable options that will be gentle on little hands. And remember, the most important supply you’ll need is imagination! Encourage your child to think outside the box (or plate) and come up with their own unique design ideas.
Designing Your First Paper Plate Masterpiece
Get creative and learn how to design your very first paper plate masterpiece, a fun project that’s perfect for little hands to get messy and make some amazing art. Let’s dive in!
Exploring Different Shapes with Paper Plates
Let’s get creative with shapes! You can make so many fun shapes using paper plates. For example, to create a circle, simply cut out the middle of the plate. This will give you a perfect circle shape that you can decorate however you like. My preschooler loved making a sun using a yellow plate and cutting out the center to create a bright, sunny circle.
To make a square or rectangle, try bending the plate into its corresponding shape. You can also use scissors to carefully cut along the edges of the plate to create sharp corners. This is a great way to teach your little one about different geometric shapes and how they fit together in our world.
Remember, you can always combine plates to make more complex shapes, like a diamond or even a heart! To do this, simply stack two plates on top of each other with the edges aligned, then cut out the shape. With a few simple cuts, your preschooler can create all sorts of fun shapes using paper plates.
When working with your child, encourage them to experiment and try new things – after all, that’s where the magic happens!
Folding Techniques for Unique Designs
When it comes to creating unique designs on paper plates, folding techniques play a crucial role. One of the most creative ways to fold a paper plate is using the accordion fold technique. This involves folding the plate back and forth in small sections, creating a series of pleats that can be used as a base for various designs.
Another fun folding technique is the spiral fold. To achieve this look, simply place the center of the plate on your work surface and begin to wrap the edges around it, overlapping each layer slightly as you go. This creates a beautiful, swirling pattern that can add an extra layer of interest to your design.
Experiment with different folding techniques and see what unique designs you can come up with! For example, you could use accordion folds to create a series of vertical stripes or use spiral folds to make a stunning flower design. With a little creativity and some practice, the possibilities are endless when it comes to folding paper plates for art projects.
Painting and Decorating Your Paper Plate Art
Now that you’ve created your masterpiece, let’s add some extra flair by painting and decorating it! We’ll show you how to bring out the colors and make it truly special.
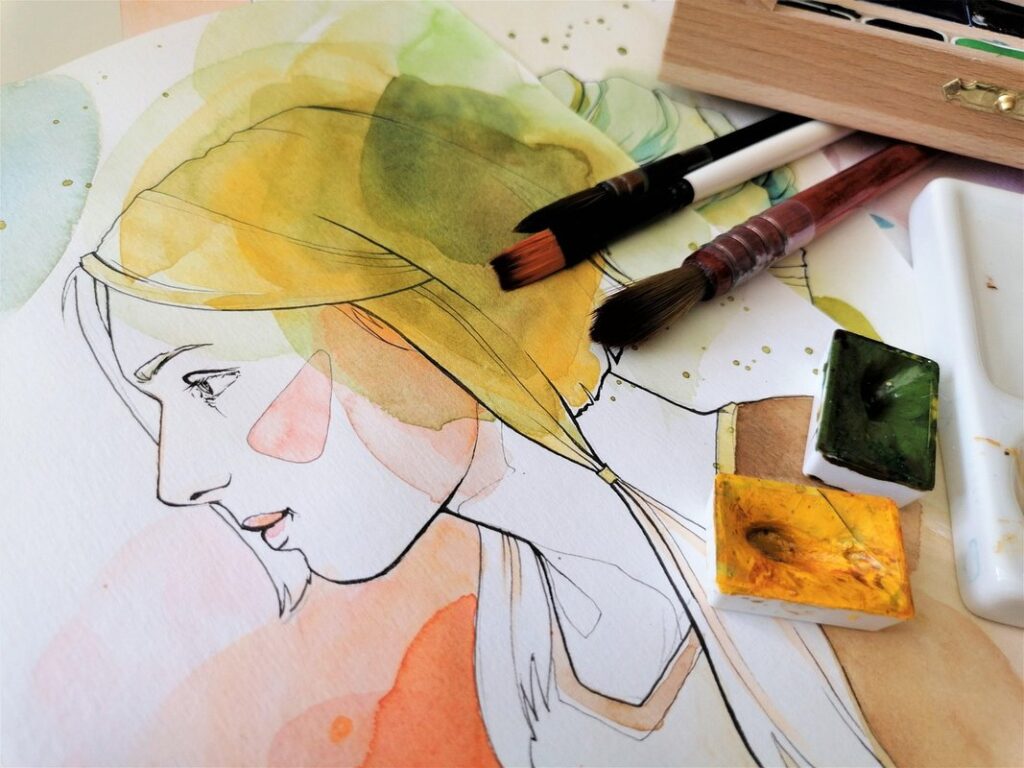
Tips for Painting with Watercolors on Paper Plates
When painting with watercolors on paper plates, it’s essential to understand that less is often more. Start by creating washes, allowing each layer to dry before adding the next. This will prevent the paint from pooling and make it easier to achieve smooth transitions between colors.
Begin with a light wash of watercolor paint, covering the entire plate in a thin layer. Allow this to dry completely before adding additional layers or details. Remember, you can always add more color, but it’s harder to remove excess paint once it’s applied.
Experiment with different colors and techniques by building up layers gradually. Try applying multiple thin washes of complementary colors to create beautiful hues and textures. For example, layering blue over yellow will produce a lovely shade of green.
As you work, keep in mind the absorbent nature of paper plates can cause paint to spread quickly. Use this to your advantage by creating soft, blended edges or subtle color gradations. By mastering these techniques, you’ll be able to achieve stunning watercolor effects on your paper plate artwork.
Adding Texture with Glue and Other Materials
When it comes to adding texture to your paper plate art, you’ll want to get creative with materials beyond just paint. This is where glue and other fun textures come into play! Adding texture not only makes your artwork more visually interesting but also engages your child’s sense of touch.
Let’s start with glue. You can use a variety of types, such as white school glue, washable glue sticks, or even decoupage medium for added durability. Apply it thickly or thinly depending on the effect you’re going for. Experiment with dripping, splattering, or spreading glue onto your paper plate design.
But that’s not all! Consider incorporating other materials to create different textures:
• Use sandpaper to scrape and scratch patterns into paint or glue
• Try adding beads, rice, or small pebbles for a tactile experience
• Experiment with sponges, foam brushes, or cloth to apply textured strokes
• Even household items like bubble wrap or aluminum foil can add unique textures
Remember, the possibilities are endless! Encourage your child to explore and experiment with different materials. This will not only develop their fine motor skills but also foster creativity and self-expression.
Creative Uses for Paper Plate Art
Get ready to unleash your child’s creativity as we explore fun and unique ways to use paper plates in art projects, from masks to mobiles.
Making 3D Shapes and Structures
Get ready to add an extra dimension to your paper plate art creations! Making 3D shapes and structures is a great way to engage preschoolers in creative play while developing their spatial awareness and fine motor skills. Start by gathering various sizes of paper plates, scissors, glue, and other craft supplies.
To create a building, for instance, cut out windows and doors from smaller plates and attach them to the main plate using glue or staples. Add some details like a flag on top or a pathway leading up to the entrance. You can also experiment with different shapes and textures by layering multiple plates or incorporating other materials like felt or foam.
Preschoolers love creating animals, so why not try making a 3D bird feeder? Cut out a plate for the base, add some smaller plates for the roof and walls, and decorate it with paint, markers, or stickers. Attach a small piece of string or yarn to create a hanger. With a little creativity, your preschoolers can turn ordinary paper plates into extraordinary 3D shapes and structures!
Making Artistic Projects for the Classroom or Home
Paper plate art can be transformed into stunning centerpieces, wall hangings, and decorative accents that add a personal touch to any classroom or home. One idea is to create a colorful mobile using multiple paper plates of different shapes and sizes. Simply cut out shapes from the plates, paint them in various colors, and attach strings or fishing line for hanging.
For a unique centerpiece, try gluing several plates together to form a 3D flower or geometric shape. You can also add decorative items like beads, sequins, or glitter for extra flair. Consider using paper plate art as wall hangings by gluing them onto a large piece of cardboard or canvas and decorating with paint, markers, or stickers.
To make your project more durable, consider adding a coat of varnish or clear acrylic spray to protect the artwork from dust and moisture. This is especially useful for classrooms where young children may be handling the pieces.
Tips for Displaying and Preserving Paper Plate Art
Now that your little artists have finished their masterpieces, let’s talk about how to showcase and preserve them so they can enjoy their creations for years to come. Displaying paper plate art requires a few special considerations.
Ideas for Displaying Your Masterpiece
Now that you’ve created your masterpiece with paper plate art, it’s time to showcase it proudly! Displaying your child’s artwork is a great way to encourage their creativity and provide a sense of accomplishment. There are many ways to display your finished project, and we’ll explore some ideas below.
You can start by displaying your artwork in a frame. This will not only protect the paper plate art from damage but also add a touch of elegance to any room. You can use a regular picture frame or get creative with unique frames made from cardboard, popsicle sticks, or other materials. Another idea is to create a collage on a large piece of cardboard or canvas using multiple paper plate projects.
Consider displaying your artwork on a shelf or mantle in your home. This will allow you to see it every day and enjoy the memories associated with creating it. You can also display your child’s artwork in their room, such as on a bulletin board or a string of art pieces along the wall. Don’t forget to rotate your artwork regularly so everyone can enjoy the different projects.
Remember, displaying your child’s artwork is not just about showing off their creativity; it’s also about encouraging them to continue exploring their artistic side. By showcasing their work, you’re sending a clear message that you value and appreciate their efforts.
Preserving Your Creations with Varnish or Spray
When it comes to displaying and preserving your paper plate art projects, preservation is just as important as creation. Without proper care, those beautiful masterpieces can fade, crumble, or even get damaged beyond recognition. That’s why it’s essential to take steps to preserve your creations with varnish or spray.
You can use a water-based varnish or acrylic spray specifically designed for paper art. These products create a protective barrier against dust, moisture, and UV light, which can cause damage over time. Apply the varnish or spray according to the manufacturer’s instructions, usually in thin coats, allowing each layer to dry completely before applying the next.
Some tips to keep in mind: Always test a small, inconspicuous area first to ensure the product doesn’t affect the colors or texture of your artwork. Also, avoid using too much varnish or spray, as this can leave a sticky residue or alter the appearance of your art. By taking these simple steps, you’ll be able to enjoy and showcase your children’s paper plate creations for years to come, even after they’ve grown up and moved on to new projects.
Conclusion and Final Thoughts
Now that you’ve explored the creative possibilities of paper plate art, let’s reflect on what your little ones have learned and take away some final tips for continued creativity.
Recap of Paper Plate Art Benefits and Uses
As we conclude our exploration of paper plate art for preschoolers, let’s take a moment to recap its numerous benefits and uses. This fun and engaging activity offers a wide range of creative, educational, and enjoyable aspects that make it an excellent addition to any early childhood program.
From a creative standpoint, paper plate art allows young children to express themselves freely, experimenting with colors, textures, and shapes. By providing them with various materials and supplies, you can encourage their imagination and foster a sense of self-expression. For example, try using food coloring, paint, or markers to create unique effects on the plates.
In an educational context, paper plate art helps develop fine motor skills, hand-eye coordination, and problem-solving abilities. By cutting, pasting, and manipulating materials, children refine their dexterity and concentration. You can also use this activity to teach basic concepts like symmetry, patterns, and texture recognition.
Remember, the beauty of paper plate art lies in its flexibility and accessibility. With just a few simple materials, you can create an array of projects that cater to different learning styles and abilities. So don’t be afraid to get creative and explore the endless possibilities of this engaging activity!
Encouraging Continued Creativity with Paper Plate Art
As you and your preschoolers continue to explore the world of paper plate art, it’s essential to encourage their creativity and curiosity. At first glance, a simple paper plate may seem limited, but with a little imagination, it can become a canvas for endless possibilities.
To foster continued creativity, try incorporating new materials and techniques into your projects. For instance, add some paint, markers, or crayons to the mix and watch as your child’s artwork transforms before their eyes. You can also experiment with different paper plate cuts, folds, and shapes to create unique 3D designs.
Encourage experimentation by providing a variety of supplies and letting your child take the lead. Ask open-ended questions like “What do you think will happen if we try this?” or “How can we make this design better?” This will not only help develop their critical thinking skills but also give them confidence in their creative abilities. By embracing mistakes and encouraging exploration, you’ll be amazed at what your child can achieve with just a simple paper plate.
Frequently Asked Questions
How do I store and organize my preschooler’s paper plate artwork?
As your child creates more art, it can be overwhelming to keep track of all the projects. Consider using a binder or portfolio specifically designed for children’s artwork. Label each project with the date and materials used, making it easy to display and revisit their creations. You can also create a digital archive by taking photos of each piece and storing them on your phone or computer.
Can I use paper plate art as a teaching tool in my classroom?
Yes! Paper plate art is an excellent way to engage students and meet various educational standards. Use paper plates to teach shapes, patterns, colors, and textures while promoting creativity and self-expression. You can also adapt the projects to fit specific curriculum goals or lesson plans.
How do I encourage repeated use of materials for creative reuse?
To promote sustainability and reduce waste, encourage your child (or students) to repurpose materials whenever possible. For example, cut a paper plate in half to create a unique shape or use old watercolor paints for new projects. Encourage experimentation with different techniques and combinations of materials.
What are some tips for involving young children in the process of creating 3D shapes with paper plates?
When working with young children on 3D paper plate projects, consider pre-cutting the materials or using sturdier plates to avoid breakage. Demonstrate each step clearly, allowing them to explore and learn at their own pace. Encourage collaboration by having multiple children work together on a single project.
Can I display and preserve my preschooler’s artwork with everyday household items?
Yes! For a budget-friendly and eco-friendly approach, use everyday materials like paper clips, string, or glue to create a unique display system for your child’s artwork. Consider using a combination of hanging methods, such as nails, command strips, or adhesive putty, to showcase their creations without damaging the walls.