
As parents, we’re always on the lookout for ways to engage our kids in creative activities that foster their imagination and self-expression. But let’s face it – coming up with new ideas can be daunting, especially when you’ve exhausted your usual go-to projects. That’s why I’m excited to share my collection of fun and easy parenting bits for craft ideas that are perfect for little ones.
From finger painting masterpieces to DIY photo albums that capture precious memories, these creative activities will inspire a love of crafting in your children. In this article, we’ll dive into some simple yet effective ways to get your kids crafting at home – no special skills or equipment required! Whether you’re a seasoned crafter or just looking for a fun way to spend quality time with your child, I’ve got you covered. Get ready to unleash your little one’s creativity and have some serious fun along the way!
Getting Started with Crafting
Welcome to the world of crafting, where imagination knows no bounds! In this next part, we’ll share our top tips for setting up a crafty space that’s perfect for little hands to get creative.
Importance of Creativity in Childhood Development
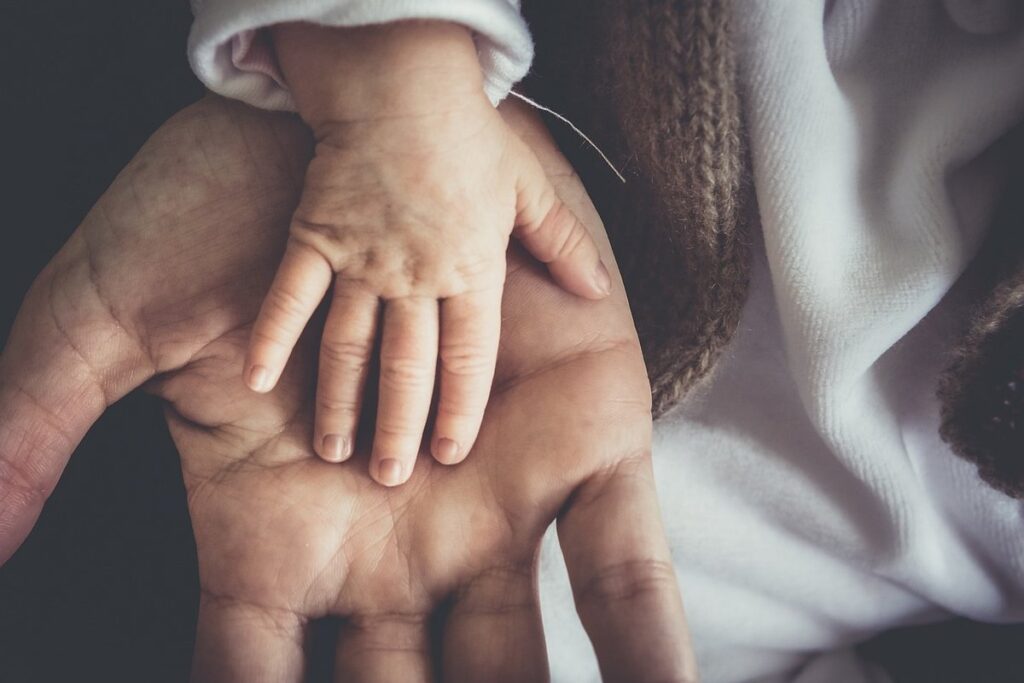
As parents, we often get caught up in ensuring our little ones are meeting their developmental milestones and learning their ABCs. While academics are essential, don’t underestimate the power of creative activities for children’s cognitive growth and overall well-being.
Research shows that engaging in creative pursuits at a young age can have a lasting impact on a child’s brain development. For instance, studies have found that preschoolers who participate in art classes exhibit improved spatial-temporal skills, which are critical for problem-solving and critical thinking. This is because creative activities like drawing, painting, and sculpture allow children to experiment with different materials and techniques, promoting cognitive flexibility and adaptability.
Moreover, creative expression helps children develop self-awareness, self-confidence, and self-expression – essential life skills that extend far beyond the classroom. By encouraging your child’s creativity through crafting and other artistic endeavors, you’re not only fostering their imagination but also giving them a solid foundation for future success. So, take some time to get messy with your little ones – make some art, build a fort, or have a dance party – your child’s brain (and heart) will thank you!
Setting Up a Craft Station at Home
Setting up a dedicated crafting area at home can be a game-changer for parents who want to encourage their kids’ creativity without sacrificing sanity. First and foremost, consider the safety of your little ones when choosing a location for your craft station. Avoid placing it near heat sources or open flames, and opt for a spot with good ventilation.
Next, think about storage solutions that will keep your crafting supplies organized and within reach. Invest in shelves, bins, or a pegboard to corral yarns, paints, and other materials. Label each container so your kids can easily find what they need. You can also repurpose items like old crates, baskets, or even a vintage dresser to add character to your craft station.
To prevent messes from accumulating, establish a few simple rules: cover your work surface with a plastic tablecloth or a drop cloth, and encourage your kids to clean up as they go along. With these basics in place, you’ll be well on your way to creating a dedicated crafting space that fosters creativity and joy in both you and your little ones.
Choosing the Right Materials and Tools
When it comes to choosing materials and tools for crafting with kids, it’s essential to consider their age group and skill level. For younger children (ages 3-5), opt for soft, pliable materials like play dough, foam sheets, or fabric scraps. These are perfect for little hands to manipulate and create without frustration.
As children grow older (ages 6-10), you can introduce more durable materials like paper, cardstock, or even wood. For kids with advanced skills (ages 11+), consider introducing new mediums like paint, markers, or collage materials.
In addition to materials, ensure you have the right tools for each craft project. For younger children, simple tools like scissors, glue sticks, and crayons are perfect. As they progress, introduce more sophisticated tools like paper cutters, craft knives (with adult supervision), or a rotary cutter.
Remember, the quality of your materials and tools is directly related to the outcome of your child’s project. Invest in good-quality art supplies and storage containers to keep everything organized and within reach. This will not only enhance their creative experience but also encourage them to experiment with new techniques and ideas.
Easy DIY Crafts for Toddlers
Get ready to unleash your toddler’s creativity with these fun and easy DIY crafts that require minimal supervision and are perfect for little hands. From finger painting to collage making, we’ve got you covered!
Finger Painting and Playdough Fun
Toddlers love getting messy and exploring their creativity through art. One of the easiest and most fun DIY crafts for this age group is making homemade finger paints and playdough. Not only are these materials cost-effective, but they also allow little ones to express themselves freely without worrying about the mess.
To make simple finger paints, you’ll need just a few ingredients: one cup of water, two tablespoons of flour, food coloring, and a bit of oil. Mix all the ingredients together until you get a smooth consistency, adding more water if needed. You can also add other ingredients like salt or glycerin to enhance the texture.
For playdough, combine two cups of flour, half a cup of warm water, one-fourth cup of salt, and two tablespoons of oil in a bowl. Add some food coloring to tint it as desired, then knead until you get a smooth dough. Both recipes are perfect for sensory-friendly activities that allow toddlers to explore textures and colors.
To create a sensory-friendly environment, make sure the space is well-ventilated, and cover your work surface with paper or a plastic tablecloth. Encourage your child to experiment with different techniques, like mixing colors or textures, and praise their creativity!
Paper Plate Crafts and Tearing Activities
Toddlers love exploring and creating with everyday materials, making paper plate crafts an excellent choice for their development. These fun and easy activities not only provide entertainment but also contribute significantly to fine motor skills growth.
One of the most engaging aspects of paper plates is tearing them into various shapes and sizes. This activity encourages little ones to experiment with different grip pressures, which helps develop pincer grasp – essential for writing tools like pencils and crayons. To incorporate tearing activities in your crafting sessions:
• Start by giving each child a plain paper plate and encouraging them to tear it into pieces.
• You can also add some fun twists like using scissor-resistant plates or attempting to tear through multiple layers of cardboard for added challenge.
• Take advantage of the torn strips to create unique designs, patterns, or even a collage on a separate sheet of paper.
For more structured crafts, try making a “plate snowman” by gluing multiple plates together in a stack and decorating it with sticks, buttons, and other materials. This activity requires toddlers to manipulate small objects while fostering creativity and imagination.
Collage Making with Stickers and Washi Tape
Collage-making is an excellent way to encourage creativity and fine motor skills in toddlers. With stickers and washi tape at their disposal, little ones can create vibrant and dynamic artwork that’s truly unique. To get started, gather a variety of materials such as construction paper, scissors (blunt-tipped for toddlers), glue sticks, and a mix of colorful stickers and patterned washi tapes.
One fun technique is to have your toddler arrange stickers on the paper in a specific theme or design. For example, you could say “Can you make a picture of an animal?” and they’ll excitedly start placing stickers on the page. Another idea is to create a “border” using washi tape around the edges of the paper. This can help contain the collage within a defined space.
For added fun, try incorporating other textures like tissue paper or fabric scraps into your collage. Encourage your child to experiment with different sticker shapes and sizes, and don’t be afraid to get messy – it’s all part of the creative process!
Handmade Gift Ideas for Kids
Looking for a thoughtful and unique gift for your little ones? This section shares creative handmade ideas that kids will treasure forever, made with love and care by you.
Personalized T-Shirts and Onesies
Creating personalized t-shirts and onesies for kids is an adorable way to show off their unique personality. You can use fabric paint or iron-on transfers to create customized designs that are both fun and functional.
To get started, choose a design that your child loves, whether it’s a cartoon character, a favorite hobby, or even a silly quote. You can find plenty of free printables online or draw the design yourself with permanent markers. For fabric paint, simply apply the paint to the t-shirt using a foam brush or sponge, making sure to follow the manufacturer’s instructions for drying times.
For iron-on transfers, use a printer to print out the design onto special paper, and then cut it out along the edges. Place the transfer on the onesie (or t-shirt) and apply heat with an iron to create a crisp, durable design that will withstand repeated washing.
Consider adding your child’s name or initials to make it extra special. This thoughtful gift is sure to become their new favorite shirt – and you’ll be thrilled to see how proud they are to wear it!
DIY Photo Albums and Frames
Creating personalized photo albums and picture frames is a thoughtful way to showcase cherished memories for kids. You’ll need scrapbook paper, glue, scissors, and any additional embellishments you like, such as stickers, stamps, or ribbons.
Start by choosing the right size of album or frame that suits your photos best. Then, cut out shapes or patterns from the scrapbook paper to decorate the background. Use glue to adhere these pieces to the album or frame, making sure not to overlap any important parts of the design.
Add more personal touches with stickers, stamps, or ribbons to create a unique look. You can also include handwritten captions or quotes to make it even more special. Consider adding a few photos that tell a story or capture an important milestone in the child’s life.
Remember, it’s all about creating something meaningful and fun for your kids. With a little creativity and some basic craft supplies, you can turn your ideas into beautiful photo albums and picture frames that they’ll treasure forever. This thoughtful gesture is sure to delight them and create lasting memories.
Homemade Treats and Baked Goods
When it comes to gift-giving for kids, what’s sweeter than a homemade treat? Baking and packaging your own goodies is not only a thoughtful gesture but also a great way to teach little ones about the value of hard work and self-expression. Let’s start with some simple recipes that are sure to be a hit.
First up, sugar cookies are always a crowd-pleaser. You can use pre-made dough or make your own from scratch using basic ingredients like butter, sugar, eggs, and flour. To make it more fun, consider adding colorful sprinkles or edible glitter on top before baking. Once cooled, package them in cute containers or bags with a personalized label.
Next, fudge is another classic treat that’s easy to make and always welcome as a gift. With just three ingredients – chocolate, sweetened condensed milk, and vanilla extract – you can whip up a batch of creamy goodness in no time. Pour the mixture into lined molds or mini baking dishes for a perfectly sized gift.
When packaging your homemade treats, consider adding a personal touch with a handwritten note or card. This not only makes it more special but also shows that you put thought and effort into the gift.
Seasonal Crafts and Activities
Get ready for some festive fun, as we dive into our favorite seasonal crafts and activities to make your parenting journey even more magical and memorable! From decorations to gifts, we’ve got you covered.
Halloween-themed Crafts
As the spookiest time of the year approaches, it’s the perfect opportunity to get creative with some DIY Halloween-themed crafts that your little ones will love. Who says Halloween has to be all about store-bought decorations? With a few simple materials and some imagination, you can create an eerie atmosphere in no time.
Let’s start with paper bag puppets – a classic! Cut out eyes and mouths from black construction paper and glue them onto the bags. Add some wiggly eyes for extra spookiness. Use markers or paint to draw on eyebrows, noses, and any other features you like. Punch holes at the top of each bag and add popsicle sticks as handles, allowing your mini monsters to bring their creations to life.
Next up are ghostly garlands – a simple yet effective way to deck out your home. Cut strips of white tissue paper or cheesecloth, then string them together with some black twine or yarn. Add some fake spiders, bats, or other creepy crawlies for an extra scare. Hang it from your doorframe, mantel, or any spot where you want to create a haunting ambiance.
If you’re feeling adventurous, try making spooky sensory bottles filled with water, glitter, and plastic spiders. Fill an empty bottle with water and add a few drops of glycerin to prevent the ingredients from separating. Then, add some fake blood (red food coloring), dry ice for a spooky smoke effect, or plastic insects for a creepy crawlies look. This activity is perfect for little ones who love exploring texture and sight. With these DIY projects, you’ll have your home looking like a haunted mansion in no time – without breaking the bank!
Christmas Ornaments and Decorations
Christmas Ornaments and Decorations are an integral part of holiday decorating. Kids love creating their own ornaments to hang on the Christmas tree, making it a fun and engaging activity for them. One such festive craft is popsicle stick ornaments. All you need is popsicle sticks, glue, scissors, and some decorations like glitter, stickers, or paint.
To make these ornaments, start by gluing two popsicle sticks together in an “X” shape to form the base of the ornament. Let it dry completely before decorating with glitter, stickers, or paint. You can also add a loop of string or yarn at the top for hanging.
Another creative idea is making snowflake decorations using paper and scissors. Cut out intricate designs from white paper and hang them in the window or on the wall to create a beautiful winter wonderland effect. For a more rustic look, use a paper chain garland made by connecting strips of colored paper together in a loop.
These DIY ornaments and decorations not only add a personal touch to your holiday decor but also create lasting memories for your kids. Encourage them to experiment with different materials and designs to make the experience even more enjoyable!
Easter Egg Decorating Ideas
Get creative and decorate those Easter eggs with our favorite techniques. Whether you’re looking for a more eco-friendly approach or want to make it fun for the kids, we’ve got you covered.
Natural dyes are a fantastic way to add color to your Easter eggs without using harsh chemicals. Try boiling beets, turmeric, or coffee to create beautiful shades of pink, yellow, and brown. Simply submerge the egg into the dye bath and let it sit for about 10-15 minutes before rinsing with cold water.
For a more modern take, grab some stickers and get decorating! Use them to add patterns, shapes, or even create a scene on your Easter eggs. You can find a wide variety of stickers at most craft stores or online. This method is perfect for young children who are just starting out with egg decorating.
If you’re feeling traditional, go ahead and bust out the dye kits. These usually come with wax paper and special dye that’s specifically designed to create fun designs. Just be sure to follow the instructions carefully to achieve the desired effects.
Advanced Crafts for Older Kids
If you’re looking for more challenging projects, we’ve got some exciting advanced crafts that are perfect for older kids to try their hand at, with great results!
Knitting and Crochet Projects
As older kids begin to explore more advanced crafts, knitting and crochet projects offer an excellent outlet for their creativity and fine motor skills. To get started, consider beginner-friendly projects like scarves and hats. These items require minimal shaping and are perfect for learning the basics of yarn manipulation.
When it comes to choosing a project, consider the child’s skill level and interests. For example, a simple garter stitch scarf is an excellent introduction to knitting, while a crocheted hat with a basic single crochet pattern can be a fun way to learn this technique.
As kids gain confidence, move on to more complex projects like blankets or amigurumi toys. To make these projects even more engaging, try incorporating different colors and textures of yarn. For instance, you could alternate between two complementary colors for a striped effect or use a textured yarn for added depth.
To ensure success, don’t be afraid to break down larger projects into smaller, manageable tasks. This will not only help build confidence but also make the project more enjoyable.
Woodworking and Carpentry Activities
As you explore advanced crafts with your older kids, woodworking and carpentry activities are an excellent way to encourage their creativity and fine motor skills. However, it’s essential to prioritize safety before setting up a woodworking station at home.
First, designate a specific workspace for woodworking projects, free from distractions and clutter. Cover the work surface with a protective layer, such as a tablecloth or plywood, to prevent damage and make cleanup easier. Ensure sharp tools are stored securely out of reach, and consider investing in a tool cabinet or organizer to keep them tidy.
Begin with basic carpentry projects like picture frames or birdhouses, which require minimal equipment and supervision. For picture frames, use pre-cut wood pieces and demonstrate how to assemble the frame using nails or a nail gun. When building birdhouses, teach your kids about measuring, cutting, and assembling different components while emphasizing the importance of precision.
To make woodworking more engaging for older kids, involve them in the project planning process, allowing them to choose the design and materials. This will not only encourage their creativity but also help them develop problem-solving skills. With proper guidance and supervision, your kids can develop a lifelong appreciation for woodworking and carpentry.
Upcycled Crafts Using Old Materials
When it comes to crafting with older kids, one of the most creative and environmentally-friendly ways to get started is by repurposing old materials. Think cardboard boxes, plastic bottles, fabric scraps – the list goes on! These everyday items can be transformed into functional items or decorative pieces that add a personal touch to any room.
To begin, gather an assortment of “junk” from around the house and let your child’s imagination run wild. For example, transform a plastic bottle into a unique planter by cutting out the bottom and decorating it with paint or markers. You can also upcycle cardboard boxes into storage bins, picture frames, or even a mini puppet theater.
Another great idea is to repurpose fabric scraps into handmade items such as stuffed animals, pillow covers, or even a quilt. Simply cut out patterns from the fabric, sew them together using a basic sewing machine, and voila! You’ll have a one-of-a-kind piece that’s not only eco-friendly but also budget-friendly.
To take it to the next level, try incorporating recycled materials into more complex projects like mosaics or wind chimes. With a little creativity and some guidance from you, your child will be amazed at what can be created using everyday trash.
Frequently Asked Questions
What if I’m not a crafty person myself – can my child still benefit from creative activities?
Yes, with some guidance and simple instructions, even non-crafty parents can encourage their children to explore various art forms and develop their creativity. Start by trying out simple projects together, like finger painting or making DIY photo albums.
How do I prevent messes when doing crafts at home with my toddler?
To minimize messes, set up a dedicated craft space with paper towels, washcloths, and cleaning supplies within reach. Cover your work surface with newspaper or a plastic tablecloth to make clean-up easier. Encourage your child to wear old clothes or an apron to protect their clothes.
Can I use recycled materials for crafts, or is it better to buy specific craft supplies?
Using recycled materials is a great way to promote sustainability and creativity in children. You can repurpose household items like egg cartons, toilet paper rolls, and fabric scraps to create unique crafts. Mix and match materials with store-bought supplies to add variety to your projects.
How do I know which crafting tools are suitable for my child’s age group?
Assess your child’s fine motor skills and hand-eye coordination to choose the right tools. For example, a toddler might use washable crayons or finger paints, while an older child can handle scissors and glue sticks with more precision.
What if my child becomes frustrated or upset during a crafting activity – how do I manage their expectations?
No worries! Frustration is normal when trying new things. Stay calm and acknowledge your child’s feelings. Encourage them to take breaks if needed and offer reassurance that mistakes can lead to creative breakthroughs. Praise their efforts and progress, even if the final result isn’t perfect.