
The holiday season is just around the corner, and you’re probably thinking about how to make this year’s Christmas decorations stand out. Why not get creative with nature’s own materials? Pine cone crafts are a fantastic way to add a personal touch to your home while promoting eco-friendliness. With kids, it’s especially exciting to experiment with natural materials that can be easily found in your backyard or nearby park.
In this article, we’ll show you how to make the most of pine cones and bring some festive cheer into your life. From simple decorations to ornaments, we’ve got a variety of fun and easy-to-make projects perfect for kids. You’ll learn how to turn pine cones into beautiful Christmas decorations that will add warmth and coziness to any room. Get ready to unleash your creativity and make this holiday season one to remember with our pine cone Christmas crafts!
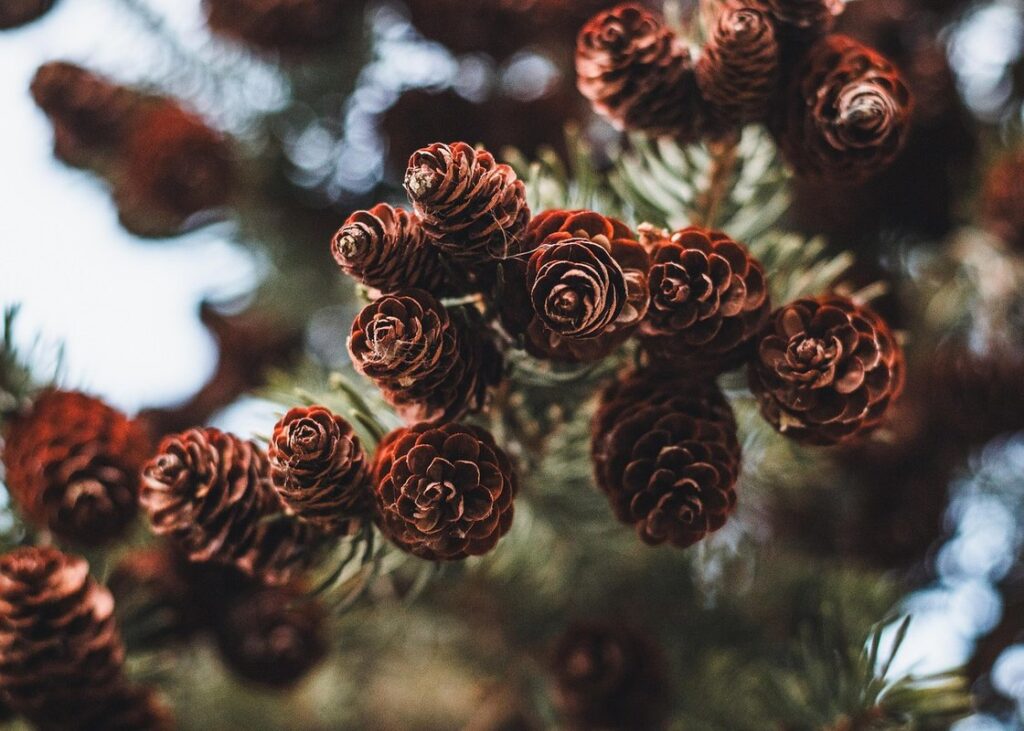
Introduction to Pine Cone Christmas Crafts
Get ready to create some magical Christmas crafts with pine cones, as we explore fun and easy projects that are perfect for kids of all ages. This section is packed with inspiration!
What is a Pine Cone Christmas?
Pine cone Christmas crafts are a fun and creative way to get into the holiday spirit. They’re a type of decoration that’s made using pine cones as the main material. But where did this tradition come from? Well, the idea of using pine cones as decorations dates back to ancient times when people would bring evergreen branches and pine cones inside their homes during the winter months.
This tradition was especially popular in Scandinavian countries, where it’s believed that evergreens like fir trees and pine cones held spiritual significance. The scent and look of pine cones were thought to symbolize warmth and life during the cold winter months. Today, making pine cone Christmas crafts has become a beloved holiday activity for kids and adults alike.
To make a pine cone Christmas craft, you can simply glue pine cones onto a wreath or arrangement and decorate with other materials like ribbons, glitter, and ornaments. You can also use hot glue to attach the pine cones to a string or stick to create a mobile or garland. The possibilities are endless!
Benefits of Engaging in Pine Cone Christmas Activities
Engaging in pine cone Christmas activities can be a game-changer for kids. Not only do these crafts bring festive cheer to your home, but they also offer a range of benefits that can extend far beyond the holiday season.
For one, these activities are an excellent way to encourage creativity and self-expression in children. By using natural materials like pine cones, evergreen branches, and ribbons, kids can let their imagination run wild and create truly unique pieces that reflect their personality. Take a simple pine cone garland for example – with just a few basic materials, your child can add their own flair by selecting different colored ribbons or sprinkling glitter on top.
Fine motor skills are also developed through these activities, as kids carefully tie knots, thread needles, and arrange decorations. These skills may seem mundane now, but they lay the foundation for more complex crafts and hobbies down the line. So why not try something new this holiday season? Set up a craft station with pine cones and supplies, and watch your child’s creativity blossom.
Tips for Starting Your Pine Cone Christmas Journey
Starting to create your Pine Cone Christmas crafts with kids can be an exciting adventure. Before you begin collecting pine cones and getting creative, here are some essential tips to ensure a fun and memorable experience for both you and the little ones.
Firstly, make sure you’re collecting pine cones from a safe source. You want them to be free of pesticides, chemicals, or any other potential hazards. Consider visiting a nearby park or nature reserve where the air is fresh, and the trees are healthy.
When collecting pine cones, try to gather ones with different shapes, sizes, and colors. This variety will add visual interest to your crafts and keep things exciting for the kids. You can also ask the kids to help you pick out their favorite pine cones, making them more invested in the creative process.
Before diving into crafting, set aside some time to brainstorm ideas and plan your project. Look at pictures online or in books, and get inspired by different designs and techniques. This will ensure that everyone is on the same page and has a clear understanding of what they want to create.
Lastly, don’t forget to have fun! Pine Cone Christmas crafts are all about experimenting with new textures, colors, and ideas. Encourage the kids to try out new things and make mistakes – it’s all part of the learning process.
Preparing Materials for Pine Cone Crafts
Before we dive into crafting, let’s get our materials ready! This section will cover everything you need to prepare to make beautiful and fun pine cone crafts.
Gathering Pine Cones and Other Essential Materials
When it comes to pine cone crafts for kids, having the right materials is essential. Let’s start with the star of the show: pine cones! You can find them in abundance during the fall season, especially on trees like pines and spruces. If you’re not finding any in your backyard or nearby park, consider visiting a local nature reserve or forest.
In addition to pine cones, you’ll need some basic crafting supplies. These include glue (hot glue works best for pine cone crafts), scissors, string or twine, and any other embellishments you’d like to use. You can also get creative with items from around the house, like buttons, sequins, or even felt.
Before you start crafting, make sure to prepare your materials properly. Start by sorting through your pine cones and selecting the ones that are sturdy enough for crafting. Give them a good cleaning with soap and water to remove any dirt or debris. This will help ensure they stick together well when glued. Finally, have all your supplies ready and within reach – it’s time to get creative!
Creating a Craft Station for Kids
Setting up a craft station for kids is an essential part of making pine cone crafts a fun and enjoyable experience. To create a kid-friendly space, start by clearing a large table or countertop where children can spread out their materials comfortably. Invest in a few storage bins or baskets to keep supplies organized and within reach.
Consider designating specific areas for different activities, such as a workspace for gluing pine cones onto wreaths or trees, and another area for painting or decorating ornaments. This will help prevent clutter and make it easier for kids to focus on their projects. Make sure to have plenty of paper towels, water, and soap nearby for cleaning up spills.
To make the experience even more enjoyable, play some festive music in the background, and consider setting up a few kid-friendly snacks or drinks within easy reach. By creating a dedicated craft station, you’ll be able to focus on guiding your little ones through their creations while keeping everything tidy and organized.
Fun and Easy Pine Cone Christmas Crafts
Get creative and make some magical memories with your little ones as you dive into these fun and easy pine cone Christmas crafts that are perfect for kids of all ages. From ornaments to decorations, we’ve got you covered!
Decorating Pine Cones with Glitter and Paint
Decorating pine cones with glitter and paint is a fun and creative activity that kids will love. To get started, you’ll need some basic supplies: pine cones, glitter, paint, a paintbrush, and a surface to work on.
First, let’s talk about using paint. You can use acrylic or watercolor paint, depending on the look you want to achieve. If you’re looking for a more rustic, natural look, go with acrylic paint in earthy tones like brown or tan. If you want something brighter and bolder, try watercolor paint in red or green.
To decorate your pine cone with paint, start by painting the entire cone a solid color, then let it dry completely before adding additional details like stripes or dots. You can also use a small brush to add tiny details like berries or leaves.
Next up is glitter! This is where things get really fun. You can sprinkle glue on the pine cone and then roll it in glitter for an all-over sparkle effect, or you can paint a design onto the pine cone with glue and let it dry before sprinkling glitter on top.
Making Pine Cone Ornaments and Garlands
One of the most fun and creative activities for kids during the holiday season is making pine cone ornaments and garlands. These natural decorations not only add a rustic charm to your home but also promote creativity and fine motor skills in children.
To make pine cone ornaments, start by collecting various types of pine cones in different sizes and shapes. You can then dip them in paint, glue, or even glitter for added color and texture. Attach a string or twine to the top of each ornament to hang on your Christmas tree or around the room.
For garlands, gather some evergreen branches, pine needles, and ribbon to create a beautiful and fragrant decoration. Simply thread the evergreen branches through the pine cones and tie them together with the ribbon to create a stunning garland that can be hung along banisters, mantels, or even as a centerpiece for your holiday table.
Remember, the best part about making pine cone ornaments and garlands is encouraging kids to get creative and experiment with different materials and designs. Encourage them to try new things, make mistakes, and have fun!
Transforming Pine Cones into Christmas Trees
Transforming Pine Cones into Christmas Trees is a fun and creative activity for kids to enjoy during the holiday season. Start by collecting pine cones from your backyard or neighborhood, and then get ready to turn them into beautiful Christmas trees.
To begin, you’ll need a few basic materials like glue, scissors, and some decorative items such as glitter, beads, or sequins. You can also use paint or markers to add color and personality to your tree. Next, take a pine cone and glue it onto a piece of cardboard or foam, creating the base of the tree.
Now it’s time to get creative! Use glue to attach smaller pine cones around the main one, starting from the bottom and working your way up. You can also add some decorations like beads or sequins to create a beautiful and sparkly effect. For an extra touch, you can use a string or twine to hang your pine cone Christmas tree on the wall or a window.
Remember, the most important thing is to have fun and be creative! Encourage kids to experiment with different colors, patterns, and designs to make their pine cone Christmas trees truly unique.
Advanced Pine Cone Christmas Crafts for Older Kids
As your kids get a bit older, you’ll want to challenge them with more complex projects that still showcase their creativity and resourcefulness in crafting pine cone Christmas decorations. This section shares fun ideas for making more advanced designs.
Creating 3D Pine Cone Decorations
Creating 3D pine cone decorations can be a fun and creative challenge for older kids. To make snowflakes, start by gluing multiple pine cones together to form the center of the flake. Use wire cutters to shape the pine cones into intricate designs, such as six-pointed stars or triangles. Add some sparkle with white glue and glitter, then let it dry completely.
To create animals, use a mixture of hot glue and pine resin to attach individual pine cones to a Styrofoam base, creating the body and limbs of an owl or rabbit, for example. You can also add details like eyes made from beads or a small bell for the head. For more complex designs, try layering multiple pine cones to create texture and dimension.
When working with kids on these projects, encourage them to experiment with different shapes and patterns to create unique decorations. With a little patience and creativity, they’ll have beautiful 3D pine cone snowflakes or animals to display in their rooms.
Making Pine Cone Wreaths and Centerpieces
Creating beautiful pine cone wreaths and centerpieces is a fun and rewarding activity that older kids can enjoy. To get started, gather some natural materials like pine cones, evergreen branches, ribbons, and decorative items. You’ll also need a wire or foam base for the wreath.
Begin by gluing the pine cones to the base in a circular pattern, overlapping them slightly to create a full and lush look. Add some greenery like fir or cedar branches to fill in any gaps and add texture. Use floral wire to attach larger decorations like bows or berries.
For centerpieces, use a vase or container as the base and start building upwards with pine cones and evergreen branches. Add some candles, pine needles, or small ornaments for a warm and inviting ambiance. You can also incorporate other natural elements like acorns, twigs, or pebbles to add interest and depth.
Remember, the key to creating beautiful pine cone wreaths and centerpieces is to experiment with different textures and colors. Encourage older kids to get creative and try out new combinations of materials for a unique look that reflects their personal style.
Pine Cone Christmas Tree Toppers
Pine cone Christmas tree toppers are a unique and creative way to add a personal touch to your holiday decorations. This project is perfect for older kids who want to try their hand at crafting something special for the family tree.
To make a pine cone tree topper, you’ll need a few basic materials: a large pine cone, some floral wire, scissors, glue, and any additional embellishments you like (such as ribbons, bows, or small ornaments). Start by selecting a large, sturdy pine cone that can hold its shape. You can use real pine cones from your yard or purchase them at a craft store.
Next, wrap the pine cone with floral wire to create a sturdy base for decorating. Then, get creative! Use glue and embellishments to add a special touch to your tree topper. Some ideas include wrapping it with ribbon, attaching small ornaments, or even adding a few glittery accents.
This project is a great way to encourage kids to think outside the box (or in this case, the tree) and come up with their own unique design. With a little patience and creativity, they can create a truly one-of-a-kind pine cone Christmas tree topper that will be the crowning glory of your holiday decor.
Displaying and Using Your Pine Cone Creations
Now that you’ve made your pine cone creations, it’s time to show them off! This next part is all about displaying and using your beautiful decorations.
Ideas for Displaying Pine Cone Crafts
Displaying your pine cone crafts can be just as creative and fun as making them! Here are some ideas to showcase your finished projects:
Consider displaying your pine cone crafts in windows for a beautiful, natural light-filled display. This is especially great for pine cone wreaths or garlands that add a warm ambiance to your home’s entrance. Simply place the craft on a window sill or hang it from a suction cup hook for a stunning view.
For wall displays, think beyond traditional frames and use unconventional materials like twigs, wire, or even old picture frames to create a rustic look. You can also arrange multiple pine cone crafts together in a collage-style display on a large piece of fabric or burlap for a cozy feel.
If you’re short on space, get creative with vertical displays by using wall-mounted shelves, hooks, or command strips to show off your crafts. Hang a beautiful pine cone mobile above a mantle or from the ceiling for an eye-catching centerpiece. Whatever display method you choose, be sure to have fun and let your imagination shine!
Incorporating Pine Cones into Holiday Decorations
Pine cones are incredibly versatile and can add a warm, festive touch to any holiday decoration. To incorporate your pine cone creations into your holiday decor, start by considering the different areas of your home that could benefit from some natural charm.
Try placing them on your mantel, where they’ll catch the light from the candles or fireplace below. This is especially effective if you’ve created pine cones in varying sizes and shapes, creating a visually interesting arrangement. You can also scatter them across a dining table or coffee table to create a festive centerpiece for gatherings.
If you have a staircase, consider lining it with pine cone garlands or swags, which will add a beautiful texture to your holiday decor. And don’t forget about the power of grouping! Gather several small pine cones together in a decorative bowl or vase and place them on a side table or console table for a simple yet effective decoration.
Remember, the key to incorporating pine cones into your holiday decor is to have fun with it and experiment with different arrangements until you find one that feels just right. With a little creativity, your pine cone creations can add a unique touch to any room in your home!
Conclusion and Next Steps
As we conclude our pine cone Christmas ideas for kids, I hope you’re feeling inspired and ready to get creative with your little ones. Remember, it’s not about breaking the bank or making everything perfect – it’s about having fun and making memories together. Encourage your child to think outside the box and come up with their own unique ideas for decorating pine cones. For example, they might glue on some glitter, stickers, or even small ornaments.
Once you’ve completed your pine cone projects, display them proudly in a festive vase or jar. Use this opportunity to teach your child about the value of patience and taking pride in their work. You can also involve them in planning next year’s Christmas decorations – let them take charge of collecting pine cones and brainstorming new ideas. By doing so, you’ll be fostering creativity and responsibility in your child, while creating a special family tradition that will last a lifetime.
Frequently Asked Questions
How can I store pine cones for future crafts?
You can dry out the pine cones completely to preserve them for longer periods. Simply tie them in small bunches, hang them upside down in a warm, dry place, and wait for 2-3 weeks. Once they’re completely dry, you can store them in an airtight container or paper bag.
What are some tips for decorating pine cones with paint?
Make sure to use high-quality acrylic paints that adhere well to the pine cone surface. You can also add a coat of varnish to protect your artwork from fading. For best results, paint the pine cones when they’re completely dry and free of moisture.
Can I use fake or artificial pine cones instead of real ones?
Yes! Artificial pine cones are a great alternative for those who live in areas with limited access to natural pine trees. You can also reuse them year after year, making them an eco-friendly choice as well.
How can I make pine cone crafts more accessible for younger children?
Consider pre-cutting and pre-shaping the pine cones to simplify the crafting process. You can also use glue sticks or other easy-to-use adhesives that are safe for little hands. Don’t be afraid to get creative and adapt the projects to suit their age and abilities.
What’s the best way to display my finished pine cone crafts?
Consider displaying them in a designated holiday area, such as a mantel or side table. You can also incorporate them into your existing holiday decor, like wreaths, garlands, or centerpieces. Be creative and have fun experimenting with different arrangements!