
Are you looking for a fun and creative activity to do with your kids? Something that’s easy on the wallet and great for the environment too? Look no further than pine cone crafts! Not only are pine cones a natural, inexpensive material, but they also provide endless opportunities for imagination and creativity. From decorations for the home or classroom to toys and ornaments, the possibilities are truly endless. In this article, we’ll explore some of our favorite fun and easy pine cone crafts perfect for kids. We’ll show you how to get creative with these natural materials, from making beautiful garlands to crafting adorable pine cone birds. So grab a few pine cones and let’s get started on some fantastic craft ideas that are sure to delight your little ones!
Why Pine Cones Are Perfect for Crafting
Pine cones are a treasure trove of creative possibilities, and we’re excited to share our top reasons why they’re perfect for kids’ crafting projects. From decorations to gifts, pine cones offer endless inspiration!
The Benefits of Using Natural Materials in Crafting
When working with kids on crafting projects, it’s essential to introduce them to natural materials like pine cones. These organic elements offer a wealth of benefits that can enhance the creative process and learning experience. For starters, using natural materials allows children to develop their connection with nature.
Pine cones are an excellent example of this, as they can be found in many outdoor environments, providing an instant link between the child’s creation and the outdoors. This hands-on approach also fosters creativity and imagination, as kids experiment with different textures, colors, and shapes. Moreover, using natural materials like pine cones encourages children to think about recycling and sustainability.
Incorporating natural materials into your craft projects can also be a great teaching tool for various skills, such as observation, patience, and fine motor skills. For instance, collecting pine cones requires kids to observe their environment carefully and develop an appreciation for the simple things in nature.
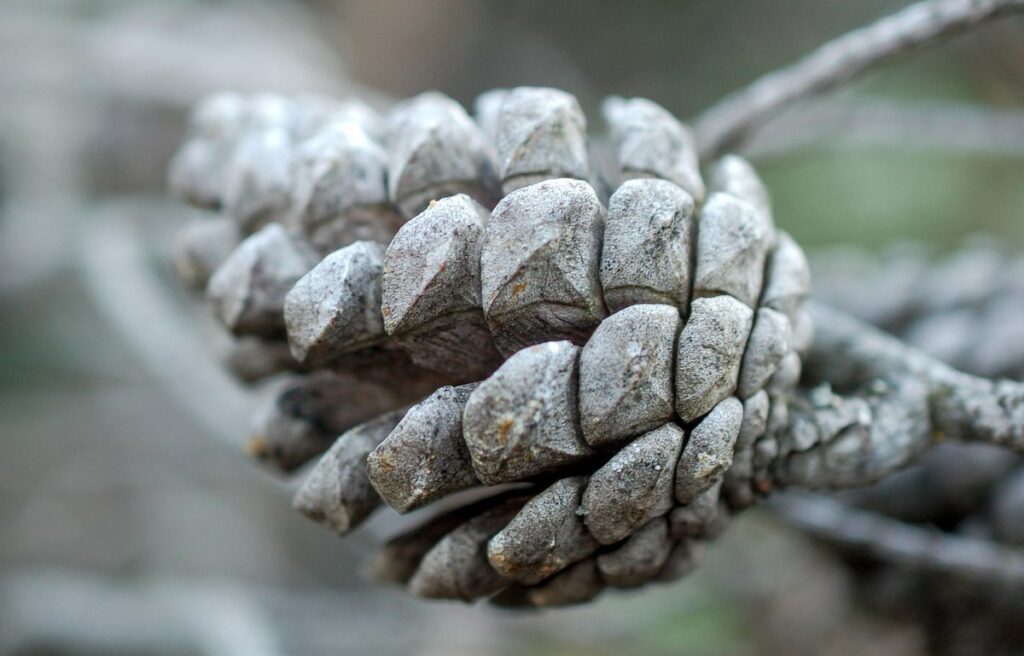
Collecting and Preparing Pine Cones for Crafting
When it comes to crafting with pine cones, having clean and prepared cones is essential for creating beautiful and long-lasting projects. To collect pine cones, consider visiting a nearby park or forest during the fall season when they are readily available on the ground. Make sure to gather cones from areas that haven’t been sprayed with pesticides or other chemicals.
Once you’ve collected your pine cones, it’s time to clean them. Start by gently brushing off any loose debris or twigs using a soft-bristled brush or a small dry paintbrush. Then, soak the cones in warm water mixed with a tablespoon of mild dish soap for about 15-20 minutes. This will help loosen any dirt and grime that’s stuck to the cones.
After soaking, use your fingers or a soft-bristled brush to gently scrub away any remaining dirt or debris. Rinse the cones thoroughly with clean water and let them air dry completely before using them in your craft projects. You can also use a hair dryer on a low setting to speed up the drying process.
Simple Pine Cone Crafts for Young Children
Get ready to create some natural masterpieces with your little ones as we explore simple and fun pine cone crafts that are perfect for young children’s creativity to shine.
Introduction to Basic Craft Skills with Pine Cones
When it comes to creating simple and fun crafts for young children, introducing them to basic craft skills is essential. One great way to do this is by using pine cones as the main material. With a few basic tools and some creativity, you can help little ones develop essential skills like gluing and arranging.
Start by gathering an assortment of pine cones in various sizes and shapes. Show your child how to sort them by size or shape, encouraging them to categorize and group similar objects together. This activity helps develop their observation and classification skills.
Next, introduce the concept of gluing. Demonstrate how to carefully apply glue to a pine cone using a craft stick or small brush. Let your child practice applying glue, starting with small amounts and gradually increasing as they become more confident. Remember to emphasize patience and gentle handling, as these young artists are just beginning to learn.
As your child gains confidence in their gluing skills, try arranging the pine cones into simple designs or patterns. This could be a fun way to introduce basic composition principles, like symmetry and balance. Encourage experimentation and creativity, allowing your child to make mistakes and learn from them.
Making Pine Cone Wreaths for the Home or Classroom
Making pine cone wreaths is a fun and easy craft that can add a touch of warmth and coziness to any room. To start, gather some pine cones, wire or foam wreath forms, floral tape, and decorations such as ribbons, berries, and evergreen sprigs.
First, prepare the pine cones by cleaning them with a damp cloth and letting them dry completely. This will prevent any debris from falling off during the craft process. Next, wrap the floral tape around the wire or foam wreath form to create a base for your pine cone arrangement.
Begin placing the pine cones onto the wreath form, working in sections to maintain an even distribution of branches. Secure each pine cone with floral tape by wrapping it around the stem and the wreath form. Continue adding pine cones until you’ve covered the entire form.
Tips: Use a variety of pine cone sizes to create visual interest, and consider adding other natural elements like leaves or twigs for added texture. You can also use this craft as an opportunity to teach children about the importance of sustainability and repurposing natural materials. With some creativity and patience, your pine cone wreath will be a beautiful addition to any room.
More Complex Crafts Using Pine Cones
Now that you’ve mastered some fun and easy pine cone crafts, let’s take it up a notch by creating even more intricate and impressive projects to impress your friends and family!
Crafting with Paints and Pigments on Pine Cones
Painting and decorating pine cones can be a delightful way to add an extra layer of creativity to this popular craft. You can experiment with different materials to create unique effects. Start by gathering various paints, such as acrylic, watercolor, or tempera, and pigments like glitter, sequins, or even natural substances like turmeric, coffee, or berry juice.
To begin, coat the pine cone evenly with a thin layer of paint using a brush or sponge. You can use one color or mix different hues to create a marbled effect. Next, try adding textures by sprinkling glitter, sequins, or even sand onto the wet paint while it’s still drying. This will give your pine cones an extra dimension.
Consider using natural materials like leaves, twigs, or small flowers to create intricate designs on the pine cone. You can also experiment with stamping patterns onto the pine cone using sponges or foam brushes dipped in paint. With a little imagination and patience, you can turn plain pine cones into colorful, one-of-a-kind art pieces that will add a personal touch to any room.
Creating 3D Scenes and Landscapes with Pine Cones
Creating detailed scenes and landscapes with pine cones is an excellent way to encourage kids’ creativity while exploring their artistic side. To get started, gather a variety of natural materials such as rocks, twigs, leaves, and moss. These elements will help bring depth and texture to your 3D scene.
Begin by selecting a base material like cardboard or foam board to serve as the foundation for your landscape. Use glue or hot glue gun to attach pine cones to create hills, mountains, or even islands. You can also use them to form trees by gluing multiple cones together in different heights and angles.
To add visual interest, incorporate other natural materials such as rocks to create rivers or lakes, twigs for branches, and leaves for foliage. Experiment with different arrangements and groupings to achieve a balanced composition. For example, you could create a scenic coastal scene using pine cones for the shoreline, rocks for the beach, and seashells for added texture.
The possibilities are endless when it comes to creating 3D scenes and landscapes with pine cones. Encourage kids to think creatively and explore their surroundings for inspiration.
Seasonal Crafts Using Pine Cones
Get creative and have fun making these adorable pine cone crafts that are perfect for the holiday season, from garlands to gift decorations. We’ve got some easy and clever ideas for you!
Winter Wonderland Crafts Using Pine Cones
Winter is here, and it’s the perfect time to get creative with pine cones! Using pine cones in winter crafts is a great way to bring some natural beauty into your home while keeping kids engaged and entertained. During this season, pine cones are abundant and add a wonderful rustic touch to any craft project.
To create a Winter Wonderland using pine cones, you can start by collecting them from your backyard or a nearby park. Once you have collected enough pine cones, you can use them in various craft projects such as making wreaths, garlands, or even decorations for your Christmas tree. For example, you can glue the pine cones to a wire hanger to create a beautiful and rustic-looking wreath that adds a touch of winter magic to any room.
You can also get creative with paint or glitter by decorating the pine cones themselves. This is a great way to let kids express their creativity while having fun with art supplies like paint, glue, and glitter. Simply spray paint some of the pine cones silver or gold for a glamorous look, or let the kids go wild with colorful markers and stickers.
Some other ideas include making pine cone birds, using them as bookends, or even creating a pine cone centerpiece for your dining table. With a little imagination and creativity, the possibilities are endless!
Creating a Springtime Garden with Pine Cones and Other Materials
As we welcome the arrival of spring, it’s the perfect time to create a miniature garden scene using pine cones and other natural materials. This fun project is an excellent way for kids to get creative while appreciating the beauty of nature.
To start, gather a variety of pine cones in different shapes and sizes. You can also collect rocks, twigs, and small leaves to add texture and depth to your miniature garden. Choose a container or tray that will serve as the base for your scene, and fill it with a layer of potting soil.
Next, use the pine cones to create a focal point in your garden. Arrange them in a decorative pattern or use them to form a mini mountain range. Add some tiny plants or mosses to give your miniature garden a lush feel. For an added touch, collect small seashells or pebbles and scatter them throughout the soil.
Remember, the beauty of this project lies in its simplicity, so don’t be afraid to experiment and add your own creative touches! Encourage kids to use their imagination and create their own unique miniature garden scene using pine cones and other natural materials.
Safety Precautions and Tips
Before you start crafting, let’s go over some essential safety tips to ensure a fun and worry-free experience for both you and your little ones. We’ll cover the basics to keep everyone safe.
Handling Sharp Objects and Allergic Reactions
When working with pine cones and other materials for crafts, it’s essential to take safety precautions seriously. Sharp objects like scissors, craft knives, and other tools can cause injuries if not handled properly.
To avoid accidents, always supervise children while they’re crafting, especially when using sharp objects. Make sure the scissors or craft knife is at a comfortable height for them, and teach them how to hold it correctly. Encourage them to cut away from their body and keep their fingers curled under.
Some materials like glitter, sequins, and certain types of paint can cause allergic reactions in some children. If you notice any signs of an allergy, such as itching, sneezing, or skin irritation, stop the activity immediately. Wash your hands thoroughly after handling these materials, and make sure to use protective gloves if necessary.
Before starting a craft project, inspect all materials for potential hazards. Read labels carefully, and follow the manufacturer’s instructions. By being mindful of potential risks, you can create a safe and enjoyable crafting experience for kids.
Encouraging Creativity and Imagination in Children’s Crafting
Encouraging creativity and imagination is crucial when it comes to kids’ crafting activities. Pine cone crafts offer a great opportunity for children to express themselves freely, without the pressure of creating a perfect piece. To foster this creative spirit, try these simple yet effective tips.
When working with your little ones, encourage them to think outside the box by asking open-ended questions like “What if we tried using different colors?” or “Can you imagine what this pine cone could be when it’s finished?” This not only sparks their imagination but also helps develop their critical thinking skills.
Another excellent way to promote creativity is by providing a variety of materials and supplies. For example, you can offer an assortment of paints, glitter, stickers, and other embellishments for them to experiment with. Don’t be afraid to let go and let them take the lead – it’s okay if things get messy!
Also, try to avoid giving too much direction or showing them what they should create. Instead, focus on guiding their process while allowing them to decide how they want to use each material. By doing so, you’ll be surprised at the unique and innovative ideas that emerge from your little artists!
Conclusion: The Fun of Pine Cone Crafting
As we come to the end of our pine cone craft journey, let’s reflect on the fun and creative projects you’ve made. Now, it’s time to see how all these awesome crafts can become a lasting part of your child’s holiday memories.
Recap of Crafts Covered and Ideas for Further Exploration
As we conclude our exploration of pine cone crafts for kids, let’s take a moment to recap the exciting projects we’ve covered so far. From decorating the house with a festive Pine Cone Garland to creating a beautiful Pine Cone Wreath, we’ve explored various ways to make the most of this natural treasure.
If you’re eager to continue crafting with pine cones, here are some ideas for further exploration:
• Make a stunning Pine Cone Mobile by threading individual cones onto a string and hanging them from a mobile base.
• Create a fragrant Pine Cone Potpourri by mixing dried cones with other natural elements like cinnamon sticks and orange peel.
• Transform pine cones into adorable Ornaments by gluing them to Styrofoam balls or attaching a ribbon loop for easy hanging.
You can also try using different materials, such as glitter, paint, or decoupage medium, to add an extra layer of creativity to your pine cone crafts. Remember to encourage kids to experiment and make mistakes – it’s all part of the fun! By continuing to explore and create with pine cones, you’ll keep on discovering new ways to inspire your little ones’ imagination and creativity.
Encouraging Continued Creativity with Natural Materials
As you’ve been exploring the world of pine cone crafting with your kids, I’m sure they’re already itching to get creative again. One of the most exciting aspects of working with natural materials like pine cones is that they encourage continued creativity and imagination. But how can we nurture this spark in our little ones?
Here are a few tips to keep their creative juices flowing: try introducing new textures and colors by incorporating other natural elements, such as leaves or twigs, into your projects. You can also experiment with different techniques, like gluing pine cones onto a canvas or using them as embellishments for a handmade card.
As your child’s imagination grows, so should the complexity of their creations. Encourage them to think outside the box by asking open-ended questions – what if you combined pine cones with seashells? Or used them to create a 3D sculpture?
By continuing to explore and experiment with natural materials like pine cones, your kids will develop essential creative skills that will stay with them for years to come.
Frequently Asked Questions
Can I use artificial pine cones as a substitute for real ones?
No, it’s best to use real pine cones whenever possible to ensure the natural look and feel that comes with using organic materials. However, if you’re unable to find real pine cones or need a more consistent product, artificial options can be used as an alternative.
How do I store and preserve pine cones for future crafting projects?
To keep your pine cones fresh and ready for use, store them in a dry place away from direct sunlight. You can also clean them with soap and water to remove dirt or debris, and then let them air dry before using them in crafts.
What if my child has allergies or sensitivities to certain materials while crafting?
Always supervise your child during crafting activities, especially when working with pine cones. If they have known allergies or sensitivities, take necessary precautions by wearing gloves and working in a well-ventilated area. Clean the work surface thoroughly after each use.
How can I encourage my child to be more creative and imaginative while making pine cone crafts?
Encourage your child to experiment with different materials and techniques, and provide them with plenty of opportunities for free play and exploration. Ask open-ended questions that prompt them to think creatively about their projects.
Can I use pine cones for crafting year-round, or are they seasonal?
While pine cones are often associated with winter crafts, you can collect and use them throughout the year to create different types of projects. Collecting pine cones during other seasons can also help teach your child about the natural world and its cycles.